How to install an acrylic insert in a bathtub: instructions for installing the liner
The need to replace an old bathtub can come at the most unexpected moment.The family budget does not always provide a reserve amount for this type of repair. As an alternative, an acrylic bathtub insert can be used, the cost of which is much cheaper. And you can do the work yourself. The main thing is to understand the essence of the process and understand all the nuances.
We suggest you figure out how to install a liner in an old bathtub, thereby avoiding a complete replacement of the plumbing. We will tell you what to look for when choosing an acrylic tab, and also provide step-by-step instructions for installing it.
The content of the article:
Which is better: liner or replacement?
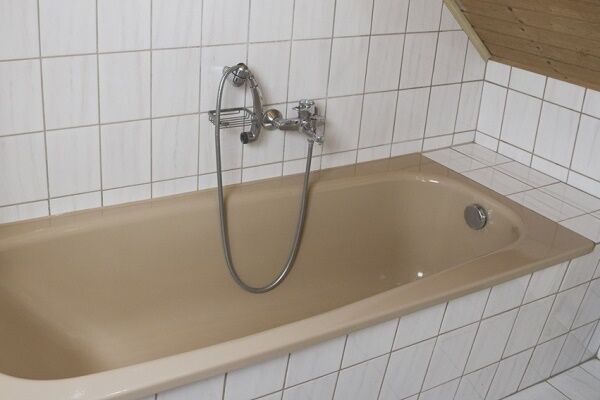
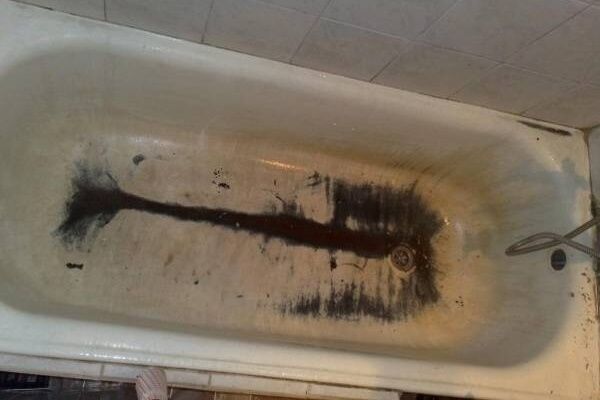
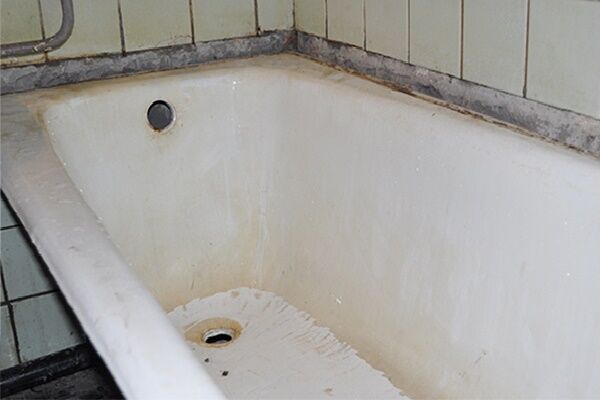
A peeling bathtub does not fit well into the abode of cleanliness - the bathroom. This sanitary container, by definition, must be not only clean, but also safe for all occupants of the home.
What kind of safety can we talk about if all sorts of microbes can live and multiply peacefully among the peeling pieces of the bathtub covering?
Even thorough cleaning cannot cope with them. One of two options will help here:
- installation of a new bath;
- radical update of the old one.
The first option is preferable. But it involves colossal financial expenses. Also, for installing a new bath It will take a lot of effort and time for a complete renovation, because replacing old plumbing will entail changing many interior details, including tiles on the floor and walls, pipes, etc.

The second option will be cheaper. The final cost will depend on the upgrade option chosen. There are 3 most popular methods:
- poured acrylic;
- enamel coating;
- liner insert.
The first 2 methods involve applying a special liquid composition to the prepared surface of the old bathtub. Here, to achieve a good result, you will need a good specialist and high-quality materials. Also, you can do everything yourself. The main difficulty is to obtain a smooth surface without streaks.
On our website there is an article rating the best compositions for bathtub restoration, we recommend that you read it.
The third option is to install a ready-made mold made at the factory. This work can be done on your own, carefully following the installation rules. You can't do it without good materials and some effort. But the result is worth it - an absolutely clean and shiny bath.

The appearance of the updated bathtub and the tactile sensations from bathing in it will not disappoint. If everything is done correctly, then you can use it for a very, very long time.
You should give preference to updating instead of buying a new bathtub in the following cases:
- there is no financial opportunity to buy and install a new one;
- if, having moved to a rented apartment, you don’t want to use the bathtub after someone else;
- when you need to get maximum results in a very short time;
- I don’t want to do repairs;
- I'm tired of the peeling bathtub.
Acrylic liners installed in a new bathtub can last at least 10 years if the installation was carried out according to all the rules and the products themselves are of high quality.
Inlay manufacturing technology
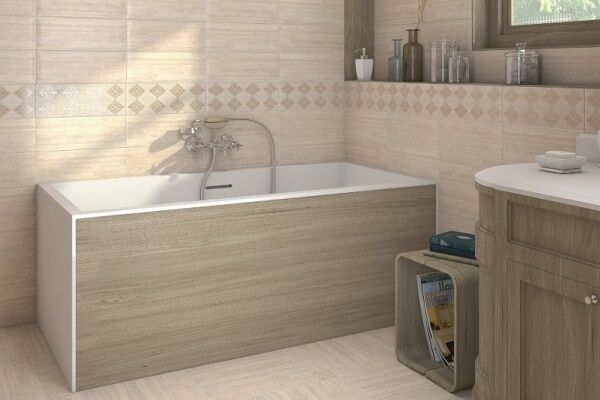
An acrylic insert used to restore the appearance of an old bathtub visually resembles a cover placed on top. It allows you to return lost performance qualities to a sanitary container in a matter of hours.
This restoration option has been used for several decades by Americans, Europeans, and for 2 decades by our fellow citizens. This is an affordable and convenient way to get the desired result without unnecessary dirt.

The most important thing about an acrylic liner is its quality. Therefore, when choosing this product for home, you need to pay attention to manufacturers with a good reputation. Otherwise, even a conscientious installation will not save the situation - the insert may burst after a month of use.
The plumbing market offers liners made from the following materials:
- medical acrylic;
- two-layer plastic – ABS/acrylic;
- ordinary plastic;
- technical acrylic.
Regular plastic and technical acrylic are used by unscrupulous manufacturers. They present their products as high-quality products at an affordable price. But such savings will backfire in just the second month.
Plumbing medical acrylic (PMMA) has been replaced by two-layer acrylic for the last couple of years. The fact is that ABS/acrylic material has the best performance qualities. Thus, it is more impact resistant compared to fragile acrylic.
The technological process of manufacturing inserts is complex and requires the skill of a craftsman and the availability of expensive equipment. In artisanal conditions, the production of high-quality products is impossible.

To make liners, they take a single-color sheet of cast acrylic with a thickness of 0.6 cm and, under the influence of vacuum and high temperature, give it the desired shape on a machine. For molding, special molds made of aluminum or synthetic composite are used.
Two-layer plastic is essentially a monolithic material that can be molded in the same way as pure acrylic. It is important that the thickness of the acrylic layer is 0.5 cm or higher. Indeed, in products with a 2 mm layer, the operating surface is quickly damaged.
The overwhelming number of foreign manufacturers and all domestic ones use ABS/PMMA material. The upper hygienic layer has dirt-repellent and antimicrobial properties, and the lower one ensures the reliability of the product.
The shape of the old bathtub is important. Not all models can be purchased with an acrylic liner. Large factories have up to 20 different dies for the production of inserts for the most common cast iron and steel products. If during the measurement process it was discovered that the bathtub is non-standard, then you will have to choose an alternative upgrade option.

You should not trust private manufacturers who promise to make an insert for a specific model. It will be very expensive and no one can vouch for the quality of the product.
Also, in the case of a non-standard model, you cannot buy a slightly smaller insert.According to the “bath within a bath” restoration technology, it should be like a second skin, worn over the old product.
Features of choosing acrylic inserts
Before installing a new liner in a peeling bathtub, you need to choose a quality option. After all, the market is replete with tempting offers, and no one is immune from the desire to save money. But the savings must be justified - it is better to do the installation work yourself than to buy a cheap fake.
To buy a good insert, you should follow the basic rules. Firstly, a quality product must have accompanying quality documents, a manufacturer’s warranty of at least 3 years, a factory logo and recommendations for use and care.

Secondly, the factory earbuds are covered with a protective film on top. It should be removed only before use, when all gluing work is completed and everything is dry.
Thirdly, the plumbing product should not be translucent. You need to check whether the selected option meets this requirement by looking through the insert into the sun, a lit lamp, or shining a flashlight from the back.
Fourthly, the acrylic surface of a high-quality insert is flat and smooth. Scratches and chips on the purchased copy are unacceptable. If the product was delivered by a courier, then you should sign the documents and release it only after a thorough inspection of the delivered goods.

Fifthly, the thickness of a high-quality acrylic coating is from 5 mm. This must be confirmed by accompanying documents.
Sixth, you need to buy only from trusted companies. Conscientious manufacturers with a good reputation have no point in deceiving their clients. Thus, LLC ISKomp, Plastall, SevenLux, Multiplast and Grand Plast have proven themselves well on the Russian market. They use Austrian raw materials and German equipment.
Seventh, the size of the purchased liner must clearly correspond to the size of the bath being updated. To do this, before purchasing, you should measure the height, width and depth of your container. It is unacceptable to take a smaller or mismatched insert, even if the seller states otherwise. His arguments that all the voids will be well filled with polyurethane foam speak of unprofessionalism.

Instructions for installing the liner
Buying a good acrylic insert is just the first step towards updating your bathtub. You should approach its installation no less responsibly. You can do this yourself or invite a specialist.
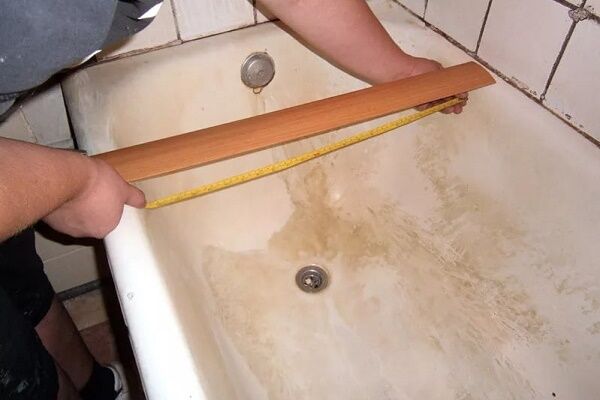
Stage No. 1 - taking measurements of the bathtub
If you have significant doubts about your abilities, it is better to invite a qualified employee from a reliable company. It’s not worth collaborating with craftsmen who promise to do everything for a nominal fee. They can not only glue the insert poorly, but also ruin it.
If the installation technology is violated, the pleasure from the updated bathtub will be replaced by disappointment in a couple of months. An unpleasant odor may appear, black mold, cracks, and the bottom will begin to collapse. Sometimes you can get rid of the consequences of poor-quality installation by inviting a repair specialist; more often, a situation occurs when you have to change the liner.
Having decided to take on the restoration of the bathtub yourself, you need to measure it. If the measurements obtained allow you to buy a factory insert, then you can safely order the desired color.At this stage, it doesn’t matter how you buy - in person in a store or online. The main thing is the reputation of the manufacturer.

If the measurements indicate a non-standard shape, then the correct choice would be an alternative option for restoring the appearance of the plumbing product.
Having selected and ordered the desired insert model, you immediately need to buy consumables for gluing it in. Often sellers offer optimal foam, glue, and sealant that are well suited for working with the product being purchased.
Stage No. 2 - cleaning the plumbing
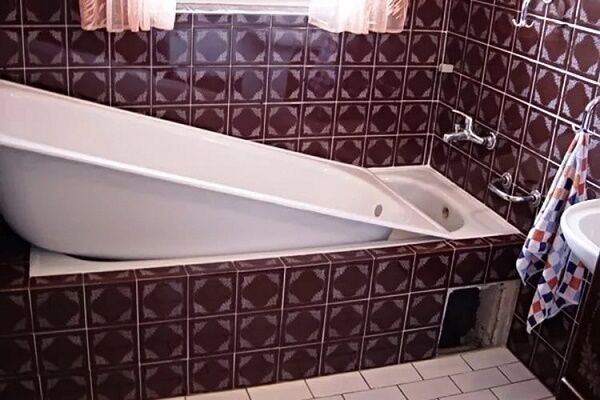
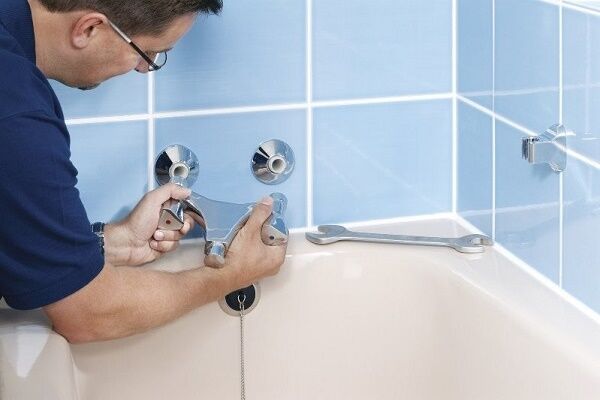
After carefully inspecting your bathroom, you will determine what tools you will need during work. Everything will depend on how exactly the old bathtub is installed. If its sides are recessed into the walls, then they need to be freed. The time it takes depends on the finish of the walls.
When there are expensive and new tiles on the walls, it would be right to choose another restoration option.

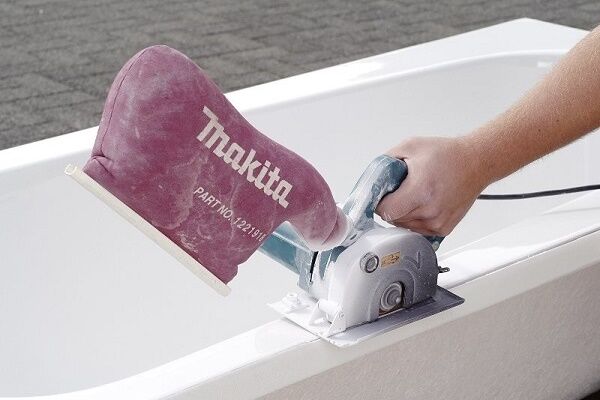
If the perimeter of the container is trimmed with a corner, then it must be removed. Old tiles that fit close to the edge of the bathtub can be carefully trimmed with a diamond blade a couple of centimeters up along the entire perimeter.

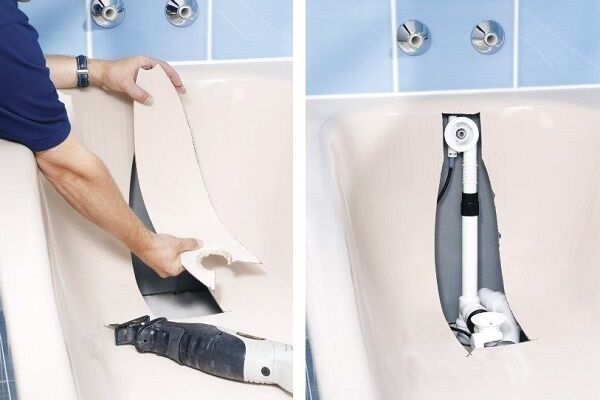
Then the old one is removed siphon and drain and overflow grates.If all of these are tightly fused with the old cast-iron bathtub, then you will have to use a grinder to remove them. Many liners come with a new siphon with drain and overflow grille.
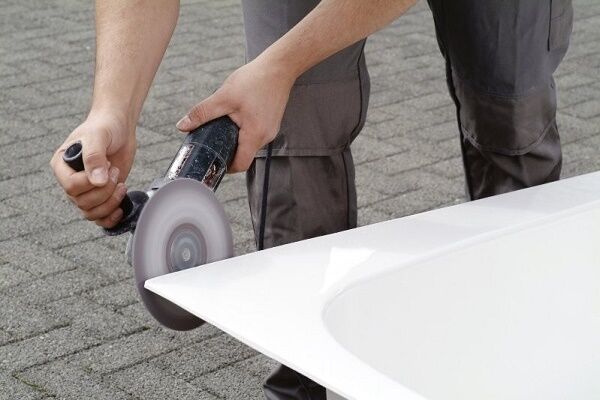
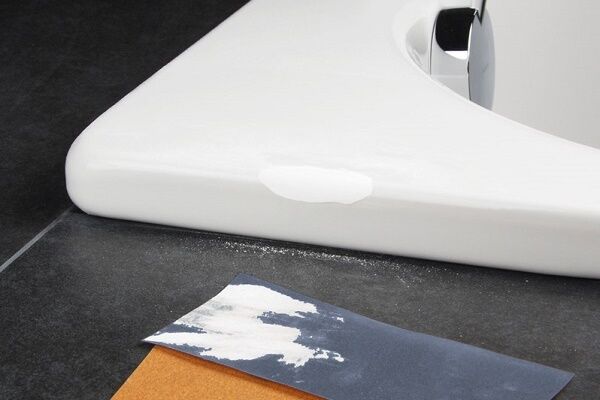
It is better to clean the surface of the old bathtub from remnants of peeled gloss using sandpaper. Then rinse everything off and dry.
Stage No. 4 - fitting the liner
Having finished preparing the surface, you can begin adjusting the liner. The ideal option is when it all fits and there is no need to cut anything off. When installing acrylic liners in an old bathtub, it is assumed that the technical side will serve as protection against water getting under them.
The main problem is the lack of space to accommodate the entire insert. This is where you have to cut off the excess. To do this, you need to try on a new bath cover and, marking the edges, remove what is unnecessary.To carefully perform this action, you can use an electric jigsaw.
At this stage, placements are marked plum and overflow. The new tab is made without these holes. You have to cut them yourself. In order not to be mistaken with their location, the edges of the drain and overflow of the bathtub can be marked with a graphite pencil, toothpaste or other coloring compound.
Using a special crown of the required diameter, all that remains is to cut holes in the liner.

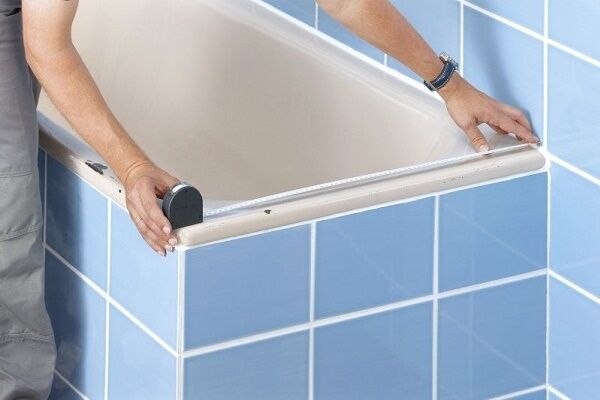
Stage No. 4 - inserting the liner
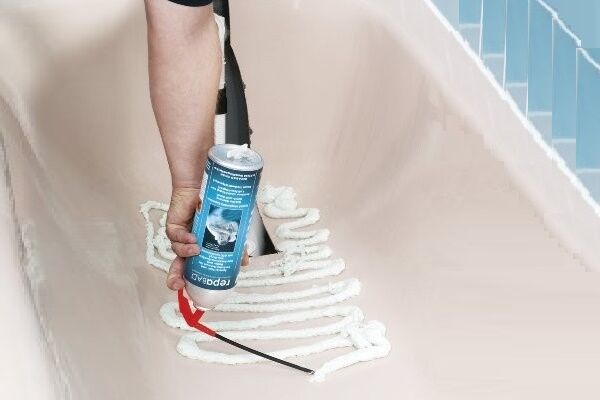
Now it's time to glue the acrylic liner inside the old bathtub. Here they use two-component foam, waterproof silicone or special glue.
Some installers suggest taking regular foam and adding ethylene glycol to it. This is wrong advice - such actions can lead to disastrous consequences. A foam container can simply burst.
To glue the insert you will need a high-quality two-component mixture or a special adhesive. The point of the action is to carefully glue the cover onto the surface of the old bathtub. If you leave dry areas, condensation will begin to accumulate in them and a bubble will swell.
The selected composition for the work is applied to the entire surface. Sealant is applied around the drain and overflow holes to prevent water from getting between the two products.

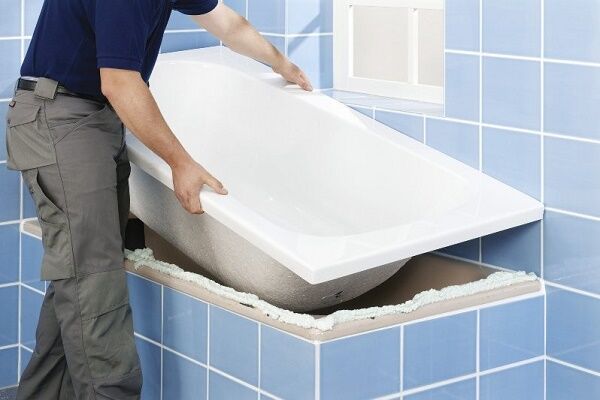
The liner is then carefully inserted into the tub.Presses tightly along the sides and bottom. For fixation, the drain and overflow grates are immediately fixed in place. You can install clips on the sides for a tight fit. Additionally, you can use silicone sealing rings when installing grilles.
Stage No. 5 - final work
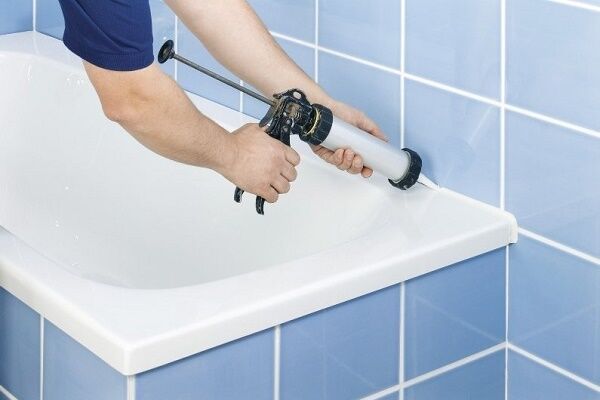
When everything is glued, you can start adding beauty to the edges of the bathtub. To hide the exposed part of the wall, glue a ceramic border around the entire perimeter. Then a sealant is applied to the joints to protect them from moisture.
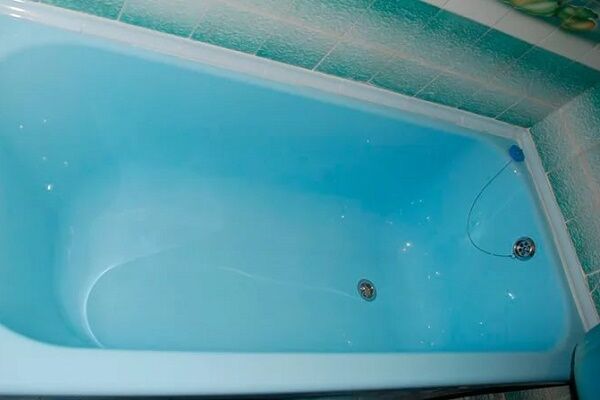
During all this work, the protective film is not removed from the insert. In order for the adhesive to dry, you need to fill the bath with clean water, not reaching a few centimeters from the overflow hole. Leave it like this overnight.

In the morning, drain the water - everything will dry completely and stick.
Secrets of acrylic inlay longevity
It is the quality of the insert itself that ensures 70% of the service life, and 20% for correct installation. The remaining 10% are the conditions for care and use of the product. Thus, the last step towards the longevity of the installed liner is proper operation and care.
When a good liner was purchased, but it was installed by a crooked master, water begins to accumulate under the coating. Over time, it stagnates - mold appears and a disgusting aroma appears in the bathroom. But this situation can be overcome as a result of competent repair work, and the insert itself will last for a long time.
You can use the updated bathtub in an acrylic case in the same way as the old one. You can’t just pour boiling water into it, throw knives and bricks.

If you are going to renovate the bathroom, it is better to cover the surface of the container with film and a soft cloth. After all, tiles knocked off the walls can severely damage the acrylic layer. Do not drop a dismantled sink or toilet - the liner may crack. Further restoration will be impossible - only removing and gluing in a new one.
Regarding care acrylic liner, then he is afraid of abrasive liquid and powder products. Also, it does not tolerate long-term stagnation of dirt.
After using the updated bathtub, it should be treated with a soft soapy sponge and rinsed with water. To wash the liner, you can use products produced for acrylic bathtubs.
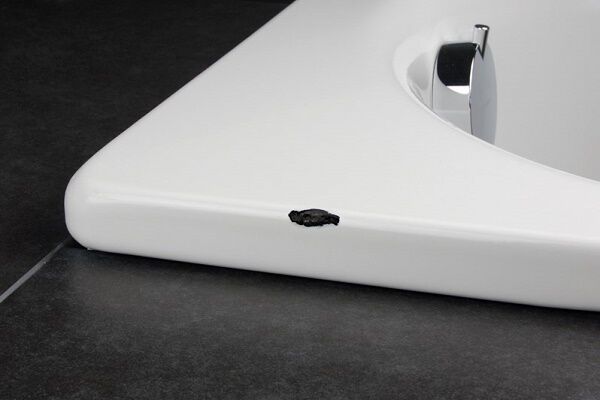
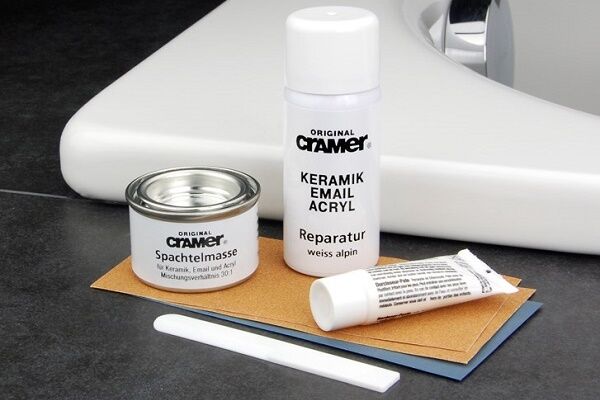
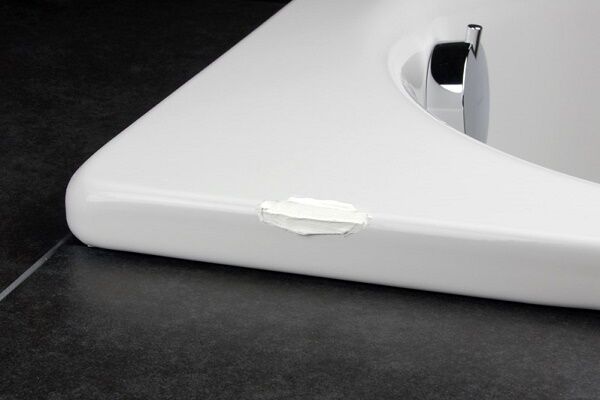
In case of deep scratches and small cracks and other types of damage, the acrylic liner can be restored. To do this, purchase a special repair kit, restorer and polishing paste. To ensure that the tone of the applied product does not differ from the original coating, it should be purchased from the same manufacturer.
Why choose acrylic?
When deciding for yourself whether an old bathtub needs an acrylic liner, you need to pay attention to its significant advantages. Perhaps friends or relatives have already used it and have had a positive experience. It’s good to cooperate with a company that officially represents the manufacturer and has good reviews from real people.
The acrylic insert has an aesthetic appearance. It is endowed with dirt-repellent properties.The polymer itself has no pores in which bacteria can multiply, so the product is safe for bathing children and people with delicate or sensitive skin.
Also, allergy sufferers can safely take a bath - the acrylic insert has a natural snow-white color. No dyes are used in the production process.

The PMMA material applied on top of the ABS layer is resistant to minor scratches. If damage does occur, it can be repaired using a special acrylic repair kit.
Another advantage is ease of maintenance. A soft sponge and soap solution are enough to clean the surface of the acrylic insert.
But all this applies only to high-quality products that have the appropriate documents from the manufacturer.
Sometimes you may encounter the unfortunate experience of installing an acrylic insert. Here, most often, the owner’s excessive savings are to blame. By choosing a cheap Chinese shell instead of a high-quality liner and hiring a crooked craftsman to install it, you get a beautiful cheap bathtub for 1 week/month. After a short time, the pseudo acrylic liner will burst beyond repair.
Conclusions and useful video on the topic
Step-by-step process for gluing the insert into the bathtub:
Video clip about the benefits of using acrylic liners:
A detailed overview of the technology for producing high-quality acrylic inlays:
Having familiarized yourself with the intricacies of choosing and installing acrylic liners, you can safely begin to put your knowledge into practice. By carefully following the recommendations and instructions, you can get a wonderful result in 2-5 hours.Saving, at the same time, a significant portion of money. A hand-renovated bathtub will delight all household members for many years.
Are you trying to install an acrylic liner yourself, but have questions about replacement? Or have you had to do similar work more than once and can you give practical advice to our readers? Please write comments on the article in the block below.


We have a cast iron bathtub in our bathroom, and when the time came to replace it, we took the path of the least financial cost and decided to put an acrylic liner inside. They called a technician because they would hardly have been able to complete the installation on their own. The impression is indescribable - as if you bought new plumbing! It's probably been there for six years, if not more. A budget-friendly and quite worthy alternative to a new bathtub.
An acrylic bathtub insert is truly a great way to restore your plumbing. It’s not too expensive for your pocket, it’s quite easy to install, and it looks great. I myself had an old cast-iron bathtub: the appearance, of course, was “not very good,” but I had no desire to throw it away, it holds heat excellently. I entrusted the installation and selection of the tab to plumbers. They made it so that you can’t tell whether it’s an insert or a solid bowl. It has been in service for more than 3 years, there are no complaints about the quality.
After reading the material, a great idea popped into my head, which would, for example, save me from installing these liners in an old bathtub.
The idea concerns mainly those who want to throw out the shower cabin from the so-called “Khrushchev” buildings.
You need to do the following:
— Make a brick partition around the entire perimeter of the wall in which the bathtub will stand.
— After the masonry has dried, reduce the part that goes downhill using the same bricks, so that you get a total gap around the entire perimeter of the liner of about 3 cm.
— After the internal foundation has completely dried, we take cement putty or pure cement as desired and use it to make a mortar, which must be calculated in such a quantity that, when LOWERING THE LINER into it, it (the mortar) does not go beyond the upper edges of the brickwork.
— The result in about 5 days will not be bad, since the entire lower surface will be in the same position as the old bathtub.
If the liner can be removed, you can check for air when filling the inner base.