How to install a tulip sink yourself: step-by-step instructions
Combining attractive appearance with functionality, a pedestal vanity is a popular sanitaryware option.It looks simple and seems like any DIYer could do the installation, right?
Have you already bought everything, but don’t know how to install a tulip sink with your own hands, so as not to involve a plumber? We will help you understand this issue - the article discusses the installation process and lists the main mistakes that beginners make when installing a sink themselves.
The main pros and cons of a tulip sink are also discussed and recommendations are given for choosing plumbing fixtures with a pedestal for the bathroom.
The content of the article:
- Distinctive features of the tulip shell
- Classification of washbasins with pedestal
- Pros and cons of tulip sinks
- Tips for choosing pedestal sanitary ware
- Detailed instructions for installing a tulip sink
- Features of installing a sink with a semi-pedestal
- Typical mistakes when installing a structure
- Conclusions and useful video on the topic
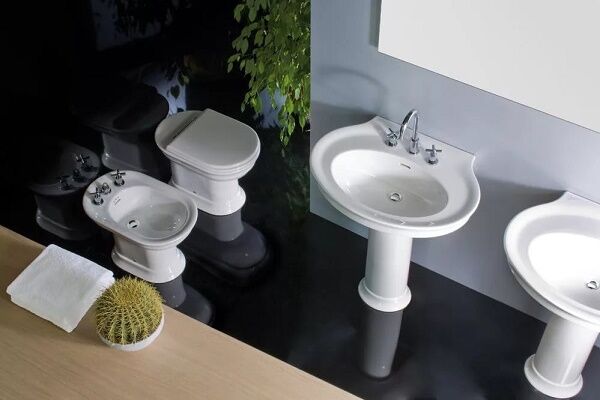
Distinctive features of the tulip shell
A characteristic feature of the tulip model is its high, hollow pedestal leg, thanks to which the model takes on a resemblance to the flower from which it gets its name.
The support column not only gives the model an elegant look, but also performs a number of useful functions:
- The pedestal gives the structure the necessary rigidity, stability, and reliability.
- When there is mechanical stress on the bowl, the leg takes the load on itself, protecting the sink from damage.
- The hollow column allows service communications (water supply and drainage systems) to be hidden from view, making the room look neat and beautiful.
The pedestal, like the bowl, can have different decorative designs, resulting in a wide variety of models.
Classification of washbasins with pedestal
There are several options for classifying shells of this type. The following characteristics can be used as a basis.
According to the way the sink is positioned
Based on the recommended installation location, two groups of sinks can be distinguished:
- Regular. The most common modification of the tulip sink, which is installed against the wall. A wide range of similar models allows you to choose an option that is ideal for any bathroom.
- Angular. As is clear from the name itself, these structures are designed for installation in the corner of the room.Such plumbing fixtures, which usually have small dimensions, allow rational use of usable space, ideal for arranging miniature bathrooms. More ideas on choosing a small sink brought here.
Corner models have an ergonomic design.

A corner washbasin cannot be installed structurally along a wall, while a straight model can easily be placed in a corner, fixed along one of the walls.
According to the design features of the models
Based on the characteristic design features, three main groups of washbasins can be distinguished:
- monolith;
- compact;
- half tulip
Monolithic models are a complete structure in which the sink is inextricably connected to the leg. Such options are quite rare in the consumer market: they are difficult to manufacture, which also affects the cost of such products.
Much more often on sale you can find washbasins of the “compact” type, consisting of two components: a sink bowl and a support column.
The advantages of these models include affordable price, practicality and ease of use. If, when the siphon is clogged, the monolithic model will have to be moved as a whole, then to eliminate this problem with a compact model, you just need to move the pedestal.
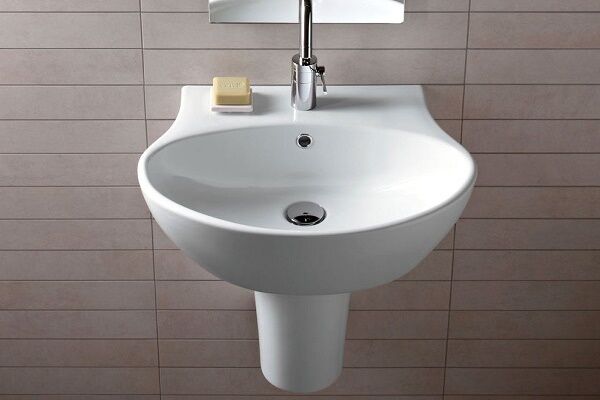
Modifications with a leg that does not reach the floor are called “half-tulip”. They have a more modest appearance, but have certain advantages.
Advantages of the third type of model:
- such products can be mounted at the desired height, which provides additional comfort during their operation;
- a half-tulip sink installed in the bathroom greatly facilitates cleaning the room, since the floor underneath remains completely free;
- the half-column, like a full-fledged pedestal, covers all communications well;
- This option is well suited for hanging plumbing fixtures, but in this case additional installation is required to firmly fix the model.
A washbasin with a half-pedestal will look great in a compact bathroom; it is also often used when decorating service spaces in offices or enterprises.
According to the material of manufacture
The material from which sinks are made affects the decorative and functional qualities of the models, as well as their cost.

The most common options include the following:
- Faience. A common and affordable material that is often used to produce plumbing fixtures. Despite the budget price of earthenware tulip sinks, they have good performance properties, are quite strong and durable.
- Porcelain. A fairly expensive option is often used for the manufacture of designer models. Porcelain products that shine through in the sun have an exquisite, noble appearance, but in terms of consumer qualities they are close to earthenware structures.
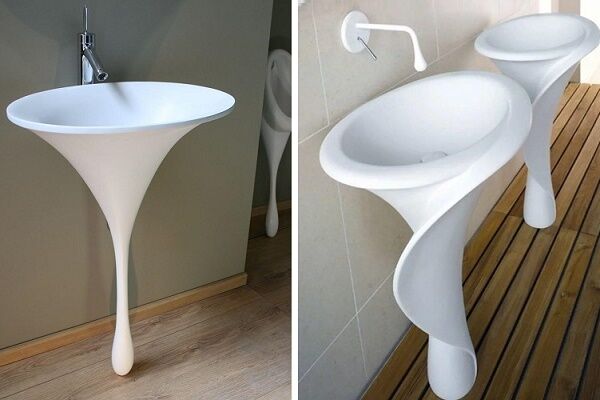
- Acrylic. An artificial material with many useful qualities. Acrylic structures have a budget cost and are fairly light in weight; they are hygienic and impact resistant.In addition, this plastic can be easily processed (grinded, engraved) and painted, which allows you to create the most incredible versions of tulip shells. Disadvantages include some fragility (the material is easily scratched) and flammability.
- Stone. A strong and durable material that can be used to create impressive washbasin options. Most often, granite and marble or more affordable artificial stone are used for this. In addition to the high cost, the main disadvantage of such models is their heavy weight: it not only makes manipulation difficult, but also puts a large load on the floor. We recommend that you read more about stone sinks.
In addition to the options listed above, there are tulip sinks made of glass, various types of plastics and other materials.
In addition, tulip shells vary in size. Typical options are models with bowl sizes of 50-70 cm, however, miniature and large-sized modifications are also available.
Pros and cons of tulip sinks
Washbasins with a pedestal have a large number of important advantages:
- Large range of models. There are various modifications on sale that differ not only in design features, but also in design, color, and size. Thanks to this, you can always choose an option suitable for interiors of different stylistic orientations.
- Affordable price. The cost of a “tulip” mainly depends on the material from which it is made. However, other things being equal, the price for a washbasin of this type is slightly lower than for other models (for example, “Moidodyr”).
- Compact design. Even conventional modifications have relatively small dimensions, which allows them to be installed in fairly compact spaces. In addition, there are miniature models - corner tulip sinks and options with a semi-pedestal. At the same time, even small-sized structures can effectively hide service communications (water supply and sewer systems) from view.
The tulip sink is practically free of flaws. Some inconvenience can be considered the inability to use the space under the washbasin (for example, under bedside tables).
However, there are models that provide additional cabinets and shelves that are attached to the column.

You should also take into account the features of models made from different types of materials (porcelain structures are fragile, stone structures are heavy, and so on).
Tips for choosing pedestal sanitary ware
When choosing a model, it is important to pay attention to the following factors:
- Height of the support column. Its length should be such that a person does not have to bend over much when washing. The typical size is 70-80 cm; if it doesn’t fit, it’s better to look for another model or settle on a tulip sink with a half-pedestal. In another article we looked in detail installation height standards shells.
- The size and depth of the bowl. The best option is a sink with a width of 55-65 cm.A large modification will take up a lot of space, and from a smaller one, splashes will fly around while washing. It is also not very convenient to wash from a very shallow bowl; it is better to choose a deeper sink. We talked in more detail about the size of the sink in this material.
- Holes for mixer. Depending on your preferences, you can choose a model that provides one modern mixer or separate axle-box taps for hot and cold water.
- Presence of overflow. This function allows you to avoid flooding in the bathroom if the outlet is clogged. You just need to remember that overflow requires a special siphon and an additional non-standard pipe.
- Accessories. Since pedestal sinks typically do not include a drain fixture, you will likely have to purchase one specifically. It is better to immediately select a tulip sink, siphon and faucet manufactured by the same company.
- Correspondence of the size of the washbasin to service communications. If a tulip sink is purchased to be installed in the bathroom after a major renovation with the replacement of water and sewer pipes, absolutely any option will do. When choosing a vanity to replace your previous plumbing, it is important that it matches the remaining plumbing systems.
Before going to the store, it is advisable to measure and record the distance from the floor to the water supply pipes and other communication parameters.
Unfortunately, the discrepancy between the pins provided on the model and the existing wiring is very difficult, and often impossible, to correct. In this case, it is better to return the unsuitable model back to the store.

After purchasing, do not forget to check the availability of all parts of the kit, and only then proceed with the installation of the washbasin.
Detailed instructions for installing a tulip sink
For plumbing work you will need the following tools and materials:
- roulette;
- hammer drill;
- level for leveling the bowl;
- hammer;
- adjustable wrench;
- drills for concrete and tiles (if there are ceramic tiles);
- dowels for fastening;
- adhesive sealant;
- soft pencil/marker.
To create airtight connections you will need tow or fum tape.
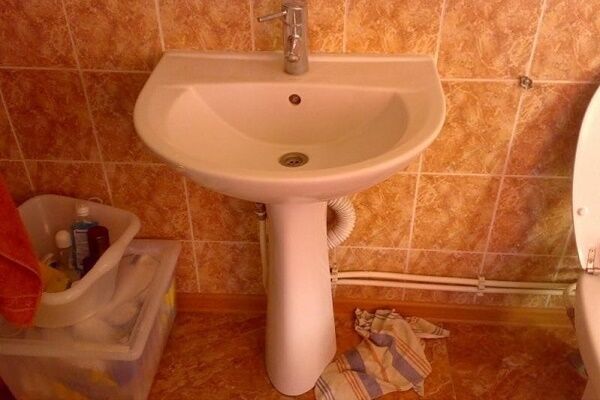
The following selection of photos will help you briefly familiarize yourself with the sequence of work on installing a tulip-type sink:
Stage #1 - dismantling the old washbasin
First of all, you should disassemble and remove the old plumbing fixtures. To do this you need:
- Shut off the main water supply.
- Unscrew the nuts on the mixer and disconnect the flexible or rigid connection, and then remove the mixer.
- Go to the drain: unscrew the nuts on the siphon and remove it.
- Remove the old washbasin from its mountings, making room for the new one.
After this, you should check or re-prepare all communication lines: cold and hot water outlets, sewerage. Their location should match the holes on the newly purchased plumbing fixtures.
After this, you can begin the main stage of work.
Stage #2 - installation of stopcocks and bowl
Installation of the “tulip” is carried out in several stages.
The best place to start is by installing shut-off valves. For insulation and connection strength, it is advisable to wrap “fum” tape or tow mixed with a small amount of oil paint on their threaded part, which guarantees improved protection against water leakage.
After this, we proceed directly to the installation of the plumbing kit.

To determine the fastening locations, we place a support column on which we place the bowl without fixing it. It is important to level the structure using a level, and then use a pencil or marker to mark on the wall where the sink will be attached.
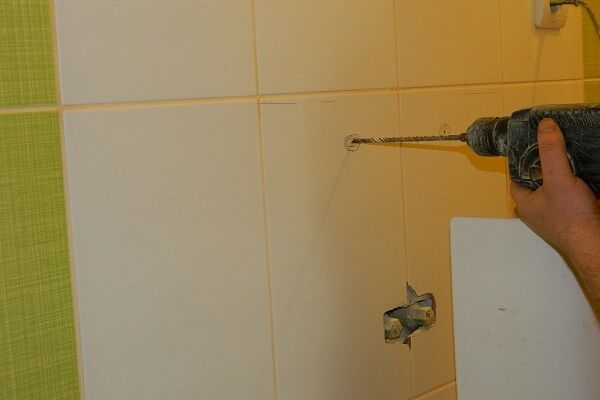
Using an electric drill, we drill holes according to the marks, the diameter and depth of which correspond to the dowels prepared in advance. If the wall is decorated with ceramic tiles, drilling must be done very carefully using a special drill.
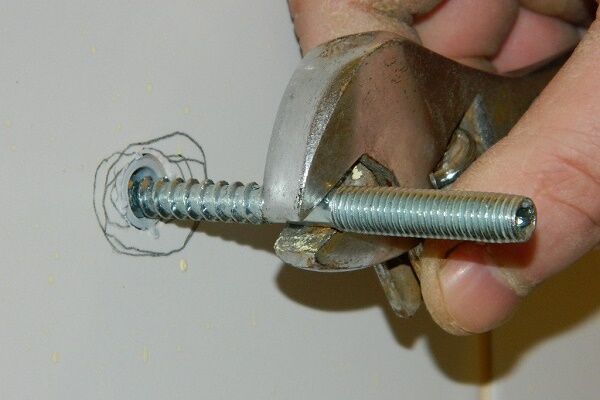
Using a hammer, we insert dowels into the holes, into which we carefully and thoroughly screw the brackets. It is important to ensure that their position is strictly perpendicular to the wall.

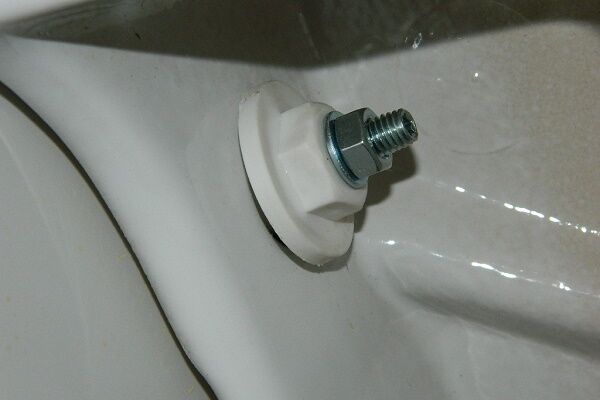
We hang the washbasin bowl, while tightening the nuts through plastic or rubber gaskets.
We have more detailed step-by-step instructions on our website. attaching the sink to the wall.
Stage #3 - connecting to communications
After that, you need to take care of communications. We plug the drain hole with a return corrugated hose, which prevents water from flowing. Then, without securing it, insert a metal drain cylinder into the hole.
We connect the washbasin to the wiring. In this case, the main drain must be secured with gaskets on the outer and inner sides.Only after this is the connection tightened, but in no case is it tightened in order to avoid mechanical damage to the bowl.
We install the mixer. It is important to take into account that the diameter of its part immersed in the sink must correspond to the size of the “tulip” hole intended for this purpose. We recommend watching detailed instructions on installing a faucet on a sink.

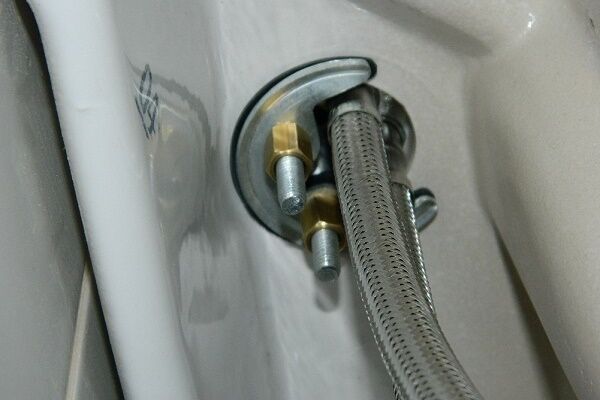
We install shut-off valves. We take into account that when the rod is pulled out of the mixer, the valve closes, whereas when the rod is inserted all the way, it is open. The opening and closing of the valve is adjusted using an angle clamp on the rod.
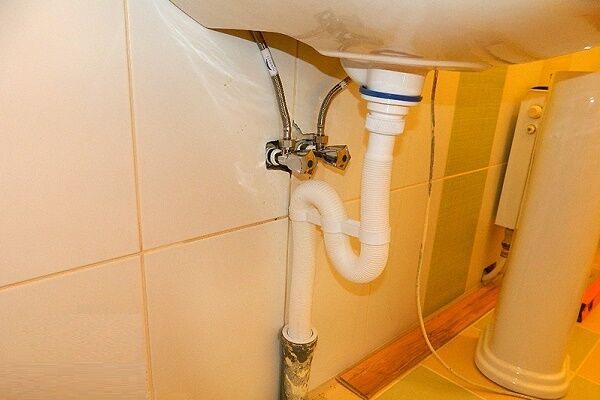
At the ends flexible water hoses There are nuts with which the mixer is connected to cold and hot water. We check the operation of the system by inspecting the structure for leaks.
Stage #4 - installation of the pedestal column
We cover the communications with a hollow support column, performing the work as carefully as possible so as not to accidentally damage the pedestal.

All seams are treated with sealant in the color of the wall, plumbing fixtures or transparent colorless. After this, the installation of the tulip sink can be considered complete.

It should be noted that in some cases it is more advisable to first connect the mixer, and only then install the bowl on the brackets.
In addition, depending on the connected communications, it is sometimes better to replace the corrugated hose with siphons of a different type (specific information is usually available in the instructions for the purchased plumbing fixtures). We recommend considering types of siphons for washbasins, their pros and cons and recommendations for selection.
Features of installing a sink with a semi-pedestal
Installation of the compact model of this modification is carried out similarly to a regular tulip sink, but has some features:
- First of all, you should correctly select the optimal height for attaching the bowl. The standard parameter is 75-80 cm, but it is better to take into account the convenience of using the washstand.
- According to the instructions above, holes are drilled in the wall, dowels are inserted and the brackets on which the bowl is suspended are secured.
- After this, the standard procedure for connecting the mixer and siphon to the communication systems is carried out.
- Additionally, markings are made for fastening the semi-pedestal; You also need to make holes in the lower part of the structure, hammer in dowels and secure this part so that it covers the pipes.
The difference in installing a half-tulip lies in the last point, since the sink leg, which does not reach the floor, cannot provide the structure with the necessary strength and stability.

Typical mistakes when installing a structure
In order not to disrupt the performance of the equipment during installation, we will consider what mistakes you should be wary of.
The defects that are often encountered when installing a tulip sink yourself include the following defects:
- Sink tilt. If you mark the wall and install fasteners without checking the level, the bowl may not be hung level. A sink skewed to one side, of course, will not decorate the bathroom too much. Correcting this defect is quite difficult: you will have to re-dismantle all the parts and drill the holes again, carefully checking with a level.
- The gap between the bowl and the wall. The edge of the washbasin should fit snugly against the wall or partition. If there is even a small free space between them, water will constantly flow into it, which sooner or later will affect the safety of the wall. To avoid this, after installing the structure, you need to carefully seal all cracks and gaps.
- Plumbing or sewer leak. A water or sewer leak can have serious consequences, including flooding of an apartment (yours or your neighbors’). Most often it happens due to poorly tightened threaded connections. After performing such operations, you need to check the connections by giving water under high pressure.
- "Moving" of the shell. The reason for the instability of the bowl of a tulip sink can be loose bolts or an uneven floor under the pedestal. In the first case, the problem can be solved quite easily: you just need to check and secure all the connections of the parts. Things are somewhat more complicated if a second reason is identified.
You can temporarily correct the situation by placing suitable gaskets under the washbasin leg (preferably silicone ones that do not stick out from under the structure).
For large uneven areas, it is better to level the floor using a cement mixture.
There is another installation instruction on our website that discusses the process pedestal sink installations.
Conclusions and useful video on the topic
In the video below you can clearly see how to install the sink.
As you can see, having the available tools at hand, installing the “tulip” is quite easy. With a little effort and time, your bathroom will be decorated with an elegant washbasin that resembles the head of a beautiful flower..
Do you have experience installing a tulip in your bathroom? Or are you a professional plumbing installer and want to share useful tips with beginners? Leave your comments in the block below this article - many home craftsmen will be grateful to you.
Or maybe you are just figuring out the process of installing a sink and you still have some unclear points? Don't hesitate to ask questions - we will try to help you.


I installed this sink myself. This was my first experience, I did everything according to video lessons from the Internet. Since we already had a faucet and stopcocks, the most difficult part was the process of attaching the sink to the wall. It was important to drill carefully so that the tiles do not crack, and to drive in the dowels so that they are perpendicular. I put a board under them so as not to make a mistake) The rest is nothing compared to this.
Installing a tulip is more difficult than a vanity sink, but not by much.It is important to have the right tool and carefully measure the location of the holes using a level. It will be easy for a man. Once the sink is screwed on, connecting the siphon and installing the cabinet couldn't be easier. I also went over the top with silicone, cleanly, so that the water would not flood, and in half an hour I was done.
The first time is always difficult. But then the installation goes like clockwork. I got it right the first time. The main thing is to do everything according to the instructions.