How a radiant heating system works: diagrams and wiring options
When deciding how to heat his own home, the owner can choose from a variety of heating technologies.What they have in common is a similar set of structural elements, which includes a boiler, a pipe system and heating devices that directly heat the room.
There are differences in pipeline connection schemes; one of its options is a radiant heating system, the characteristics and construction rules of which will be discussed in the article. We described in detail the specifics of the collector wiring and provided options for its design. We outlined the criteria for choosing equipment for constructing circuits.
For a clear perception of the information presented, the text is supplemented with selections of photos, useful diagrams, and videos.
The content of the article:
Significant advantages of beam distribution
The main task of the heating system is to replace the heat that the building loses due to differences between the internal and external air temperatures, as well as due to the varying degrees of thermal conductivity of the external walls. Its solution largely depends on the correctly chosen pipe layout diagrams, delivering coolant to the devices.
In practice, you can connect all heating devices together using the following methods:
- tee connection;
- radial (collector) connection, when a separate pair of pipes is supplied to each heating device using a collector for direct and reverse supply of coolant.
The tee or perimeter type of pipe connection is cheaper.But due to the fact that the devices are connected to each other and connected by a pipeline to a single riser, the system will need to be completely disconnected and freed from coolant to repair a separate radiator or section. Or equip it with bypasses and shut-off valves, which will significantly increase the cost of organizing heating.
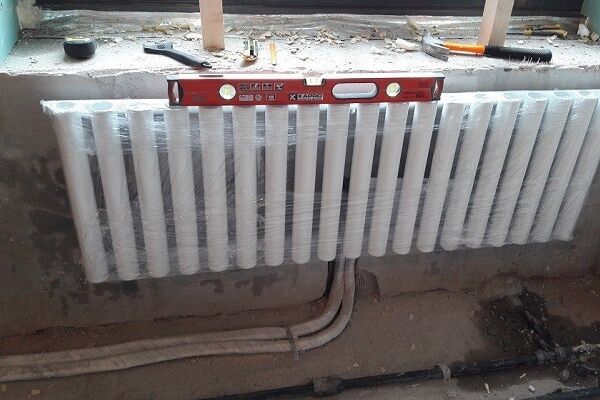
With traditional perimeter wiring, the entire pipeline is most often installed in an open way, less often in a hidden way. Radiant heating systems They are mainly laid in walls or floors, because a large number of pipes laid on top of structures negatively affects the interior.
Concealed installation is carried out by a system of underfloor heating pipes, which, in accordance with the technological specifics, is arranged according to a radial scheme. The radial pipeline to the heating devices is also laid in a hidden way in the floor screed, because this is better for technological and architectural reasons.

A large number of pipes when using the beam method of pipeline assembly can ruin the interior. Therefore, all heating communications are laid in the floor or walls.
All connections remain on the surface, so there is virtually no risk of leakage under the screed. This cannot be done with a tee system, because If the connections wear out, you will have to break the walls and floor.

The main disadvantage of collector wiring is its high material consumption, which is due to its large length. For normal operation, technical devices are required, because this is exceptional coercive schemes. And the main advantage is that you can set different temperatures in each room, creating a comfortable microclimate in any room.
Each radiator or convector is connected independently, which is also convenient for carrying out maintenance work and replacing worn-out system elements without having to turn off the heating in the entire house or apartment.

The principle of organizing a beam circuit
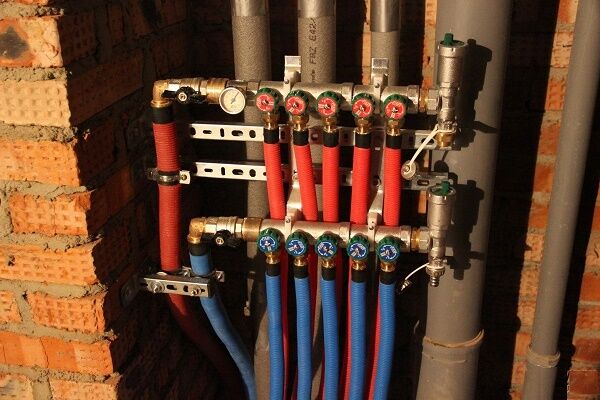
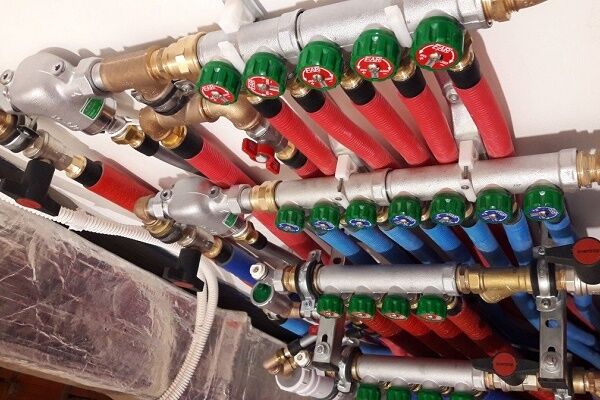
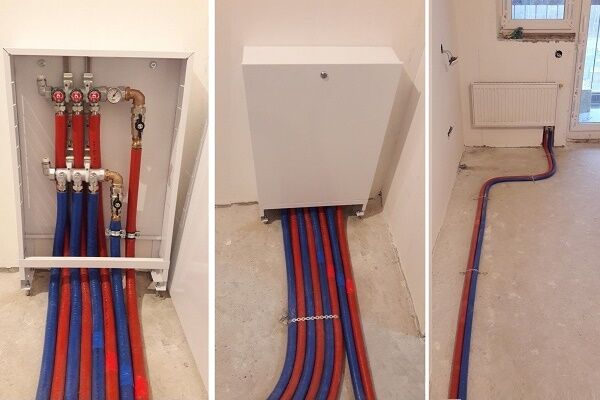
One of the central elements of the beam system is collector unit. If you are going to do heating in a house with several floors, then the collector should be located on each level.
During installation, collectors are placed in a collector cabinet, where a convenient system for positioning this element is provided for subsequent maintenance or adjustment.

The indisputable advantage of the radial system is the minimum number of connections, which has a positive effect on the hydraulic stability of the entire heating system. The central working body is the boiler.
To ensure high efficiency and safety, the owner needs to take into account the power of the unit, the consumption of thermal energy by heating devices and the heat loss of the system. This must be done regardless of what type of fuel the boiler operates on.
An increase in the length of the pipeline when creating radial distribution is fraught with a slight increase in heat loss, which also needs to be taken into account for power balance.

Choosing a circulation pump
Radial piping is used mainly in horizontal circuits with bottom coolant supply. It requires a circulation pump that stimulates the movement of heated water through numerous branches.
Controlled coolant circulation makes it possible to reduce the temperature difference at the inlet and outlet of the heating circuit. As a result, it is possible to increase heating efficiency, making the system more compact and less material-intensive.

This unit is selected according to several important parameters, including:
- productivity, m3/hour;
- head height, m.
To get it right choose a circulation pump For these parameters, it is necessary to take into account the diameter of the pipes, their length and height relative to the level of the pumping unit. When drawing up a heating system installation project, these parameters are calculated in advance.
Rules for installing a circulation pump
By adhering to the recommendations below, you can achieve high heating efficiency and safety:
- circulation pumps with a wet rotor are installed so that the shaft is horizontal;
- the device with a thermostat should not be close to hot surfaces (radiator or boiler) so that the readings are not distorted;
- as a rule, it is installed on the return section of the pipeline due to lower temperatures.Modern models can also be installed in the supply line, withstanding high temperatures;
- The heating circuit must be equipped with an air bleed mechanism. If there is none, then the pump must have an air vent;
- should be located as close as possible to the expansion tank;
- Before installing the pump, it is recommended to flush the system to remove solids;
- Before starting the pump, fill the system with water;
To avoid becoming a victim of excessive noise, select a pump in accordance with the performance of the heating system.
Is it possible without a pump?
Of course, you can save money and not buy a pump, air vents for bleeding air, sensors, etc. But a beam system with natural circulation requires compliance with several not very convenient conditions.
Experts recommend this option in extremely rare cases. Firstly, you will need to install wide diameter pipes. Secondly, the expansion tank must be installed at the highest point of the facility.

This option is suitable for a cottage or other modest-sized object, providing enough heat. The choice between natural circulation and forced circulation must be made at the design stage.
Selecting a distribution manifold
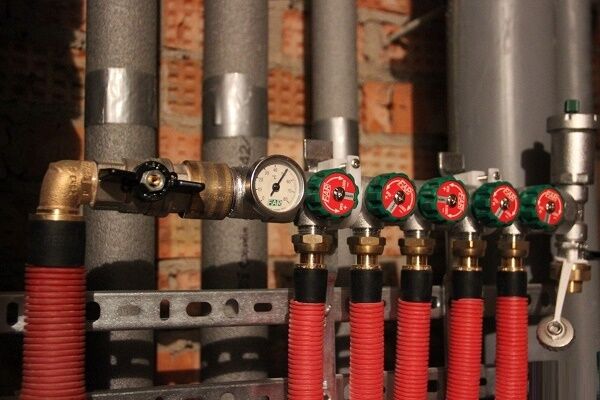
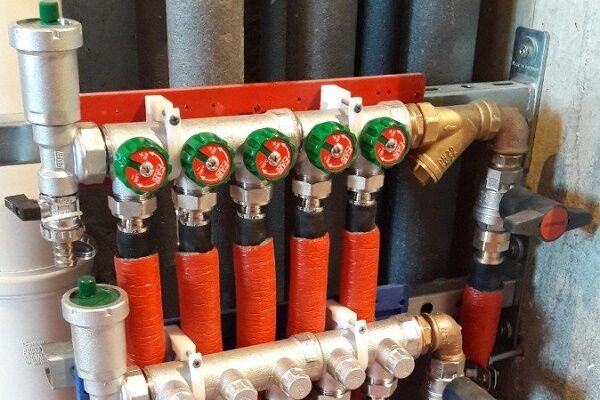
This device is also called distribution comb. Serves to supply coolant to each heating device (warm floor, radiator, convector, etc.). Through the collector, the return flow also occurs, which then enters the boiler or is again mixed into the circuit to regulate the temperature.
The collector can support from 2 to 12 circuits.Some manufacturers offer even more branches for complex projects.

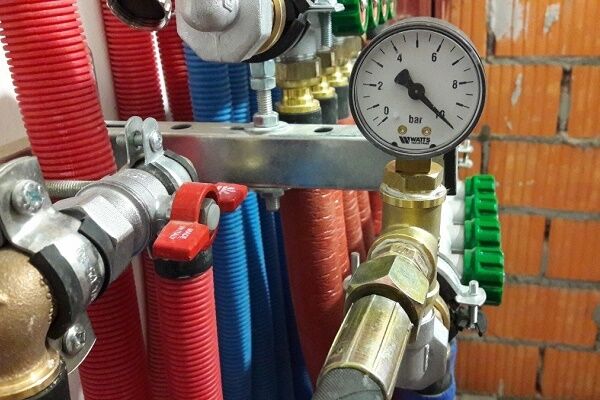
Combs are often equipped with additional shut-off and temperature control elements. They allow you to configure the optimal coolant flow for each heating branch. The presence of air extractors guarantees more efficient and safe operation of the system.
Beam wiring diagram
When choosing a heating scheme, in most cases they choose a radial floor-to-floor pipeline layout. All pipes are hidden from view in the thickness of the floor. The collector - the main distribution body is installed in a niche of the wall enclosure, often in a special cabinet located in the center of the house/apartment.
In the vast majority of cases, the implementation of beam distribution requires a circulation pump, and sometimes several, installed on each ring or branch. Its necessity is described above. Radial wiring of the heating system assembly is most often performed on the basis of one- and two-pipe installation, almost completely replacing the tee type of connection.

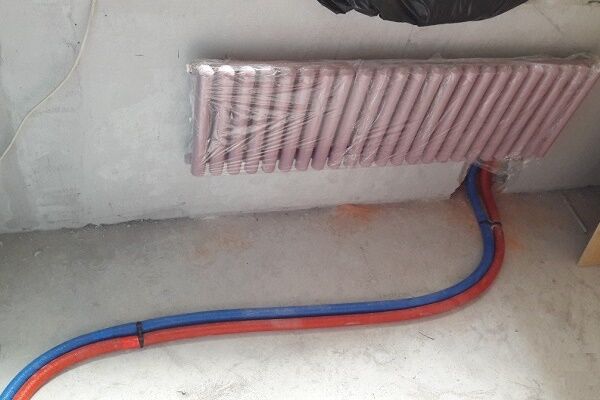
On each floor, supply and return manifolds are installed near the riser of the two-pipe system. Under the floor, pipes from both collectors run in the wall or under the floor and connect to each radiator within the floor.
Each of the contours should have approximately the same length. If this cannot be achieved, then each ring must be equipped with its own circulation pump and automatic temperature control.
In this case, the change in temperature conditions will be completely independent on each circuit and will not affect each other. Because the pipeline will be under the screed; each radiator must be equipped with an air valve. The air vent can also be placed on the manifold.
What needs to be done before installation?
Before starting work, the owner’s task is to correctly select all components and equipment locations, namely:
- determine locations radiators;
- select the type of radiators, based on pressure indicators and type of coolant, and also determine the number of sections or area of panels (calculate heat losses and calculate the thermal power required for high-quality heating of each room);
- schematically depict the location of radiators and pipeline routes, not forgetting about the remaining elements of the heating system (boiler, collectors, pump, etc.);
- make a paper list all items and make purchases. In order not to make a mistake in the calculation, you can invite a specialist.
So, to proceed to the next stage, it is necessary to take into account the rules for installing the beam system
Rules for installing beam wiring
If you choose to lay pipes under the floor, follow several rules that will help avoid heat loss and freezing of the coolant. There should be enough space between the rough and finished floors (more on this later in the description).

The subfloor can be a concrete foundation slab.A layer of insulation is first laid over it, then a pipeline is installed. If you lay pipes without a heat-insulating backing, the water in these areas may freeze, losing a lot of heat.
As for pipes, it is better to opt for polyethylene or metal-plastic models, which are highly flexible. Polypropylene pipelines do not bend well, so they are not suitable for beam distribution.
In most cases, a pipe with a diameter of 16 - 20 mm is used (if the radiator power is over 1.5 kW, then 20 mm), on which a thermal insulating corrugation is placed to reduce heat loss and compensate for thermal expansion.
The pipeline must be attached to the base so that it does not float while pouring the finishing layer of screed. You can secure it using mounting tape, plastic clamps or other available methods.

Then we lay insulation around the pipeline with a 50 mm layer of polystyrene foam or polystyrene foam. We also attach the insulation to the base of the floor using dowel nails. The final stage is pouring a 5-7 cm layer of mortar, which will serve as the base of the finished floor. Any flooring can be laid on this surface.
If pipes are laid on the second floor and above, then installation of a thermal insulation layer is optional. Remember one important rule: there should be no connections in the sections of the pipeline located under the floor.
In the presence of circulation pump With sufficient power and performance, the collector is sometimes placed on the floor below relative to the level of the radiators.

From the collector, the pipes rise vertically to the ceiling. Then a bend is made and the pipeline along the ceiling is brought to each radiator with another 90 degree bend. The pipes must be secured to the ceiling. Thus, a vertical pipe through the ceiling is connected to each heating device.
Radiant wiring and heated floors
The radial scheme can also be used to install a “warm” floor system. With a well-designed project, taking into account all factors, you can abandon radiators, making the heated floor the main source of heating.
Heat flows will be evenly distributed throughout the room, without creating a convection effect, unlike radiators. As a result, there is no circulation of dust in the air.
Before you take on the idea of installing water-heated floors, it is important to consider the following features:
- a reflective screen with a layer of thermal insulation is laid on a concrete or wooden base;
- pipes are laid on top in a loop-like pattern;
- Before pouring concrete, a hydraulic pressure test of the system is carried out throughout the day;
- The finishing layer is screed or flooring.
The manifold of each circuit must be equipped with flow meters and thermostatic valves, which allow precise control of coolant flow and regulation of its temperature.
When routing pipes, you can use thermostatic heads and servos. These devices allow you to automate the operation of a heated floor. The system will respond to changes in room temperature, adjusting a comfortable mode for each room.

During installation, it is extremely important to properly fix the pipes before filling everything with screed. To do this, you can use insulation with grooves, reinforcing mesh or staples.
Before laying the pipeline, it is necessary to clearly define the route that the coolant will travel to heat the floor (do not allow pipes to cross). It is best to cut the pipe only after it has been completely laid and connected to the return and supply manifolds.
It is important that the pipeline is under pressure when filling. Until the concrete mixture hardens completely and three weeks have passed, coolant cannot be supplied at operating temperature. Only then we start with 25ºС and after 4 days we end with the design temperature.
Options for wooden houses
To lay the pipeline in a wooden foundation, it is necessary to drill holes in the wooden floor beams. In this case, the holes should be slightly larger than the diameter of the pipes so that the beam and the entire structure do not create pressure on the pipeline.

In our example, the subfloor is wooden, on which the pipe system is located. Again, there should be no connections in the thickness of the floor, because... they should be located exclusively above the level of the floor covering.
Analysis of the arguments "for" and "against"
Let's start with the cons.In addition to the material consumption, which affects the cost of the project, there is the need to install a manifold cabinet, which will require additional space.
This is where the disadvantages of the beam system end, and a series of advantages begin:
- simple design and installation, the system uses pipes of the same diameter;
- with hidden installation there are no connections in the walls and floor;
- high installation speed due to the minimum number of connections;
- expansion of functionality due to the installation of shut-off valves, sensors, air vents and thermal heads to automate the operation of the heating system;
- temperature control in each individual room using mechanical elements or automation;
- the ability to cut off any radiator without stopping the heating process;
- uniform heating of all rooms.
The external control panel allows you to program the heating operation, including automatic adjustment depending on the weather conditions outside. Thanks to the installed sensors, all residents can set any parameters that are comfortable for them while in a specific room.

Thus, the radial wiring diagram makes it possible to achieve high controllability of the heating system and achieve optimal coolant flow.
Conclusions and useful video on the topic
The video will help you visually understand the installation features and understand how a heating system with radiant wiring works:
An energy-efficient heating system is a balanced combination of all its components. The pipe layout serves as a kind of circulatory system for heating.The radial method of pipeline installation allows you to deliver exactly as much coolant as each working device needs for its optimal operation.
Do you want to ask questions about unclear points that interested you while reading the material? Would you like to provide useful details on the design of beam systems? Please write comments in the block below.


Is a circulation pump needed for a radiant heating system in an apartment of 60 sq.m. with individual heating (gas double-circuit boiler) with three heating radiators and a heated towel rail? Thank you in advance!