Thermal imager for construction: types and rules for conducting a home inspection
You can objectively evaluate the work performed on insulating a private house based on a number of criteria. In most cases, this is the amount of electricity spent on heating and thermometer readings.But if thermal insulation turns out to be ineffective, it is difficult to find the reasons without special equipment.
In such situations, a thermal imager is used for construction. The article we have presented describes in detail the principle of operation and design features of the device. The rules for using and processing data obtained during thermal photography are given.
The content of the article:
Why conduct thermal imaging?
Inspecting a cottage, cottage or residential building with a construction thermal imager makes it possible to see on a thermogram what is happening inside various objects and structures of the building, without touching them at all. This is called non-destructive testing.
This kind of inspection will show the condition of the heating pipelines in the walls and heated floors without opening the plaster or tiles.
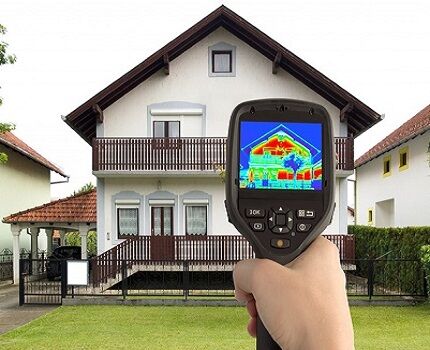
The sensitivity of some models reaches hundredths of a degree, thanks to which you can not only see the thermal trace on the surface of structures, but also find out what is happening inside.
The unique advantage of modern thermal imagers over other means of control is precisely the ability to look inside objects without violating their integrity. Even a minimal deviation of temperature indicators from the norm will indicate the presence of problems, for example, in the electrical network.
Checking a private home with a thermal imager will help solve a variety of problems:
- localize heat leaks and determine their intensity;
- monitor the effectiveness of vapor barriers and detect the formation of condensation on various surfaces;
- choose the right type of insulation and calculate the required amount of thermal insulation material;
- detect leaks in the roof, pipelines and heating mains, leakage of coolant from the heating system;
- check the airtightness of double-glazed windows and the quality of installation of door blocks;
- carry out diagnostics of ventilation and air conditioning systems;
- determine the presence of cracks in the walls of the structure and their sizes;
- find clogs in the heating system;
- diagnose the condition of electrical wiring and identify weak contacts;
- detect rodent habitats in the house;
- find sources of dryness/high humidity inside a private building.
A construction thermal imager makes it possible to quickly check the compliance of the parameters of a constructed building with technical requirements, assess the quality of a real estate object before purchasing it, and diagnose the operation of internal communications.
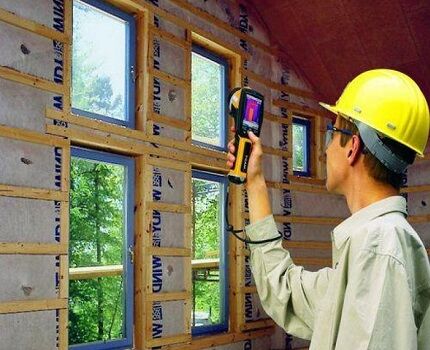
And after the work is completed, thermal imaging will allow you to monitor the final result and detect installation flaws that create heat loss. The check will also show cold bridges that can be quickly eliminated in preparation for the winter season.
Before reconstructing or repairing old structures, a device with an infrared camera will come to the rescue to identify the coldest zones and leakage areas, problems with heated floors, and objectively assess the volume of planned construction work.
Design and principle of operation
The sensitive element of any thermal imager is a sensor that transforms infrared radiation from various objects of inanimate and living nature, as well as the background, into electrical signals. The received information is converted by the device and displayed on the display in the form of thermograms.
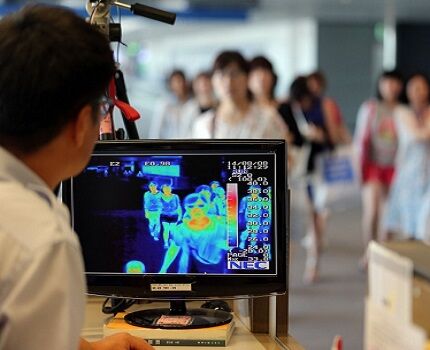
In mechanical devices, heating of individual component parts occurs due to constant friction at the interface points of moving elements. In electrical equipment and systems, conductive parts heat up.
After pointing and shooting an object, the IR camera instantly generates a two-dimensional image containing complete information about temperature indicators. Data can be saved in the memory of the device itself or on external media, or can be transferred using a USB cable to a PC for detailed analysis.
Some thermal imager models have built-in interfaces for instant wireless transmission of digital information. The recorded thermal contrast in the field of view of the thermal imager allows you to visualize signals on the device screen in halftones of a black-and-white palette or in color.
Thermograms display the intensity of infrared radiation of the structures and surfaces under study. Each individual pixel corresponds to a specific temperature value.
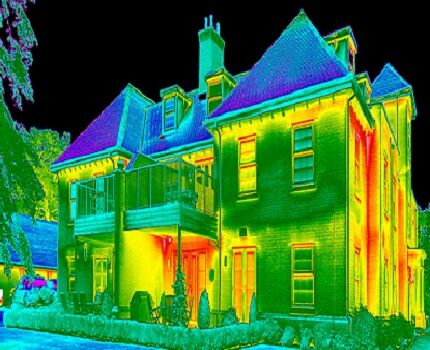
On the black and white screen of the thermal imager, the warmest zones will be displayed as the lightest. All cold objects will be practically indistinguishable.
On the color digital display, areas that emit heat the most will light up red.As the radiation intensity decreases, the spectrum will shift towards violet. The coldest zones will be marked in black on the thermogram.
To process the results obtained by the thermal imager, it is enough to connect the device to a personal computer. This will allow you to reconfigure the color palette on the thermogram so that the required temperature range is best visible.
Modern multifunctional devices are equipped with a special detector matrix, which consists of a huge number of very miniature sensitive elements.
Infrared radiation recorded by the thermal imager lens will be projected on this matrix. Such IR cameras are capable of detecting temperature contrasts equal to 0.05-0.1 ºC.
Most thermal imager models are equipped with a liquid crystal control display to display information. However, the quality of the screen does not always indicate the high level of infrared equipment as a whole.
The main parameter is the power of the microprocessor used to encode the received data. Processing speed plays a major role, as pictures taken without a tripod may turn out blurry.
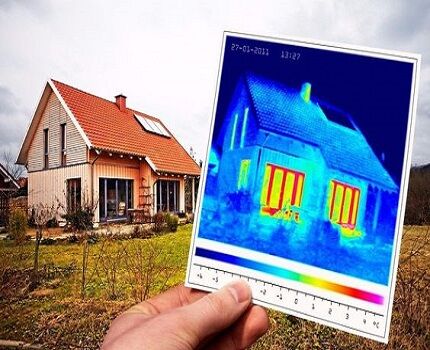
Another important parameter is matrix resolution. Devices with a large number of sensing elements produce higher-quality two-dimensional images than thermal imaging devices with a lower resolution detector matrix.
This difference is explained by the fact that one sensitive cell has a smaller surface area of the object under study.In high-resolution graphics images, optical noise is almost invisible.
Types of thermal imaging devices
Checking a private home for heat loss with an IR camera makes it possible to carry out the most accurate measurements and qualitative analysis of all temperature indicators. And after that, based on promptly received data, competently carry out repair work and/or modernization of a residential property.
For thermal imaging diagnostics, two types of devices are used:
- stationary thermal imagers;
- portable infrared cameras.
Stationary devices are used mainly in manufacturing plants. They are designed for regular checking of the condition of electrical networks and continuous monitoring of complex technical equipment. Stationary thermal imaging systems are made on semiconductor matrices of photodetectors.
Using portable thermal imagers, energy audits of residential apartment buildings and private buildings are carried out. These devices are used both for one-time local inspections and for comprehensive diagnostics of homes.
Handheld thermal imagers are based on silicon uncooled microbolometers and are ideal for use in hard-to-reach areas.
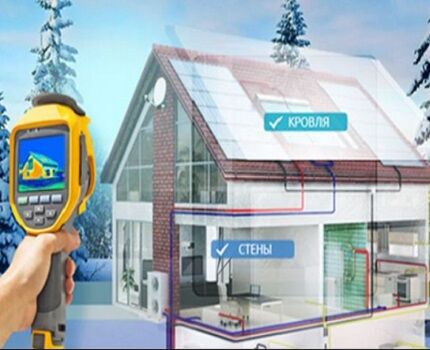
Depending on the functionality, there are three types of thermal imagers:
- Observational devices - provide only visualization of various heat-contrasting objects, often in monochrome form.
- Measuring devices — create a graphic image within the infrared radiation and assign a certain temperature value to each point of the light signal.
- Visual pyrometers — designed for non-contact temperature measurements and visualization of the thermal field of specific objects in order to detect areas with deviations from normal values.
The price for good functional thermal radiation receivers starts at $3,000. Purchasing them for a one-time home inspection is simply not cost-effective. Many companies today offer construction thermal imagers for rent for a day. This is a very convenient service.
You can also order a full professional thermal imaging inspection of the cottage/house. The average cost of shooting with a thermal imager is $5 per 1 square meter of private residential property.
Typically, the cost of thermal imagers is an indicator of their functionality. But even budget models effectively perform infrared diagnostics. Therefore, when choosing, you should focus on basic technical characteristics and the ability to solve specific problems.
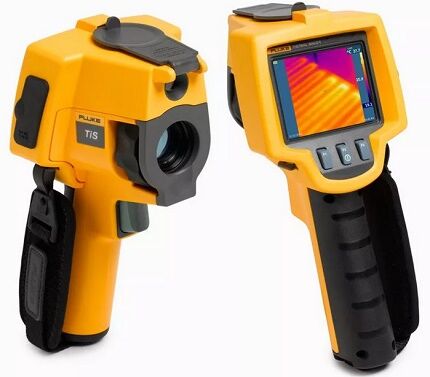
A big plus is the presence of additional functions, namely: digital zoom, laser pointer, annotations for thermograms, customizable color alarms, identification of areas with maximum and minimum temperature values.
Various accessories will greatly simplify thermal imaging diagnostics at home - removable optical wide-angle lenses for viewing the general plan and telephoto lenses for detailing critical areas, folding tripods, containers for storing batteries.
Rules for using a thermal imager
The main task of thermal imaging inspection is to accurately identify heat losses and defects in the operation of engineering systems, as well as to detect possible weak points of a residential building during the construction stage.
Thermal imaging diagnostics of buildings includes:
- examination in the long-wave infrared region of the spectrum in the range of 8-15 microns;
- constructing a temperature map of the objects and surfaces under study;
- monitoring the dynamics of thermal processes;
- accurate calculation of heat flows.
Inspections of a residential property are carried out both outside and inside the building. In the first case, infrared photography makes it possible to detect gross defects in the infiltration of air flows through the building envelope and thermal insulation defects. Secondly, to identify errors in operation heating system and power supply networks.
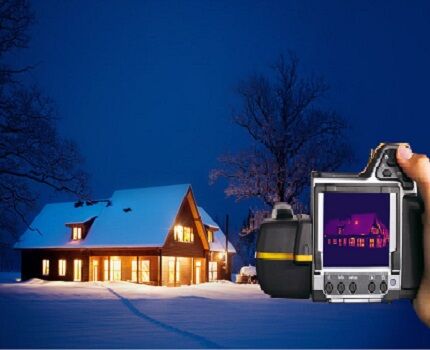
The higher the temperature difference, the more accurate the test results. In addition, in order to obtain correct data, the residential property being surveyed must be uninterruptedly heated for at least 2 days. In summer, inspecting a building with a thermal imager is practically useless due to the minimal temperature difference.
Checking buildings with thermal radiation receivers shows the distribution of temperature fields over the surfaces of objects or structures at a specific point in time. Therefore, shooting with an infrared camera highly depends on a number of conditions, the observance of which is critical for obtaining correct results.
The operation of the device is affected by strong wind, sun and rain. Under their influence, the house will cool or heat up, which means the test can be considered ineffective.The structures and surfaces being examined should not be exposed to bright direct rays of the sun or reflected radiation for 10-12 hours before the start of thermal imaging diagnostics.
It is recommended to keep door and window units in a fixed position for 12 hours before shooting with an infrared camera and during the building inspection process.
Before starting a home inspection, you need to set the basic settings on the device, namely:
- set the lower and upper temperature limits;
- adjust the range of thermal imaging;
- select intensity level.
Other indicators are adjusted depending on the type of thermal insulation, wall and ceiling materials. An energy audit of a private home begins with checking the foundation, facade and roof of the building.
At this stage, it is very important to conduct a thorough diagnosis, since areas on the same plane are significantly different and thermal radiation receivers will definitely show this.
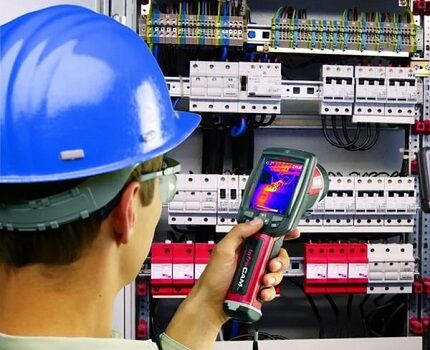
The survey is carried out in the direction from the window blocks to the doors, slowly examining all technological openings and walls. In this case, the doors between rooms are left open to stabilize the flow of heated air and minimize the likelihood of errors in measurements.
Thermal imaging control involves a step-by-step inspection of different zones of enclosing structures, which must be open for filming with an infrared camera. To do this, you need to free up the window sill space and organize unobstructed access to baseboards and corners.
During internal thermography of a building, the walls must be cleared of carpets and paintings, peeling old wallpaper and other objects that interfere with direct visibility of the object being examined.
Houses equipped heating radiators, It is customary to shoot only from the outside. Diagnostics of facades is carried out under favorable weather conditions - the absence of humid fog, smoke, and precipitation.
Interpretation of the data obtained
Thermal imaging devices record a temperature difference of 3 ºC, and this will be displayed on the thermogram as an anomalous zone in a characteristic color spectrum. However, the spectrozonal image itself is not sufficient justification to consider the diagnosed area to be defective.
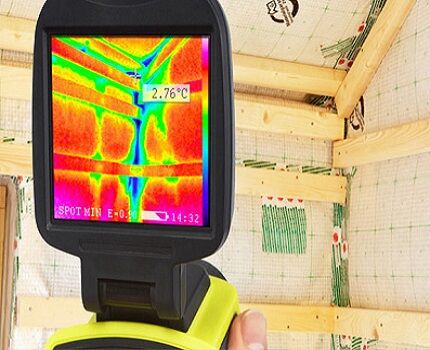
Therefore, portable thermal imagers come complete with instrumental software for qualitative and quantitative analysis of thermograms, as well as creating reports.
All this means that no special training is required to operate an infrared camera. After studying the user manual, it is easy to independently carry out a thermal imaging test and process the results in the proposed program. After analyzing the obtained indicators, the application will give an expert assessment of the pictures.
In addition, the information collected by the equipment can be transferred to programs for processing statistical data - spreadsheet processors or special engineering utilities, for example, MathLab.
It is also worth noting that the thermal imager may produce incorrect results if configured incorrectly. Similar situations occur when examining surfaces such as glass, glossy tiles, and mirrors.
Infrared radiation from nearby objects will be reflected in these surfaces, which will lead to distortion of thermograms. To correctly determine the temperature of mirror surfaces in thermal imaging devices, it is necessary to additionally adjust correction factors.
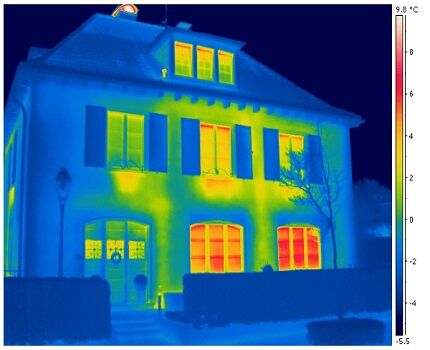
The quantitative method for analyzing the distribution of temperature fields over the surface of structures does not take into account the emissivity and background radiation of the environment. Moreover, it does not matter whether the shooting is carried out with an IR camera on site or whether the results obtained are processed by software.
When carrying out diagnostic measures inside a building, more reliable results are obtained, since external climatic conditions do not affect the surfaces being examined. The final thermograms after processing with appropriate programs correspond to reality.
The use of a building thermal imager allows you to objectively assess the quality of a building’s thermal protection, detect cold bridges and subsidence of insulation, as well as find hidden damage and defects in the installation of window units, doorways, and poorly executed joints of roofs, walls and ceilings.
Infrared diagnostics makes it possible to correctly, and therefore economically, carry out work to minimize heat loss in a residential building, reduce costs floor insulation and thermal insulation of other structures.
Carrying out a research procedure will make it possible to correctly select insulation for walls And ceiling private building. As a result, the cost of heating a private home will decrease.
Conclusions and useful video on the topic
The operating principle of a thermal imager, checking a building after insulation for defects and correct interpretation of infrared images in the video:
Functionality of thermographic scanners:
Video on how to analyze and create a technical report for diagnosing a home with a thermal imaging device using the Testo IRSoft software module:
Today, thermal imaging inspection with an IR camera is an advanced non-destructive monitoring technology that allows you to monitor the condition of various structures, communication networks and electrical equipment.
The study of heat loss using a thermal imager is carried out to prevent emergency situations, detect defects in thermal and waterproofing, and identify malfunctions in the engineering systems of the house.
Do you have experience using a thermal imager to examine weak points in your country house/apartment? Perhaps you can share some useful information on determining heat loss from a building structure? Please write comments, ask questions, and post photos related to the topic of the article in the block below.

When we built our frame, we called a specialist with such a thermal imager. Very comfortably! Our house is ecological, instead of insulation there is dry sawdust, so we had to look at where it was properly filled and where it was not. They called twice, when they built and lit the stove inside (it was December) and the following fall, when it was a stable 0º outside. Everything was inspected, heat leaks were eliminated. Of course, I took the money normally, but I don’t regret it. If we hadn’t gone through a thermal imager, we would have gone broke on the heat loss and the rework.
Even if you are building a budget house, do not skimp on the quality of insulation. Let sawdust or fashionable ecowool. It’s better to go through the device twice than to patch it later and wonder why it’s blowing and where the heat goes.
A thermal imager is a useful little thing, but here’s the problem: it costs a lot. And you will use it 2-3 times at most. Or maybe it will come in handy once to check the quality of the insulation, and that’s all. I ordered thermal insulation from a company that has been doing this for many years. I came to the site myself and checked how the work was being carried out. The foreman had a thermal imager, and he checked the house with it in front of me. In general, it is not suitable for home use.
Is it possible to check a house with a thermal imager for hunting or are they fundamentally different from something for construction?
Hello. Every device has its own purpose. They have completely different characteristics, indicators and non-universal applications. Therefore, we still advise you to purchase a construction device.