Construction of a cesspool: rules of organization and waterproofing
The lack of a centralized sewerage system becomes the reason for the installation of all kinds of local treatment facilities in suburban areas.But sometimes, instead of an expensive autonomous structure, installing a simple cesspool is enough. Moreover, it is quite possible to cope with its construction on your own.
In the article, we provided detailed information on how to install a cesspool on a site, and what rules and regulations should be followed when organizing a drainage structure. We have described the most popular and practical solutions, and also provided step-by-step instructions for their implementation.
The content of the article:
Types of modern cesspools
Today, the functional load of the drainage pit has increased noticeably, since the presence of a home sewerage system and a basic cold water supply system increases the volume of wastewater several times.
In this regard, new modifications of sewerage structures have appeared, more voluminous and more advanced from the point of view of waste processing.
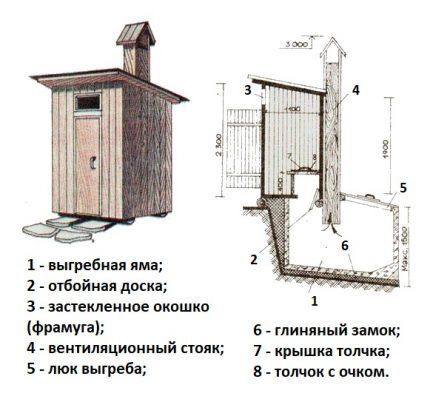
Remember what the drainage pit used to look like - a small well into which all waste was methodically poured until it was completely filled. The walls of the well were lined with boards, lined with stones or reinforced with other available materials.When the level of wastewater reached its maximum, a sewage truck was called in to pump it out.
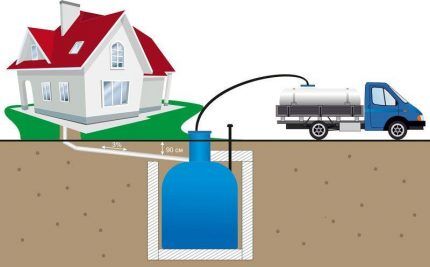
Of course, there was no talk of any kind of ecology or protection of the environment from pollution in those days. But today everyone wants to keep the soil clean on their site, so they strictly monitor the sealing of wastewater treatment plants.
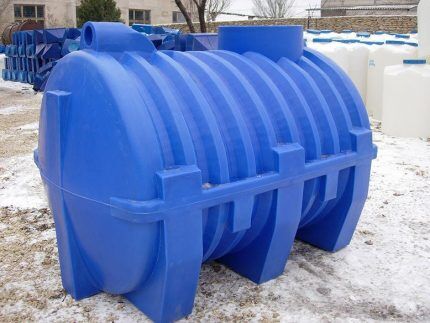
Manufacturers choose materials that do not require time-consuming installation or special waterproofing. An example of modern models are volumetric polymer tanks.
Monolithic one- and two-section concrete structures, as well as installations made from one, two or even three concrete wells, have not lost popularity. The choice is explained by the relative ease of installation (filling) and a decent (up to 30 years) service life.
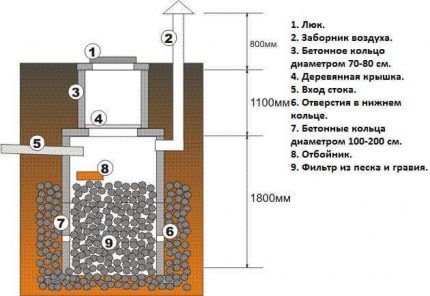
The point of lining a shaft with bricks has disappeared, because installing several rings is much easier than creating durable brickwork. The main quality of the new devices is tightness, which protects the soil from pollution by wastewater.
Choosing a location taking into account sanitary standards
When constructing a new cesspool, you should be guided by the requirements set out in SNiP.Of course, for ease of use I would like to place it closer to home.
However, the distance from the foundation to the tank must be at least 10 m. Force majeure circumstances associated with a violation of the tightness of both the foundation and the storage tank are taken into account.

When planning, also keep in mind that the fence delineating the boundaries of the site should be no closer than 4 m, and the roadway no closer than 5 m.
The largest interval is to a water source (well or well) - at least 25 m, with loose sandy soil - up to 50 m. If there is a body of standing water nearby (pond or lake), then this must also be taken into account - 30 m.
Concrete rings - a current type of material
Reinforced concrete rings for septic tanks and the construction of drinking wells are so in demand that many factories began to specialize in their production.
Moreover, in addition to the main parts, they produce rings equipped with a bottom, separate necks, ceilings and upper segments with a hatch. Let's consider two options for constructing cesspools, with and without a bottom.
Concrete absorption well
An open tank without a bottom, in other words, an absorption well, is a combined option that resembles a conventional storage tank, but operates on the principle of a septic tank filter element.
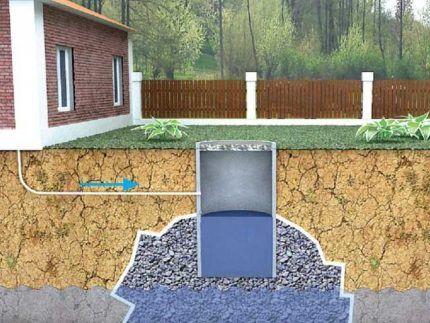
There are conditions under which the construction of a structure with an “open” bottom should be avoided:
- the groundwater level must be at least 100 cm below the base of the sewer well, otherwise the waste liquid will mix with underground water horizons, which will cause soil contamination with harmful substances;
- the type of soil must meet the requirements of filtration, that is, be permeable: sandy, gravel or pebble with a high sand content. Rocks, loams and clays do not have such properties and over time can become an insurmountable barrier to runoff.
If the conditions are met, you can build a well yourself.
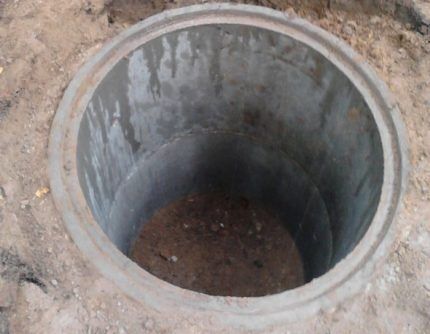
Work order:
- Digging a pit to a depth equal to the total height of the rings (2 or 3) plus half a meter for the drainage layer and 20-30 cm for arranging the neck.
- Laying the filter base from bulk materials - sand, pebbles, crushed stone, gravel. For example, the bottom layer is sand, the top layer is coarse crushed stone. For effective cleaning, you can use a perforated concrete base or geotextile.
- Installation of rings using a crane.
- Connecting a sewer pipe into a hole previously made with a hammer drill;
- Well waterproofing – sealing seams, joints, connections;
- backfilling and compaction of soil around the perimeter of the pit.
Particular attention should be paid cesspool waterproofing. It is better to fix the pipe using a tee, followed by sealing all connections with sealant.
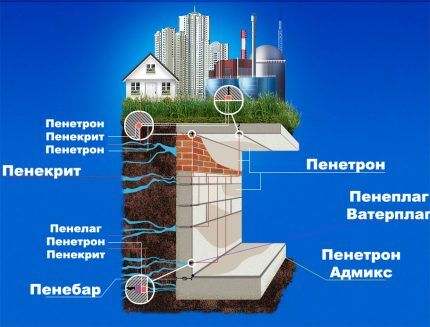
Even when using concrete rings with a locking joint, they must be sealed on the inside and outside. On the outside you can use bitumen roll material, which is laid in several layers, on the inside - a combination Penetrona And Penekrita or cement mortar Aquabarrier.
To ensure the pumping process, it is necessary to install a hatch in the upper part with a tightly closing, insulated lid.
Ring storage tank
A high groundwater level (a fairly common occurrence) does not allow the installation of sewer wells without a bottom, so the most successful option would be to install a simple storage tank. You can use a plastic tank or a large polymer barrel, but we'll look at a concrete ring project.
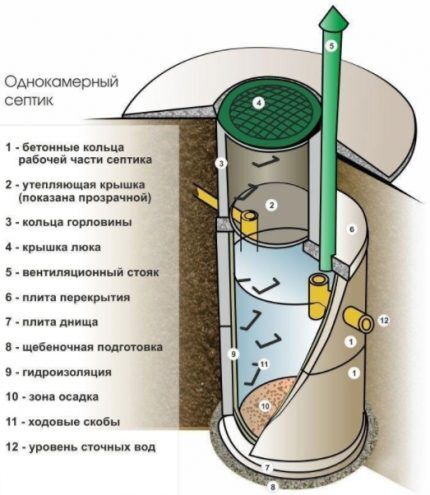
Conveniently, almost all parts can be purchased ready-made. The cost of one well ring with a diameter of 110 cm (wall thickness - 16 cm, height - 89 cm) - from 1500 to 2000 rubles, a 6-centimeter addition - 250-300 rubles. etc., therefore, the entire structure in an amount not exceeding 10,000 rubles.
If you want to save your budget, you can make reinforced concrete rings yourself.
Progress:
- Pit construction (50-80 cm wider than the well) with simultaneous laying of trenches for sewer pipes.
- Installation and insulation pipeline.
- Backfilling and compaction sand and crushed stone cushion (30-40 cm thick).
- Installation of concrete bottom (strictly horizontal, with level check); instead of a finished element, you can build a reinforced screed.
- Installation of concrete rings using a crane.
- Waterproofing joints rubber tape, concrete mortar with the addition of liquid glass.
- Plastering internal seams bitumen mastic, external ones - with bitumen waterproofing. Backfilling.
- Installation of the top plate with a hole for the hatch, fixing the lid.
One of the products of bacterial waste processing is dangerous methane gas. To prevent its concentration, and at the same time ensure air access to the drains, the well is equipped with a ventilation pipe.
Using concrete rings, you can build a two-chamber septic tank, more details in this article.
Budget option from rubber tires
The advantages of this project are accessibility, cost-effectiveness, ease of installation, the disadvantages are fragility, lack of good sealing, and “disposable” design. It is not possible to repair or modify an installed structure.
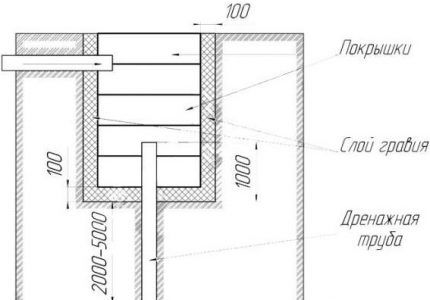
The first stage is excavation of soil and construction of a pit.The depth can be calculated by knowing the number of tires, the width - by placing one product on the ground and drawing a circle around it, adding 30-40 cm. When the pit is ready, it is necessary to make a drainage hole. It is drilled out in the center of the hole using a drill.
A pipe is inserted into the hole so that it rises above the base by about 100-120 cm. A meter margin protects the drainage drain from clogging with large solid particles that accumulate at the bottom.
To ensure that liquid flows freely into the outlet, its sides are additionally perforated, and the upper end is covered with a protective mesh. The bottom around the pipe is covered with gravel or crushed stone.
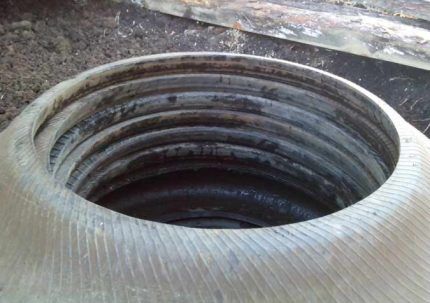
The tires are laid one on top of the other, coating the joints with sealant. In about 2 or 3 tires, a hole is cut out from the top and the end of the sewer pipe leading from the house is inserted; the junction is also carefully sealed.
The top of the structure is covered with a homemade lid made of plastic or wood with a small cutout (diameter = 10 cm) for the ventilation pipe.
Additional information on the feasibility of such a decision, the selection and preparation of tires, as well as the construction of a cesspool from them is presented in the article - Do-it-yourself tire drain pit: step-by-step instructions for arrangement
Installing a plastic container
Main plus installation of a polymer tank – absence of additional construction activities. It is enough to dig a pit, connect sewer lines, bury it - and the cesspool is ready. Transporting a plastic container is also easy, since, unlike concrete structures, it is lightweight.
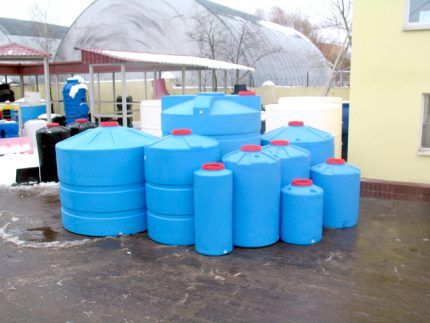
A metal barrel is also suitable, but it is inferior to plastic containers in terms of its characteristics, since it is susceptible to corrosion, therefore, it will quickly rust and fail.
Before installing it in a pit, the container must be prepared - perforation is made over the entire surface. To do this, use an electric drill to drill holes in a checkerboard pattern, the interval between holes is 15-20 cm.Perforation is necessary for the natural drainage of liquid; it is a kind of filter.
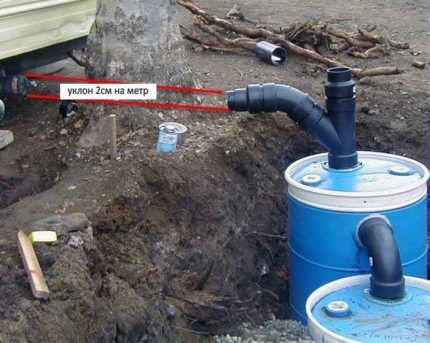
We cut a hole in the top or side (depending on the sewer pipe connection) and install a flange. We carefully coat all joints and joints with special polymer sealants.
You can use bitumen mastic, which plays the role of additional waterproofing. It is desirable that the pipes and fittings are also made of plastic.
To protect the container from soil particles, we use geotextiles. It copes well with the filtering function and does not rot or wear out quickly. We wrap the tank on all sides with rolled geotextiles and secure it at the neck with a synthetic cord.
We install the barrel in the prepared pit and connect it to communications. The slope of the pipes allows wastewater to flow naturally into the tank. We fill the free space on the sides with a sand-crushed stone mixture and sprinkle it with soil on top. The mini-septic tank must be cleaned based on the degree of filling.
The process of installing a storage tank for complete pumping of wastewater looks somewhat different. It involves immersing a completely sealed container in the ground, which is used to accumulate brown and mixed masses.
As the accumulation reaches approximately one-third of the volume, the vacuum cleaners are called to empty the storage tank.
Construction of a pit made of monolithic concrete
Not always ready-made containers are suitable in shape or size, and besides, the cost of high-quality volumetric septic tanks does not suit everyone, so this method of constructing a cesspool is still practiced, such as the construction of a monolithic one- or two-chamber concrete tank. Let's take a look at the instructions for making it.
How to properly dig a pit
During construction, you can not limit yourself to a single-chamber structure, since there will be no fundamental difference or additional complexity during the construction of the second compartment. You will have to dig a pit twice as large and prepare more building material for formwork and filling.
The first compartment of the septic tank is intended for clarification of wastewater, the second for filtration.
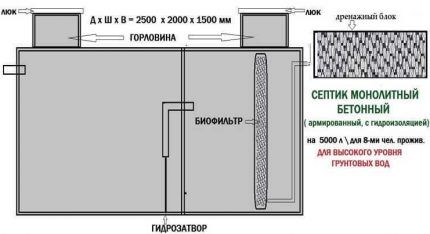
The first stage is digging a pit of the required size. There are two options for excavating soil - manually or using construction equipment. The first method is time-consuming, but more accurate, the second is fast, but expensive and not entirely suitable for subsequent formwork.
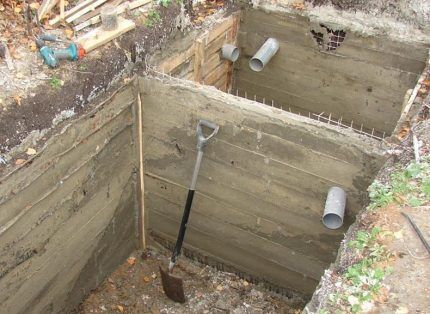
The fact is that to support wooden panels, smooth edges of the pit are necessary. If the soil is sufficiently hard and stable, then the formwork structure can be made one-sided.
The second chamber of the septic tank is a filtering one, therefore, part of the pit must be deepened and equipped with a sand and gravel cushion about 30 cm thick. The walls should be leveled, but if the soil is loose, you will have to build a double-sided structure, like for a foundation.
Construction of wooden formwork
To ensure that the underground humid environment has minimal impact on the concrete structure, before installing the formwork, we cover the pit with rolled geotextiles. We position the canvas so that the movement of the liquid is directed towards the soil. The individual pieces must be fastened together, and the edges must protrude outward by about 40 cm.
We install a metal frame on the outside: steel rods, thick wire, or mesh from old beds are suitable for reinforcement. Metal parts can be replaced with fiberglass. When pouring, you must ensure that the solution completely covers the iron elements, otherwise corrosion will cause cracks to form.
The panels and boards themselves will not hold, so to fix them, spacers should be built from beams or metal pieces. At the junctions of the pipes, it is necessary to make mortgages in advance.
The distance from the formwork to the pit wall is about 20-25 cm (the future thickness of the septic tank wall). If the structure is double-sided, then this distance is maintained between the two walls along the entire perimeter.
Concrete pouring and waterproofing
We prepare the solution according to the following scheme: for every 200 kg of cement - 300 kg of sand, 100 liters of water, 2.5 liters of superplasticizer (in liquid form). If a filler is needed, add a small amount of fine crushed stone.
Concrete is never poured to the full volume. If you want the structure to be durable and last for years, fill it in layers, each of which is no thicker than 40-50 cm.Otherwise, voids will form in the material, which will cause rapid destruction of the structure. To make the mass more dense, we use a vibrator.
Experts recommend equipping the overflow with a tee, which will reduce the risk of clogging and prevent large particles from entering the second filtration compartment.
As the concrete mass hardens, small cracks will appear, which must be covered with the same solution. After complete drying, you can increase the tightness of the chambers and provide additional internal waterproofing.
The last stage of concreting is the installation of the top floor. It is installed after the walls have completely dried (a period of 10 days to 2 weeks is required).
Procedure:
- installation of metal profiles - corners;
- laying the base - flat slate or wooden boards;
- roofing felt flooring with subsequent reinforcement;
- pouring concrete.
Don’t forget that you need 2 holes for hatches (according to the number of cameras).
Backfill and exterior decoration
Before backfilling, we perform waterproofing - apply a layer of bitumen mastic to all concrete surfaces, internal and external. It will protect the concrete from moisture penetration and rapid destruction.
In northern regions, additional thermal insulation is required. To insulate the chambers from the outside along the walls, we lay pieces of foam plastic or extruded polystyrene foam, then fill the remaining space with soil.
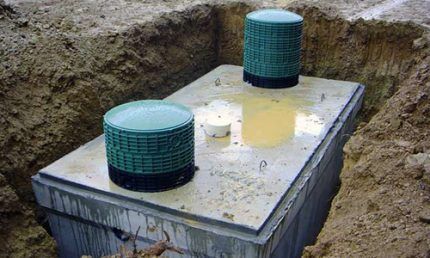
Don't forget about the ventilation pipe.To exit it, we arrange a separate hole or equip a hatch. More efficient operation of the septic tank is ensured by a set of two pipes, one of which pumps in fresh air, and the second serves to remove accumulated gases. The pipes should rise 40-60 cm above the ground level.
Step-by-step instructions for constructing a monolithic concrete septic tank are described Here.
Conclusions and useful video on the topic
Educational videos are a great opportunity to supplement your knowledge with interesting and useful information.
Practical advice - stages of constructing a cesspool:
Do-it-yourself compact septic tank made from tires:
Pit made of monolithic concrete - video instructions and brief overview:
As you can see, it’s not at all difficult to make a storage tank or a simple treatment station yourself; even one person can equip some types of cesspools.
However, do not forget that consultation with an expert in the field of sewer systems will increase the chances of creating the most functional and efficient structure.
Share with readers your experience in constructing and arranging a cesspool. Please leave comments on the article and ask questions that interest you. The feedback form is located below.


An excellent and reliable system, and everything is described in detail in this article. At our summer cottage, we will definitely take advantage of the experience and useful recommendations received on this Internet resource. The main thing is to properly arrange the cesspool so that there are no problems in the future. And knowing the specifics of the construction of the system, no problems with the arrangement will arise.
Somehow, before reading your material, I thought that a cesspool was just a dug hole. Right now I’m planning to build a house, and I liked the idea of plastic tanks or rings. I'm more inclined to go with the tank; in terms of money, it should most likely be much more economical than rings. Moreover, delivery will be cheaper, or you can even bring it yourself. Is there a price comparison for such pleasure?
If we talk about a full-fledged cesspool not only for “gray”, but also for “brown” waste, then the option of rubber tires is simply disrespect for yourself, your neighbors and the environment. It is almost impossible to achieve the tightness of such a structure; it will negatively affect the soil and may leak into groundwater. In general, I think that this is an option only for “gray” household wastewater.