Do-it-yourself tire drain pit: step-by-step instructions for arrangement
The desire to add urban comfort to country life encourages many summer residents, and even owners of country real estate, to install a water supply system on their own property. But full-fledged operation of the water supply system is impossible without sewerage, isn’t it?
It turns out that you can make an autonomous sewer system yourself from scrap materials. One of the popular home-made structures is a drainage pit made from tires, used to collect and filter wastewater. The structure and installation of the structure are very simple, but the efficiency and safety of operation of the system is achieved only with strict adherence to technological standards.
In this material we will talk about how to choose a place for a cesspool, and what needs to be taken into account. Also, here you will find step-by-step instructions for building a cesspool from car tires. The material is accompanied by arrangement diagrams and videos with expert advice on the construction of drainage pits.
The content of the article:
Design and principle of operation of the settling tank
Cesspool - the simplest arrangement option autonomous sewerage. With the advent of highly efficient septic tanks and local treatment systems, the use of drainage collectors in private households and cottage communities has decreased. However, this method of wastewater disposal remains in demand among summer residents.
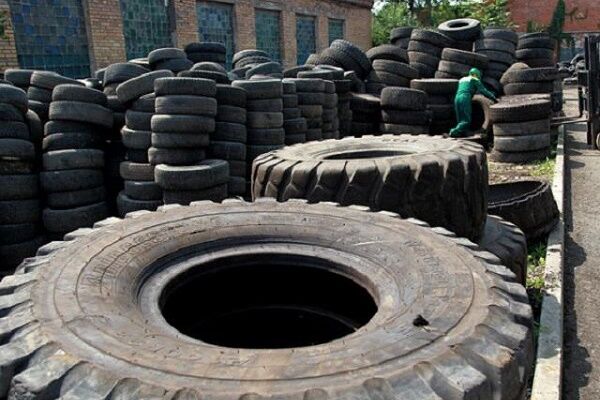
The most cost-effective and easy-to-implement local sewage system is based on the use of old tires. In this case, the walls of the drain container are reinforced with rubber tires, and the bottom of the tank is missing.

The base of the absorbing, or otherwise filtering, option is a drainage layer of crushed stone and sand. The stability of the structure is achieved due to the weight of the tires themselves, soil filling and accumulated wastewater.

Operating principle of the absorption pit:
- The waste liquid flows through the pipe into the container.
- Heavy, solid suspensions settle on the surface of the “cushion” of crushed stone.
- Semi-purified water seeps through the drainage layer and passes deep into the soil.
- The accumulated sludge is periodically pumped out of the tank.
To improve the quality of filtration and speed up the drainage of wastewater, a hollow perforated pipe is installed inside the tire tank.

The feasibility of a drainage collection made from tires
When planning the construction of a cesspool from tires, it is necessary to compare the features of the arrangement, the efficiency of the drainage collection with the expected operating conditions and “loads” on the sewer system.
The main arguments in favor of a well made of rubber products:
- Low cost. You can get used tires for free - a car service center or trucking company still has a lot of old tires left for recycling. In extreme cases, you can buy worn-out car tires for almost pennies at a flea market. The main expense item is the arrangement of the supply pipeline.
- Easy to install. Preparing the material, installing and connecting the drain tank is a feasible task for one person. The work does not involve the use of expensive tools and equipment.
Rubber does not corrode, so the pit will last longer than a structure made from metal barrels. The average service life is 10-12 years.

A “makeshift” sewage treatment plant has a number of negative factors that limit its use:
- Poor performance. Even very large tires are not able to provide sufficient volume for the accumulation and removal of wastewater. The tire absorption pit is suitable for a family of two or three people.
- Freezing of the system. Despite the use of thermal insulation materials, in severe frosts the rubber becomes frozen, which can lead to freezing of drains and stopping the operation of the sewer system.
- Unpleasant smell. From time to time, “aromas” of sewage may be heard from the direction of the cesspool. To eliminate the problem, install a ventilation pipe and cover the hatch with a tight lid.
- Limited use. The degree of wastewater purification by an absorption pit reaches 40% - this is not enough for safe disposal into the ground. In order not to disturb the ecological balance, heavily contaminated liquid and fecal matter should not be dumped into the tire drain pit.
- Insufficient tightness. It is quite difficult to ensure complete impermeability of the joints between tires. When the soil moves and after cleaning, there is a high probability of depressurization of the structure - sewage begins to seep into the ground.
Loss of tightness is the most common cause of failure in the sewer system.
Possible solutions to the problem: overhaul of the structure after cleaning or complete dismantling of the rubber well and subsequent construction of a trench from new tires.

It is advisable to build an absorption well made of tires if the following conditions are met:
- the volume of waste liquid does not exceed 1 cubic meter/day;
- the groundwater level in the area is at a depth of 2 m;
- It is preferable to install a cesspool without a bottom on light, well-drained soils (sand, sandy loam); on heavy substrates (clay), the water tends to stagnate.
The construction of a pit is advisable for a summer cottage, sauna or bathhouse for seasonal use.
Choosing a place for a drain hole
When constructing a drainage pit, one should be guided by the standards set out in SanPiN 42-128-4690-88. The document clearly defines the permissible boundaries of the placement of the sewer system on the site.

Additional, but no less significant, restrictions on the removal of a reservoir with sewage:
- The distance to the water pipes depends on the direction of movement of groundwater. The direction can be approximately determined by the slope of the terrain. When water flows from the drainage pit, the minimum distance between the designated objects is 40 m, otherwise - no less than 25 m.
- The nearest well or deep well with drinking water should be 50 m or more. In practice, it is very difficult to comply with this norm. With the permission of the SES, this distance is reduced to 30 m.
- The distance to open water is at least 30 m.
- The distance between trees, bushes and a cesspool is 4 m. The same parameter is determined for the roadway.
- The distance of the treatment plant from the neighboring site is about 3 meters.
The optimal location of the pit is in the lowland of the site in the direction of groundwater. To reduce the likelihood of an unpleasant odor entering the home, a container with sewage is built on the leeward side, away from the house.
When planning, it is necessary to ensure unimpeded access for cleaning equipment to the cesspool.

Technology for constructing a tire cesspool
Below is a step-by-step instruction on how to create a drainage pit with a drainage well. The material used to construct the absorption well is old tires.
The process of constructing a drainage structure from old automobile rubber includes a number of traditional steps:
Stage #1. Calculation of the volume of the drain tank
The primary task of constructing an autonomous tire treatment system is to calculate the volume of the drain tank to determine the number and dimensions of tires used. The volume of the chamber depends on the number of people living in the house.
According to regulatory data, one adult spends about 170-200 liters of water per day (for bathing, washing, cooking, etc.). If we take as a condition that a family consists of three people, then the daily volume of wastewater will be about 600 liters (0.6 cubic meters).

This means that the resulting value (0.6 cubic meters) is multiplied by three. In total, the tank capacity should be 1.8 cubic meters. However, for the accuracy of calculations, the type of soil should be taken into account. When arranging a cesspool on a porous substrate, the volume of the “rubber” tank can be reduced by 20%. In case of dense soil, increase by 10%.
To calculate the number of tires, you need to determine the volume of one tire. This is easy to do if you know the diameter and height of the tire.

Stage #2. Preparation of materials and tools
To independently construct an absorption pit and supply communications to it, you should stock up on tools and materials. Earthworks are carried out using different types of shovels.
Shovel. The curved scoop design makes it easy to scoop and remove soil from the ditch. If the metal blade of the shovel bends, it can be reinforced with additional sides.
Bayonet shovel. It is used at the beginning of digging, so a tool with a standard length handle (1.5 m) is suitable.
"Digger". A ripper shovel with a long holder, similar in design to double forks. The tool is designed for loosening hard soil layers.

Indicative list of materials:
- Tires. Tires from tractors, trucks or cars are suitable. In case of high groundwater, it is better to use products of large diameter - it will be possible to obtain the required volume without going deep into the groundwater.
- Crushed stone, gravel and sand. Materials are needed to construct the filter bottom of the tire tower.
- Sewage pipes. For pipeline assembly, two-layer polyethylene or propylene pipes with a diameter of 110 mm are suitable. Additionally, you need to purchase corrugations, tees, plugs and fittings.
- Lid. A plastic insulated model is suitable sewer hatch. The diameter is selected in accordance with the dimensions of the drainage pit.
- Film waterproofing and concrete mortar. Materials are necessary to ensure the tightness of the tank - the outer cracks of the “pyramid” are coated with the solution, and the inner surface of the walls is lined with film.
- Plastic or concrete pipe. It goes deep into the drainage layer and acts as a filter element.
For installation work you will need: a cutter or jigsaw, a tape measure, a building level, a garden auger, a ladder, a bucket and a rope.
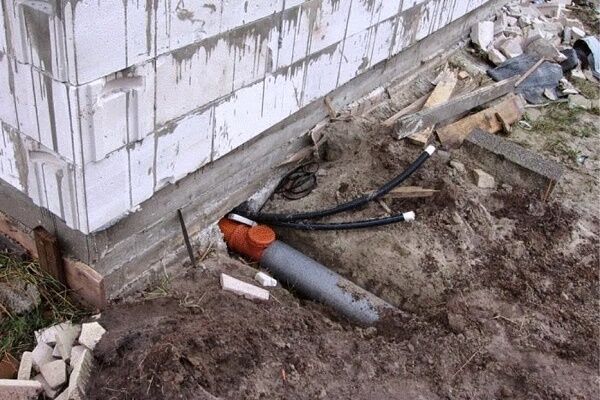
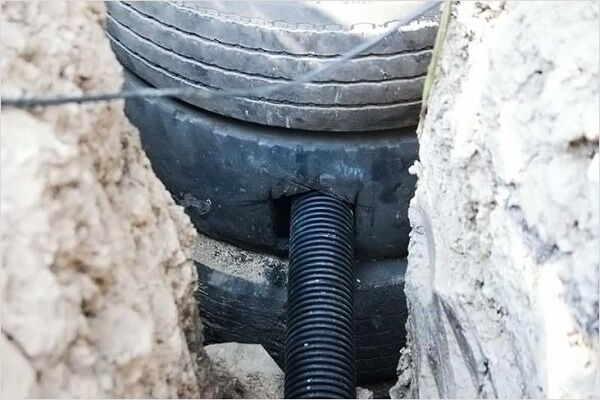
Stage #3. Sewer pipe outlet
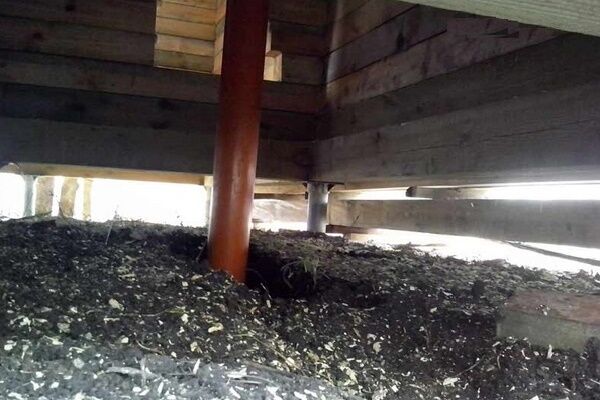
The organization of a local treatment system begins with the arrangement of an outlet. Subsequently, the riser in the house is assembled, tees and outlet pipes are connected. In an old building, the sewer pipeline is discharged through an underground or cellar.
If the new house does not have an exhaust duct provided in advance, then you will have to dismantle the floor and make a hole in the foundation.

The depth of the pipeline at the exit from the house should be at least 60 cm, optimally 1 m. If in some areas the depth of the trench is less than 90 cm, then the pipeline must be insulated. Read more about the depth of sewer pipes Further.
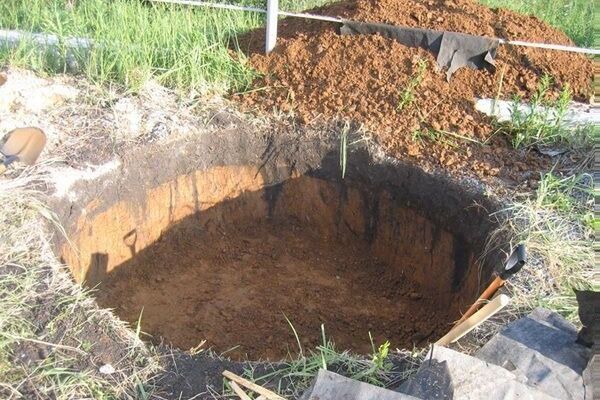
Stage #4. Land works
One of the tires is used as a pattern for marking the boundaries of the pit. The tire must be placed in the chosen place and pegs should be placed around the perimeter of the circle. In order for the tires to fit freely into the pit in the future, the diameter of the ring must be expanded by 20-40 cm.
At first, it is convenient to dig the ground with a bayonet shovel.The fertile soil layer (the first 50 cm) can be evenly distributed throughout the garden; deeper soil layers can be used for backfilling.
It is easier to continue digging a deep pit with a shovel with a long handle - the compacted soil is loosened by a “digger”, then collected with a shovel and loaded into buckets. To descend into the ditch and lift filled containers to the surface, a ladder is lowered into the excavation.
Working together, you can speed up the digging process and build a primitive lifting mechanism - tie a rope to the buckets.

For safety reasons, excavation work at depth must be carried out with a partner. One person is engaged in digging, and the second helps on the surface and insures against the collapse of the walls of the pit. This requirement is especially relevant when constructing a pit in unstable soils.
Stage #5. Preparation of car tires
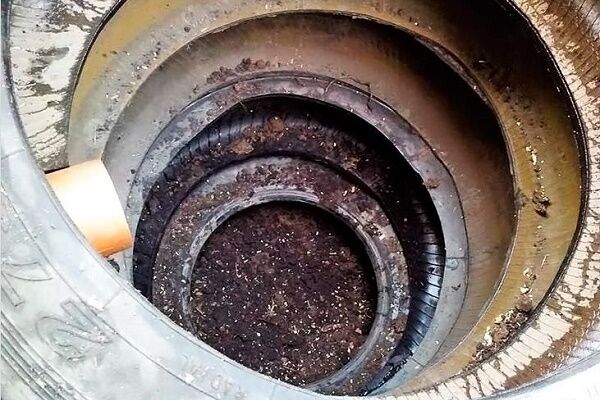
Regarding the technology for preparing tires for installing a cesspool, the opinions of the performers were divided. The first group believes that there is no need to do any manipulations with the tires, since complete or partial removal of the tread will negatively affect the stability of the segments and the tightness of the structure as a whole.
However, keeping the tire beads worsens the performance of the absorption pit - the useful volume of the tank is significantly reduced, and waste accumulates very quickly in the formed “pockets”. At the same time, it is almost impossible to efficiently clean the sludge from the embossed walls - the tank quickly fills with sewage, and the sewage system fails.

In one tire you need to cut a hole for connecting the sewer pipe.
Stage #6. Formation of a drainage well
At depth, the soil is often heavy, clayey, poorly absorbent and permeable to moisture. To increase the suction area of waste liquid and improve the efficiency of the absorption trench, one or more drainage channels are installed.
Work progress:
- Use a garden drill to drill the deepest possible hole - the channel should pass through dense rocks that slow down the outflow of filtered water. The depth of the trench from the bottom of the pit is up to 3-5 m.
- Prepare a pipe that matches the length and diameter of the drainage channel. To prevent the filtration pipe from silting, its upper edge must be 1 m higher than the base of the drainage pit.
- The side walls of the pipe, starting from the top and not reaching 50 cm to the bottom, are drilled. The top of the channel is covered with a fine-mesh polypropylene mesh.
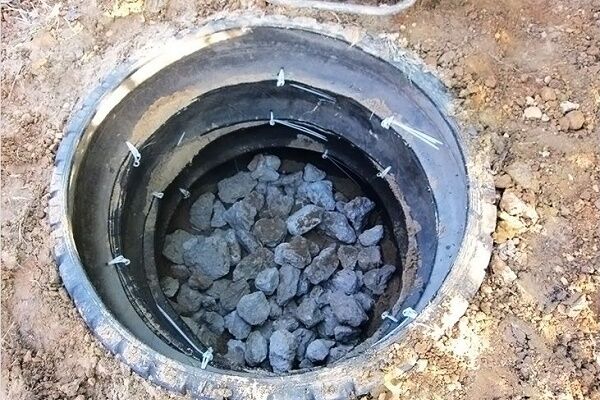
After casing the drainage well, i.e. installation of a perforated pipe in the drilled trunk, a layer of crushed stone and gravel is poured onto the bottom of the pit - the thickness of the filter pad is about 20-30 cm.

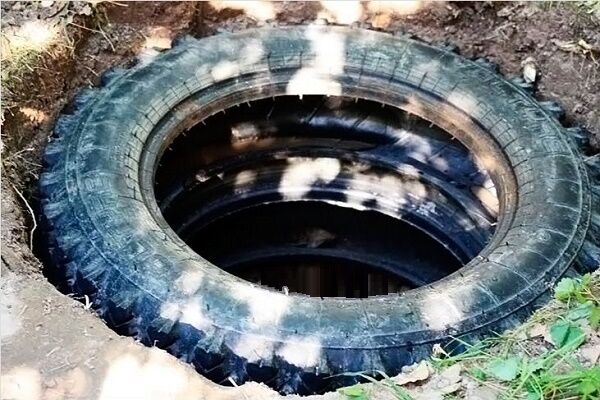
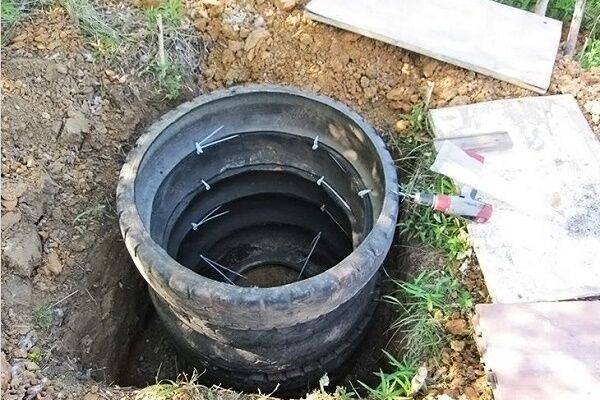
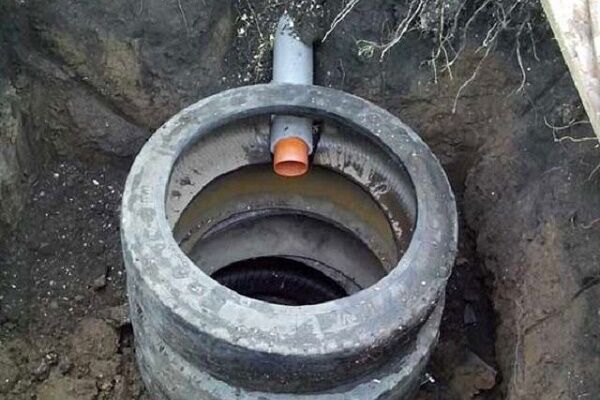
Stage #7. Laying tires and sealing walls
The first tire is placed at the bottom of a kind of shaft, passing through it drainage pipe. In a similar way, the second tire is lowered into the hole, and the beads of adjacent wheels are connected in a convenient way.
Having compared and aligned both tires, you need to make through holes in the treads.Pass a metal wire or plastic clamp through them and twist tightly.
During the construction of the tower, the external joints are sealed - the joints of the tires are treated with concrete mortar or bitumen mastic. After the mixture has set, you can begin backfilling the pit.

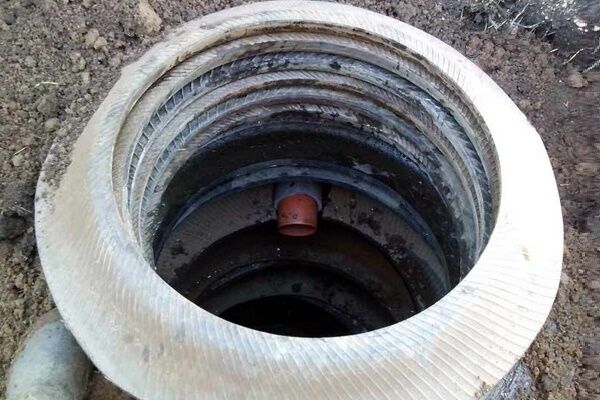
The end of the last tire should rise slightly above the ground. Upon completion of laying all the tires, the inside walls of the container are covered with waterproofing material. The most affordable option for a hydrobarrier is a sealant of suitable composition.
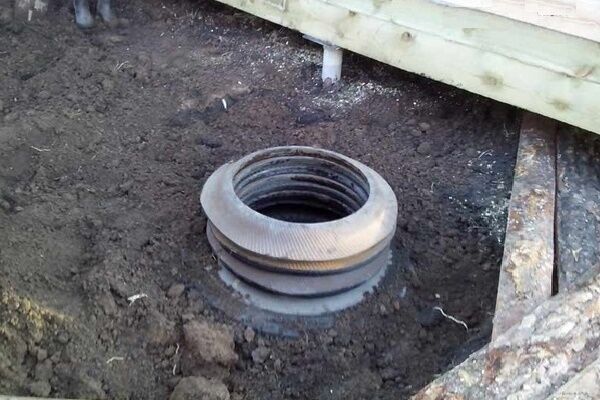
Stage #8. Final arrangement
A small embankment is made along the perimeter of the beads of the finishing tire and compacted - a kind of blind area is obtained that prevents rainwater from penetrating inside the trench. The container is closed from above with an insulated hatch.
The ventilation pipe can be removed through the plastic cover. The length of the outer part of the ventilation duct must be at least 60 cm to ensure normal draft.

In order not to deteriorate the thermal and waterproofing properties of the hatch, the sewer hood can be made in another way. You need to cut a hole in the closing tire and install an “L”-shaped ventilation sleeve with an exit to the outside. These works are carried out before backfilling the pit.

Conclusions and useful video on the topic
Technology for manufacturing a cesspool trench from tires with main and side drainage on the walls:
Construction of a homemade drainage pit for a summer residence:
The “makeshift” version of the cesspool is simple and easy to construct. However, when using it, there remains a risk that some of the sewage will go into the ground without filtration, since the tire construction does not guarantee complete tightness. The construction of an absorption trench made of tires is justified only in rare cases.
Are you trying to create a drainage pit from car tires yourself, but have questions arise during the work? Or maybe you found shortcomings in the material or have valuable information that you can share with visitors to our site? Please leave your comments at the bottom of the article.


In my opinion, this option for a cesspool for a dacha is almost ideal, both in terms of cost and labor costs. This is what I did, constructing a facility for collecting wastewater on the hacienda. The cost was about three thousand, taking into account the fact that I had the stingrays in stock. I dug myself and spent three days doing everything. The only thing I'm afraid of is freezing in winter, although I don't go there that often in winter. So, I hope that everything will be fine, and our winters are not so harsh.
I categorically disagree with you. Yes, it is inexpensive and requires little fuss, but it is very difficult to achieve tightness in such a design. Think about the ecology in your area; you are creating a source of infection with your own hands. What if you decide to eventually install a well or a well on your property? What if your neighbors already have a well and people drink the water that your wastewater ends up in? And all this because you were sorry for the money or time to do it right.
So I appeal to you and others who want to make such a drainage pit - come to your senses, our ecology is so-so, let’s at least not aggravate the situation ourselves!
Something remains unclear, the tires placed on top of each other are the reservoir (this same drainage pit) into which the sewage will drain. Won't impurities accumulate in the tires themselves, even when filled with gravel, emitting unpleasant odors, especially when they are constantly moistened with drained liquids? I'd like to know what this looks like in practice.
Alexander, you are asking the right questions. The design is far from ideal.I made such a pit from tires, its only advantage: simplicity and cheapness. Although we had to tinker with the joints, it was not so easy. But after just six months I felt all the delights: the pit quickly fills up, the aromas due to the rubber intensify, and in winter, with a slight minus, it already freezes. In the end, I dismantled everything and made a normal drainage hole from concrete rings.
Hello. As a rule, sediment remains on the tires themselves when filling the pit; solid sewage sinks to the bottom, creating a silting effect over time. If you throw paper and wet wipes into the sewer, they will cling to the edges, although in general, doing this is absolutely impossible and impractical because of the difficulty of subsequent cleaning and quickly filling a compact pit.
My personal conclusion is that this arrangement method is ideal for a small family, when the soil has time to dry out. Not suitable for a family of 5 people - the bottom is silted, the soil is saturated, and the water is overflowing. You can clean the bottom using biological and chemical reagents, but these methods also have their drawbacks. Didn't clear the siltation - first wash and the pit is filled again.
I have had this type of sewer system for over 20 years. The first time I had to clean it was only 2 years ago and only because the bottom silted up. It is not advisable to throw paper down the drain. Otherwise, no problems. Cheap and cheerful.
I dug this one 4 meters deep with a diameter of 1.5. It will only be under water.