Do-it-yourself monolithic concrete septic tank: diagrams and rules for arranging a concrete septic tank
The optimal solution for organizing the treatment of domestic wastewater in a private household is a monolithic concrete septic tank. To install it, you can hire a team or do everything yourself. This will further reduce the budget, don’t you agree? Materials for its construction can be easily purchased at construction stores.
We will tell you in detail how to build a monolithic septic tank. Let’s look at which concrete treatment plant option is best to choose for your site. Here you will learn how to care for an autonomous sewer system and what to do with wastewater treated in a septic tank.
We offer step-by-step instructions for independent home craftsmen. A visual perception of information will be provided by useful diagrams, photo collections and video instructions.
The content of the article:
Typical design of a monolithic septic tank
Standard concrete septic tanks for cottages and houses have from one to three adjacent chambers. Between them, wastewater moves through overflow pipes built into the partitions.
Due to many days of settling, separation of insoluble sediment from water and the activity of microorganisms, natural wastewater purification occurs. All chambers of the septic system are used only for settling.
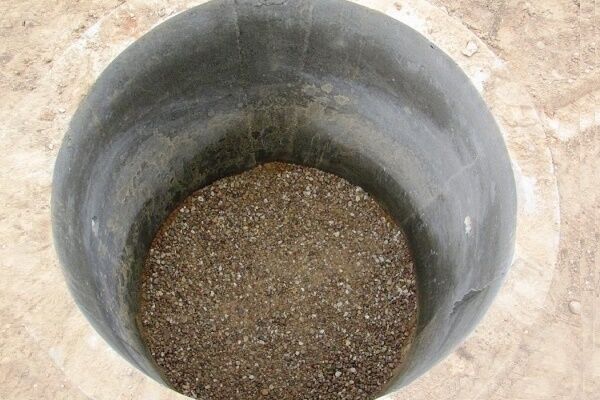
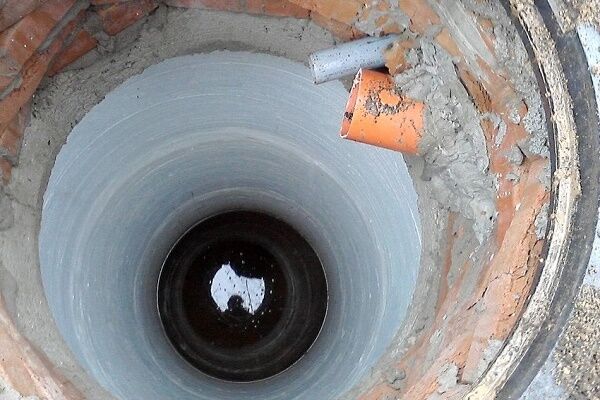
You cannot make a filter well adjacent. Over time, this will lead to deformation of the entire septic tank, so you need to install a filter system separately. It must be selected based on the area and the desired quality of cleaning.
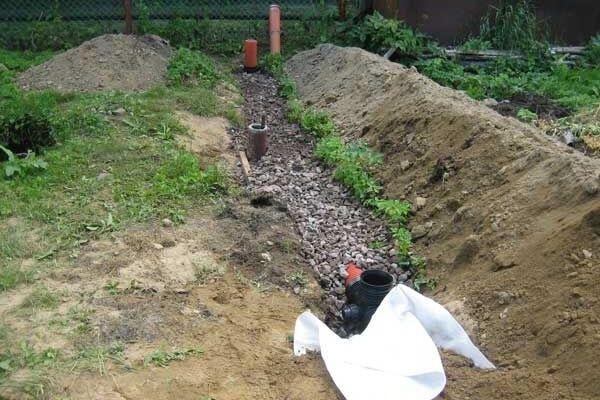
This could be a free-standing well, a filter trench or filter field. The purification system can be installed after installing a monolithic septic system, but in this case the trenches will have to be dug manually. It will be impossible to use the equipment, as it can damage pipes and ceilings.
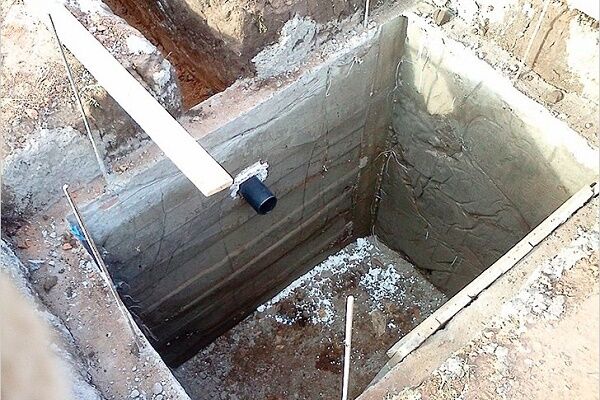
Specifics of a single-chamber cleaning point
A septic tank that has one chamber is called a drain pit. Its device does not involve multi-stage treatment and serves primarily for storing sewage with subsequent pumping.
Waste is pumped out and transported using a special machine. The disadvantage of such a drainage system is its rapid filling and costly maintenance.

The depth in the diagram of this concrete septic tank is 2 m, it is designed to serve two to three people. Due to lack of cleaning and draining, the container quickly overflows.
An alternative to a monolithic single-chamber septic tank is cesspool made of concrete rings, we recommend that you familiarize yourself with the features of the structure.
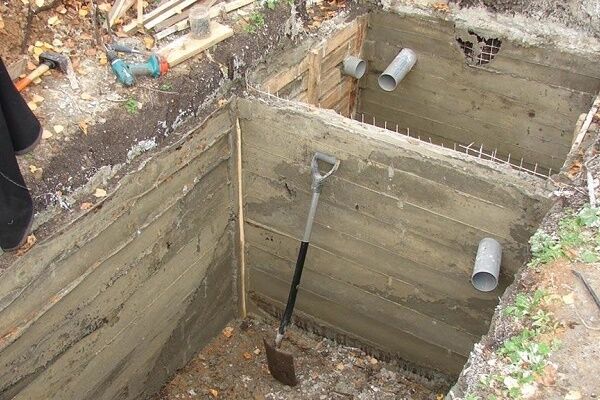
Scheme of a two-chamber version
In this system, water undergoes preliminary settling before being discharged or pumped. According to sanitary standards, such water can be discharged into the ground. The advantages of this system lie in its compactness. With the same volume, two free-standing containers made of reinforced concrete rings take up more space than a monolithic concrete structure.

This septic tank has an internal concrete partition, which allows the water to settle in two stages. In addition, it can be equipped with a sensor that signals overflow.
The second overflow at the opposite end of the container is located slightly lower than the first, which eliminates the return of wastewater to the receiving compartment and ensures spontaneous overflow of the settled liquid into the next chamber.

How to build a two-chamber septic tank using concrete rings, written here. We recommend that you familiarize yourself with this material.
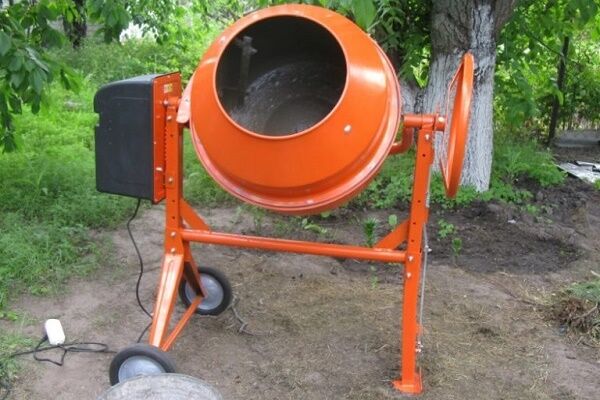
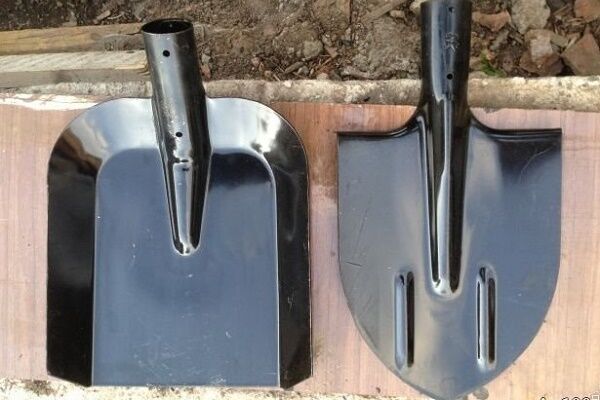
Required tools and materials
To install a concrete septic tank with your own hands, you will need the following materials:
- ASG (2.5 t).
- Cement (18 bags of 50 kg).
- Liquid bitumen (20 kg).
- Iron corner 40 x 40 (25 m).
- Iron sheet 2 mm thick 1.250 x 2.0 m (1 piece).
- Sheets of plywood 1.5 X 1.5 m (8 sheets).
- Flat slate 1500x1000x6 (6 l).
- Polyethylene film (two to three cuts with a total area of 13 x 9).
- Boards 40 x 100 mm.
- Plasticizer (depending on type per 5.9 cubic meters of concrete).
- Wire rod with a cross-section of 0.6 mm (meterage depends on the density of the mesh).
- Bars 50 x 50 mm.
- Bricks (120 pcs.).
- Pipes for external sewerage (individually, depending on the distance).
- Pipes for internal sewerage (individually, depends on the design).
- Branch pipes (individually, depends on the design).
- Fittings (according to the number of pipe connection points).
- Sealant (1 pc.).
- Screws (300 pcs.).
- Cutting disc for metal (1 pc.).
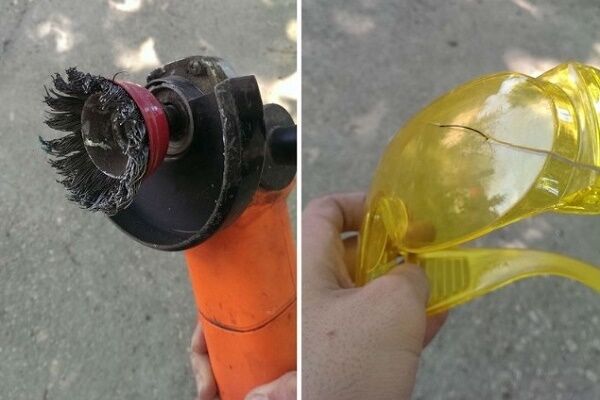
- Grinding attachment for angle grinders (1 pc.).
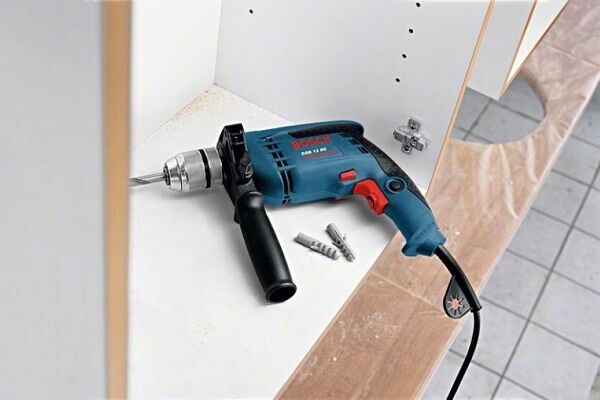
To install a concrete septic tank, you will need the following tools and equipment:
All calculations of materials were performed for a monolithic concrete septic tank with dimensions: width - 2 m, length - 3 m, depth - 2.30 m.
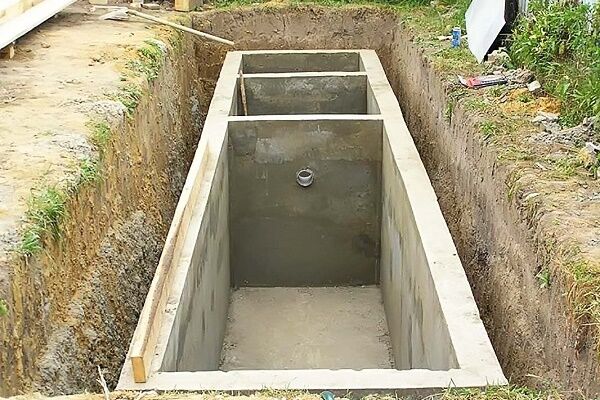
Construction of a monolithic septic system
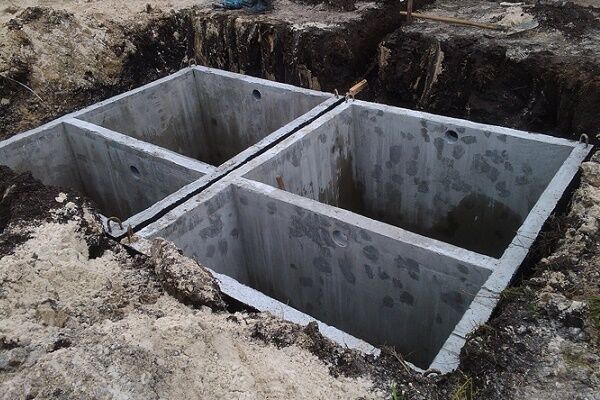
The complexity of installation forces many to buy ready-made reinforced concrete structures. Their use allows installation to be carried out much faster.
It will take a couple of days to organize a septic system from ready-made elements, and to install a monolithic concrete structure it will take more than a month, including the construction of formwork and a technological break allocated for hardening of the concrete stone.
Each stage, from excavation to welding of hatches, is performed in strict sequence. Before you start work, you need to stock up on time or arrange for help with other people on a commercial basis.
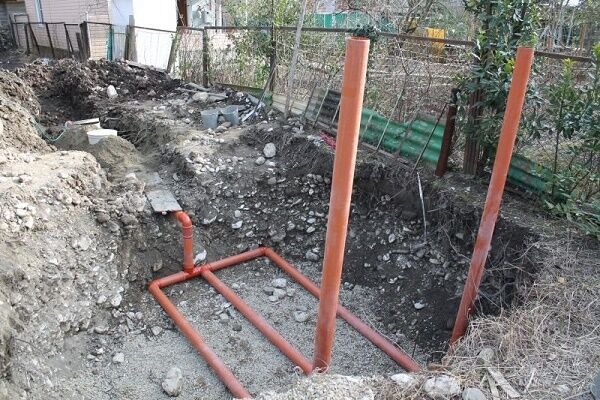
Since the pipe leaving the house/bath and entering the septic tank must be laid with a normative bias, It is better to prepare a trench for it in advance. This is necessary to accurately determine the height of the pipeline entry into the concrete structure.
Development and preparation of the pit
Since the hole will be used as a mold, it is necessary to make its edges as smooth as possible. Excavation must be carried out without the use of machinery or only at the initial stage.
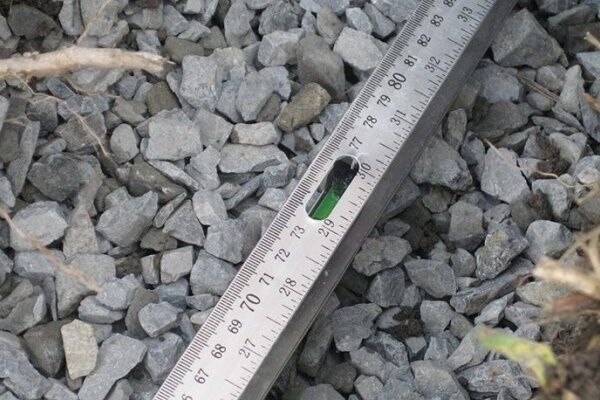
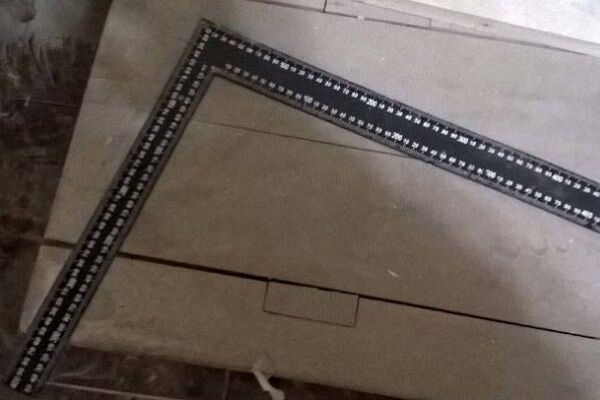
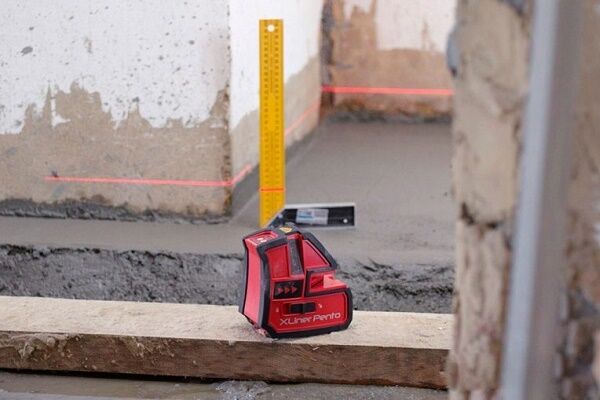
The edges of the pit must be trimmed manually. Periodically you need to check the evenness of the surface. To do this you need to use a level. To ensure that the corners are even, you need to periodically measure with a construction angle.
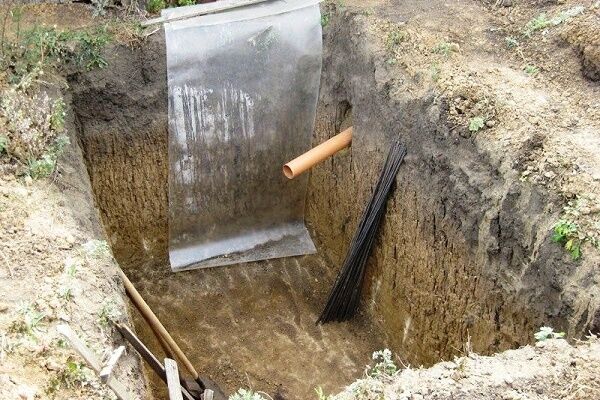
Excess soil must be removed or distributed evenly over the site. After completing the excavation work, it is necessary to lay a plastic film at the bottom of the pit. It may consist of several sections.
The film should cover the pit completely. Using polyethylene serves two purposes. It reduces the consumption of cement mortar and also serves as additional waterproofing. The joints of polyethylene sheets do not need to be sealed. The film can be fixed with bricks, so it will not move during strong gusts of wind.

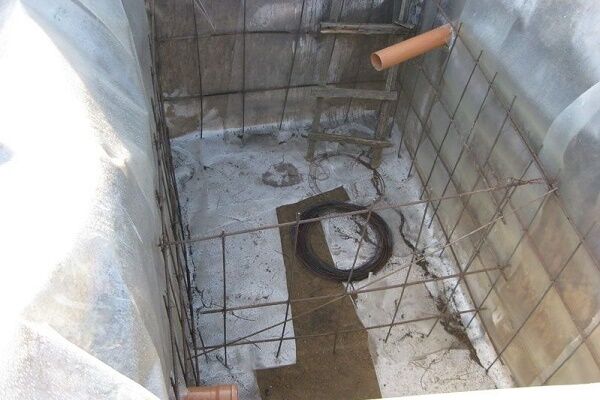
Construction of formwork for pouring the mixture
The service life of the entire structure depends on how the formwork is installed. Since there will be a volume of liquid inside the container, it will exert pressure on the walls of the containers. Therefore, before placing the formwork, you need to make reinforcement.
To do this, you can use reinforcement, knitting wire or a ready-made mesh. The walls need to be reinforced so that the mesh is in the middle of the monolith. Its distance from the outer edges of the pit should be 7 cm.

After installing the partition, you can reinforce the floor. The net for it should be raised 7 cm from the bottom surface. This is necessary for the greatest bonding effect.
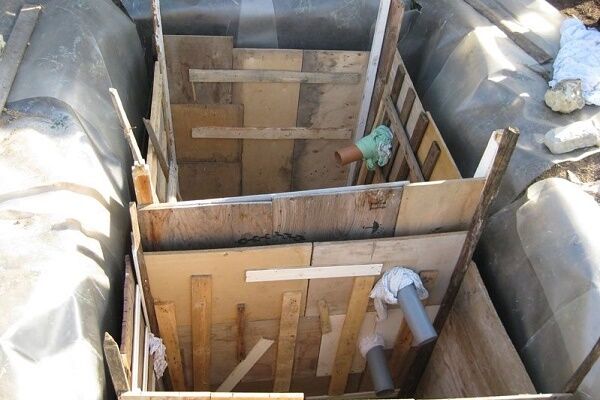
The construction of the formwork is carried out before the installation of the reinforcing frame. To do this, you need to build shields from plywood and blocks. These should be two boxes without a bottom. Each one is placed in a container.
Their sizes:
- for the first tank: width and length 1.7 m;
- for the second tank: width 1.7 m and length 0.085 m;
You need to check that there are no gaps during installation. After organizing the formwork and before concreting, you need to install the overflows. If you do this after concreting, you will have to drill holes. This may lead to deformation of the structure.
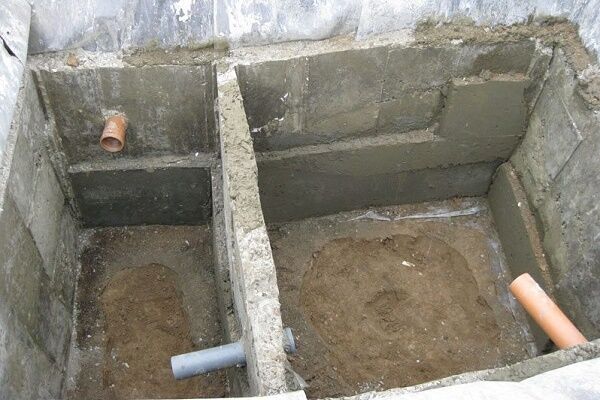
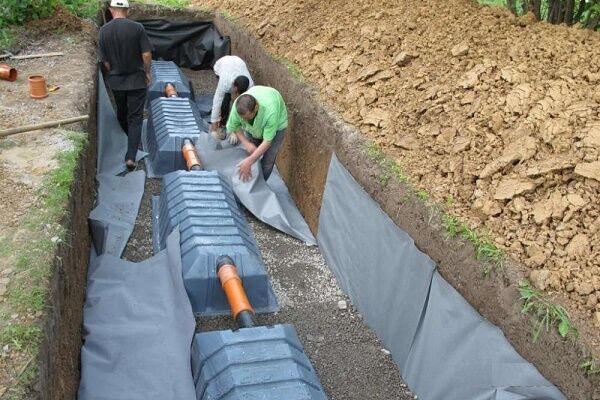
Installation of overflow pipes
For overflows, two straight pipes are required. The first pipe is put on sewer pipeleaving the house. To do this, you need to cut a hole of suitable size in the plywood and bring the end into the receiving tank.
The pipe is attached to the pipe using a rubber ring and sealant. The drain hole of the pipe should be directed downwards.
A pipe 40 cm long must be inserted on the partition between the two containers. The pipe is fixed in plywood on both sides of the containers. At the ends of the pipe on both sides, pipes are put on, with drain holes directed downward.
Preparation and pouring of concrete solution
Since the layer thickness is small (15 cm), it is necessary to make a strong solution. First you need to take a container for mixing the solution. Place cement and ASG at its bottom in a ratio of 1:3.
The amount of water depends on the moisture content of the gravel mixture. The consistency of the solution should be moderately thick. To improve the properties of the solution, you need to use a plasticizer. The amount of its addition depends on the brand of cement substance.

This way you can speed up the filling process. It is better to fill the entire volume in one day. Such monolithic concrete will last longer, since there will be no delamination in the cement stone along the pouring boundary on different days.
You can start with the walls or floor. This is not particularly important. After finishing the concrete work, you need to wait until the solution has completely set and hardened. According to building regulations, this takes 28 or more days.
The rate of hardening depends on the ambient temperature. As concrete dries, it changes color and becomes lighter.The structure poured into the formwork must be protected from drying out with wet sawdust or polyethylene.
Freezing of the cement stone during the hardening period must be completely excluded. After the specified period, the formwork can be dismantled.
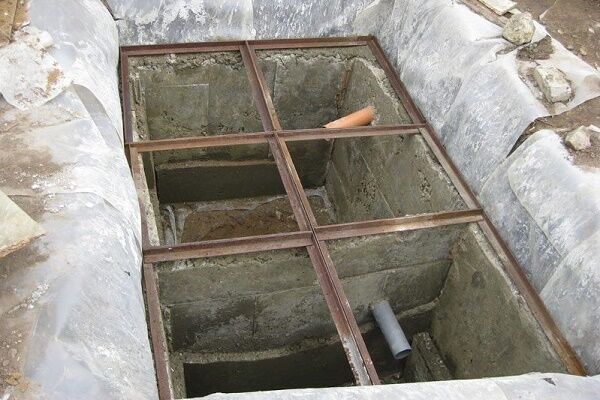
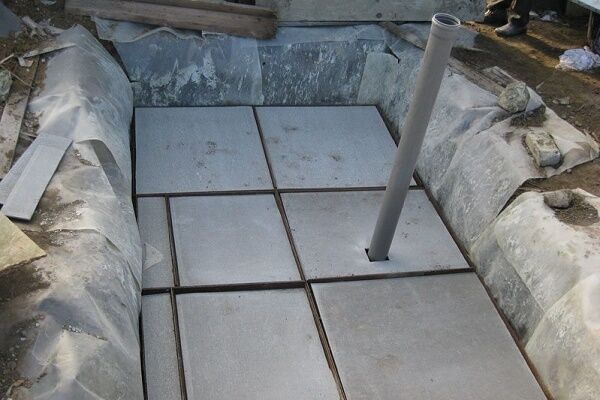
Upper ceiling device
Installation of the upper floor begins with the installation of the frame.
It consists of iron corners, which are installed in the following order:
- Four corners, 3 meters long, need to be laid on the walls of the septic tank. One corner on each edge and two close to each other in the middle of the container.
- Several transverse corners are laid on top, forming a lattice. They need to be laid taking into account the size of future hatches.
The resulting structure requires additional fastening. To do this, you need to make holes in the corners and attach them to the concrete base using anchors. The transverse corners must be attached using bolts or special screws.
After installing the corners, it is necessary to cut out suitable squares from flat slate sheets. After this, the slate sheets need to be laid on top of the grate. To prevent the solution from leaking, it is worth treating the joints with liquid bitumen.
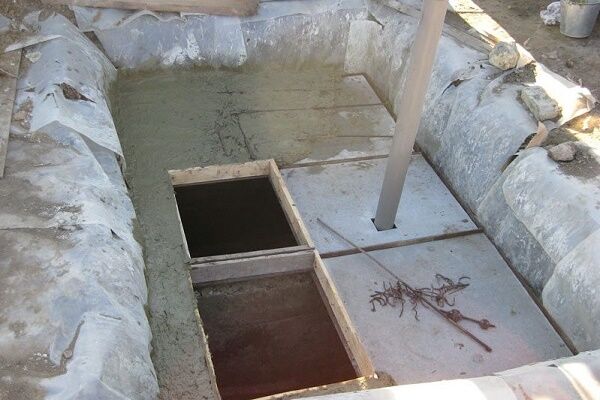
Next, you need to fence the perimeter of the hatches with boards. It's better to make them adjacent. In addition to hatches, additionally place formwork over the entire floor area. After this, you need to insert the ventilation pipe by making a hole in the slate above the second chamber.
Upon completion of the installation of the pipe, you can fill the overlap area with the solution. After the solution has dried and hardened, the formwork must be removed.

Since the amount of sand required is small, you can sift the ASG. The proportions of the solution can be 1:4. After finishing the masonry, it should harden. This takes 2-3 days. After waiting this period, you can insulate and bury the pit. Periodically you need to compact the soil.
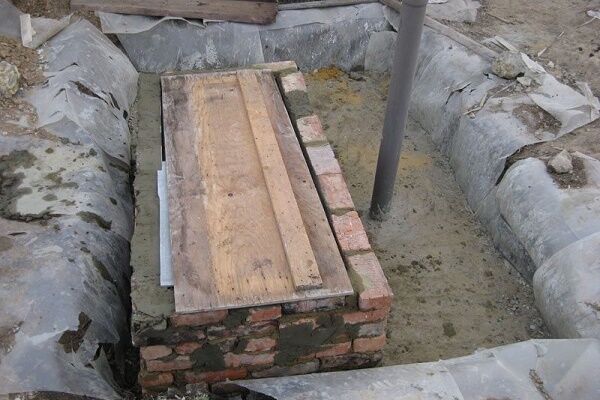
Manufacturing of manhole covers
In order to prevent the septic system from overcooling and debris from entering it, it is necessary to install hatches. Covers for them can be made of wood and metal. The wooden cover is installed as an internal one.
It protects against temperature changes, and insulation is placed on it. To make it, you can use plywood or separate boards nailed together. The cover does not need to be attached to the awnings; it must be removable.
The outer cover must be made of metal. To do this you need a construction angle (40x40). A rim for the hatch is welded from it, which is attached to the base using anchors.
It is necessary to cut the cover from a sheet of metal to the size of the rim. The edges need to be processed with a grinding attachment for an angle grinder. Canopies need to be attached to the lid. They can be welded or bolted. After this, the cover is attached to the rim in the same way.

Proper care of your septic system
During operation, any sewer pipes are periodically coated on the inside with a greasy coating, which reduces their throughput. It must be removed with special means.
They can be chemical or bacterial. Products based on microorganisms preferable, since they do not damage the pipes and do not lead to the death of the microflora inside the septic tank.
In winter, when the temperature drops to -25 degrees Celsius, it is necessary to insulate the hatch openings. Otherwise, the processes of processing organic matter in containers will slow down, which will lead to reduced purification.
How to use treated wastewater?
Purified and disinfected water in a septic tank can be used to water plants and trees in a personal plot. It is distinguished by a small percentage of contamination (10 -15%).
Purified water is quite suitable for use for domestic purposes. This will significantly reduce water consumption for watering your garden or garden in the summer. This means it will save money.

Within a couple of years of operation, the system will fully pay for itself, since with the help of solar energy converted into electricity, it is possible to reduce the consumption of electricity supplied by centralized networks. Solar battery quite able to cover the needs of the pump.
The pump can pump out water from a secondary or tertiary settling tank, as well as excess sludge from the receiving chamber. The pumped out sludge can be used in compost maturation. It is used as an independent fertilizer or in a mixture with other components.
You can pour the remaining organic matter into the compost pit. This can include fallen leaves, weeds and manure. After three to four years of rotting, an excellent fertilizer is obtained that increases the fertility of the soil in the garden.
Conclusions and useful video on the topic
The first video shows the principle of constructing a concrete septic tank before filling with cement mortar:
The second video shows the pouring stage, dismantling the formwork and the final appearance of the septic tank:
This is one of the most budget options. Its production is cheaper than its concrete analogue made from rings, not to mention factory-made biological treatment stations. The price gap is more than 50,000 rubles, including installation.
Another advantage of the design is durability. Concrete does not decompose, but is partially destroyed when exposed to moisture. This can be avoided by treating the tank walls with liquid waterproofing materials.
Please leave interesting facts about the construction of a monolithic concrete septic tank or a story about how you filled it yourself in the block below. Here you can ask questions and share useful information.


Well, in general, it is accessible and understandable, and will be especially interesting and useful for beginners. I would like to ask a few questions or seek advice:
1. I made a system with ground-based post-treatment, that is, clarified and disinfected wastewater goes into the ground. Or would it be better to collect and pump out regularly?
2. They say that red brick is more durable in such an aggressive environment. Is it so?
3. Which sewer pipes are preferable: plastic or cast iron?
Thanks in advance.
Regarding pipes, I believe that cast iron is a thing of the past and should not be used now. Modern plastic pipes are not inferior in reliability, but are cheaper and easier to work with.
Good afternoon, Nikolai Sergeevich. For your questions:
1.If the water absorption of the soil allows the use of a filtration well, of course use it. The main thing in this case is the distance of the well from the foundation of the house. The distance should be at least 5 meters, and preferably about 8 meters. Heavily moist soil is susceptible to swelling in winter and proximity to the foundation is very dangerous.
2. Yes, red brick is resistant to aggressive environments.
3. Plastic is more pragmatic. For many reasons:
- light weight compared to cast iron. What makes it easier, in addition to delivery and installation;
— installation is much simpler, sockets allow for quick connections. An assortment of angles to suit the desired degree;
— the inner surface is smooth, which reduces the risk of clogging;
- no corrosion compared to cast iron. The warranty period for plastic pipes is 50 years.
When purchasing, please note that there are sewer systems for internal installation, and others for external installation. They differ in color: the inner one is gray, the outer one is orange.
Good afternoon. Thank you for the article. I would like to clarify one point: how to backfill a monolithic septic tank with soil on top? Do you need waterproofing and thermal insulation? My septic tank ceiling is at a depth of 70 cm, freezing in the region is 80 cm (max.), actual freezing is up to 50-60 cm.