How to build a septic tank from tires with your own hands: step-by-step instructions
Are you planning to install sewerage in a private home, but have a very limited budget? This is not a reason to deprive yourself of amenities, is it? Or have you decided to build a septic tank from tires, using available materials for these purposes? But you doubt your own abilities and don’t know where to start?
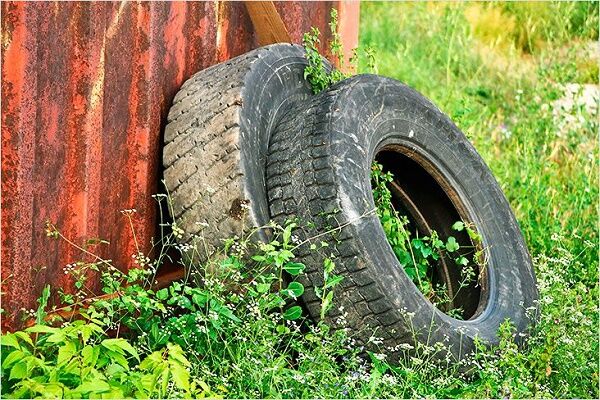
We will help you understand this issue in detail - the article discusses common options for setting up a local treatment plant, for which you can use used car tires. This material is easy to find in motor transport companies, where it is simply written off as unnecessary, or look for advertisements from private individuals.
The article also provides detailed instructions for making a homemade septic tank, starting with calculations and ending with laying the sewer pipeline. All actions are accompanied by step-by-step photographs.
To help the novice craftsman, we have selected video recommendations on the arrangement of this type of septic tank with useful tips on making sealed connections of pipeline sections from the craftsmen.
The content of the article:
Arguments in favor of improvised means
How much can you save on a septic tank if you use old tires? One medium-sized concrete ring costs 4,500 rubles. you need at least three of them. The cost of a worn tire does not exceed 2,000 rubles, and a minimum of three or four are required.
Cumulative tank series capacity, for example, costs on average about 18 thousand rubles. Even without taking into account concrete bases and covers for wells, the savings will be about 6,000 - 8,000 rubles.

But such a septic tank has a significantly shorter service life than concrete or plastic structures. The reason is the lack of solidity of the body, the low weight of the tires and poor sealing between them.
When the ground moves, displacements of elements often occur. True, if you use a certain technology, then such a septic tank will last longer, and pumping out sewage can be done less often.
Rules for arranging a septic tank
Any construction work, including communications, requires permission from the administration if the depth of the facility exceeds 5 m.
It is easy to register if the land survey is carried out according to the new rules. They came into force with amendments to the Land Code of the Russian Federation in 2014. Old cadastral passports of plots need to be redone. The cost of surveying is about 6,000 rubles.
If it is discovered that a communication cable is located on the territory of a private home, additional permission from specialists will be required.
To do this, you need to contact the military unit that owns this cable.They will send a specialist with a metal detector who will determine exactly where you can’t dig.
Location of the tank on the site
Once permission has been obtained, a suitable location for the waste tank must be selected. There are certain SANPIN standardsthat must be followed.
If you locate a sewage storage tank or wastewater treatment plant next to a source of drinking water, the wastewater, if clogged or leaking, will end up in groundwater.
The resulting leaks will make the water undrinkable. Infection can be avoided by making the septic tank airtight and installing a filtration system for post-treatment.

But the tank should not be located too far from the house. A large distance between the point of sewage exit from the house and the treatment facility will significantly increase the cost of organizing the system.
It will be necessary to lay a long section of pipeline, which will need to be provided with inspection wells.
The external part of the local sewer network must be provided with at least one inspection well. If the length of the line is more than 25 m, an additional well will be required to inspect and clean the system.
In addition, an excessively long pipeline often leads to blockages. This should not be forgotten, even if a pump is installed to pump out sewage.
Sewer pipe outlet
First you need to worry about creating a diagram. Installation of an autonomous sewer network begins with the release device. After this, the risers are assembled from bottom to top, crosspieces and tees are connected, and floor branches are constructed.
Installation of the system is carried out along pre-prepared routes with punched grooves, holes for fixing pipes, made and plastered niches, with a developed trench for the outer branch.
If the house is old, it probably has a cellar or underground. Then there will be no need to remove the floor covering. If the house is new, then you need to think about laying pipes in advance, before the floors are laid.
Otherwise, they will have to be dismantled in the places where the pipes will lie. Depending on the complexity and ramifications of the system, the following elements may be needed.

If the house has two floors, you should immediately install a riser for an additional bathtub or sink on the second floor.
It can be closed with a plug until it is needed.

The sewer network should be designed in such a way as to avoid, if possible, unnecessary turns, branches and connections..
The optimal route for constructing an external branch should generally be as straight as possible.
If you still have to make branches, you should use fittings that match the pipe material - most often used for sewerage PVC and HDPE pipes.
For a hermetically sealed connection of the elements, there are special sealing rubber bands inserted into the inside of the sewer pipe. Information about fittings for polypropylene pipes discussed in our other article.

The suitable diameter of sewer pipes for laying to an autonomous septic tank is 110 mm. This is a full-fledged sewer that will last a long time.
It is better not to skimp on pipes and install them with the expectation of a possible increase in load on the system, otherwise they may need to be replaced in the future. The approximate cost of materials can be found here.

After installing the internal system, the pipe for draining the tires into the septic tank must be brought to the house. You should not arrange a sewer exit from the house under the foundation.
It is better to punch a hole at the depth required for removal with a crowbar, a hammer drill, or use a hollow iron pipe with a sharp end.
Features of laying a sewer pipeline in a private house are considered In this article.

After this, a trench is developed from the outside of the house. It runs from the outer foundation wall to the location of the septic tank.
The depth of the trench is determined by local climatic conditions. Its bottom should be laid below the level of seasonal soil freezing in the region by 20 - 30 cm.
The external pipeline is laid with a slope towards the natural movement of wastewater - towards the septic tank.
The average slope is 2 - 3 cm per linear meter of pipe.
For systems with forced transportation of wastewater, the slope is 1 cm over the same segment. Details about sewer pipeline slope discussed in our other article.
After laying the external and internal sewer pipe system, you need to begin choosing a design for organizing a septic tank from used tires. There are several ways to arrange it.
Popular septic tank options
Septic tanks made from used tires come in three types:
- With filter system.
- With sump and filter (absorption) well.
- With filter system and drainage pipe.
You need to choose a design based on the volume of wastewater. For a family of three, a tire septic tank with a filter system is quite suitable. If the family is large, then such a septic tank will quickly become unusable due to overload, so it is better to choose the option with a sump and filter well.
No. 1 - design with a filter system
This is the most budget-friendly way for those who decided to make a septic tank from tires with their own hands. For it, it is enough to dig a pit, prepare the bottom and lay the wheels.
The principle of installing a simple wastewater treatment facility is clearly and clearly shown in the picture.

The operating principle is simple:
- The wastewater ends up in a container.
- The solid insoluble component of the wastewater does not penetrate into the ground and settles on the surface of the drainage layer of crushed stone.
- Filtered water goes into the ground through drainage.
The disadvantage of the structure is that this type is designed to collect and purify only gray waste: water contaminated during cooking, water from a shower with a bathtub, from a washing machine and dishwasher.
Fecal matter is not processed in this design.
However, if you install a sealed bottom instead of a drainage layer and ensure a tight connection in the walls, this option can serve as a storage tank for collecting all types of wastewater that must be pumped out regularly.
The advantage of this system is its simplicity. For sprinkling, you can choose expanded clay, sand, or just plain soil.The disadvantages include the rapid formation of viscous sludge residue at the bottom of the container, which over time will impede the outflow of liquid.
If this happens, you will have to pump out the septic tank and clean the bottom, followed by replacing the gravel. Such a septic tank should not be located close to buildings or cellars.
No. 2 - structure with a sump and filter system
This option is more complicated than the previous one, but also more durable. The design consists of two containers. One serves to settle wastewater, and the other to filter it before entering the ground.

Principle of operation:
- Wastewater is drained through a pipe into the first container.
- Large fractions settle at the bottom of the settling tank.
- Light fractions, together with the liquid component, enter the filter well through an adjacent pipe.
- Liquid waste passes through a gravel and sand filtration system and then goes into the ground. Light fractions settle at the bottom of the absorption well.
This septic tank design made from old tires is the most environmentally friendly and cost-effective. It will need to be pumped out no more than 4-5 times a year. Moreover, if the septic tank is constantly used, there is no need to further insulate it.
No. 3 - septic tank made of tires with a drainage pipe
This is not the best design. The presence of a drainage pipe does not play a special role in the operation of the system.

The operating principle of this homemade septic tank system:
- The wastewater ends up in a container.
- Insoluble sewage settles on the rubble.
- The filtered water goes into the ground through the drainage pipe and crushed stone.
The purpose of the drainage pipe is to drain water away from the bottom clogged with silt. But it also quickly becomes clogged with it and does not last long.
Stages of septic tank construction
In addition to sewer pipes and components, you need to stock up on tires. Tires from Kirovets will do. Installing larger tires cannot be done alone.
Step #1 - prepare materials and tools
Tools for installing a septic tank with your own hands:
- Drill.
- Bulgarian.
- Pliers.
- Shovel
- Selective shovel.
- Ladder.
- Scrap.
- Axe.
- Buckets.
- Roulette.
For cutting polypropylene pipes use a pipe cutter, but you can use a knife. The materials necessary for the work are available. They can be bought at any hardware store.

If the “native” soil chosen when digging a pit and trenches does not contain layers of sandy loam and loam, it can be used for backfilling.
If there are clay layers and lenses, replacement is mandatory.
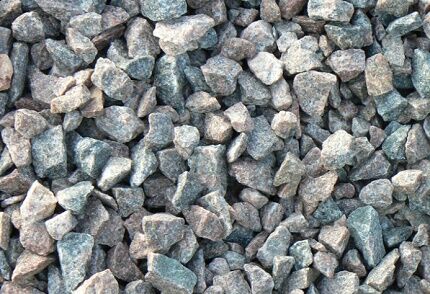
It is not necessary to fill the sewer structure with expensive granite crushed stone, such as is shown in the photo.
A budget dolomite or limestone analogue is quite suitable.
Step #2 - calculate the amount of materials
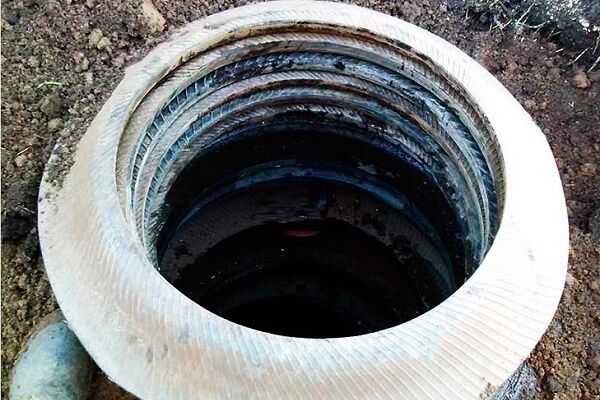
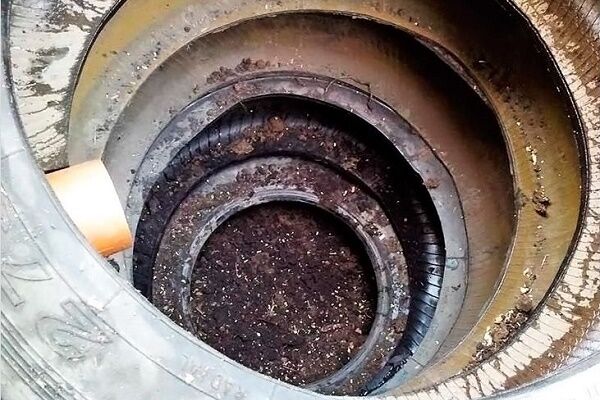
The required depth of the septic tank is 2.5-3 m. As a result of connecting the tires, you should get one large container without a lid, with or without a bottom.
The installation depth of the septic tank must be divided by the width of the tire. Seven tires from Kirovets and two tires from Kamaz will be enough.
The number of pipes must be determined based on the distance from the septic tank to the house. This distance must be divided by 3 meters (the length of the longest sewer pipes). The resulting number will be equal to their number.
It is better to take it with a reserve, as they may be damaged during the installation of a septic tank. One pipe is also needed to connect two septic tanks.
Use clamps at the rate of 5 for two wheels (with a margin). If knitting wire is used instead, 1-2 meters will be enough. For waterproofing you need a piece of rubber measuring 1X1 (a little larger is possible).
One roll of roofing material, which is needed for waterproofing containers.
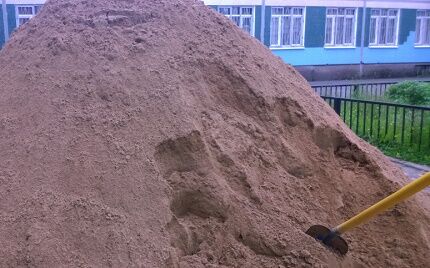
To construct a filter pad you need 2 tons of sand and gravel. You can also use ASG, but the quality of filtration will be worse, since the sand will quickly become clogged with silt. The remaining sand and gravel can be used as a coating for containers.
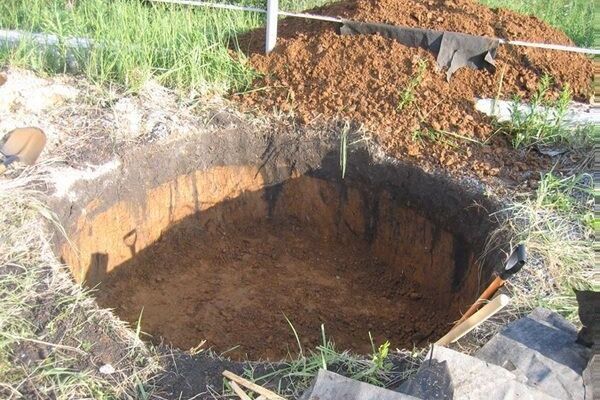
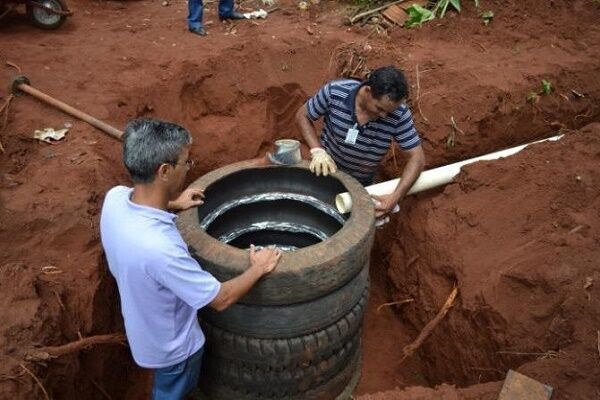
Step #3 - preparing the pit for installation of a septic tank
After all the materials have been collected and the drainage system has been removed from the house, you can begin installing the septic tank.
It consists of two containers. One of them is a settling tank for large fractions of wastewater, and the second is a filter well for water drainage. Its design is detailed in the diagram below.

Mounting the tires is easy. The most labor-intensive process is digging a pit. It is difficult to dig a hole of the required size on your own. This may take about a week.
If the hole is developed manually, then when it is deeper than one and a half meters, it will become difficult to extract soil from it.
You will need a device such as a bucket on a rope to lift the blade and a cart to remove excess soil. You need to take care in advance of the place where the excess soil will be dumped. The top black soil layer can be scattered around the garden.
The dug pit must be cleared of plant roots. During the growth process, the roots of trees such as poplar can move segments of the septic tank or break its tightness. To do this you need to use an ax.
After the roots are removed, you need to level the place where the bottom of the sump will be located. This is necessary for a tight fit of the rubber to the bottom tire. The smoother the area, the better the fit and tightness.
The place where the bottom of the filter well will be located must be further deepened to the width of one tire from Kirovets and the width of the sand cushion.
The thickness of the sand filter bed layer is from 30 to 60 cm. It is not necessary to level it, since this will be followed by a layer of gravel.
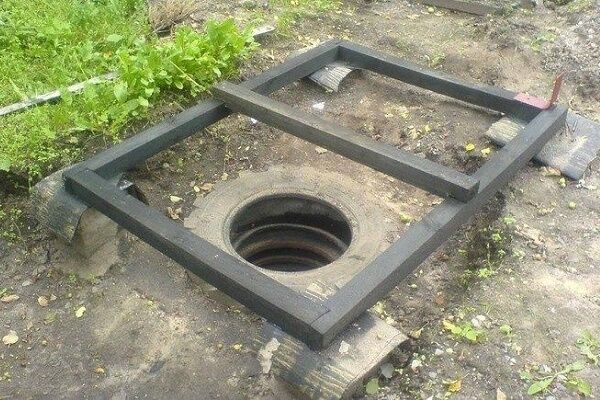
If children live in the house, it is necessary to fence off the pit while the septic tank is being installed. This is necessary to prevent accidents, since the edges of the pit may crumble if you stand on them.
The child does not understand the degree of danger, so it is better to play it safe.
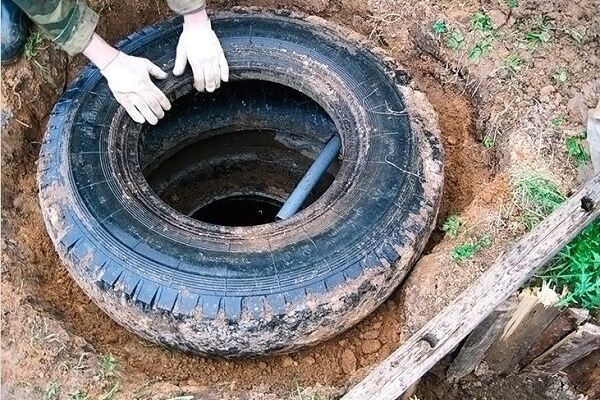
Step #4 - lay tires for the sump
Step-by-step instructions for installing sump tires:
- The rubber is laid on the prepared base.
- The first tire is placed on the rubber bottom.
- The joints of the tire and rubber are coated with liquid bitumen.
- The second tire is placed on the first tire.
- The joint between the first and second tires is coated with liquid bitumen.
- The first and second tires are fastened together with clamps or binding wire.
- The third tire is installed on the second and fastened in a similar way, followed by sealing the joints with bitumen.
- In the third tire, using a grinder, a square hole is cut for the drain pipe from the house.
- A tire from Kamaz is placed on the third tire.
- The joints between the fourth and third tires are sealed with liquid bitumen.
The pit with the settling tank does not need to be backfilled until the supply sewer line has been inserted into it, and a pipe has been led out of it to the filter well.

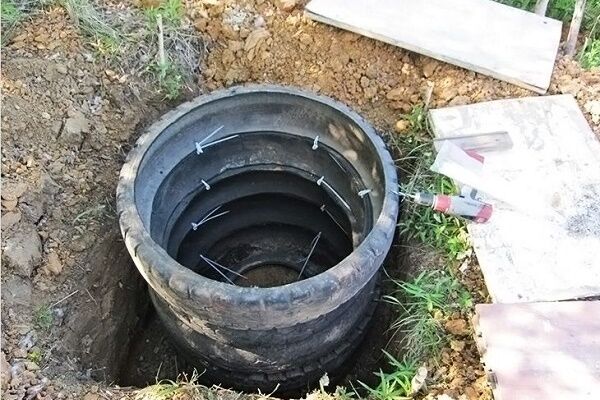
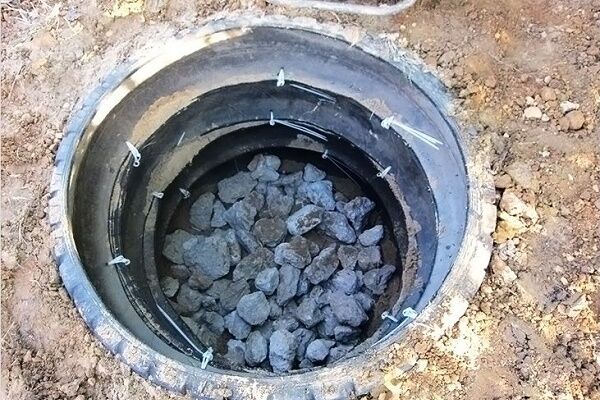
Step #5 - lay tires for the filter well
Step-by-step instructions for installing a well:
- The first tire is laid on the sandy bottom.
- Crushed stone or gravel is poured into the tire.
- The second tire is placed on the first tire.
- The joint between the first and second tires is coated with liquid bitumen.
- The first and second tires are fastened together with clamps or binding wire.
- The third tire is installed on the second and fastened in a similar way, followed by sealing the joints with bitumen.
- The fourth tire is installed.
- In the fourth tire, using a grinder, a square hole is cut for the drain pipe.
- The fourth tire is fitted with a tire from KamAZ.
- The joints between the fourth and fifth tires are sealed with liquid bitumen.
Having completed the installation of the sump and filter well, you need to begin laying pipes between the tanks. The pipe should have a diameter of 110 mm, since when it is used, a greasy coating appears on the walls.
Over time, the pipe clearance will become smaller. If you trim the edges of the tires from the inside, the volume of the absorption well will increase significantly.
Gravel is poured into the absorption well so that its lower layers are composed of the smallest available fraction. As you gain altitude, the fractional composition should be increased.
Using this method, a finer cleaning will be carried out at the outlet of the gravel filter.
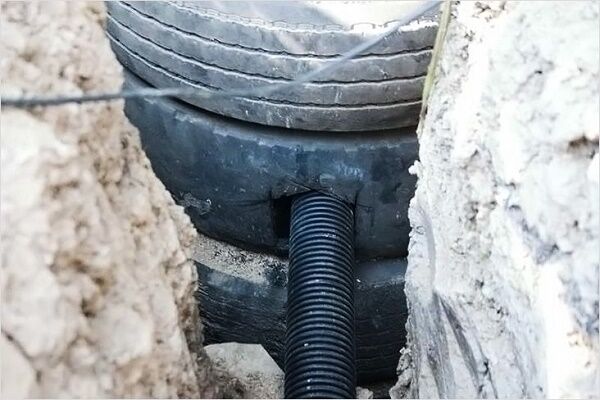
Step #6 - connect the sump and filter well
To do this, you need to cut two holes with a grinder. The outlet of the pipe from the sump into the well should be located below the level of the drain pipe from the house.
The hole can be made in the lower area of the third tire or in the upper area of the second. The pipe can be installed horizontally or at an incline of 15-20 degrees.

The places where the pipe connects to the tires need to be additionally seal. To do this, you need to cut small patches from roofing felt and glue them with liquid bitumen.
This is necessary to prevent soil from falling through the cracks from the pipe. When the sealing is completed, you can proceed to the final stage.
The external sewer branch must be equipped with a ventilation pipe, which is easier and more convenient to install in the lid of the filter well.
However, the exit from the house or the area between the receiving and absorption wells is considered optimal. It is best if ventilation is arranged at two points: at the exit from the building and above the filter well.
The distance between the walls of the pit and the containers must be filled with sand. Periodically you will have to go down and compact the earth. This can be done using a small wooden post or piece of gun carriage. It is better to take pine, as it is lighter.
The soil in the pit will settle immediately after the first rain, after which it will have to be additionally covered with earth. After this, you can remove all excess soil on the site. For this you need a wheelbarrow or buckets. The covers for the septic tank can be cut out of a sheet of iron using a grinder.
The service life of such a drainage system is more than 15 years. Only the settling tank will need to be pumped out as it fills with heavy fractions of sewage.
You may also find useful information about sewage pumps for forced pumping, reviewed here.
Conclusions and useful video on the topic
Video with practical experience in constructing a septic tank from tires:
Construction of a three-section septic tank:
Video about the optimal options for connecting sewer pipes:
We have described a cheap and reliable way to build a septic tank with your own hands. It protects soils and groundwater from pollution. In addition, except for the cost, it is not inferior to its analogue made of concrete rings..
Do you have a septic tank made from old tires on your property? Please tell us how difficult it was for you to build it and what nuances you had to face.Or did you notice a discrepancy in the instructions given in the article? Please write to us about this in the comments.


There are both pros and cons to this design. Personally, I like that the septic tank is cylindrical in shape. As a rule, such septic tanks last much longer; due to the lack of ribs, less sediment accumulates in them when compared with square or rectangular samples. But I have some doubts about the tightness of a septic tank made from tires.
You are correct in your doubts; it is very difficult to achieve tightness in such a homemade septic tank, almost impossible. People who make such “collective farm” homemade septic tanks justify themselves by saying that the joints are sealed with bitumen, polymer mastic, fastened with self-tapping screws, and so on, but this is all self-deception. The structure is flimsy and will sway due to ground movements.
If the voice of reason is silent in you and you are ready to risk polluting the environment, then perhaps at least the probable responsibility for this will make you think. And liability may well arise not only administrative, but also criminal, under Art. 250 of the Criminal Code of the Russian Federation “Water Pollution”.
We bought a country house. No sewerage. I made a temporary option with my own hands with a septic tank. I used used tractor tires and used them to build a drainage hole with a drainage filter instead of a bottom. He brought a sewer pipe to it. He built the hole away from the foundation, house and well. Works great. The wastewater enters the “reservoir”, thanks to drainage it is filtered, purified water seeps into the ground, and everything else remains on its surface.As a temporary measure, an excellent solution.
It is more convenient to make a septic tank from tires for filtering wastewater from the sink and bathroom from low-profile R20, R21, R22. The lowered cylinder is assembled on the surface, the tires on each side are tightened with 3 8mm bolts, 40mm long, under wide washers on both sides.
The structure of 6 tires is driven to the opposite end of the pit and is easily immersed in a pre-dug pit 1.9 m deep by simply lifting the opposite end. It was as if she was jumping up on her own, which I was very surprised by.