Do-it-yourself garden shower: technology features and main stages of construction
Even beginners in the construction business can make a garden shower with their own hands.To erect a simple structure, you do not need expensive tools, complex plumbing fixtures and exclusive materials. It's worth a try. Right?
Let's consider the best options for shower stalls for a summer cottage, and look at the principles of design planning. The article we presented provides practical recommendations on the selection of materials. The methods and specifics of the technology for constructing a wooden shower are described in detail.
The content of the article:
The nuances of drawing up a homemade shower project
At the design stage, it is necessary to choose the location of the shower stall and decide on a number of design parameters. You need to think in advance about the dimensions and configuration of the building, the organization of water supply and drainage, and select consumables.
Choosing a location for the shower
The location of the shower will be of great importance for the comfortable use of water procedures.
When choosing, you need to consider the following factors:
- water heating principle – natural method through the sun or forced heating;
- tank filling method – automatic or manual;
- dimensions the buildings.
Sufficient illumination is the main rule for arranging a garden shower when heating water naturally. We need to take care of the water supply. In summer cottages, the barrel is usually filled manually, so it is better to install the shower near the water supply. If there are no such possibilities, then a flexible hose can be stretched from the water intake point.

What else to consider:
- If water drainage into the ground is provided, then the shower should be placed away from the house - 15 m or more. Uncontrolled flows will gradually erode and spoil the foundation.
- When installing a drainage drain or sewerage supply, a shower is installed regardless of the location of the house.
- You need to find a flat area on a small hill for the shower. In lowlands, water stagnates - construction materials rot (wood) or corrode (metal).
You should not build a shower too far from the entrance to the house, especially if the design does not provide a changing cabin. When the air temperature is low or in the rain, jogging down the street after water procedures is not pleasant.
Design features of the structure
On a piece of paper, you need to draw up a sketch of the future building, showing the dimensions and shape of the structure, the presence of additional elements: changing areas, shelves, holders for clothes and bath accessories.
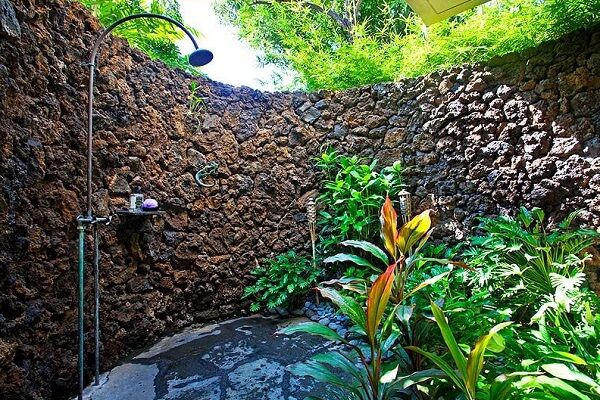
In the garden you can arrange several options for compact showers:
- rack;
- stationary cabin.
The stand is an excellent solution for installation in the middle of a vegetable garden or garden plot.The main conditions for the operation of a shower stand are the presence of running water and good water pressure.

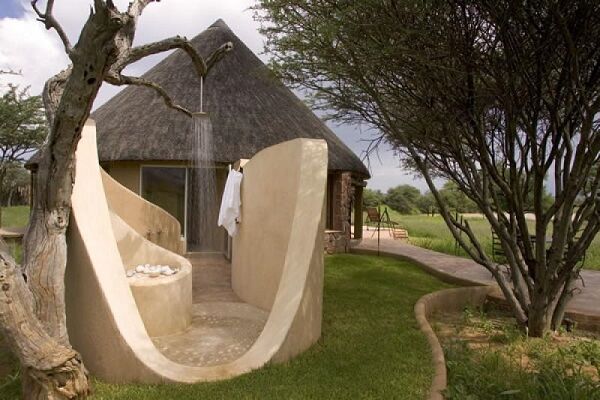
The option with a stationary cabin is more difficult to implement, but provides comfortable showering. A typical design includes: a closed room, a water tank, a tray and a tap.
The cabin is the most suitable option for a garden or summer cottage. When planning the dimensions of the room, the physical characteristics of the users are taken into account. Minimum building values:
- area – 1 sq. m;
- height – 2.2 m.
If there are children, then it is advisable to expand the internal space. This will allow parents to freely enter the shower and bathe the baby.

The minimum dimensions of the vestibule are 0.7-1 sq. m. The locker room must be protected from the washing area with a moisture-proof curtain. An alternative solution to a full-fledged vestibule is an L-shaped screen. It is made from the same material as the shower itself - the result is reminiscent of a beach version of a locker room.
Methods for organizing drainage
Before you go on your own build a garden shower, we need to resolve the issue with the drainage system. The choice of water disposal method depends on the size of the building and the number of regular users.
Possible solutions for the shower cabin:
- drainage ditch;
- filter field;
- filter well.
The simplest thing is organization drain hole in the shower. This option is applicable when the shower is used infrequently and the volume of waste water is small.

It is better to move the waste pit 2-3 m away from the shower. If you make a drain for construction or near walls, then there is a high probability of destruction of the foundation and rapid deterioration of wooden structural elements.
It works on a similar principle filter field – water is discharged through perforated pipes and absorbed. From the shower, ditches are laid underground towards the vegetable garden or flower bed, and then the pipeline is filled with crushed stone and soil.

If the shower is used regularly and the volumes of wastewater are large, then it is best to organize drainage through a septic tank. Installation of an autonomous sewer system will protect the surrounding soil. In addition, the septic tank can be used simultaneously for a shower and a toilet.
Frame material
The “skeleton” of the structure is made of metal and wood. The metal frame is considered more durable and reliable. For work, pipes with a diameter of 4-5 cm are used, the wall thickness of the racks is from 3 mm. The structure must be strengthened with intermediate crossbars. For piping, a pipe with a diameter of 2.5 mm is suitable, the metal thickness is from 2 mm.
The metal frame must be treated with an anti-corrosion primer and coated with paint.

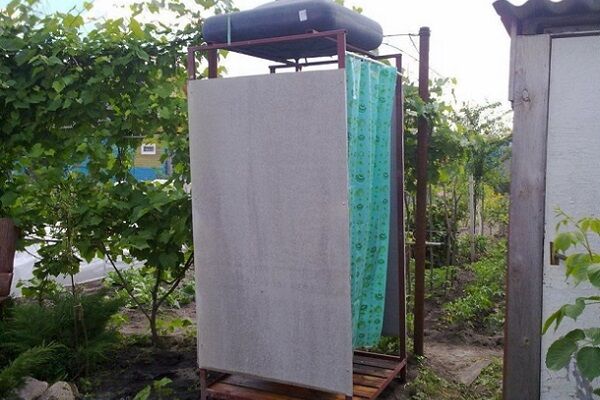
For garden shower structures wood is often chosen.The material is easier to process, but needs protection from moisture - the frame elements must be coated with an antiseptic composition.

For the bottom trim, it is better to use lumber with a cross-section of 150*100 mm. The joining of elements is carried out in two ways: through metal corners or with a tongue-and-groove connection.
Garden shower trim
The list of materials for cladding the frame is very long.
Among the most popular are:
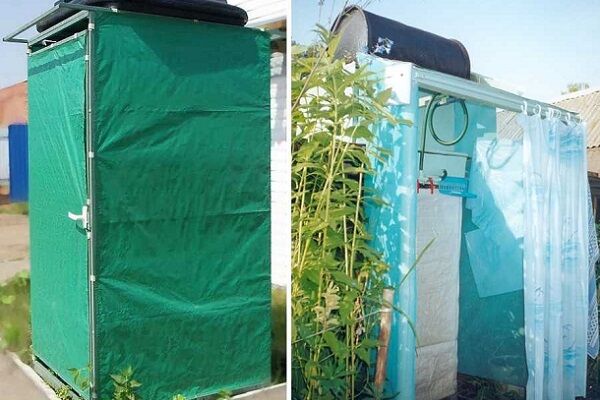
- Film. In demand among summer residents and gardeners due to its affordability. However, from a practical point of view, the material has more disadvantages. Oilcloth does not protect against gusts of wind, wears out quickly and is not particularly attractive.
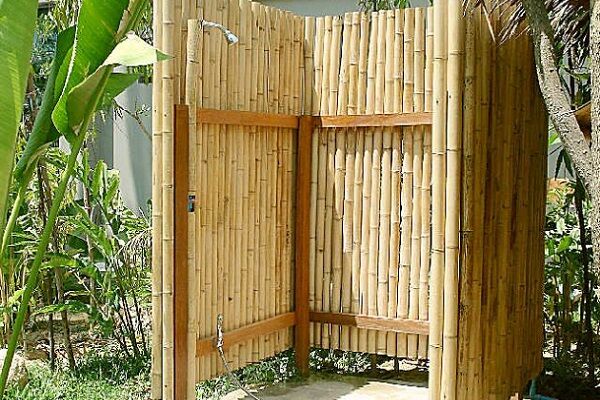
- Lumber. The materials used are clapboard, block house, planed board or profiled timber. The main advantages of wooden cladding are its beautiful appearance, pleasant aroma, reliability, strength and heat capacity.
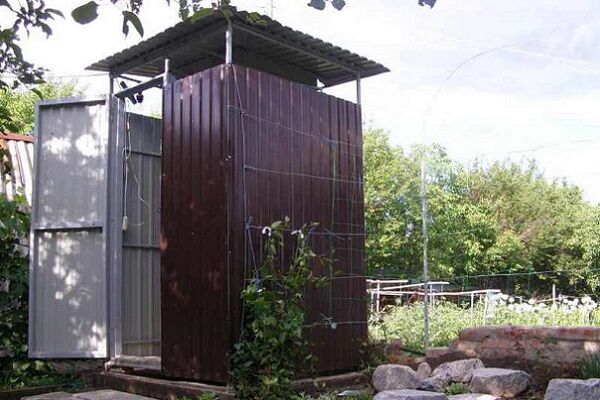
- Corrugated sheet. A practical, but not aesthetic option for a garden building. Galvanized corrugated sheeting with a decorative coating is waterproof and durable, but a metal booth will get very hot in the sun and quickly cool down in the evening.
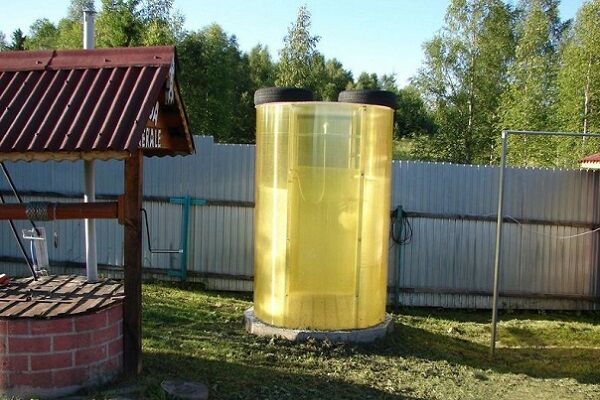
- Polycarbonate. An excellent solution for a garden shower. Polycarbonate retains heat, is easy to process and is impact resistant. The material is not afraid of temperature fluctuations, the service life is up to 10 years.
Polycarbonate cladding will cost less than cladding a shower with profiled sheets or wood.
For cladding, some summer residents use flat slate or plastic. The first option does not look very aesthetically pleasing, and the second is short-lived. Thin plastic will only last a couple of seasons - due to temperature changes, the material becomes brittle and deformed.
Foundation options
Despite the lightweight design, a stationary shower stall requires a reliable foundation.
The following types of foundations are constructed:
- pile;
- columnar;
- tape;
- slab
The choice of base depends on the dimensions of the cabin, the building materials used, the volume of the water tank and the topography of the site.
A pile base is the most common and optimal option for a compact shower. This foundation is suitable for buildings on a slope and on a flat area.

An anchor pin is placed in the upper part of the support for subsequent fastening of the lower trim. The pipes are concreted, and a grillage made of timber is built on top.
For stable soils and flat areas, a columnar foundation is suitable. The supports are constructed from concrete blocks and buried 40-50 cm into the ground.

Strip and slab foundations are material- and labor-intensive; their construction is justified for a brick shower.
Summer shower floor
The floor in the cabin is made of wooden beams. A tray is installed in the washing area. Water from it will flow through the sewer pipe towards the septic tank, waste pit, or by gravity into the drainage layer under the shower.

When constructing a slab foundation, the floor is left concrete. For free flow of water, it is necessary to provide a slope towards the drain hole. A rubber mat is placed on the bottom or a flooring of wooden slats is placed.
Selecting a water tank
The water tank is evaluated according to a number of parameters: material of manufacture, shape, volume, color and heating method.
The material used to make the tank is metal and plastic. In the first case, different types of steel are used:
- galvanized;
- stainless.
The galvanized tank is treated with a thin layer of zinc, which partially protects the metal from corrosion. To extend its service life, it is advisable to paint the tank. Containers of 40-200 liters, flat, square and round are available for sale.

Metal containers are equipped with a lid, a hose fitting and a ball valve. The general advantage of such products is the speed of heating, the disadvantage is significant weight.
Plastic tanks are in great demand. The main advantages of polymer tanks:
- affordable price;
- variability in the choice of shapes, colors, volumes;
- chemical neutrality;
- durability – service life is about 40-50 years.
Plastic containers are sensitive to low temperatures, so it is better to bring the tank indoors for the winter.

The volume should be selected based on the number of users. For a family of two people, a tank of 80-100 liters is enough. The approximate calculation of displacement is 40 liters per person. It is not advisable to choose tanks with a capacity of over 200 liters - reinforcement of the frame may be required.
When choosing a color, you need to remember the rule: the darker the tank, the more intensely it attracts the sun's rays, which means the water in it warms up faster.
As for the type of heating, traditionally at the dacha they use natural heating by the sun. The process proceeds uncontrollably. On cloudy days it will not be possible to obtain a comfortable water temperature. In this case, it is better to start building heated summer shower, you will find guidance in our recommended article.

Operating a heated tank is more convenient and is completely independent of weather conditions. But it requires connection to the electrical network and water supply, monitoring the filling of the tank. A stable water pressure is required for normal operation.
If buying a ready-made container seems unjustified to you, shower tank you can do it yourself. The article we recommend will introduce you to the technology of its manufacture.
Organization of internal space
You should worry about the lighting and ventilation of the shower stall in advance. Often a window is left at the top of the building. It performs two tasks simultaneously. Ventilation is provided through the hole and the sun's rays pass through.
The transmitted light is sufficient for comfortable washing during the daytime. To take a shower in the evening, you can install a tall street lamp near the building on the side of the window.

It is better to install a forced exhaust in the wall of a stationary building, since ventilation through the window in autumn and winter will greatly cool the cabin.
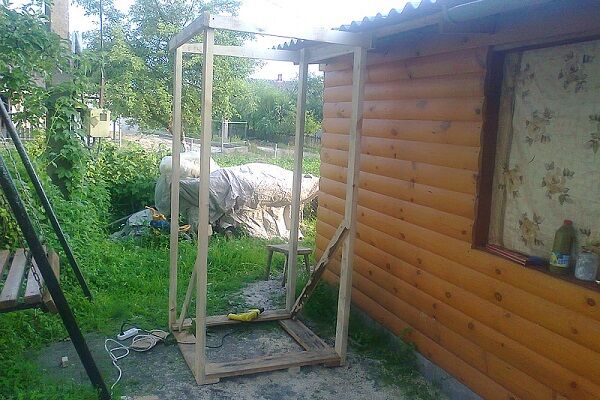
Instructions for making a wooden shower
One of the simplest options for a homemade outdoor garden shower is a cabin with a wooden frame covered with clapboard. The technology involves the arrangement of a prefabricated columnar foundation and drainage into a drainage pit.
Stage #1 - selection of materials and tools
For construction wooden structure you need to stock up on lumber.
Indicative list of materials:
- beams with a cross section of 10*10 cm, length 2.5 m - for a small shower you will need 4 supports;
- thick boards for the lower and upper trim, as well as reinforcement of the frame;
- slats for flooring;
- concrete blocks or bricks;
- lining for cladding;
- container for water;
- flat slate for roofing;
- oilcloth curtain.
Supplies you will need: wood primer, screws and nails, crushed stone to create a drainage well.

To prepare support posts and boards, you may need a circular saw or jigsaw, a plane and a grinder.
Stage #2 - preparing the drainage pit and foundation
First, they make markings on the ground and begin to arrange a reliable foundation.
Work progress:
- Dig holes in the corners of the future shower stall - 50 cm deep.
- Pour a sand and gravel cushion (10 cm) onto the bottom, moisten and compact.
- Lay a layer of waterproofing on the base; ordinary roofing felt will do.
- Erect pillars from the foundation blocks, observing the bandaging of the seams.To fasten the elements, use concrete mortar.
If it is necessary to build a stronger foundation, it is better to build monolithic pillars. In this case, formwork made of boards is installed in the prepared pits and reinforced with metal rods.
Subsequently, the rods are used to connect the supports with the grillage. The formwork is filled with a mixture of cement, sand, gravel and water.

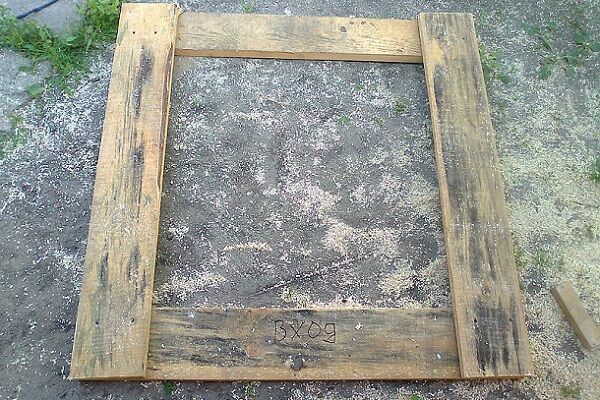
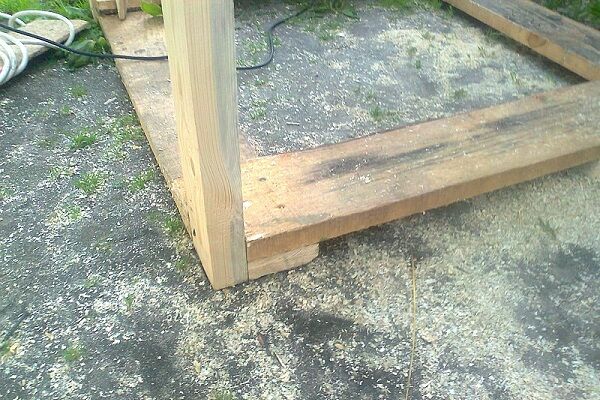
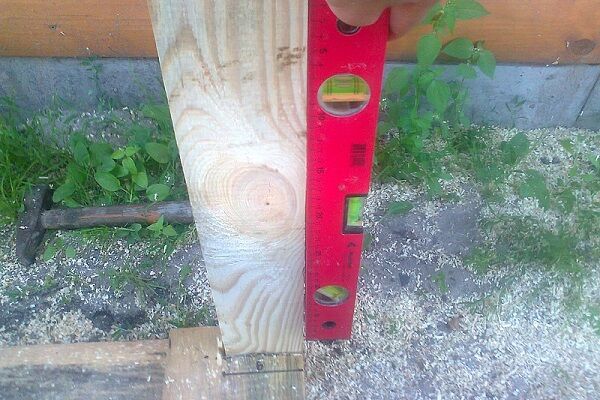
Stage #3 - construction of a wooden frame
To make the work easier, the frame is first assembled on the ground and then fixed to the foundation support pillars.
The sequence of actions can be divided into several stages.
After this, the frame is attached to the foundation pillars.The supports are pre-covered with waterproofing - this can be roofing felt or a piece of linoleum.
Stage #4 - covering the structure and installing the tank
The frame elements must be treated with a protective compound; an antifungal bioprotective primer is suitable. After it dries, the surface is painted with façade acrylic varnish.
Next we begin covering the frame.
Work order:
- Adjust the lining slats to the dimensions of the spans between the vertical posts.
- The ends of the planks mounted on the sides of the booth can be rounded to improve appearance. The slats for lining the back of the shower are cut straight.
- Sand the ends of the prepared lining.
- Install the slats in rows, starting from the bottom of the structure. Self-tapping screws can be used for fastening. It is necessary to leave gaps of 2-3 mm between the planks - wood can swell under the influence of moisture.
It is advisable to leave a technological gap between the last row of the lining and the top trim. It is necessary for lighting and ventilation of the shower stall. The next step is to install the sheathing from the beams and lay flat slate on the upper beams of the frame.

Next, install the water tank. If the container is flat in shape, then it is enough to lay it on the slate and align the lower pipe with the hole in the roof. You can pass a steel rod with rings through the side eyes and secure it tightly to the top of the walls.
To install a barrel or canister, you need to prepare a site - build a boardwalk on the roof. After installation, additionally secure the tank with metal strips - bend the workpiece around the tank and secure it to the roof.

A stopcock and shower head are installed on the pipe. Inside the cabin there are shelves for bath accessories and towel racks.
If you already have experience in the construction of domestic buildings, you should familiarize yourself with a more complex, but extremely practical version of the tandem from shower room with toilet. We recommend reading a very useful article on the design of a complex box and the implementation of the project.
Conclusions and useful video on the topic
Step-by-step instructions for constructing a shower stall with a changing room:
Ideas for arranging a garden shower:
It is quite possible to install an outdoor shower yourself. You can implement the proposed options or implement your own ideas.
A variety of manufacturing technologies and building materials allows you to quickly acquire a comfortable and practical building on your garden plot. The main thing is to take into account the expected loads, take care of a reliable foundation and frame.
Would you like to tell us about how you made a country shower box with your own hands? Do you have useful information or rational suggestions for building a cabin? Please write comments in the block below, post photos showing the process step by step, and ask questions.


I want to build a garden shower stall in my dacha. I would like to choose some simple design without any problems.I plan to make a water tank on top, which will be naturally heated in the sun. At first I planned to make the frame wooden, but after the idea of a tank came up, I was no longer sure that the structure would be reliable and would withstand the weight. I will think.
It depends on how many liters you are going to make the tank. I made the shower frame from a 30x30 metal profile pipe; it holds a 150-liter stainless steel tank normally. There are no “problems” in the design.
Hello. You expressed it abstractly regarding the durability of the structure; residential buildings also have wooden frames that last 100+ years and do not fall apart. Depends on the selected material, its safety and the weight of the water tank. I have had a wooden shower with a 45-liter tank in my dacha for 6 years now, and the design still has no complaints about its quality and durability. The tank is black, plastic.
I am attaching a photo of the design of a completely reliable summer shower and wood (I am attaching a photo), which can easily withstand a tank of even 100 liters. But often for a country house option, a 50-liter tank is enough. In this scheme, I would add lateral reinforcements on three sides so that the support beams do not “walk.” Now I’ll even quickly draw on the diagram how I see it.
You can already sheathe such a frame with whatever you like best or what fits into your budget: wood, lining, siding, plastic, and so on. I also corrected the lower concrete supports; they can be made monolithic, of course, leaving a hole in one side where the water will drain.