Summer polycarbonate shower: step-by-step design instructions
Price-quality ratio is the fundamental criterion for choosing a shower cabin for a summer residence.We can safely say that a polycarbonate summer shower is a leader among competitors. Possessing the necessary strength, the material is attractive at an affordable price and is easy to process.
We will tell you how to competently build and equip a country shower box. The article outlines the technology step by step: from design planning to commissioning of the finished building. Taking into account our recommendations, you can acquire a convenient, durable and trouble-free collection point for hygiene procedures.
The content of the article:
Polycarbonate: arguments for and against
Polycarbonate is a synthetic, low-flammable material made from extruded polymer granules.
Construction products are produced in monolithic or hollow sheets of various colors.

Polycarbonate meets most of the requirements for the material for constructing a summer shower:
- Impact resistance. The plastic sheet withstands the vagaries of nature and mechanical stress.
- Manufacturability. Polycarbonate is half the weight of glass, which simplifies its installation and allows it to be used for cladding a lightweight frame. An additional advantage is the flexibility of the sheet and the ability to form without special equipment.
- Temperature resistance. The material retains its properties in the cold (up to -40°C) and in the heat.
- Low thermal conductivity. Air gaps of cellular polycarbonate retain heat in the structure.
Sheets of plastic are coated with a protective layer that blocks UV rays - the structure of the polymer remains unchanged and remains flexible for a long time. The service life of the building with proper care is 7-10 years.

Polycarbonate cladding has some disadvantages:
- low abrasive resistance - the plastic coating is easy to scratch;
- high level of thermal expansion - at sub-zero temperatures the leaf shrinks slightly, and vice versa, increases in heat.
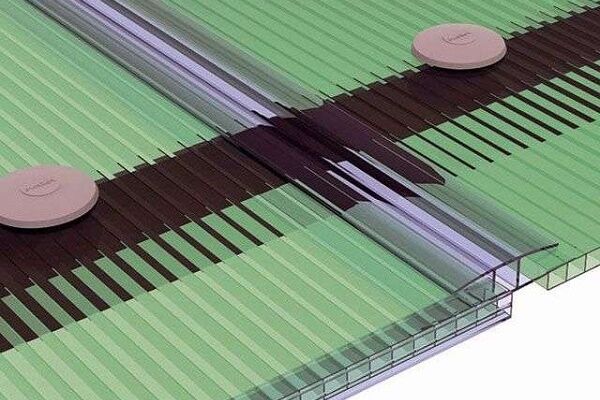
Defects from thermal deformation can be reduced if the joining of the panels is done using connecting profiles and thermal washers.

Work plan: what needs to be taken into account
Before getting down to business, it is worth familiarizing yourself with the theoretical aspects and issues of summer construction. The more construction issues are resolved at the design stage, the fewer shortcomings will arise during the assembly and operation of the shower.
Optimal place for shower
The location of the summer shower stall is selected taking into account a number of factors:
- Illumination. When heating water naturally, a sufficient amount of sun is the basic rule. The tank should not be obscured by trees. For those who prefer evening water treatments, it is better to place the shower in the west of the garden plot.
- Proximity of communications. It is optimal if there is a septic tank or waste pit nearby - this will solve the problem of sewage waste disposal. In addition, you need to plan the water supply in advance and arrange a shower closer to the water supply.
- Relief. A slight elevation accelerates the outflow of water used in hygiene procedures.
If there is no dressing room in the shower stall, then the structure should be installed near the entrance to the house.

Nuances of developing and creating a sketch
A sketch of a summer shower covered with polycarbonate sheets is first drawn up. On it you need to indicate the dimensions of the structure, display the type of foundation, the structure of the frame and the method of attaching the tank.
The size of the frame is selected taking into account the individual characteristics of the owners of the dacha. Average values:
- height – 2.2 m;
- length and width – 1 m each.
If there are small children in the family, then the space inside the booth should be slightly increased so that an adult can freely come in and buy the baby.

Some nuances of planning a shower:
- A threshold must be installed between the locker room and the washing room - this will prevent water from entering the “dry” zone.
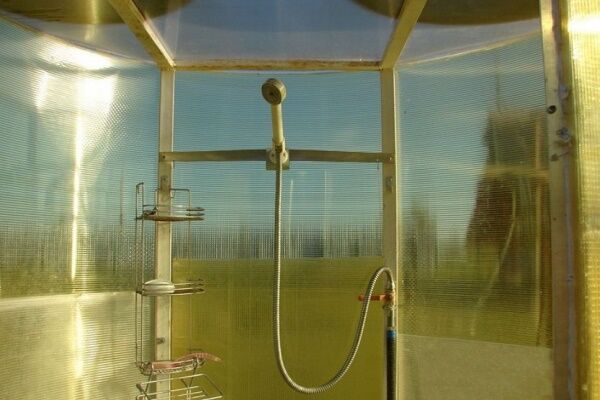
- It is necessary to think over a storage system for bath accessories - corner shelves are optimal. They are compact and roomy.
- There should be lighting inside the booth. It is important to choose lighting fixtures with a high degree of moisture protection.
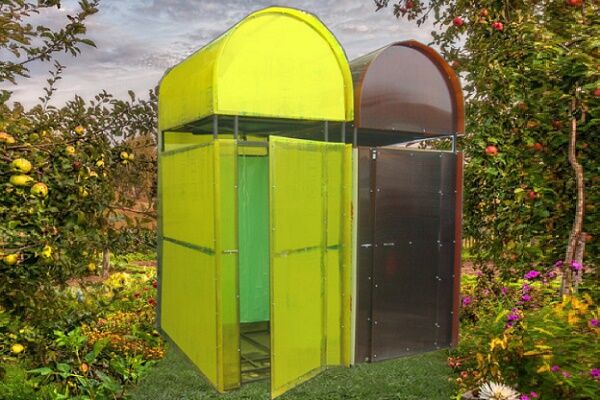
- Instead of a locker room, you can install racks near the shower and cover them with polycarbonate, giving the structure an L-shape. The finished structure resembles a beach version of a changing area.
Taking into account the parameters, a sketch is “drawn out” and the consumption of materials is calculated.

Will introduce you to designing a shower/toilet unit next article, completely devoted to this interesting issue and the choice of the optimal scheme.
Which frame material is better?
The frame of an outdoor shower stall is made of wood or metal. In terms of reliability and durability, metal construction is the leader, but often, summer residents rely on the availability of materials and their own work skills.
The most optimal option in terms of strength is a profile pipe. Disadvantages of the material: relatively high cost and the need to use a welding machine.

Wood is easier to process, but more capricious to use. Technology building a shower from lumber is given in the article, the contents of which we advise you to familiarize yourself with. For open work, it is advisable to choose larch, cedar or oak. Regardless of the type of wood, the frame needs to be treated with antiseptic compounds to prevent rotting.
Criteria for choosing a water tank
The quality of water heating largely depends on the parameters summer shower tank: material, shape, displacement and heating method.
Material. There are plastic and metal tanks on the market. Modern polypropylene containers are superior to their metal counterparts in some respects.
Features of plastic tanks:
- chemical neutrality - the walls of the vessel do not rust;
- ease of transportation and installation;
- low cost;
- maintaining water purity for a long time;
- safety of use in conjunction with heating equipment;
- susceptibility to shocks and low temperatures - the plastic tank must be removed from the street for the winter.
Metal tanks are available from stainless steel, galvanized and carbon steel. The first two materials are durable and resistant to corrosion processes. Black steel containers develop rust over time.

Form. The flat tank is conveniently mounted on the frame and warms up the water faster. A large parallelepiped-shaped tank can completely replace the roof. Water in barrels heats up longer and worse.

Displacement. Experienced summer residents advise selecting tank dimensions at the rate of 40 liters per person. However, even for a large family, you should not buy a capacity over 200 liters, otherwise you will have to additionally strengthen the cabin frame.
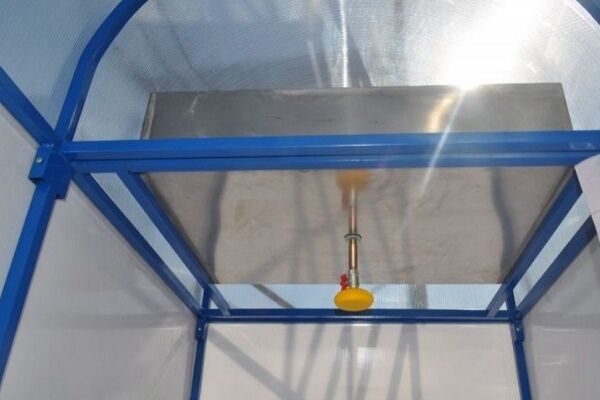
Heating method. Conventional tanks are designed to be naturally heated by the sun. Using various tricks, you can improve the intensity of the temperature increase:
- painting the tank with black paint;
- covering the tank with dark polyethylene;
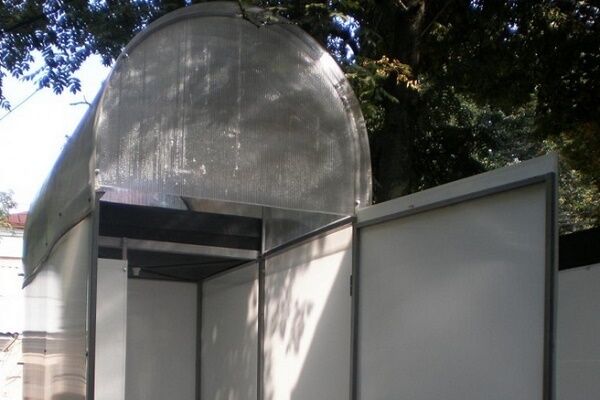
- installation of a closed polycarbonate roof over the tank;
- installation of foil or a mirror from the northern part of the tank, redirecting the sun's rays towards the tank.
A more effective way is to use a heated barrel.

But it's not that simple.Commissioning a heated tank requires an electricity supply, connecting the shower to the water supply or using a pump, as well as organizing a system for monitoring the filling of the tank with water.
All about the device heated summer shower you will find out by reading the article we recommended.
Foundation and drainage options
In order to strengthen the structure, prevent waterlogging of the area and the proliferation of the population of harmful insects, it is recommended to erect the shower stall on a foundation. A pile foundation is suitable for a polycarbonate structure.

The drainage system is organized using one of the following methods:
- discharge to a settling tank or waste pit;
- arrangement of a drainage cushion.
Method 1. Supplied under the shower stall sewage pipe and connects to the drain pan. Outside the shower, the pipeline is laid in a trench and runs to a sump.
The role of a septic tank can be performed eurocubes for bulk products, container volume – 1000 l. An alternative option is to create a primitive cesspool from tires, barrels or concrete rings.

Method 2. If the dacha is used for “weekend trips” to nature and low water consumption is expected, then a simple drainage system is suitable for disposal of drains.
A hole is dug under the washing section and filled with stone, large and small crushed stone.Water will naturally be absorbed into the soil. In this case, you can do without a pallet and make a slatted floor from wooden blocks.
Stage-by-stage construction of a summer shower
It's time to move from theory to practice. Let's look at the construction of a shower on a pile foundation step by step. The sheathing material is polycarbonate, the frame is wood, the drain is a drainage system with a filtration pipe.
Quick Photo Guide
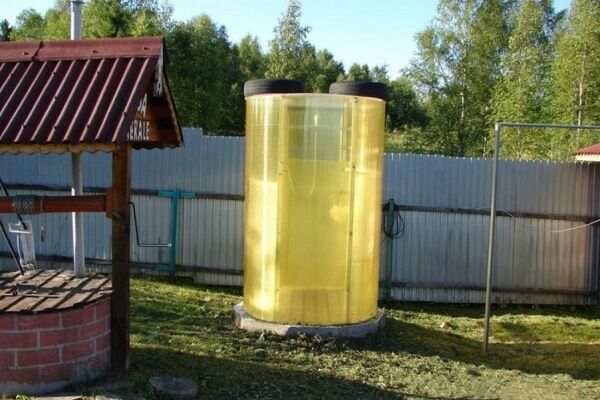
Let's look at an example of constructing a shower stall from cellular polycarbonate panels fixed in a circle. The water will flow into a structure located under the cabin absorption well. After moving the shower stall to a new location, you can simply fill it with sand and cover it with a layer of fertile soil on top.
Foundation and drainage pit
Sequence of installation of a pile foundation:
- Mark the location for the shower, remove a layer of soil from the site, level it, cover it with sand, moisten it and compact it.
- Mark the corners of the future building and check the evenness of the diagonals. The permissible error is 2 cm.
- Drill holes with a diameter of 20 cm and a depth of 50 cm
- Pour crushed stone into the holes - the layer thickness is about 20 cm.
- Install metal-plastic sewer pipes (diameter – 10 cm) into each trunk. 15 cm of PVC pipe should remain above the ground.
- Prepare a solution of cement, sand and gravel in a ratio of 1:1:2, respectively. Fill the gaps between the pipe and the walls of the pits with the mixture.
You can cut the pipes after a day - the concrete should “set”.The cutting line should be marked using a laser or water level.

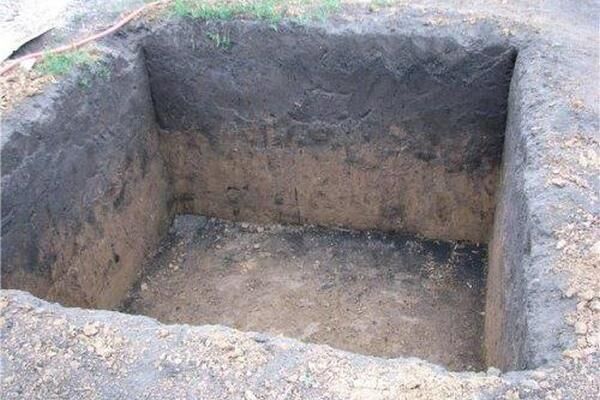
During this period, you can work on the drainage system. Work progress:
- Dig a pit about 1 m deep between the pillars.
- Fill the bottom of the hole with broken bricks or large stones. Pour gravel on top, not reaching 10 cm to the surface of the ground.
- The top layer of backfill is previously removed turf.
Over time, a new grass lawn will grow over the septic tank, hiding the location of the drainage.

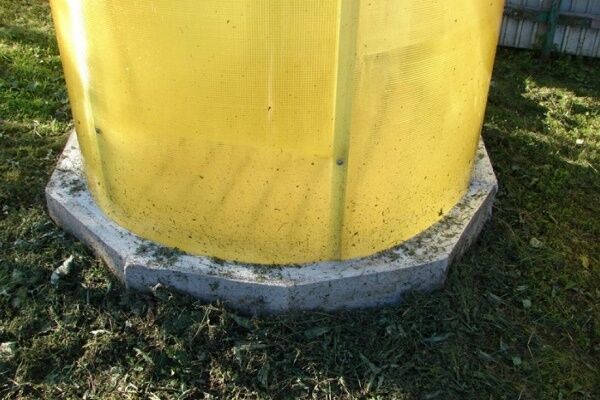
Assembling the lower shower trim
For strapping, beams with a cross section of 50*100 mm are used, the joining of parts is carried out with metal corners. To increase the strength of the assembly, fixation is carried out on both sides of the harness.
Procedure:
- Assemble a wooden frame - the base of the shower.
- Secure the harness to the foundation with anchors.
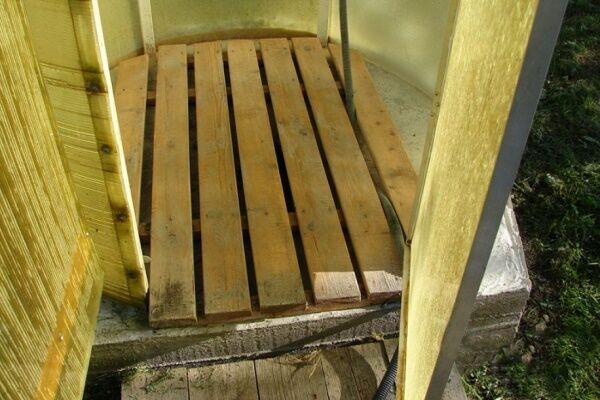
- Fix a jumper in the center - a support for the pallet and floor joists.
- From 5*5 cm bars, knock down a frame for the pallet and mount it into the frame. The floor level should be flush with the sides of the pallet.
- Install 20*20 mm beams along the perimeter of the frame, corresponding to the height of the floorboards.
After trying on the shower “pallet”, you can begin tiling the floor with planed boards.

Fabrication and installation of the frame
The frame is erected from 5*5 cm beams, fastened with metal corners and self-tapping screws.
Frame assembly sequence:
- Prepare and install vertical posts on the harness. Additionally, secure the posts with lumber.
- Cut out the parts of the top trim and screw them to the posts.
- Check the verticality of the pillars and the horizontality of the roof base.
- From the entrance side, mark the doorway by installing the appropriate bars.
- Strengthen structures using jibs.
Ready frame for summer shower it is necessary to check for rigidity experimentally, rocking the structure in different directions. The frame is supplemented with vertical struts and the evenness of the walls is checked.

Gable roof installation
The proposed option includes a gable roof. To simplify the task, you can make a flat roof or even use an open shower.
Assembly technology for a gable structure:
- Assemble rafters from the beams using metal strips and corners.
- Using the template, make a couple more rafters.
- Raise and install the rafter system onto the frame.
- Make a polycarbonate lathing from the slats - the fastening step is about 50 cm.
If a soft roof is used (bitumen shingles or rolled material), then a continuous sheathing is laid.

Sheathing the structure with polycarbonate
All wooden elements are pre-treated with high-strength alkyd-urethane varnish. The coating will increase the wood's resistance to moisture and improve the appearance of the building.
After waiting for the frame to dry, you can begin sheathing. Thermal washers are used for work. Fasteners are sold complete with sealing rings and plugs; self-tapping screws are not included in the kit.

Sequence of fastening cellular polycarbonate:
- Lay the sheets on a horizontal surface and cut them, running a sharp knife at an angle of 30°. A longitudinal cut is made along the honeycomb, a transverse cut is made in two stages - first the top covering is cut, and then the sheet is broken.
- Attach the sheet to the frame and prepare a hole for fasteners.
- Install the washer and close the screw head with a plug. The fasteners are not visible inside the structure.
Open polycarbonate honeycombs are sealed with silicone.

Finishing work: commissioning
By analogy with the frame of a shower stall, the door is assembled - the frame is knocked together from 5*5 cm planks.

Next, the interior arrangement and design of the cabin is carried out: pallet is installed, the tank is placed, the rubber mat is laid and the curtain is hung.

It’s a good idea to take care of a convenient climb to the locker room and build small steps made of brick and wood.

Conclusions and useful video on the topic
Video #1. Option for arranging a shower stall with a dressing room:
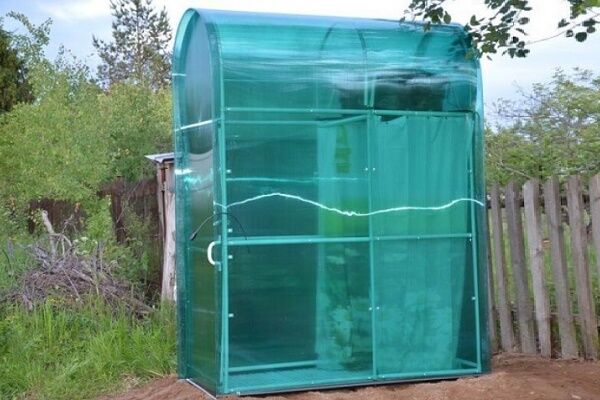
Video #2. Assembling the purchased structure and covering it with polycarbonate:
A polycarbonate shower is a practical and affordable option for a summer cottage. The construction technology is not difficult, and the cost of the materials used is quite reasonable. By spending a little time and enlisting the support of an assistant, you can build a durable structure and improve the conditions of country life.
Tell us about how you built a shower stall with polycarbonate walls on your own summer cottage. Perhaps you have technological nuances in your arsenal that will be useful to site visitors. Please write comments, publish thematic photographs, and ask questions in the block below.


I also installed a shower stall at my dacha myself. I chose polycarbonate because a booth made from it, in my opinion, is more reliable and durable than a plank one. The roof was made flat. A metal tank with a bottom covering the entire area of the shower roof was placed on top of it - the main heating was due to the sun. I installed a 1.5 kilowatt heating element into this tank (the sun is not always enough for the water to warm up properly).
I made one for myself on the site. Actually, nothing complicated.The main thing, as noted here, is not to forget the protection from UV rays, otherwise you can throw it away. Well, be careful with the wind, otherwise you’ll get out after a shower and catch a cold. I placed it on a small hill so that the water would flow down. It’s true that the tank is still plastic, I want to get a stainless steel one for next summer, it will last longer.
I want to make a shower with a 240 liter tank with a heating element. There is a profile pipe 25×25 mm available. Will this frame hold up? You can, of course, make a smaller tank or take a 40x40 pipe. But then you’ll have to buy more, and it’s all lying around in the barn, unused.
Hello. It is better to take 40x40 or 40x60. A pipe of this type can withstand up to approximately 173 kg with a length of 2 meters. Of course, the load will be distributed on the frame, but taking into account climatic factors, the weight of the water and the possible weight of a person climbing to check the water level, such a structure will be the most reliable.
Hello! What thickness is best for polycarbonate? Somewhere they say 4 mm, somewhere 16 mm. I'm leaning towards 8 mm, but I'm afraid to make a mistake