How to make a summer shower with your own hands: diagrams of common designs
In the summer heat, after working in the garden beds or active games with children, nothing compares to the freshness of a summer shower.A small neat structure on a sunny spot or just a compact device on the wall of a country house is a temporary replacement for a bathroom.
We will tell you how to build a summer shower with your own hands. The article we presented describes in detail all types of structures popular among summer residents. Instructions are provided for constructing homemade shower stalls that increase the level of comfort of country life.
The content of the article:
Popular summer shower designs
The design of a shower for a dacha, which is usually installed near the wall of the house or at some distance from the building, is quite simple. Usually it comes down to a “volumetric tank + faucet-watering can” set. The tank is mounted on the roof of a light building, and the watering can should be no higher than at arm's length.
But we will move away from the primitive designs of a summer shower and consider various models that differ in both their external design and the method of water supply.
Curtain on a metal frame
A simple and budget solution is a frame-type product. It consists of a metal frame, in the upper part of which a water tank is attached. The container can be made from a barrel, but factory models are most often initially equipped with a flat tank with a volume of 100-200 liters.
Water enters the tank in two ways: pumped from a water supply (well, well) or carried manually in buckets. The second method is labor-intensive, but sometimes it is the only possible one.

The metal frame can be sheathed with sheets of polycarbonate, plywood or corrugated sheets and equipped with a door, then it will turn into a closed shower stall. It is easy to move from place to place and install where it is currently needed: in the garden, in the garden, near the house, summer kitchen or pool.
With the technology of constructing a summer shower covered with polycarbonate sheets read the article, dedicated to the analysis of options and construction of similar structures.
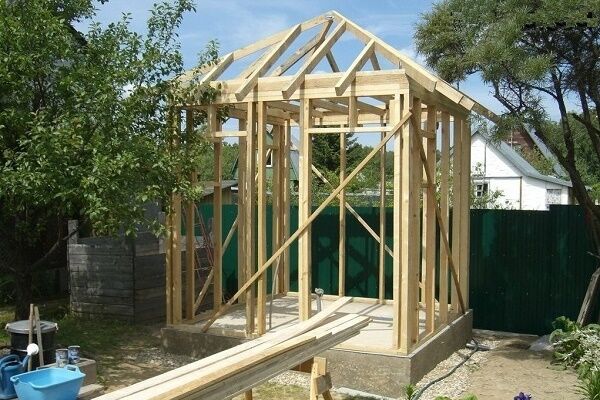
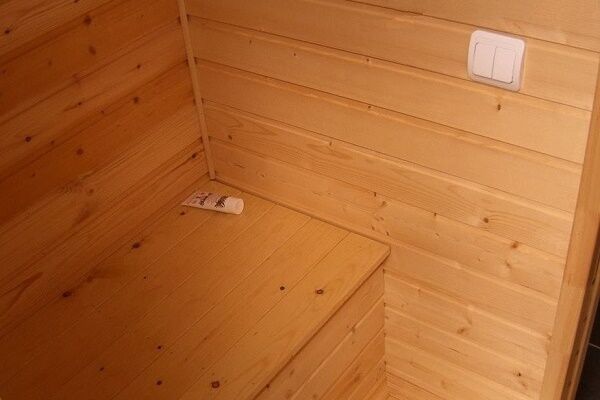
Light wooden structure
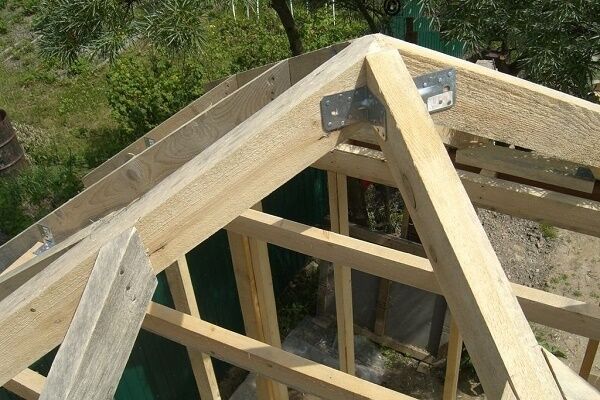
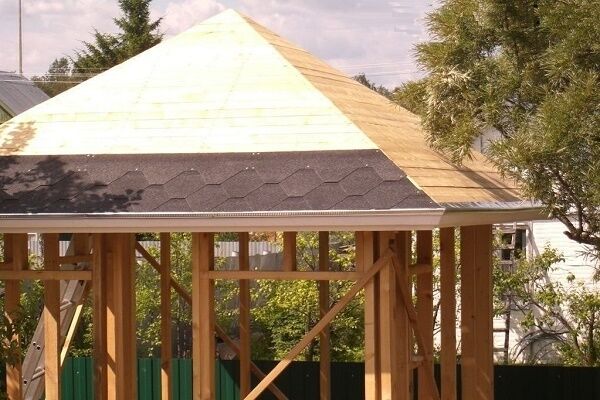
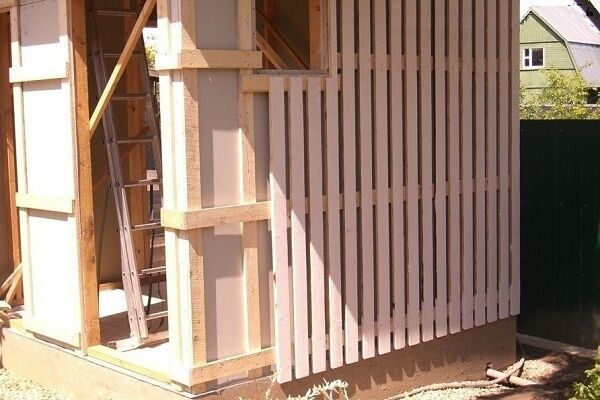
A building covered with clapboard, boards, timber or siding is a more serious decision. If the project is expected to last several years, it is recommended to make a foundation that will ensure stability and reliability. Sometimes metal posts dug into the ground are enough, on which the entire structure rests.

You can get creative and create a unique structure that is both simple and stylish.

If a fully landscaped house is built on the site, wooden summer shower can be attached to the wall of the house, organizing the water supply.

Wood is valuable because it goes well with brick and wooden houses, fences, and green spaces. In addition, it belongs to soft, easy-to-process materials, so you can take care of creating a comfortable summer shower in your dacha yourself.
As you may have noticed, to create a comfortable cabin you do not need complex drawings and diagrams - just a small amount of wooden parts and a little imagination.
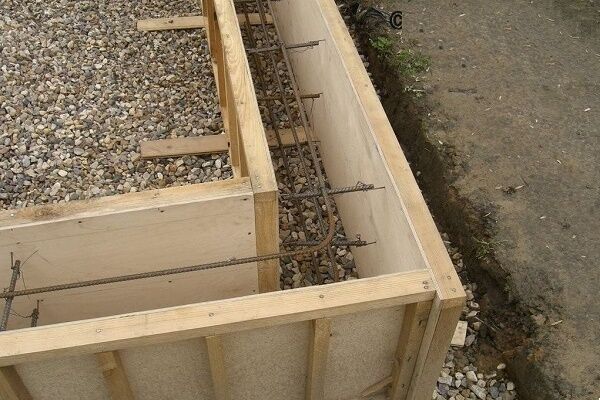
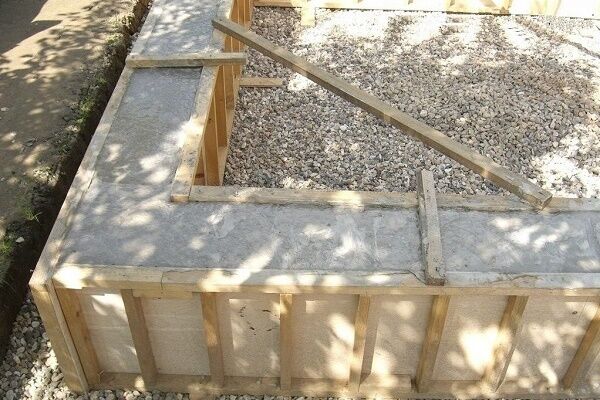
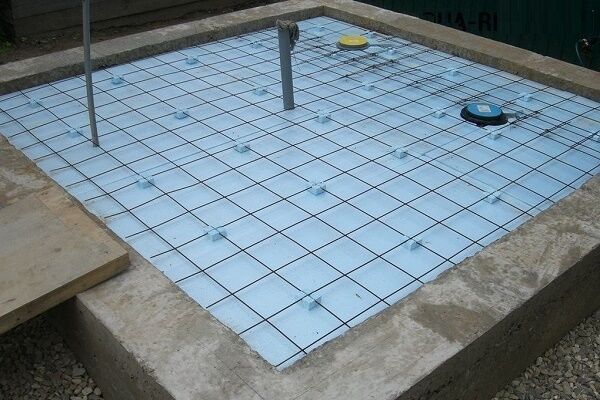
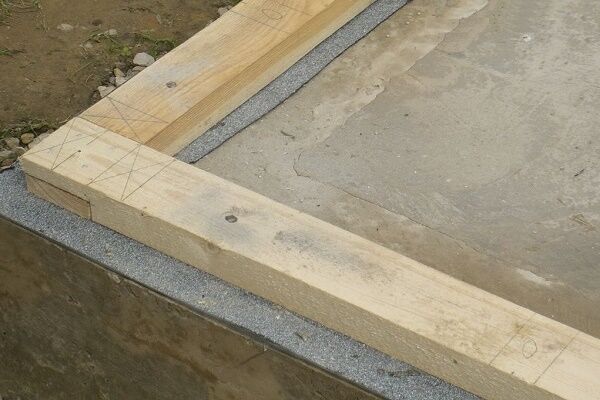
Capital building with tank
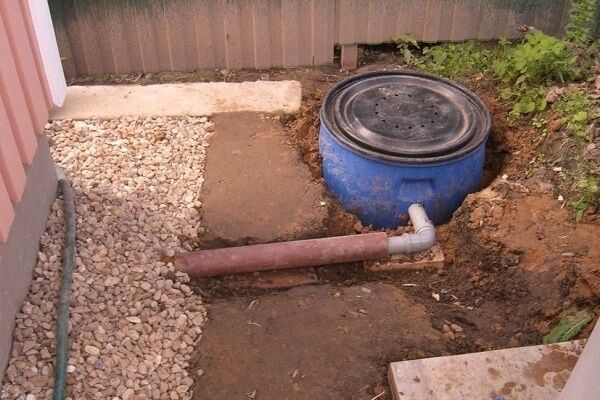
If you live outside the city permanently or spend more than six months, a permanent structure made of brick, timber, or foam blocks will come in handy. In order for the shower to be provided with water, the storage tank must be connected to the water supply system, and to use the room even in October or early spring, heating can be done.

When cold weather sets in, the system must be completely emptied of water, otherwise it will freeze and damage all equipment.
An exception is made only if the building is insulated - for example, it is an extension to the house and is partially heated by a common heating system.

When installing heated shower All parts can be purchased separately or you can buy a ready-made model.

Before building a building, it is better to draw up a project - at least draw a diagram with all the significant elements, calculate the consumption of materials, and draw up an action plan.

When drawing up a project, it is worth remembering that the more serious the construction, the more expensive it will be.
Two-section building with toilet
One of the popular options is a shower combined with a toilet. For ease of use, the two bathroom rooms are separated by a thin plank partition.
There are two ways to register:
- one door and equipment for a small “dressing room”;
- two doors leading into the premises from the street.
In the first case, extra space will be required to arrange the vestibule, in the second - the cost of a second door.

The shower is equipped according to standard principles: connecting water from the water supply or installing a storage tank.
The design of the toilet may vary. Some summer residents are satisfied with the traditional option with cesspool, others, more economical, do peat toilet. Sewage waste processed with peat can be used in the garden as organic fertilizer.
Practical owners are unlikely to use the territory of their summer cottage for the construction of several important facilities - a shower, toilet and change house. Most likely, they will create one building for them, but with different entrances.

The choice of size for each room depends on the availability of free space. Usually there is a toilet in the smaller compartment, and a shower in the larger one.
The following photo selection will introduce you to one of the options for constructing a complex shower-toilet structure:
The complex bathroom for the dacha is almost ready, all that remains is to sheathe the walls and finish the building inside:
Design details and instructions with a step-by-step description of the process of constructing a complex building are given here. We recommend that you read the useful material.
Open options without fencing
If a country house has a stationary shower or bathroom where you can wash yourself comfortably, the summer shower is a lightweight open-type structure, the main functional part of which is a watering can with a tap. It is installed directly on the street, near the house, pool or in the garden - depending on the purpose or ease of use.

Thanks to the ease of implementation of the project, the shower can be turned into a decorative country art object.

To install an open summer shower, a minimum of building materials is required.

One of the advantages of open models is their location right in nature: among flowers and trees, near a pond or vegetable garden.

The easiest way is to install a pipe in the wall of the house and equip it with a watering can.

If an open type of shower needs to be temporarily blocked, you can use a portable screen or a lightweight aluminum frame covered with a piece of fabric.
Shower Construction Instructions
As a simple example for self-production, we present an open model that can be installed in any area convenient for use. This shower is not designed for full washing.
If there is a need to use it as the only alternative to a bathhouse, a partition should be erected to shield the person taking the shower from prying eyes. Let's look at how to make a wooden country shower from boards.
Choosing a place on a summer cottage
The location for installing the lightweight structure must be selected based on the purpose of use. If you need it to rinse off after swimming in the pool, it is logical to install the structure directly on the lawn or area near the pond.
For washing after working in the garden beds, it is better to install a shower directly in the garden. The universal device is located as close to the house as possible - so that any family member can see whether the shower is occupied.

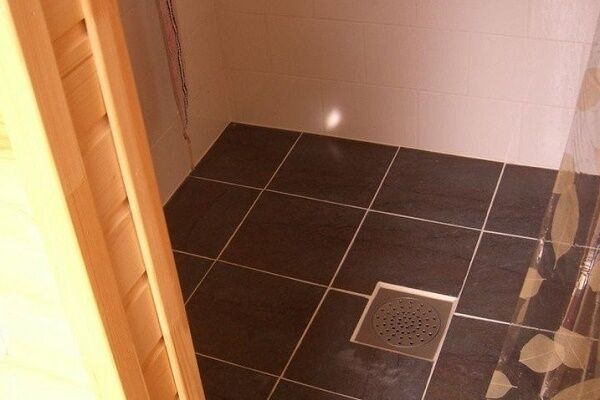
When setting up a shower, do not forget about organizing water drainage. Sandy and sandy loam soil, on which lawn grass often grows, is natural drainage and does not require additional landscaping.
But clay soil does not allow water to pass through well, so it requires the additional installation of a tray with a drain mechanism. The used water flows into a pipe leading to a ditch or filter well.
Drawing up a project and drawing
Having chosen a place, you need to draw up a design diagram. We offer a ready-made option, which can be improved if necessary - supplemented with a pallet or screen.

Installing the holder with the water supply pipe is secondary; first you need to correctly calculate the base. For ease of calculations and creating a template, you can use a sheet of Whatman paper.

The parts are assembled in the following order:

If the project is drawn up correctly, assembly will not take much time.
Preparation of tools and materials
Wood was chosen as the main material for construction, so the set of tools will be standard:
- a hacksaw or jigsaw for sawing boards into fragments and cutting out rounded parts;
- sandpaper for grinding the surface of all elements;
- screwdriver for tightening screws.
You may also need a hammer, screwdriver, pliers and wrenches to assemble the shower equipment.

Material:
- boards 21 mm thick;
- metal corners;
- self-tapping screws;
- pipe, watering can, shower faucet.
As you can see, the set is quite budget-friendly - if you wish, you can easily spend 1000 rubles. It is better to prepare all the tools in advance. Lumber is bought at a construction supermarket, shower equipment - at a plumbing store or a special department for a summer residence.
Assembling a wooden structure
First we cut and assemble the base using four boards. The surface of the boards is corrugated so that water drains or evaporates faster. We cut the boards so that the outside is a circle and the inside is a square.

We prepare two parts so that we can then place one on top of the other.

We connect the two parts of the base with self-tapping screws.

We install the stand between the metal corners and screw it on. We assemble the top covering from thin boards or bars.

We secure each strip along the edges with self-tapping screws.

The wooden base with a stand for attaching the shower is ready.
Installation of watering can and tap
All that remains is to fix the plumbing equipment on the rack - a curved pipe with a watering can and a tap that regulates the water supply.

You can use a regular watering hose, equipping it with a fitting for quick attachment to the pipe.

By connecting the hose and turning on the water, we test the operation of the shower. If everything is installed correctly, water should flow without interruption, with sufficient pressure.
A guide for do-it-yourselfers, which describes the step-by-step process of making a shower tank, is given in the next article, in which you will find a lot of useful tips.
Conclusions and useful video on the topic
Several interesting ideas for arranging a country shower are presented in the following videos.
Video #1. Beautiful combined shower/toilet bathroom in a marine style:
Video #2. Bright design with shower for relaxation:
Video #3. Assembly of a polycarbonate cabin:
To freshen up in the country, it is enough to design and install a light wooden structure or, if desired, a more serious structure with a toilet and water heating. The construction of a shower is not much different from the construction of another household building, however, it is necessary to take care of the water supply and sewage system.
Tell us about how you or your neighbors built a shower in their own summer cottage. Share important technological details not covered in the article. Please write comments in the block below, ask questions, post photos on the topic of the article.


When I decided to install an outdoor shower, I didn’t build a special building for it. In the courtyard there is an unfinished summer kitchen, without interior decoration, which we practically never use; it is quite warm. Half of the kitchen was converted into a dressing room and shower room, there was still enough free space left. Maybe someone will find my idea useful.
Before installing an outdoor shower, you need to determine the location on the site. We need to think about it so that it does not disturb anyone, but is not too far away. And then everything depends on your imagination and financial capabilities. It is possible to erect permanent structures made of brick and stone, and it is also possible to install temporary shower facilities for one season. For example, I have a polycarbonate shower and a barrel placed on the roof of the building, the water is heated in the sun.