Installing a Shower Tray: Installation Instructions
Do you want to save space in your bathroom by installing a shower? The bathroom is a place of relaxation that should be practical and aesthetically pleasing, right? Are you planning to do all the installation work yourself, but are you confused about installing a shower tray and connecting plumbing?
We will show you how to cope with this task - the article discusses the important points that you will encounter during installation. We also paid attention to the features of pallets made of various materials, describing in detail the installation process of each option.
To help the novice plumber, we have selected photographic materials demonstrating important nuances, and a video describing in detail the assembly and installation of a compact shower cabin.
The content of the article:
Types of shower trays
Manufacturers are ready to surprise the most sophisticated owner, offering many shapes, sizes and design options shower trays.
One of the first classifications is the division of models by shape. These can be square, oval, round, triangular, rectangular products.
It is worth choosing the shape and size of the tray that will distribute the space in the bathroom as ergonomically as possible with the appropriate level of convenience.
Another classification is related to the material used. Today you can purchase a pallet from:
- cast iron;
- acrylic;
- marble;
- ceramics;
- become.
In this case, the tray can be installed in different ways: using a metal frame, a pedestal or a flat surface (for ceramic models).
It is worth noting that marble products are very fragile and can be damaged by impact during the installation stage, so all work must be done as carefully as possible. A ceramic tray can also crack from an impact.
Each manufacturing material has its own characteristics:
- cast iron and steel models may be uncomfortably cold in the morning;
- acrylic warm to the touch, but quite fragile;
- quaryl - these are the same acrylic products, but with the addition of quartz dust, due to which the booth becomes stronger and more durable;
- marble the trays have a spectacular appearance and quickly warm up, giving a pleasant tactile sensation when in contact with the skin;
- ceramic models heat up slowly, but are practical for everyday use and durable.
Prices for ceramics and stone products are significantly higher compared to other models of shower trays.
Pallets also differ in depth. When choosing, you can use the following guideline: very flat (6-10 cm), medium (10-18 cm), deep (25-35 cm).
Choice shower cubicle size or pallet should be based on the dimensions and configuration of the bathroom.
Pallet Installation Instructions
Installation rules often depend on the material from which the pallet is made, so we will consider four popular options. Acrylic and steel modifications are more common, while cast iron, marble and ceramic are less common.
The standard cycle of work for installing and connecting shower trays includes a number of traditional stages:
After installing and fixing the pallet, you can safely proceed to the finishing stages of work:
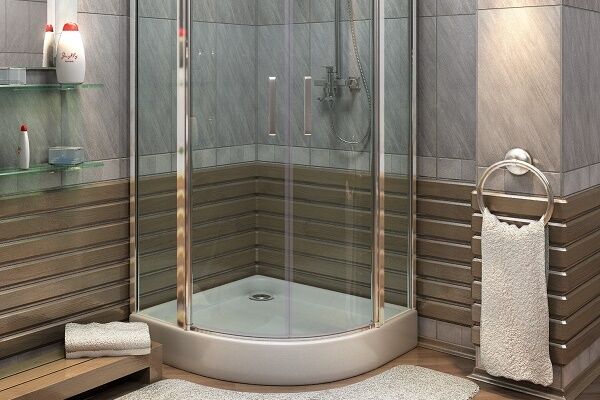
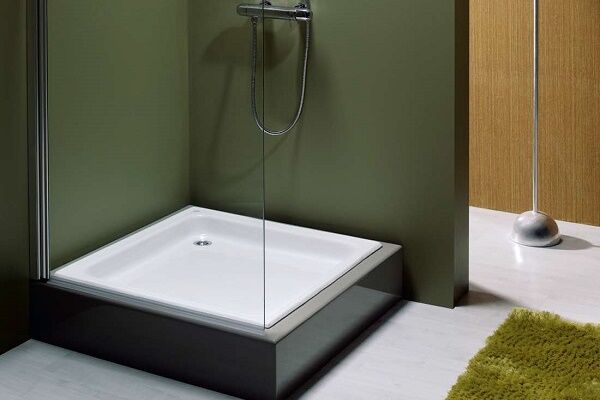
No. 1 - installation of acrylic models
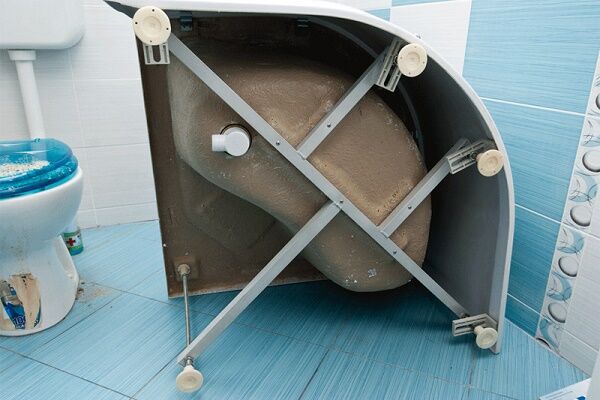
Acrylic solutions are the lightest, most affordable, and come in a variety of shapes and sizes. Such models are equipped with brackets, legs and other fittings that help to install and secure the pallet to the base.
A design flaw in many cheap models is the lack of reinforcing support under the bottom, so when choosing, you need to pay attention to ensuring that the bottom is reinforced.
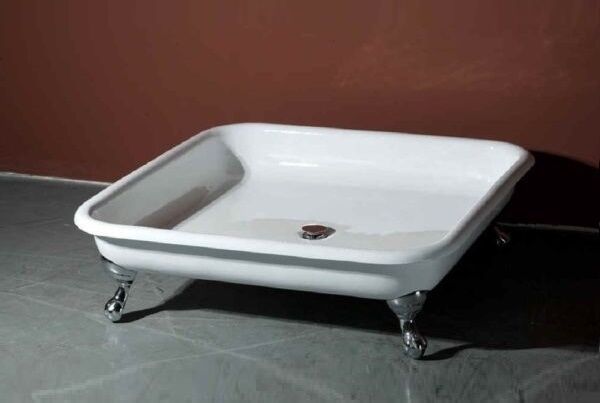
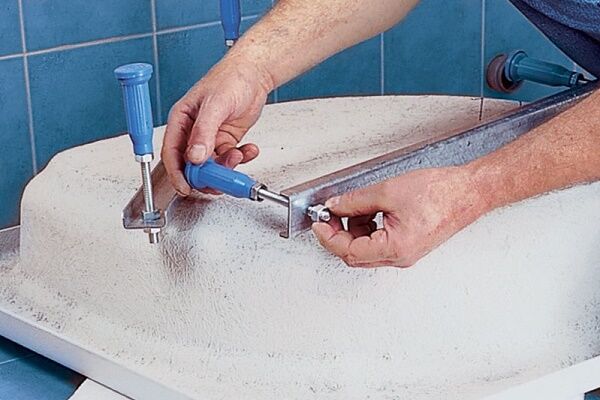
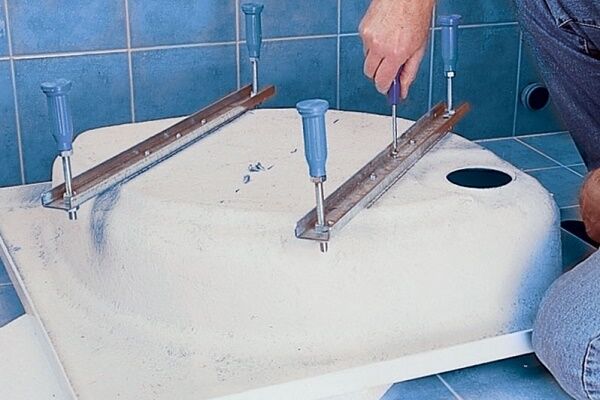
Step 1. Installation of legs. Depending on the model, the kit may include from 3 to 5 supports.
A number of products use a support frame based on plastic or metal. The holes for mounting the legs will be located in this frame.
When screwing in the supports, you need to ensure that the length of the legs is not less than the height siphon. Also, all supports must be screwed in to the same height (then you can adjust the horizontal position of the pallet using a level)

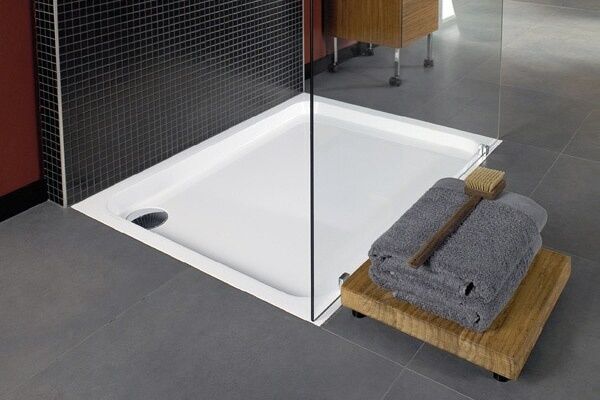
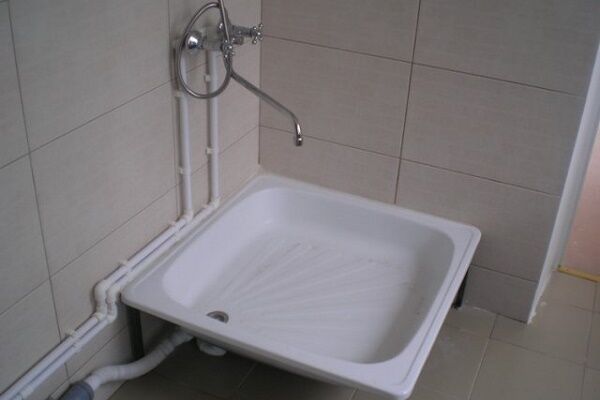
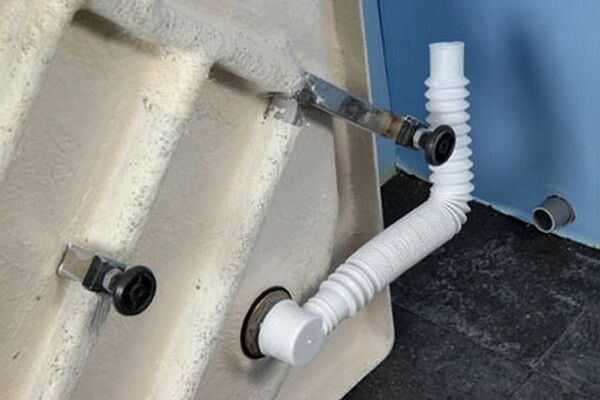
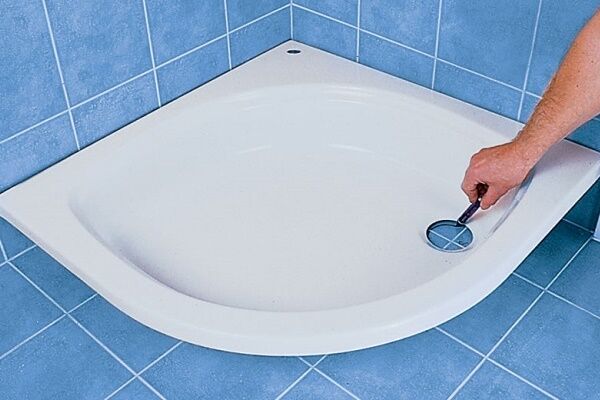
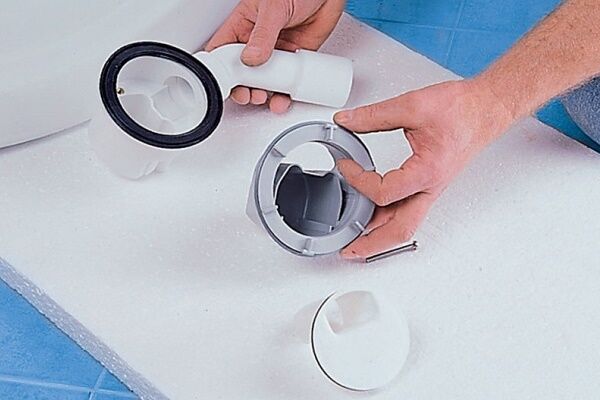
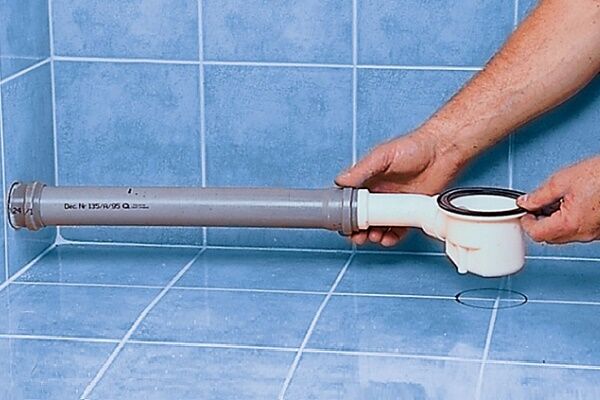
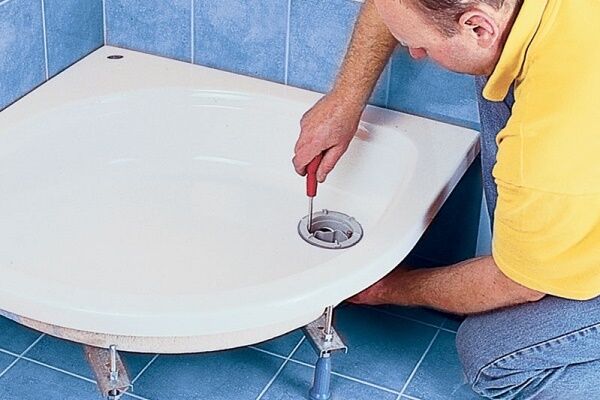
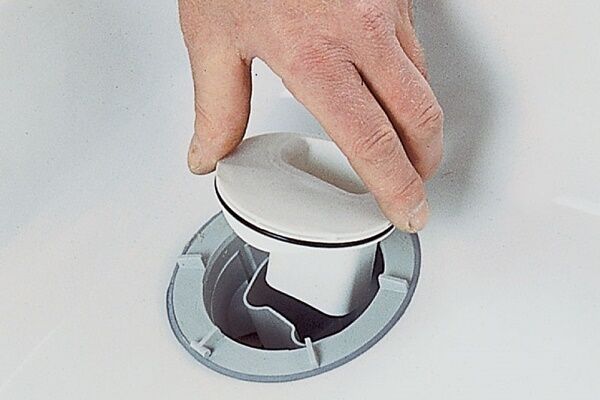
Step 2. Installation of the drain system. Necessary connect the pan to the sewer, placing the product on its edge. A complete bushing is inserted inside and is used for connection.
The siphon pipe is placed on the protruding end of the sleeve. To prevent leaks, the joints are coated with glue. You can use epoxy glue or epoxy plasticine. Connect the pipe and the bushing, and seal the connection with sealant on top.
Some models of shower cabins may use a connection system with paronite or polymer gaskets. In this case, there is no need to use glue. Place the tray on the legs, making sure that the edge of the siphon does not touch the floor.
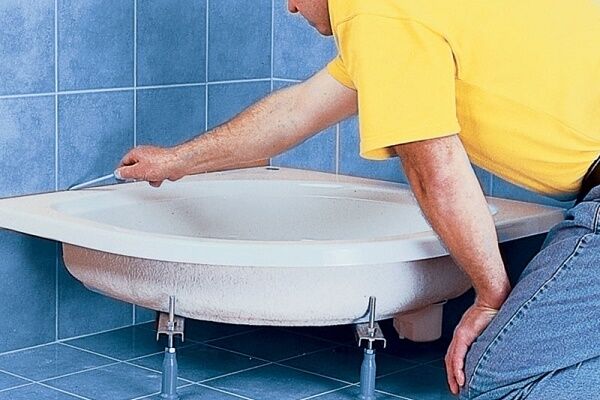
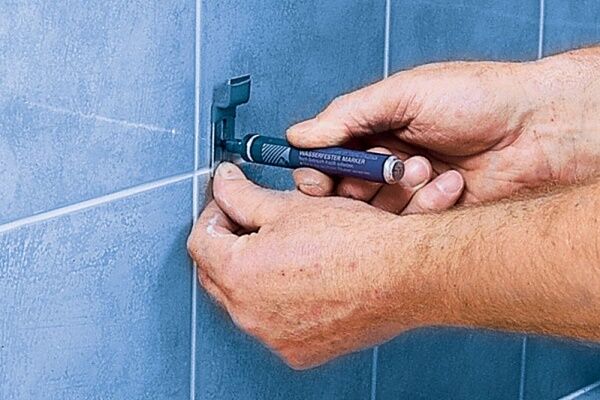
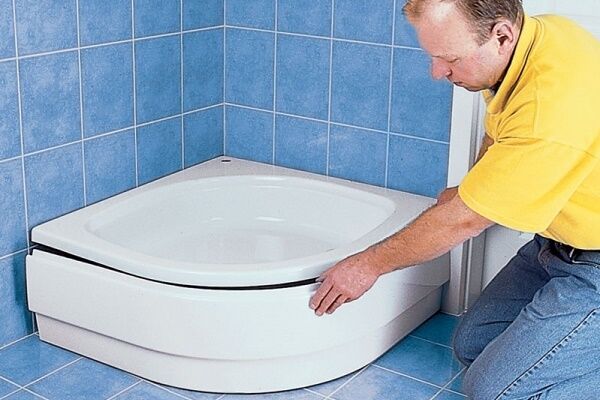
Step 3. Adjusting the tray position. Now it's time to adjust the horizontal structure. To do this, we rotate the legs, placing a level on the walls of the tray (the grooves in which the shower enclosure will be mounted).
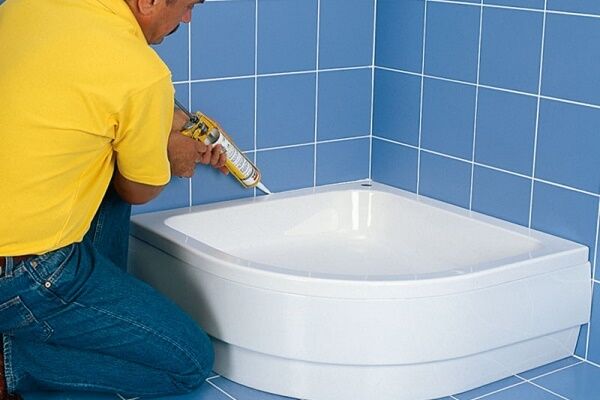
Horizontal alignment must be checked on all sides of the pallet. If the product is installed against a wall or corner of the room, then it is necessary to lubricate the surfaces in contact with each other with glue and press firmly.
You need to wait until the glue dries, and then strengthen the seal with sealant, applying a layer of it to the contact point between the sides of the pallet and the wall.

Step 4. Siphon connection to the outlet pipe of the sewer system, installation of a decorative casing, which comes complete with the pan.
It is recommended to use the shower cabin 6-10 hours after the sealant and adhesive have completely dried.
No. 2 - installation of a cast iron pan
The installation of a cast iron product is similar in steps to the installation of an acrylic tray.
The fundamental difference lies only in the design of cast iron models:
- Cast iron is a very durable and impact-resistant metal.There are no reinforcing elements in its design, and the legs are an integral part of the pallet and are cast simultaneously with the body.
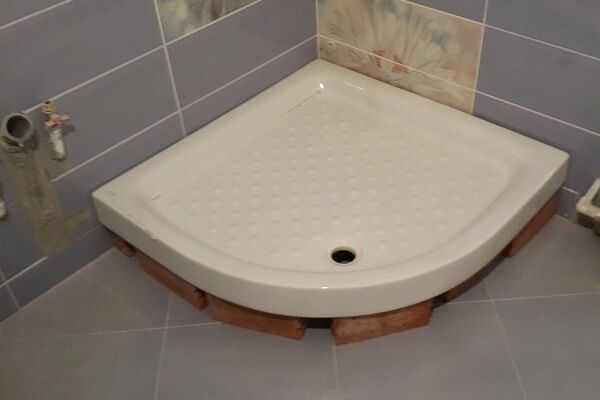
- To level such a model horizontally, you will have to place steel strips under the legs or other objects that will prevent the floor covering from being pressed through, because The cast iron pan has significant weight.
- The sides of the cast iron product are not glued to the wall of the room.
But how to secure the pallet so that it does not move off the plates installed under the supports?
This problem can be solved by cementing bosses that will frame each leg, preventing movement. An ordinary matchbox will do for formwork.
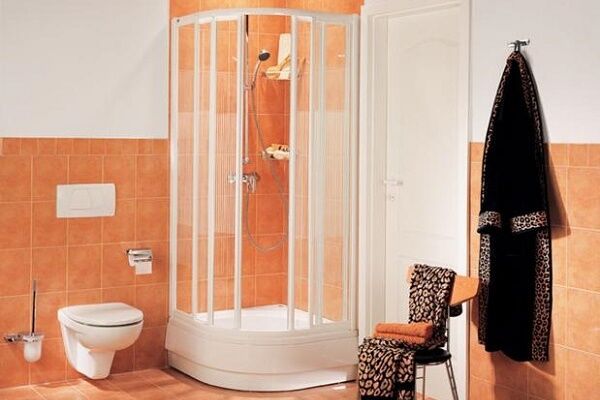
It is worth noting that assembled shower cabins are not equipped with cast iron trays. They are usually used with simpler fences, including curtains, screens, and other lightweight materials that do not require precision, so as not to fit them to the geometry of the pallet.

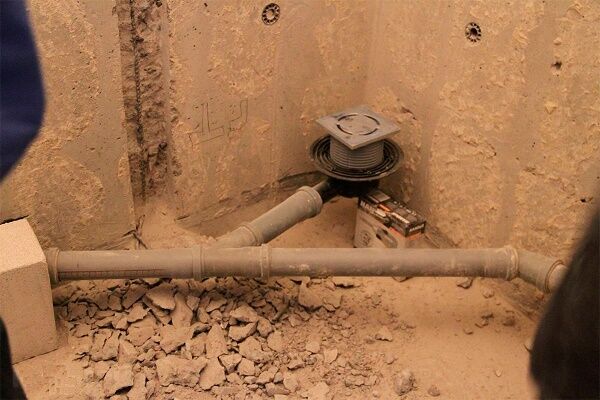
Sometimes the height of the legs of such a product is not enough to place a drain siphon under it. In this case, you have to prepare a special parapet.
The procedure is not difficult to implement. It is enough to lay bricks around the perimeter of the pallet or erect a concrete collar - this will be the parapet. It must have space for installing a siphon and sewer outlet.
Then you need to level the pallet using a level, placing plates under the legs, cementing them with cement bosses. To hide the parapet and the space above it, you can use tiles or mosaic modules.
No. 3 - features of installation of steel products
Steel models are produced using stamping, so making a one-piece structure from a tray and legs is quite difficult.
Steel products are equipped with a stand. The plant that produces steel pallets also produces corresponding stands for them.
They have a rectangular or square shape and are a welded structure made of profiles containing threaded bushings. Threaded feet are screwed into them, with which you can adjust (level) the pallet.
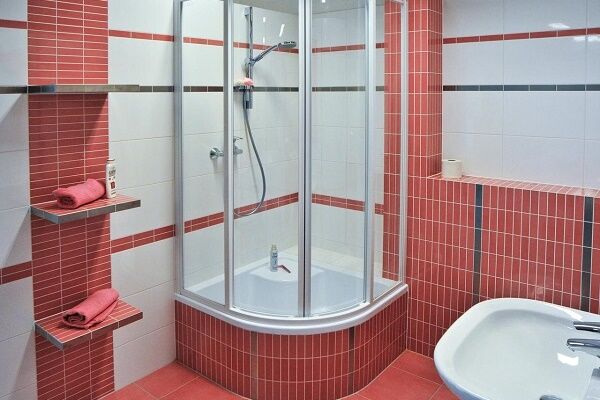
Steel trays are often included with factory shower enclosures. It is also a reliable option for replacing a worn out acrylic tray.
If the tray is installed as an independent product, then a cement backing or pedestal is mounted on the bathroom floor. Their height must be sufficient for the location of the siphon and pipe connection.

The contact points between the pallet and the wall can also be glued and sealed, as when installing an acrylic product. The construction of the pedestal will be discussed in the next paragraph.
Details about the assembly and installation of steel models are written in this article.
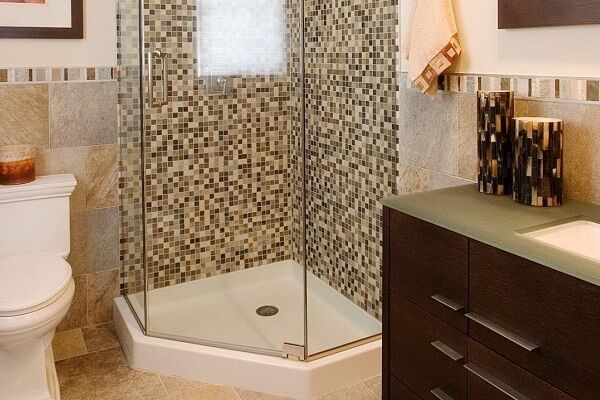
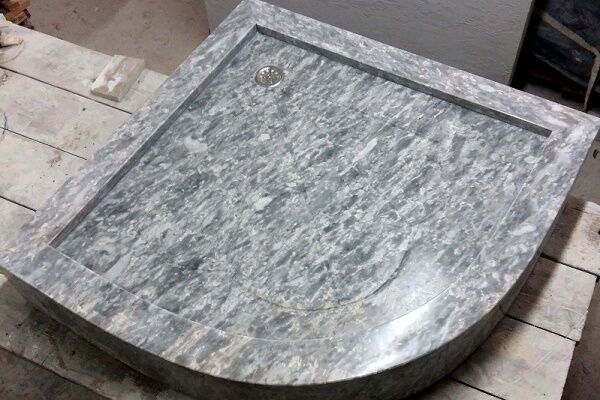
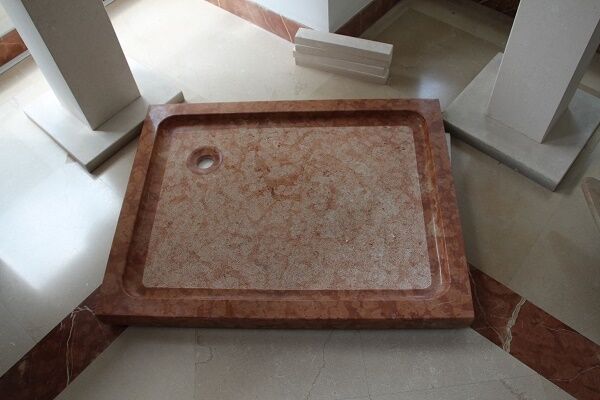
No. 4 - installation of ceramic and marble models
Ceramic and marble sanitary ware are trending today. Shower trays are no exception. Such products are durable and massive, so they do not require the use of legs or reinforcing elements.
The installation method is selected depending on the design of the pallet.
There are two options:
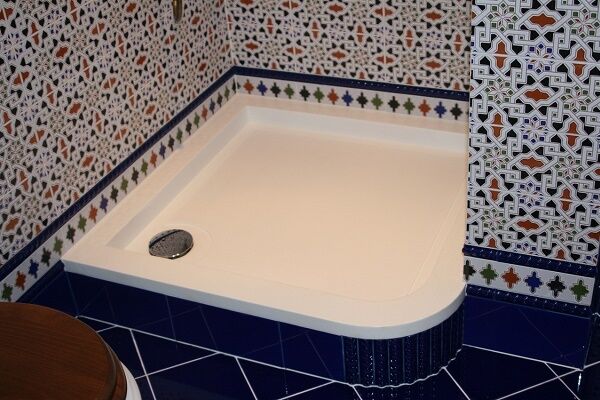
- Niche design. Many ceramic models have a niche in the tray cavity for installing a siphon and draining the sewer system. Such a tray simply needs to be connected to the sewer and installed directly on the bathroom floor without any additional steps. All that remains is to attach the walls of the shower stall.
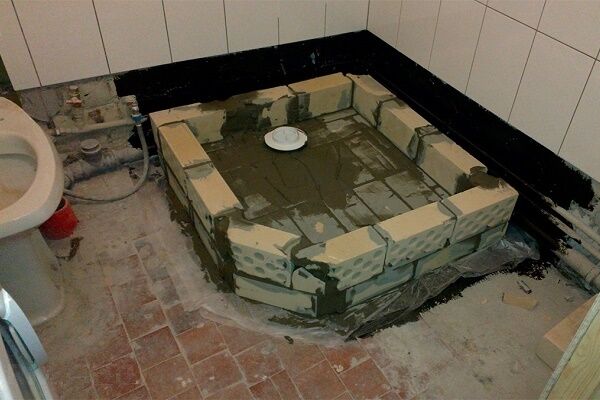
- Monolithic option. In this case, in order to connect the drain hole to the siphon, you will need to build a pedestal. Inside it there will be space for connecting to the sewer.
The construction of the pedestal occurs as follows. We apply a layer of waterproofing to the area where the pedestal will be built.
To do this, you can use liquid rubber, roofing felt, polyurea or other composition. You must wait for complete polymerization if you used a liquid product.

Next, create a layer of cement screed with a horizontal surface (use a level). We wait until it dries completely.
Inside the contour of the pallet we make brickwork with a height that would be enough for the normal location of the siphon. It is necessary to provide a cavity for the drainage system.
Connecting the drain hole tray with siphon, the reverse end of which is connected to the outlet tube. Apply a layer of cement mortar on top of the masonry.
Next, we install the tray on the pedestal so that the siphon and outlet are in the places designated for them. Finally, you need to line the pallet with tiles.
DIY pallet construction
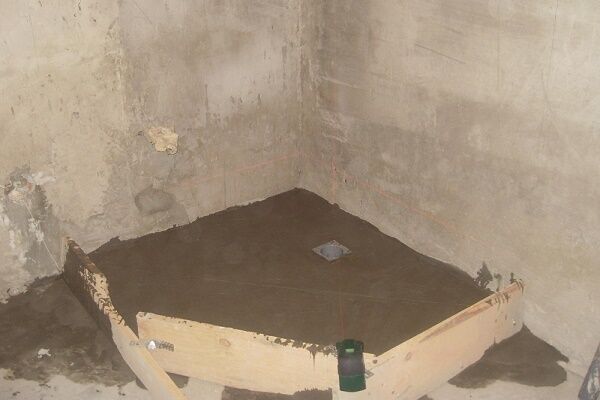
The process begins with preparing the future space for the shower stall.
Step 1. To begin with, the installation area is waterproofed, as in the previous paragraph. This will help protect the walls and floors from mold, mildew and dampness.
The process of making a pallet yourself includes the following steps:
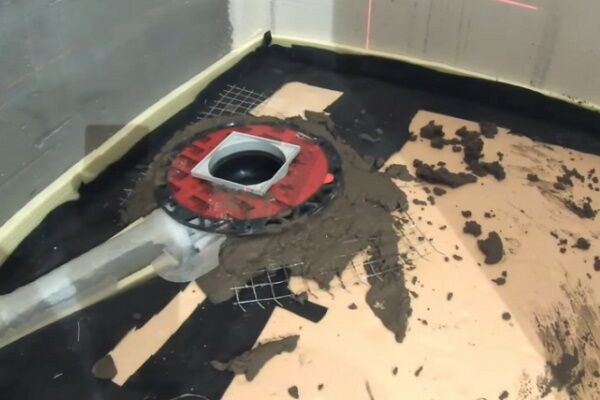
Step 2. Preparing the drain. A ready-made drain assembly can be purchased at a hardware or plumbing store. It is also called a shower drain. It must be of high quality.
The drain hole is immediately connected to the sewer system. The installation must be very tight, so you can use glue and sealants on all threaded connections.

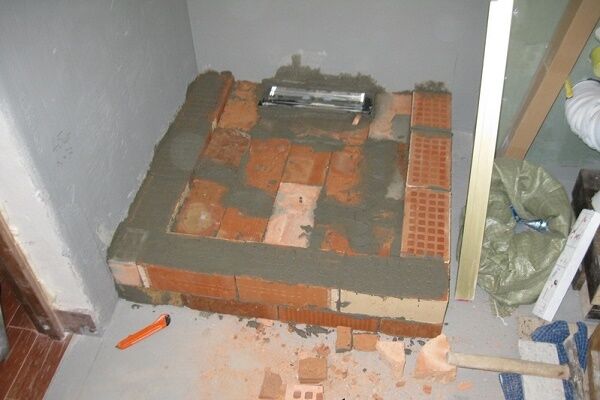
Step 3. Now you need to lay the base (use brickwork or rough screed) after the waterproofing composition has dried.
We lay the walls using silicate or ordinary bricks.Before this, you need to put a metal mesh on the base to make the structure solid.
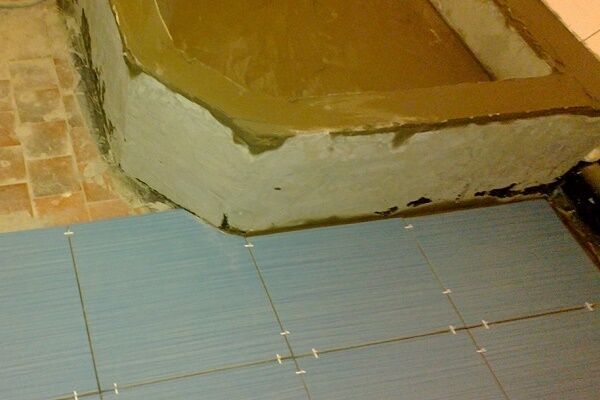
Experts recommend laying out the sides in a square, and making the protruding corner beveled. This will prevent injury from the corner and visually expand the space. After 3-4 days you can move on to the next stage.
We treat the entire base of the pallet with waterproofing material. After it dries, we apply a layer of screed over the entire surface of the pallet to hide all the brickwork behind it.
It is important that the screed has a minimum slope towards the drain so that water does not accumulate after using the shower stall. After drying, apply the penultimate layer of waterproofing.
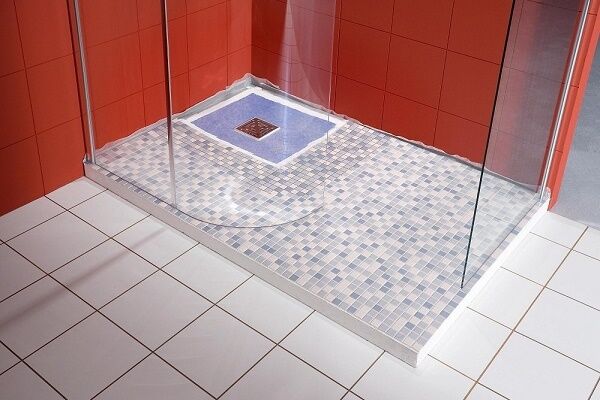
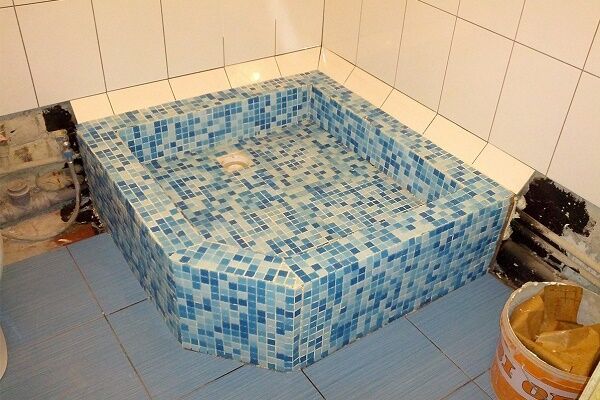
Step 4. Leveling the surface of the pallet. To do this, you can use a self-leveling mixture. We apply the final layer of waterproofing and cover the pallet with tiles. It can be mosaic or any other tile.
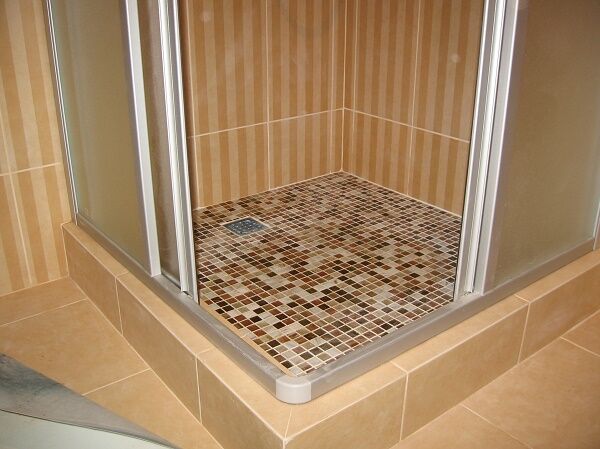
Tile or mosaic cladding
In many cases, side cladding is required to hide the mounting bases. One of the most convenient options for solving the problem is to use mosaic tiles on a plastic or glass base.
A layer of glue is applied to the base using a notched trowel. After pressing the tiles, excess adhesive must be removed immediately.
With the help of mosaic, you can cover any uneven surfaces, since it can be easily cut with construction scissors or a knife thanks to its paper base.
It doesn't matter whether you use tiles or mosaics, all seams need to be sealed. This especially makes sense when you decide build a pallet yourself.

When forming seams, use crosses. After facing, you need to grout the seams using waterproof grout and a rubber spatula. Then the remaining grout is removed and everything is wiped with a piece of cloth. After everything has dried, you need to wash the tiles.
Strengthening a steel or acrylic product
These solutions, especially acrylic ones, do not have a strong enough structure. Measures to increase strength come down to installing supporting elements, which can be bricks.

In this case, all supports in places of contact with the bottom must follow its shape. For this you can also use gaskets made of paronite or rubber.
Some are complete shower cabin models have a large fence and tray height, for the installation of which the ceiling height may not be enough. In this case, you need to make a excavation of the floor in order to install the tray and connect it to the drain.
Conclusions and useful video on the topic
Use the recommendations for installing the pallet by watching the video.
How to install a shower stall correctly:
Installing a shower tray with the right approach does not take much effort and does not require special training. If you follow the instructions, you will get a first-class installation of a monolithic pallet with the highest possible reliability.
Do you have anything to add or have questions about installing a shower tray? Share your opinion and leave comments on the publication. The contact form is located in the lower block.


When I purchased a shower stall for the first time, I was disappointed with the acrylic tray. The first six months after installation there were no problems, but then the structure became unstable. I tried to secure it additionally, but since the pallet does not have normal stiffening ribs, nothing really changed, and in the end I decided to replace it. Now the ceramic one has been in place for a year, no questions - just like the first day.
An acrylic pallet has many advantages, the main one of which is price. You just need to fasten it right away, without waiting for it to come loose.
I used to have an enamel tray. Well, he stood there and stood there until his wife dropped the shower head on him and broke off a piece of enamel. The question arose about a replacement, I thought about buying one made of stainless steel, but I couldn’t find anything sensible in terms of size and shape, the choice of such options is very limited. I didn’t install ceramics or stone, I can’t afford it. I settled on cast iron. Yes, it warms up slowly, of course, but it holds the temperature well and feels good on your feet.
Please tell me which pallet with access to communications can be installed in an apartment building so that a disabled person can use it. It is assumed that instead of a full-wall bathtub, you need to put a tray (the size of the wall where the bathtub stood was 150 by 70 cm) and a sanitary chair on wheels in it, so that a person can be moved along the tray under the shower and back. It seems that it is impossible to install a ladder without permission from the BTI; you need access to the pipes under the ladder. The sewer pipes are raised from the floor by 10cm, which means we can only build a podium, but we don’t know which pallet listed in the article can withstand such a load. We would be very grateful for your advice.