Internal sewerage: installation options in an apartment and a private house
Properly connected internal sewerage in a new home is the key to the normal operation of plumbing equipment and the absence of unpleasant odors, and professional installation of pipes allows you to maintain the integrity of new renovations in the premises.
To make the right decisions in the process of laying a sewer, knowledge about the schemes for its arrangement and the necessary materials is required. In this article we will tell you what the internal sewage system consists of and the basic principles of its arrangement.
The content of the article:
Types of sewer pipes
For domestic needs, sewer pipes are made from various materials and different diameters.
Theoretically, the wider the diameter and thicker the wall, the better the cross-country ability and the lower the risk of pipe sagging. But the aesthetics of appearance and price change the real choice of people when purchasing these products.
What material is used for manufacturing?
Their durability and peace of mind for residents depend on the material of sewer pipes.

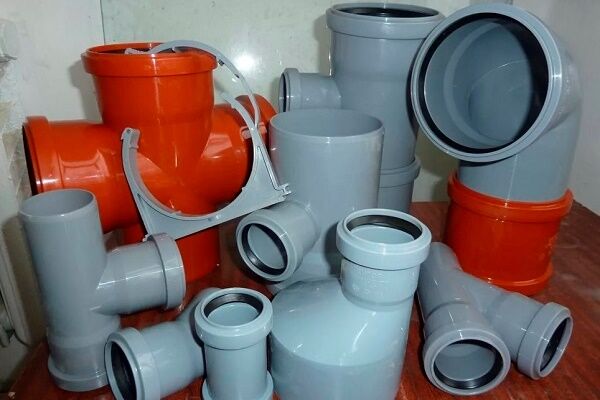
Cast iron sewer pipes have not been used in domestic sewage systems for a long time; their place has been taken by plastic analogues, which can be made from the following materials:
- Polyethylene. Sewer pipes made of this material are flexible and sag, so their joints are difficult to seal. Polyethylene pipes are used in industrial sewerage, where they are reinforced with transverse rings and used in areas with difficult terrain. They are not used in internal sewerage.
- Polypropylene. Quite expensive, but has good mechanical strength.Sewage pipes made of this material are heat-resistant, resistant to abrasive particles and tolerate cable cleaning well.
- Polyvinyl chloride. PVC pipes are almost the same as polypropylene pipes in their properties, but they are a little noisier and can bend when water flows through them over 70 degrees.
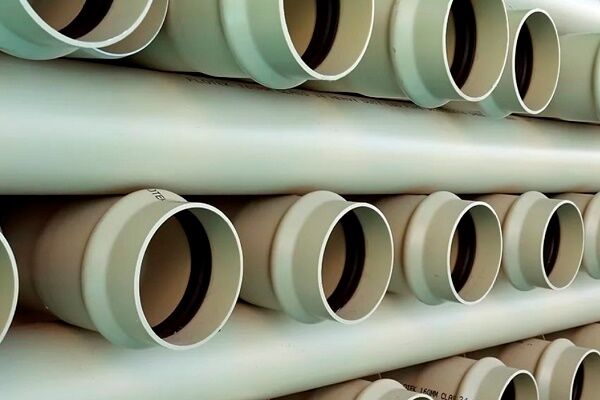
Sufficient for apartment and intra-house sewerage PVC pipes or polypropylene, which, if properly installed, will last for several decades.
Pipe diameters for sewerage
There are standard diameters of sewer pipes that allow you to combine products from different manufacturers.

The most common pipes when installing internal sewerage are 40 mm and 50 mm in diameter.
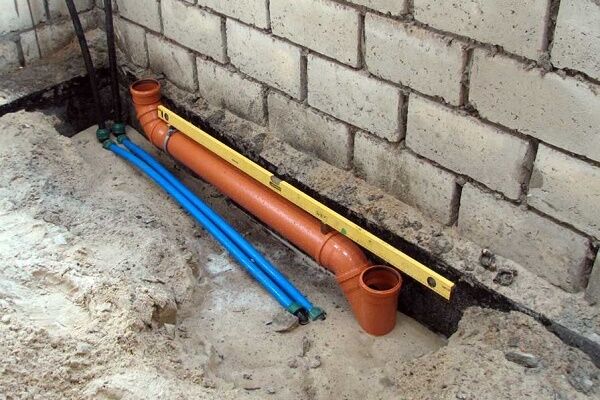
For risers, a pipe with a diameter of 110 mm is used, but in multi-storey cottages its size can be increased. To connect pipes of different clearances, adapters and pipes of appropriate sizes are used.

Pipe assembly technology
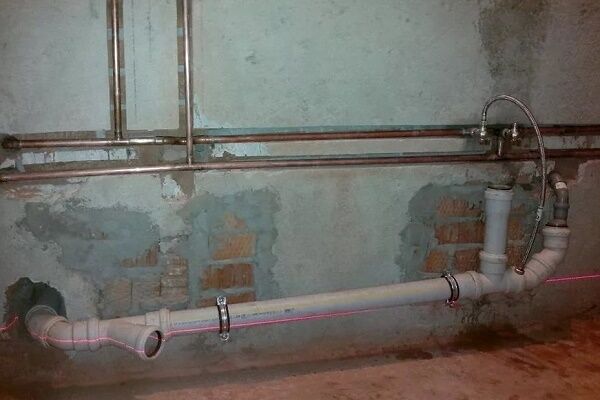
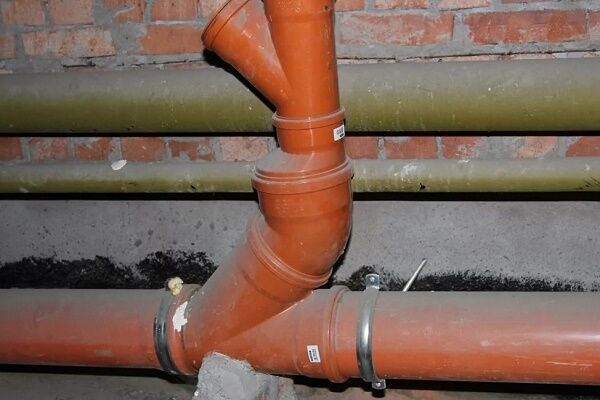
The procedure for assembling plastic sewer pipes is extremely simple and similar to a children's construction set. Each of the pipes has a length of up to 3-5 meters, and their minimum size is adjusted with a hacksaw or special pipe cutter.

The purchased pipe or adapter has two different ends: smooth and with an extension (socket). The simple end of another pipe is inserted into the socket.To seal the connection, the extension has a groove for installing a rubber ring. For better glide during installation, the seal can be lubricated with a thin layer of silicone.
It is necessary to lubricate the rubber ring with sealant only during final installation of the system, and not during the fitting process.
Calculation of the angle of inclination
The peculiarity of internal sewerage is that both insufficient and excessive slope of pipes leads to their clogging. With a slight slope, solid particles settle to the bottom without being washed away by a weak stream of water.
With a large percentage of slope, clear liquid quickly leaves, and food particles remain and harden on the walls, which over time narrow the lumen of the pipe. The maximum permissible slope should not be more than 150 mm per meter of pipe.
Compliance with the standards for horizontal installation of pipes leads to a “self-cleaning” effect, in which solid particles are washed away by the flow of water into the riser, and they do not settle on the inner wall of the sewer.

The indicated slope values are calculated per one meter of pipe, so if a three-meter pipe with a diameter of 50 mm runs from the sink in a house, then the difference in its levels at the sewer riser and at the junction with the siphon should be at least 9 cm.
For more information about calculating the slope angle of sewer pipes, read this material.
Why do you need a water seal?
The smell of sewage remains in pipes and risers due to a hydrophysical phenomenon such as water seal. This is a water plug that forms in the siphon due to the drained water.It prevents putrid smells from entering the bathroom.

If the sewer pipes have insufficient permeability, then during a massive drainage of water the water seal may fail. At the same time, due to the siphon effect, all the water leaves the bend, and putrefactive air enters the room from the sewer.
Internal sewerage of a private house
When arranging and designing the internal sewage system of a country house, errors and shortcomings may occur, which are accompanied by the need to redo installation work that has already been completed.
Such situations can be minimized using the following instructions and rules for planning and assembling the sewer system of an individual house.
Main points of arrangement
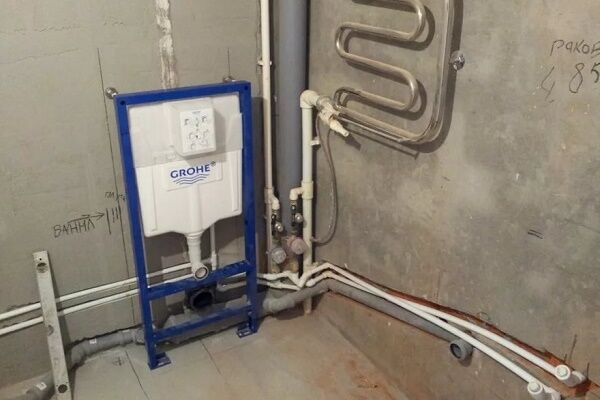
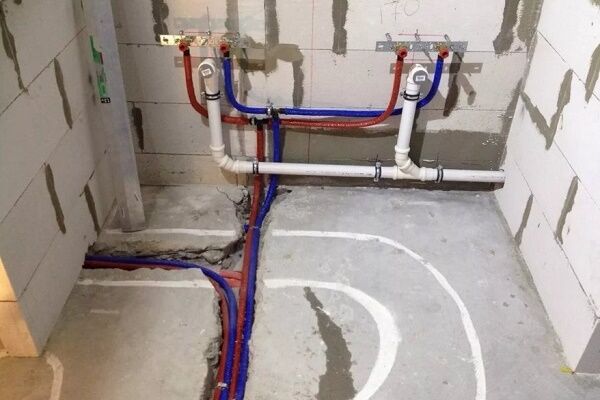
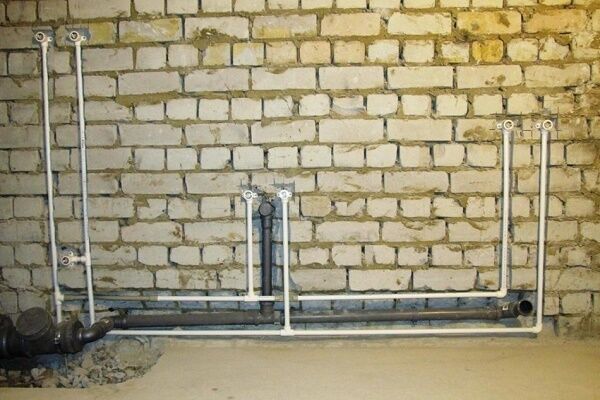
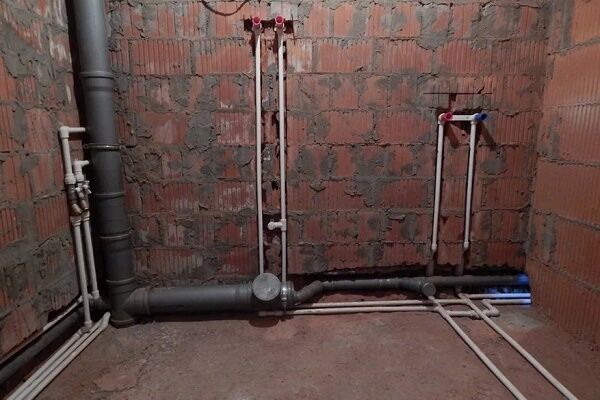
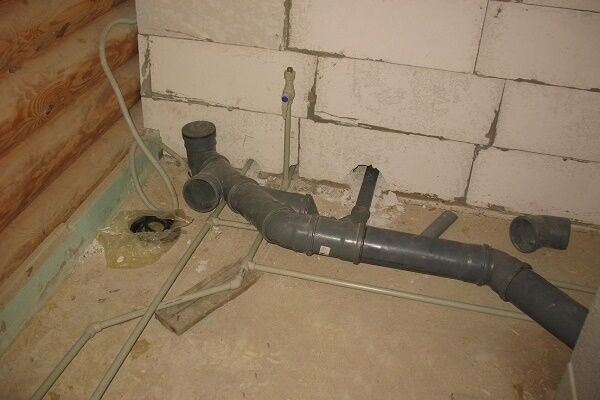
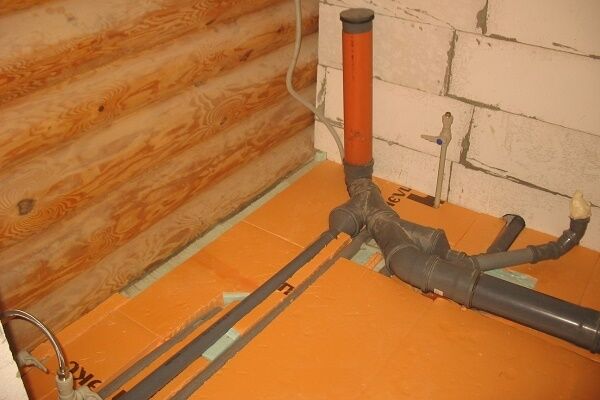
The internal sewage system of a house takes the form of a complex of plastic risers, pipes and connecting parts, which is used to drain wastewater from plumbing equipment and other devices that use water.

The upper part of the riser is installed above the roof of the house and is equipped with a special lid or valve that allows air to enter the pipe when water is drained to prevent the siphon effect and failure of the water seal.

A ventilation ring scheme is also possible, in which the far edge of the horizontal outlet pipe is connected to the riser above the drainage point.
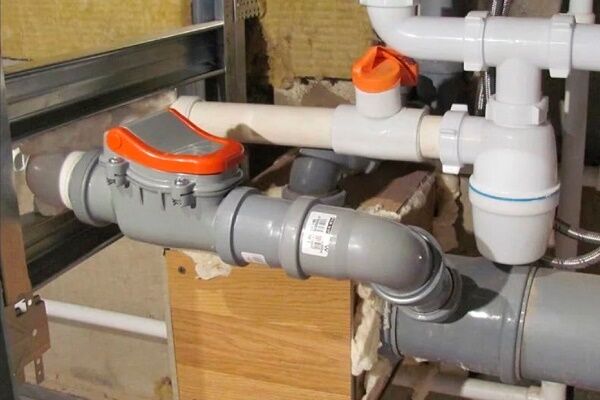
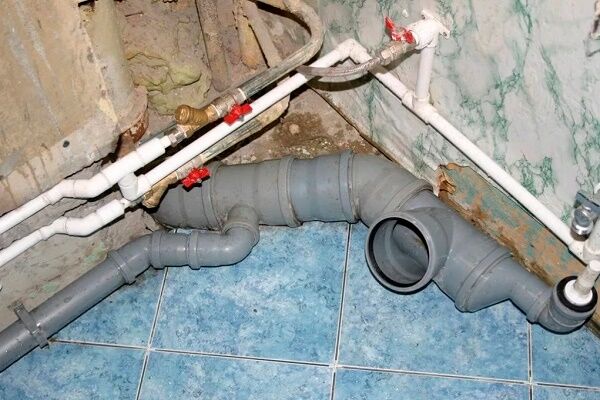
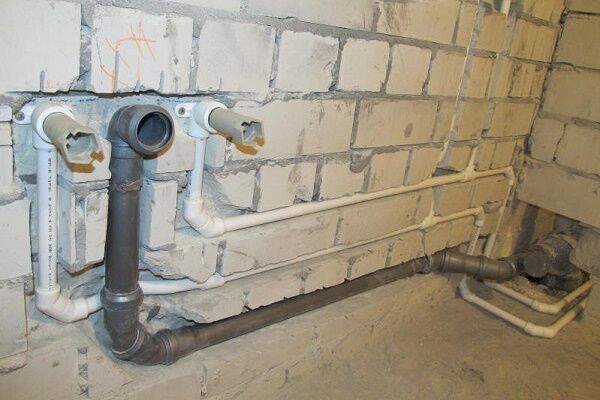
The riser is led out of the house through the basement or underground space to the street into the well. From the vertical pipe there is a plastic wiring to the toilet, sinks and other equipment. Siphons are located between sewer pipes and plumbing fixtures, which prevent unpleasant odors from entering the room.

Circuit Design Stages
If the layout of the house is not made by a specialized design organization, but by the owner himself, then he should plan the location of the kitchen, bathrooms and sewer lines himself.
A preliminary analysis of needs will allow you to subsequently decorate the rooms as you want, and not as circumstances force you to do.
The procedure for designing an internal sewage system is as follows:
- Take a house plan on a plot of land and determine the location of the drainage well. If the plumbing will be located on several floors, then the plan should be floor-by-floor.
- Mark the location of the vertical risers.
- Draw the location of all equipment that requires sewer lines.
- Draw horizontal pipes running from the equipment to the risers.
- Determine the diameter of the riser and the length of the fan pipe.
- Analyze the need to purchase plastic elbows, tees and adapters.
- Consider the possibility of concealed sewerage and the need for decorative boxes.
In accordance with the drawn up diagram, the entire internal sewage system will then be installed.The more carefully the plastic wiring diagram is planned, the fewer problems there will be during its installation.
Planning calculations
Making a graphic representation of the internal sewerage system of a country house is the key to avoiding major engineering mistakes. To work out small details, an accurate calculation of the parameters of the sewer system is required.
Therefore, it is necessary to take the already drawn diagram and analyze the following parameters:
- calculate the length of horizontal plastic pipes and the possibility of meeting their slope standards;
- calculate the required number and diameter of seals, connecting elements, adapters;
- determine whether pumping equipment is required for the normal functioning of the sewer system;
- calculate the maximum simultaneous flow through the supply pipes. A pipe with a diameter of 40 mm is usually sufficient for one device;
- consider the need for an additional air circuit if the toilet flush is located above the level of other equipment in the horizontal distribution system.
Correctly performed the above steps will make the sewage system efficient and operational even under maximum loads and minor pipe blockages.
Sequence of plumbing installation work
When planning the construction of a house, it is necessary to focus on the following sequence of installation of its internal sewage system:
- Risers are installed, their ends lead to the roof and to the basement.
- Inlets for toilets are connected to risers.
- A horizontal wiring is formed and one end is connected to the riser.
- Siphons are connected to plumbing fixtures.
- Plumbing fixtures are connected to the sewer system.
The organization of an external sewage system can be done before or after the described actions.
After installing both systems, they are combined into one, connecting the internal risers to the external drain pipe.

Internal sewerage in the apartment
The organization of internal sewerage in a high-rise building is not much different from that in a country house, but still has its own nuances. There is no need to choose plastic wiring diagrams, because the location of risers and rooms is included in the general house floor plan.
Principles of interior design
Indoor sewerage is based on the following principles:
- the system operates on a gravity principle without the use of compressor units;
- the entire apartment sewer system is connected to common building risers;
- the basis for the performance of the system is compliance with the norms for the slope of sewer pipes;
- Ventilation drain pipes are used to equalize intra-sewer pressure.
Compliance by all residents of an apartment building with these principles when installing internal sewerage allows neighbors not to worry about flooding and unpleasant odors in the bathrooms.
Features of the layout of the apartment
Changing the sewerage system in an apartment is quite difficult, because toilets should always be located next to a vertical riser. Moving them several meters will be accompanied by the need to lay 110mm pipes throughout the apartment, which will not add aesthetics to the appearance of the rooms.

The arrangement of rooms and the number of sewer risers in high-rise buildings is limited only by the designer’s imagination, but they also try to comply with the basic rules for installing such systems.
Options with two bathrooms are rare in domestic apartments, but the kitchen and bathroom can be separated by a corridor into two independent sewer circuits. Then each room has its own vertical riser.

There is always a separate 110 mm pipe from the toilet. It can accept additional supplies from other plumbing equipment or be intended solely for flushing the toilet.
In the classic scheme, a sink is connected to the horizontal wiring at the far end of the pipe, then a bath or shower is connected, then a washing machine with a sink. After this, the pipe is connected to the toilet tee or directly to the riser.
It is mandatory on the roof of all apartment buildings drain pipe is installed, which equalizes the air pressure in the riser and the interior of the house.
Sewer installation procedure
Before purchasing new plumbing for your apartment, you need to understand the future structure of the sewer network so that there are no problems with the installation of the purchased plumbing equipment.
To do this you need:
- Determine the types of plumbing fixtures and their installation locations.
- Draw diagrams of pipelines taking into account their angles of inclination.
- Check that the size and height of the holes in the walls are sufficient for the installation of the planned wiring.
- Determine the number of products and materials for installation and purchase them.
- Perform a trial installation of pipes and check the possibility of their installation.
- Dismantle the old sewer system if necessary.
- Finally install sewer line.
- Install plumbing equipment and connect it to the sewer system.
- Check the resulting system for leaks.
If everything is done correctly, then after checking for leaks you can use the plumbing for your pleasure.
Basic planning rules
When planning an internal sewerage scheme, it is important to follow a number of rules that will help save time and ensure the durability of the assembled system.
Tips for arranging a riser and toilet:
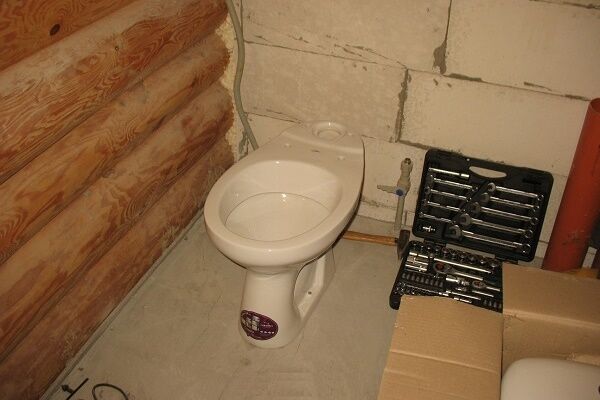
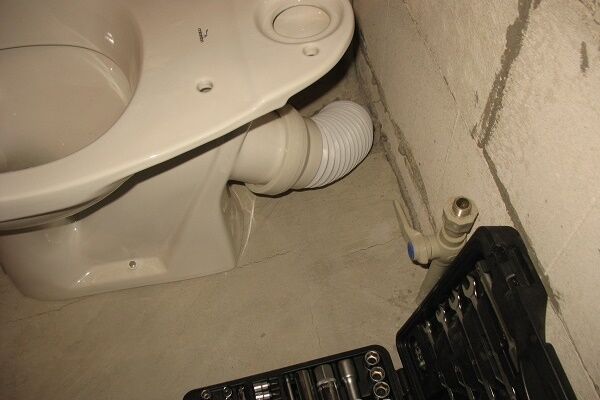
- The toilet must have its own connection to the vertical riser. When connecting the device to a common horizontal distribution, the water seal in the adjacent plumbing may break.
- The clearance of the riser pipe must be equal to or greater than the diameter of the toilet drain hole, but not less than 110 mm.
- It is necessary to provide special hatches in the vertical riser for inspections. The optimal height of their locations is 1000 mm from the floor.
- It is unacceptable to lead the edge of the fan pipe into the chimney.
- If the interfloor ceiling in the bathroom is filled with cement, then the plastic riser is placed in a special plastic sleeve.
Rules for designing horizontal wiring:
- The size of the drain pipe of the plumbing fixture must be less than the diameter of the sewer pipe draining water.
- The length of the drain pipe running from the toilet to the riser should not exceed 1 meter, from other appliances - 3 m. For longer pipes, it is necessary either to increase their diameter to 70 cm or more, or to loop the pipes with ventilation of the vertical riser above the drain point.
- Horizontal pipes should not be connected with rectangular elbows due to the risk of blockage. It is better to connect them through two elbows with an angle of 135 degrees.
- The socket of the sewer pipes must be located towards the water flow.
- When installing sewer systems in closed boxes, you can line the pipes with mineral wool for sound insulation.
- A groove for pipes in load-bearing walls can be dangerous, so its installation is possible only with the permission of an engineer.
- It is advisable to equip drains from the dishwasher and sink grease traps.
- When connecting plumbing equipment, the lower edge of the tee must be rotated to half the height of the socket.
- Long plastic pipes must be secured with clamps to prevent sagging.
After completing the installation of the internal sewage system, it is necessary to fill the sink and sink to the brim with water, open the drain hole, and also completely drain the toilet.
If there are no leaks or unpleasant odors, then most of the rules have been followed.
Conclusions and useful video on the topic
To visually familiarize yourself with the correct planning of the location of sewer pipes, it is recommended to watch the following videos.
Designing a drain pipe in a private house:
Rules for arranging internal sewerage:
Nuances of internal sewerage in an apartment building:
The presented options for placing sewer pipes in housing are typical. The importance lies not in copying the proposed options, but in following the rules and principles of planning and installation of the sewer system. Only compliance with them can eliminate the need for additional repairs due to leaks and non-compliance of equipment with sewerage parameters.
Do you have any questions, have you found any shortcomings in the article, or do you have personal experience in arranging internal sewerage? Please leave your comments, ask questions, and share your experience in the block below.


The mother-in-law in the old house simply had some kind of horror with the sewer system - they screwed up both the angle of inclination and the water seal, in short, I don’t know what genius installed it. The result is deplorable - when washing with a machine, sometimes some of this water escaped into the bathroom and sink, and smells of something rotten often appeared, i.e. sewerage. Everything had to be redone because it was completely unsanitary!