How to install a drain pipe: step-by-step instructions and analysis of common mistakes
It is impossible to install ventilation for an independent or centralized wastewater disposal system without installing a special drainage outlet. The element blocks the return flow of gases into the bathrooms, acting as a connecting component between the septic tank and the atmosphere.
The technology for installing the riser is quite simple. But before you start work, you need to understand the principle of operation of the ventilation duct and understand how to properly install the vent pipe in the house. The answers to these questions are described in detail in the article.
The content of the article:
Operating principle of a fan pipe
The fan pipe is a structural element that connects the pipeline with a specially constructed ventilation duct. Its key purpose is to remove gases and odors from the sewer system.

The length and shape of this element can be arbitrary. There are models of vertical and horizontal design, beveled at right or acute angles.
The principle of operation of the vent pipe is simple. Wastewater entering the vertical riser creates a vacuum in the pipeline cavity. It can be partially compensated by water, which acts as a hydraulic damper in the siphons of installed plumbing fixtures.
But if the vertically installed riser has a large length and at some point there is a one-time powerful discharge of waste liquid, then a vacuum arises in the sewer pipe.
The formed piston from the liquid with all its strength and characteristic “smacking” sound at one moment tears off and breaks through the hydraulic valves of the plumbing, emptying the siphons.
As a result, water is completely sucked out of all water seals. And therefore obstacles for sewer "flavors" doesn't stay. Due to this, they quickly spread throughout the building.

The trouble is that the matter is not limited to the appearance of an unpleasant “fragrance” in living rooms. The natural process of decomposition of feces is accompanied by the release of gases harmful to households: methane and hydrogen sulfide.
If the system is equipped with a fan riser, at the moment of “throwing in” there are no such consequences, since the vacuum created in the collector simply does not have time to break through the hydraulic valves in the siphons.
This is prevented by flows of atmospheric air, which, simultaneously with the occurrence of vacuum, are drawn into the system, blocking the penetration of gases into the room when draining and pumping out the septic tank.
Conditions for installing a fan riser
According to the current building codes 2.04.01-85*, and in particular the section “Internal water supply and sewerage of buildings”, an element such as a drain pipe must be installed in the following cases:
- In one-story buildings, if they have swimming pools and other structures that are capable of discharging single portions of large volumes of wastewater.
- When installing sewer risers assembled from pipes with a diameter of 50 mm.
- In low-rise buildings, provided that each floor is equipped with a water supply and wastewater disposal system.
The easiest way to determine whether installation of a fan riser is required for specific conditions is to focus on the maximum volume of a single portion of wastewater.

In multi-storey buildings, where communications are connected to each floor and each apartment, the installation of a vent riser is a strict condition. In this case, the riser is installed on the roof of the building.
Features of installation activities
The technology for installing a fan riser is quite simple. Even a novice master can perform the installation work.
Selection of required materials
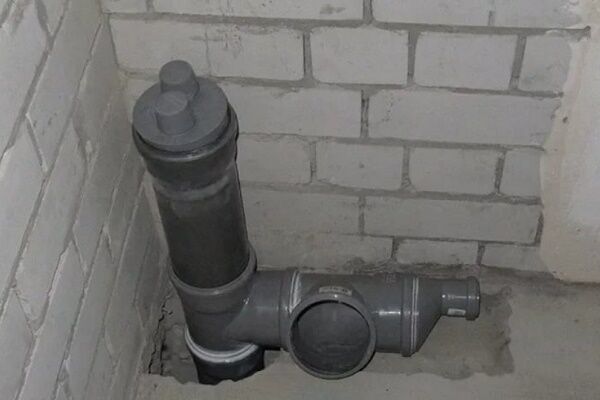
The three key elements of the ventilation system are the drain pipe, the valve and sewer water seal. Each of them ensures equal pressure in the system.
Siphons with a water seal are installed at the stage of installation of indoor plumbing fixtures.

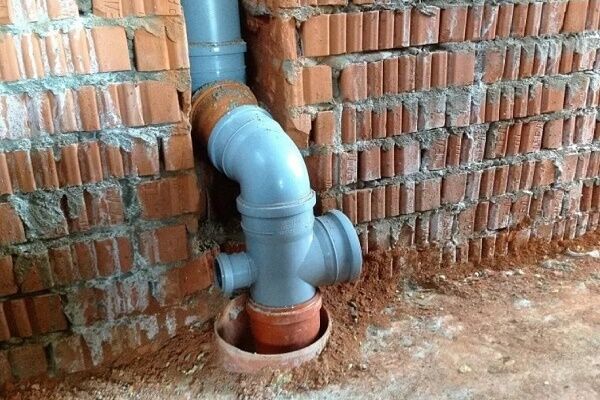
The drain riser acts as a continuation of the sewer pipeline. And to arrange it, you can use the pipes used in assembling the main system.
For installation of the ventilation duct it is best to choose plastic pipes. They do not freeze, are not subject to the destructive effects of moisture and are resistant to corrosion.
When installing a sewer system, polymer products are also advantageous because, due to the smoothness of the walls, they do not produce noise when wastewater passes through the pipeline.
When deciding on the size of the drain pipe, you should be guided by the rule that the throughput of the 50th pipe is almost 16 times less than the 110th. Using D 50 mm pipes, you will not get an effective ventilation system, but a useless set of connecting pipes.

Regardless of the design and location, each drain pipe is equipped with a check valve. After all, even if the pipeline was initially laid correctly, due to insufficiently reliable fixation of the pipes on the walls and under the influence of the natural process of shrinkage of the building, its slope may change.
If the ventilation malfunctions, air will flow into the sewer drain from the nearest plumbing fixture. Most often, it becomes the element of sanitary ware that has the smallest water seal.
Each valve is equipped with inlet and outlet pipes. An air-filled ball is located in the cavity of the device. At the moment a vacuum is created, it presses on the membrane, which completely covers the chamber. Due to this, gases simply cannot enter the pipe cavity.

In addition to its main function, a check valve helps solve two key problems:
- prevents the return of waste to plumbing fixtures;
- protects the system from the ingress of large mechanical impurities and penetration through the system by rodents.
But in order for the air valve to cope with the task assigned to it, it must be placed only in those rooms where the temperature is constantly above zero.
General installation recommendations
The main rule when arranging the system is that the starting point is placed in the heated part of the building, where the temperature is above zero at any time of the year, and the final point is in the cold part.
This solution allows us to provide the necessary temperature difference, creating conditions for the uninterrupted removal of “aromas” outside the building.

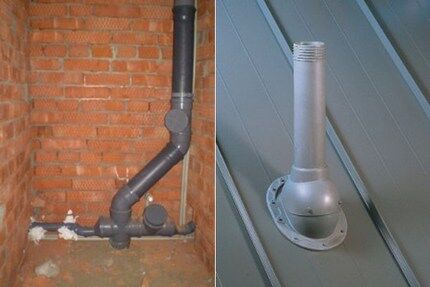
The vertical riser should be led directly to the roof of the building.The attic space is not suitable for these purposes, since the draft will be weak and the attic “stinks.”
When installing a drain pipe, it is important to adhere to a number of basic principles:
- The outlet of a riser equipped with a waste pipe must be placed separately. According to clause 17.19 of the building codes, it cannot be organized together with a stove chimney or ventilation system.
- When placing a structural element on a pitched roof, it is placed at a height of 500 mm, positioning it as close as possible to the ridge. If the roof is flat and, moreover, unused, then the height of the exhaust part should be 300 mm.
- The horizontal distance of the vent pipe installed above the roof relative to the balconies and opening windows in the house should be about 4 meters.
- Do not place the exhaust pipe under the eaves. With this arrangement, traction is reduced.
In a situation where the roof is actively used and other objects are placed on it, then the height of the riser outlet should be at least 3 meters. Provided that the duct is equipped in a prefabricated ventilation shaft, it is placed at a distance of 100 mm from the edge.

Several risers can be combined simultaneously within one drain pipe. But, in any case, since with such an arrangement the ventilation is not forced, but gravity-fed, it is advisable to avoid turns and various kinds of narrowing of the pipeline. Their presence may create unwanted resistance to air flow.
If the exhaust part is slightly offset relative to the riser, you can connect the structural elements corrugated plastic sleeve.

At arrangement on the roof equipped with a riser pipe, there is no need to erect auxiliary exhaust devices in the form of a weather vane or deflector, as well as protective “mushrooms”. This point is clearly stated in paragraph 18.18 of the current SNiP.
The use of these devices can, on the contrary, have the opposite effect: the condensate formed when the ambient temperature drops will freeze and block the outlet openings. Installation ventilation deflector It will be advisable only in the situation if the building is located in an area with a warm climate.
How to connect a check valve
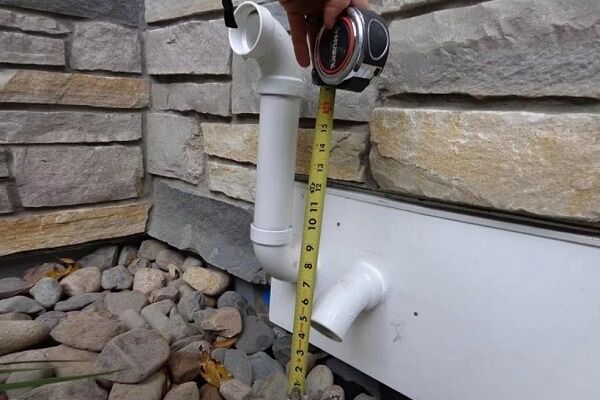
The vent pipe is connected to a pre-equipped ventilation duct. If the ventilation scheme requires the presence of too few outlet risers, the fan pipe can be routed separately through the nearest wall, placing the outlet element horizontally in its upper part.
To do this, it is brought through the wall opening, leading outside the building to a distance of 30-40 cm.
The ventilation valve is mounted in the free end of the pipe or socket. The main thing is that the section of the pipe on which the valve will be installed is located above the highest point of drainage from the plumbing equipment.
When placing the element internally, it is necessary to clean the section of the pipe where the valve will be installed and treat it with a degreasing compound.
A special insert is buried inside the pipe, which can be purchased at any hardware store. The valve is recessed into the insert, placing it in the opposite direction of the flow of waste. It is positioned in such a way that the petals of the device bend towards the plumbing.
Detailed technology for installing a check valve for sewage is described in this article.
When installing a drain pipe with a cross-section of 110 mm, the check valve is connected using an adapter.

An important point: all operations for installing a vent pipe should be carried out on dry surfaces. At the stage of fixing the check valve, you should not use silicone sealants or any kind of lubricant.
Typical installation errors
Most often, the situation with the formation of a vacuum in the system occurs when pipes of different diameters are used in its arrangement. For example: the toilet is connected to a pipe D 110 mm, the bathtub is connected to a pipe D 50 mm, and the opening of the cistern is D 70 mm.
Unpleasant stench in bathrooms often appears when plumbing fixtures are equipped with siphons that have insufficient volume.This occurs due to the fact that when the devices are not used regularly, the remaining water in the siphons dries out, removing the hydraulic valve and opening up free access to the spread of “aromas”.
When choosing a place to place a ventilation fan pipe, many people make the mistake of placing it under the roof overhang. This leads to the fact that in winter, snow sliding and falling from the roof damages the drainage structure.
To prevent the condensate formed inside the ventilation duct from freezing at sub-zero temperatures, the structure must be insulated.
Conclusions and useful video on the topic
How to design and install a fan pipe:
How to properly remove the riser through the roof:
By correctly calculating the dimensions of the drain pipe and installing it in compliance with all installation rules, you can almost completely eliminate the possibility of accumulation and the likelihood of sewer gases entering the house. And then problems with the operation of the sewer system will definitely not arise.
Do you have practical skills in installing a ventilation drain pipe? Share your accumulated knowledge or ask questions on the topic - the contact block is located below.


