Surface-mounted sockets and switches: rules for safe installation and connection
Electricity is used everywhere.Devices that provide access to this essential resource for all are very important to the consumer. These include surface-mounted sockets and switches - equipment that is extremely simple to install and operate.
Any home craftsman can easily install such a device if desired. We will tell you how to properly secure it and connect it to the power line. Taking into account our recommendations, you will be able to build a trouble-free network that is safe for others.
The article proposed for consideration provides step-by-step installation instructions. We describe in detail the design features of overhead electrical installation products. To optimize the perception of extensive information, useful diagrams, photo collections and guides, and videos are attached to the text.
The content of the article:
How overhead sockets are arranged
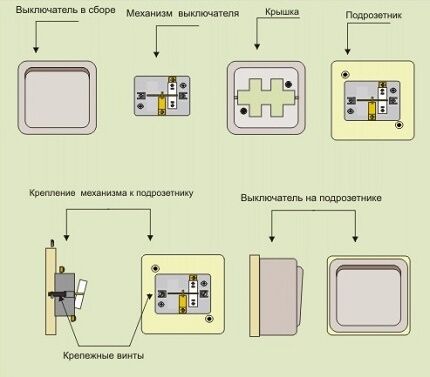
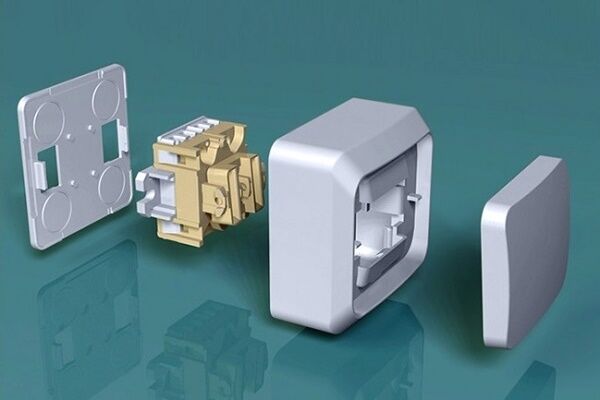
In the manufacture of modern sockets, a modular method is used. That is, the socket mechanism is executed as a separate unit or functional module. It can be installed in almost any standard devices.The decorative module or cover can be easily removed and replaced at the request of the owner, which is very convenient.
Replacing the cover is very simple, given that during installation only the mechanism is fixed to the wall.
Both modules, decorative and functional, are made of dielectric materials that are not sensitive to temperature changes, do not collapse or change color under the influence of an electromagnetic field or UV radiation.
To ensure that there are no unwanted additional connections in the path of current flow, the terminals and receiving sockets of the socket are a single unit in the form of a branch of the plate from which the receiving socket is made.

Contact reliability depends on the quality of the mechanical connection of the wires to the terminals. The latter can be of two types:
Screw type terminals
The wires are connected to current-carrying elements using screws. The main difference between these terminals is the significant force with which the wire is clamped, which ensures reliable contact and good cable retention.
To avoid spontaneous unscrewing of fasteners due to heating or vibration, it is advisable to use screws in such terminals together with spring washers.
Features of spring clamps
Inside the terminal there is a spring-loaded plate that fixes the end of the wire and presses it with force against live parts. The advantage of such a system is the ease of connecting wires.
However, it is practically impossible to control the cable clamping force. If it is insufficient, it will not be possible to notice it at the installation stage. But subsequently, a socket with a weak contact will quickly fail.

Quite often, not one wire, but two, is connected to the outlet terminals. Therefore, both spring and screw terminals have two holes for wires and two seats.
All receptacles have at least two receptacles and two insulated terminals. For wiring with a three-wire wire, special devices with a third terminal are used - the so-called “grounding”.
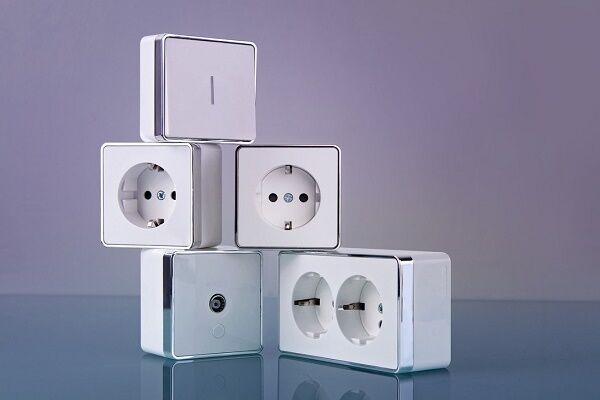
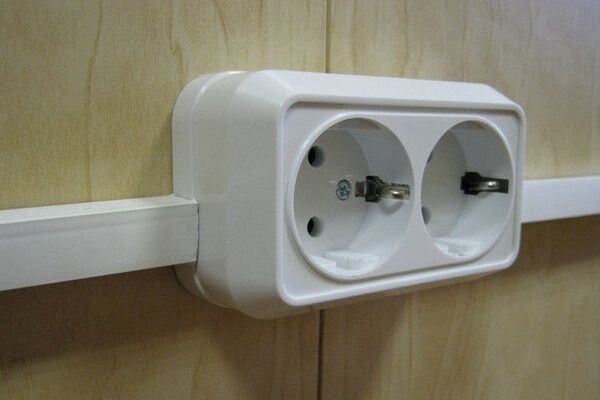
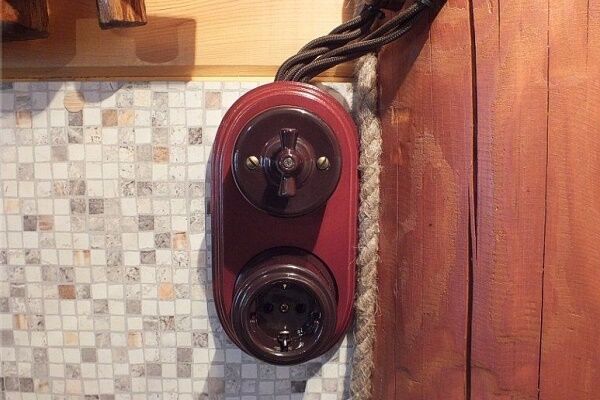
The main difference between a surface-mounted socket and its built-in counterpart is that it is installed on the surface of the wall, rather than recessed into it. This greatly simplifies the installation of the device, but somewhat spoils the interior picture. Surface-mounted sockets are most often used to connect to open wiring, but if necessary, they can also work with hidden wiring.
Where are overhead sockets installed?
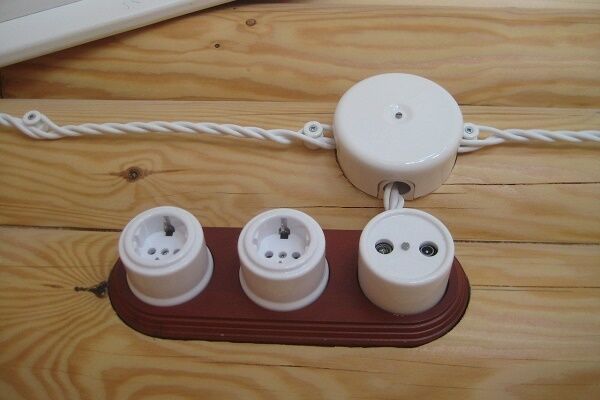
The use of overhead electrical installation products is most often associated with the device wiring in country houses, the walls of which are made of timber, regular or rounded logs. True, hidden cable laying in channels hollowed out in wood is permissible if the cable wiring is pulled through non-flammable sleeves.

However, the process of its installation is unnecessarily expensive in terms of cost and labor effort. In addition, the selection of channels can reduce the load-bearing capacity of the partitions and affect the thermal insulation characteristics of the building as a whole.
The construction of open wiring on wooden walls is justified by reducing costs and ensuring the ability to easily monitor its condition. This option allows you to easily identify and repair damage, change sockets with switches yourself, not only if they fail, but also, if desired, transform the design of the room.
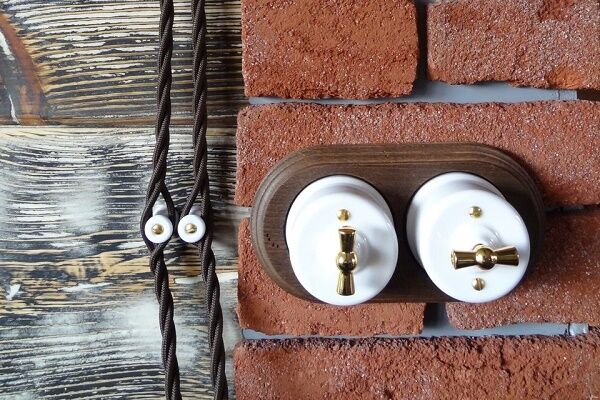
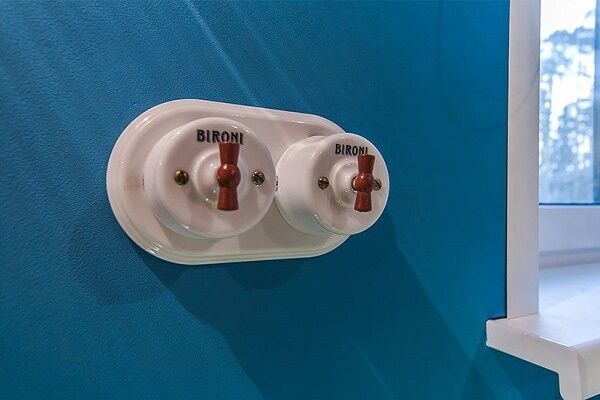
Electrical installation devices of the latest generation - the so-called retro sockets and switches - are noticeably different from their historical predecessors. They are produced in a wide range, the options differ in the degree of protection and decorative design.

Instructions for installing a surface-mounted socket
Before starting work, we should prepare all the necessary tools. We will need: pliers, a straight or Phillips screwdriver, a pencil, a sharp knife, or better yet, a stationery cutter.
Depending on the material from which the walls are made, you may also need a drilling tool: a drill or a hammer drill. The cable for connecting a surface-mounted socket can be laid hidden, for example, in a wall cavity or groove.

But most often the wire is laid in an open way: in a cable channel, corrugated pipe or just on top of the wall. Regardless of this, the connection procedure is approximately the same.Let's look at all the stages of this process in detail.
Power outage
The first thing you should always do when working with electrical devices is to turn off the power supply. To do this we open electrical panel and turn off the machines. Most often, this requires moving the position of the handle on the corresponding machine to the “down” position.
You need to know that usually one machine is not “responsible” for all sockets, but only for some part of them. For ease of use, devices are usually signed.
If this is not the case, we can determine the machine we need experimentally. To do this, turn off each circuit breaker one by one and use an indicator screwdriver to check the presence of voltage in the wiring. As soon as it is not there, it means that the required machine has been found.
Those who do not want such experiments can be advised to disable everything circuit breakers on the shield. After making sure that there is no voltage on the wire, you can proceed to the next step.

As we already know, the socket consists of two main elements: a functional module or mechanism, and a decorative panel - the body. To install the device, you must first remove the housing. To do this, take a Phillips or straight screwdriver, it depends on the model of the socket, and unscrew the central fastening screw on the decorative panel. After this, carefully remove the housing.
Marking the wall and preparing the outlet
Some difficulties with disassembling the outlet may arise if you need to install the device in a moisture-resistant housing. They are distinguished by the presence of a lid that closes the device.
In this case, first open the cover, thus gaining access to the latches that hold the decorative panel of the socket. Then carefully press them out with a screwdriver and disconnect the front panel of the device.

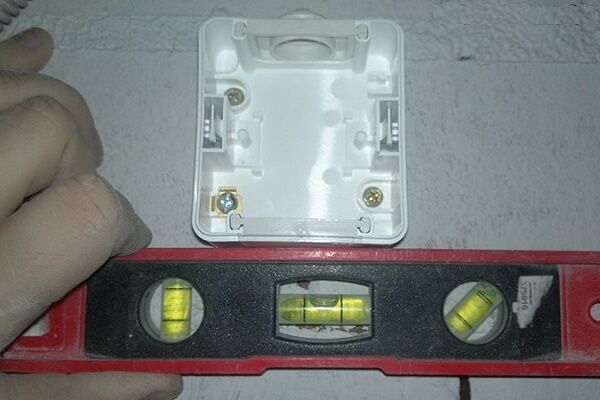
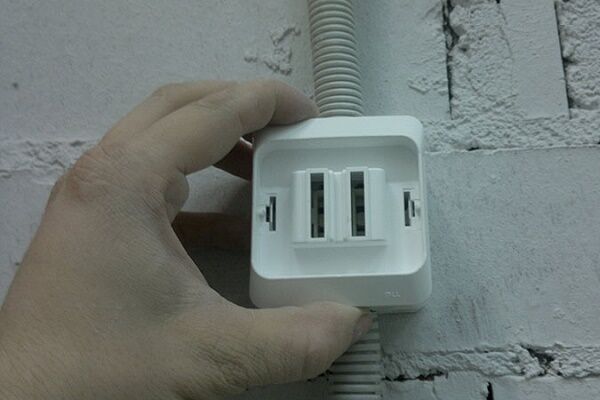
Now we need to choose place for installing a socket and mount the mechanism on the wall. To do this, take it and apply it to the place where it will be located.
We align the position of the part strictly horizontally, after which we take a pencil and, inserting it into each mounting hole, mark on the plane the points at which the fasteners will be located. We carry out all operations carefully, since an error in the markings will lead to the socket being installed askew.
Fastening the device mechanism
Depending on the material from which the walls are made, the fastening procedure may vary slightly. Let's consider the most common option with a concrete surface.
First, using a puncher or drill, we make holes at the designated points. Their depth and diameter must correspond to the dimensions of the dowels prepared for fastenings.

We insert dowels into the resulting holes, the so-called plastic plugs that provide the screws with good adhesion to the wall. Then we attach the socket mechanism to the base and securely fix it with screws or self-tapping screws. We check the quality of the resulting fastening. The durability and reliability of the new outlet depends on its strength.
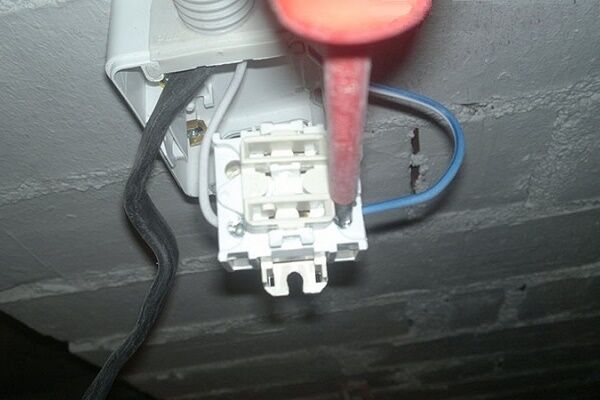
Preparing the wire for connection
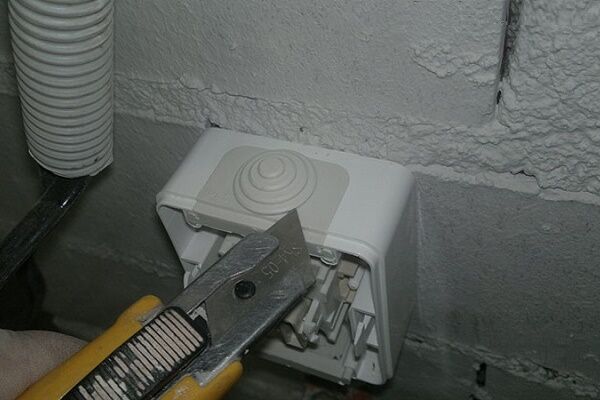
Depending on what model of outlet we have, the steps may differ slightly. You may need to route the cable inside the box first.
Most often, sockets of this type have a plug on one side of the body, on which several possible holes of different diameters are identified. In this case, all that remains is to remove the required plug with a sharp knife or cutter and get a hole for the wire.
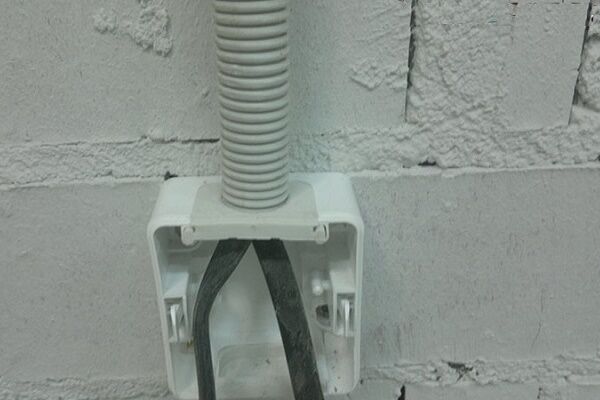
If there is no plug, it is less convenient, but not hopeless. You must cut the required hole yourself. After this, the wire is inserted into the housing and trimmed so that the length of the remaining segment is sufficient for connection.
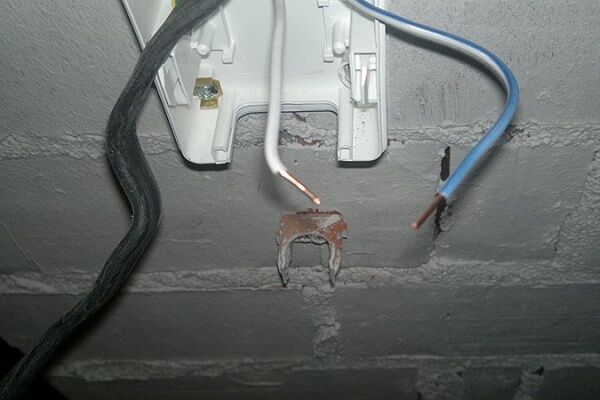
From the cable connected to the mechanism you need cut off the insulation. Then we separate each of the cores and strip them down to metal. The length of the exposed core should be 0.8-1 cm.

Connecting the mechanism to the cable
When installing overhead sockets, it is important not to make mistakes in connecting the wires. If a two-wire cable is used in the wiring, one of the wires will be zero, the second will be phase. They are connected to different terminals.
A little more complicated with a three-core cable. In this case, the phase and zero are fixed to the outer terminals, and grounding to the central one. Problems do not arise if the person doing the connection knows exactly the designation of the wires, but this is not always the case.
The easiest way to determine zero, phase and ground is if the wiring is color coded. According to this, the working zero or neutral will always be in blue-white or blue insulation, the protective zero or ground will always be in a yellow-green braid.
A wire of any other color, most often red, white, black or brown, will be a phase. Unfortunately, houses with old wiring do not have any color coding.

In this case, you need to determine which wire is which. This is easiest to do for two-wire wiring. We will need an indicator screwdriver. When it touches a live wire and simultaneously closes the contact, an indicator light on the back of the instrument body lights up.
If this happens, then the phase has been found. The second wire, accordingly, will be the working zero or neutral.
To deal with a three-core cable you will need a special multimeter device. First, you need to disconnect the grounding at the electrical panel. Then determine the phase, and then sequentially “ring” using a device of a pair of wires.
When you simultaneously touch the phase and the working zero, a certain value will appear on the device monitor; when you touch the working and protective zero, no value will appear.

Installing a decorative insulating cover
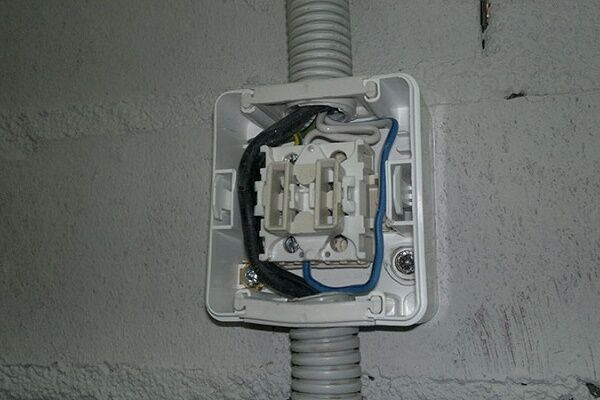
The procedure may vary slightly depending on the surface socket model. If we are dealing with a separately installed case, we insert a mechanism with fixed wires into it, cover it with the front panel and fix it.
If the mechanism and the body are a single unit, replace the decorative panel. If necessary, trim the edge of the housing so that the cable fits in freely.We fix the front panel. Our installation is complete, you can check the operation of the device.
You can learn how to properly plan the location of sockets in the kitchen from popular article our site.
Features of surface-mounted switches
The most common single-key switch is a two-position switching device with normally open contacts. The principle of its operation is extremely simple.
Inside the device there is a mechanism with a moving contact. The latter, when you press a key, takes one of two possible positions: on or off. In the first case, the electrical circuit is closed, in the second, it is opened.

Important note: only the phase should be connected to the switch contacts. The design of the device is extremely simple and includes two main elements: a working mechanism and protection parts. The latter includes a key designed to switch modes and a frame-housing. The contact group of a single-key switch consists of two contacts. One of which is considered outgoing, the other is considered suitable.
The first is connected to the phase that goes to the lamp, to the second is the phase that goes to the switch. The manufacturer usually labels the contacts of the operating mechanism to indicate the appropriate and outgoing contacts.
However, if there is no such marking, there will be no problems, since in any variation the device should work equally well. Like switches, contact terminals can be screw or press-type.
The former are considered more reliable in operation, the latter are easier to install. The main difference between surface-mounted switches is that they are installed directly on the wall surface.
The appearance of such devices is inferior to their built-in counterparts, but they are easier to install. Surface mounted switches with open wiring are used, but can also operate with a hidden system.

Installation process of a single-key surface-mounted switch
First you need to prepare all the tools necessary for the job. We will need pliers or pliers, a sharp knife or a stationery cutter, electrical tape, a pencil and a level.
In addition, you should prepare the fastenings. For wooden or plasterboard walls, self-tapping screws will be sufficient; for concrete and brick, you will need dowels and a hammer drill or drill to drill holes for them. Still needed disassemble the switch and remember how they took it apart in order to put it back together again. Let's get to work.
To ensure personal safety, we begin the installation by turning off the power supply. To do this, simply turn the lever on the corresponding circuit breaker on the electrical panel to the “down” position.
If it is not known which of the circuit breakers is “responsible” for the desired group of switches, the easiest way would be to turn them all off. Then you need to make sure that there is no voltage on the working wire, which can be done with an indicator screwdriver.
#1. Preparing the device for installation
Let's start with the key. It needs to be removed. To do this, grab the protruding side parts of the key, carefully squeeze them and pull them towards you. The axial guide keys will come out of the grooves and it will be easily removed.
If you cannot grasp the part from the sides, you can try to pull on any protruding part of the key. If this doesn’t work, all you have to do is take a flat-head screwdriver, very carefully pry the key with it and remove it.
Now we see the front panel of the switch, behind which the working mechanism is hidden. It also needs to be removed. It can be attached differently in different models. The most common type is one with latches that can be easily pressed out with a flat-head screwdriver. After this, the panel can be easily removed. In some cases, you will have to unscrew the mounting screws. All that remains is to remove the working mechanism from the switch body.

#2. Attaching the housing to the base
To properly install a surface-mounted switch, you must first mount it to the wall. To do this, take the body and apply it to the place of fastening. Take a level and set the part strictly horizontally.
After making sure that the case is exactly level, take a pencil, insert it one by one into the mounting holes of the case and make marks. We use the resulting markings to prepare the wall for installation.
Actually, the method of fixing the switch housing to the wall depends on what material it is made of. We will consider the most difficult option - concrete. Using a puncher or drill, we make holes strictly at the designated points.
Select the diameter of the drill so that it matches the size of the dowel. We also determine the depth of future holes. After they are ready, we hammer in the dowels.

We put the switch body in place and fix it with dowel nails. We carry out the work carefully so as not to damage the plastic part. The body must be well secured to the base so that there is no slack or movement. Take a level and once again check the position of the part. If a misalignment is detected, we correct it by removing the housing and making a new hole.
#3. Connecting the device to the wiring
First we need to run the cable inside the switch housing. The easiest way to do this is with devices that have special plugs on one of the walls. It’s even better if the plug is divided into several parts of different diameters.
In this case, all that remains is to cut off the element of the required diameter with a sharp knife and the hole for the cable is ready. If there is no hole for the cable on the case, you will have to make it yourself.
If necessary, cut the cable suitable for the switch and insert it inside the housing. If the wire is laid inside a plastic corrugation, we also lower it into the housing. This way the connection will look more aesthetically pleasing. Using a sharp cutter or knife, remove the insulation from the cable and divide it into separate wires. We carefully clean each of them to a height of about 0.7-1 cm.

To make the connection correctly, you need to know exactly the purpose of the wires. How to do this was described in the case of installing a surface-mounted socket. We take the phase wire, if properly marked it will have white insulation, and insert it into the terminal marked as L.We insert another blue-braided control wire into the terminal marked 1. If necessary, tighten the fixing bolts.
#3. Assembly - the final stage
All we have to do is assemble the device. First, we insert the working mechanism into the housing box and fix it inside as provided by the device model. Then we put the front panel in place.
We make sure that the clamps fit correctly. After this, you can put the key in the frame. We do this carefully so as not to break the rather fragile element with excessive force.

The switch is installed and ready for use. It remains to carry out operational tests of the device. We looked at the procedure for installing and connecting the simplest single-key switch.
For two- and three-key devices, the technology for carrying out the work will be approximately the same. The main difference will be in the connection diagram of the device, where each key will have its own lighting device connected.
Conclusions and useful video on the topic
Video #1. Determining the phase wire before installing electrical installation products:
Video #2. The process of installing and connecting an open wiring outlet:
Video #3. How to install a surface-mounted switch:
Surface-mounted switches and sockets do not require installation in specially prepared recesses in the base, so their installation is quite simple. And yet we should not forget that you will have to work with electrical devices that require special care.
If you have no experience in electrical installation work, and the wiring in the house is old and there are no markings on it, it is better to turn to electricians for help.
Would you like to tell us how you installed and connected a surface-mounted socket model with your own hands? Would you like to share specific installation subtleties that were not mentioned in the article? Please write comments in the block below.


I only did something like this once, when the only outlet in the room was behind the furniture. I took the wire out from it, laid it along the baseboard, and reached it to the place I needed on the other wall. There I already installed an overhead socket. The process itself is simple, the most difficult and requiring ingenuity was to hide the wire so that it does not catch the eye and does not spoil the appearance of the room.
Surface-mounted switches and sockets are indispensable for country houses and apartments, when expensive repairs involving the installation of internal electrical wiring are not required. In addition, some models of surface-mounted sockets and switches have a modern design and can fit even into the most modern interior. The problem of masking wiring is easily solved with the help of decorative boxes where the cable is hidden. You can build sockets directly into the baseboard; there are special adapters for this. In this case, the wiring is laid directly in the baseboard.
Still, I'm more of a fan of the classics. Yes, the external socket is more reliable, and the attachment is much better and stronger, but still the internal one is somehow closer to the heart. So the appearance of the apartment should also be pleasing to the eye.