Electrics in a wooden house: diagrams + installation instructions
Wood is considered an environmentally friendly material for the construction of residential buildings, so it is not surprising that the demand for beautiful and comfortable houses made of timber or rounded logs is not decreasing. First of all, a residential building must be safe from an electrical installation point of view.
It is important to understand how electrical wiring should be done in a wooden house. You need to know how to install and organize the electrical system so as not to harm the health of residents and ensure the safety of property. We have presented in detail all aspects of this issue.
Our proposed article will introduce you to the general requirements for wiring. We will talk about methods for installing an electrical network in a house, rules for arranging an electrical panel and methods for installing cables. All electrical installation work must be carried out in strict accordance with the fire safety regulations we provide.
The content of the article:
General wiring requirements
The main difference between wooden houses and reinforced concrete and brick structures is their high degree of fire hazard. This means that increased requirements apply to the selection of electrical devices, cables and the conditions for their installation.
According to statistics, about 1/2 of fires or ignitions in wooden houses or in houses with wooden trim occur due to gross errors by electricians.
If you install the socket incorrectly, do not connect the wires in the junction box carefully enough, or ignore the grounding rules, a fire may occur, followed by a fire.

It is necessary to know the basic rules of electrical installation for two reasons: to be able to carry out some of the installation or repair work yourself and to control the actions of unscrupulous “specialists”.
The following requirements should be remembered:
- The technical characteristics of cables and electrical equipment must correspond as much as possible to the power consumption of the devices of each individual group.
- The operation of sockets, switches, and emergency shutdown devices must be carried out taking into account the load placed on them.
- It is prohibited to use cables, wires, and terminal connections when they are regularly heated.
- It is necessary to completely prevent the transfer of fire from the cable to structures made of wood or other flammable materials using fireproof protection.
Electrical wiring must be completely safe for home owners, their families (especially small children) and pets.

Material from video reviews and instructions posted on the Internet is very contradictory, so you should not rely entirely on the opinion of people in work overalls. You should focus on excerpts from regulatory documentation - sections of PUE, SNiPs, GOSTs.
Entering the power line into the house
In Russia and some other countries (unlike, for example, Europe, where the wires are hidden in the ground), electricity reaches consumers through overhead power lines - to the final support.
It is then transmitted to users in three ways:
- via self-supporting insulated wire (SIP);
- underground;
- by cable (used extremely rarely).
The first option is the most popular.

Electricity metering devices are also installed along with the machine. Special shields (SHUE) are designed specifically for this. According to the rules, the control panel can be installed box on the front of the house, and inside the building, then the wiring diagram will change slightly.

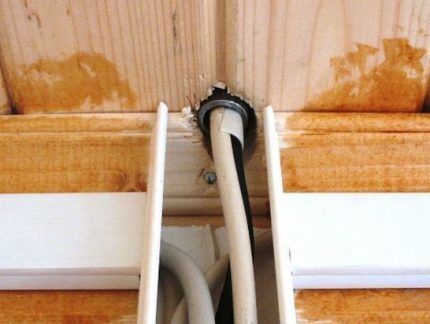
To insulate wires running along a wooden surface, use fireproof boxes or corrugation for electrical wiring. The transition through walls and ceilings is carried out in protective sleeves made of metal; plastic analogues are unacceptable.
But it is recommended to use a polymer gasket at bends to protect the cable from wear.Plastic materials are treated with fire-fighting solutions containing fire retardants (for example, special paint).
SIPs are not installed inside the house. According to the standards, only copper wires can be laid inside and on top of combustible structures, therefore, aluminum analogues will also have to be excluded.
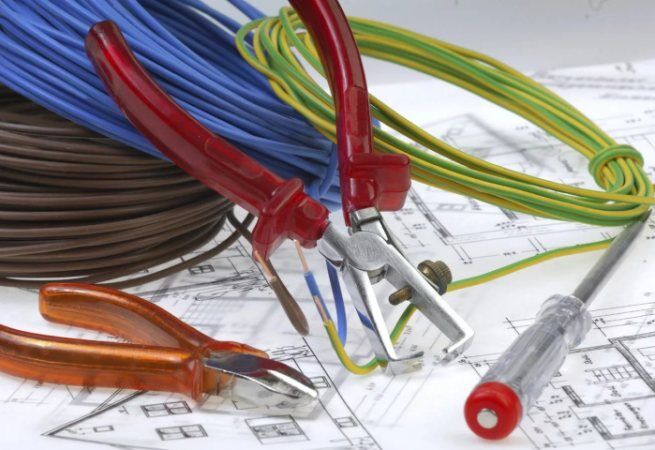
To select cable for wiring in a wooden house, you need to pay attention to the type of insulation. VVGng and NYM are recognized as the best options for a wooden house.

If the metering board is fixed on the facade, for example, at the request of the service company, then the SIP is connected inside it automatically, and then, to the main switchboard - the in-house distribution board - the VVGng is pulled.
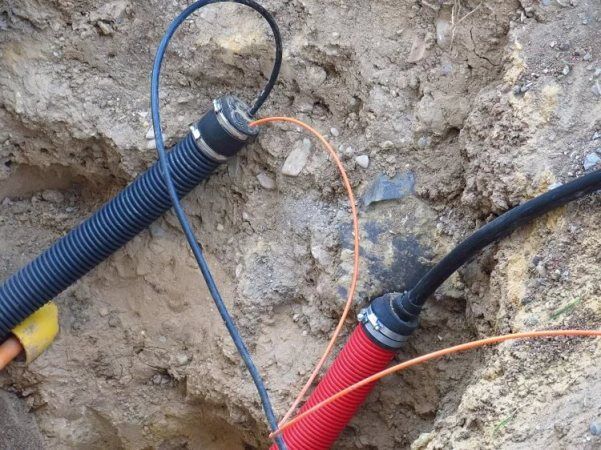
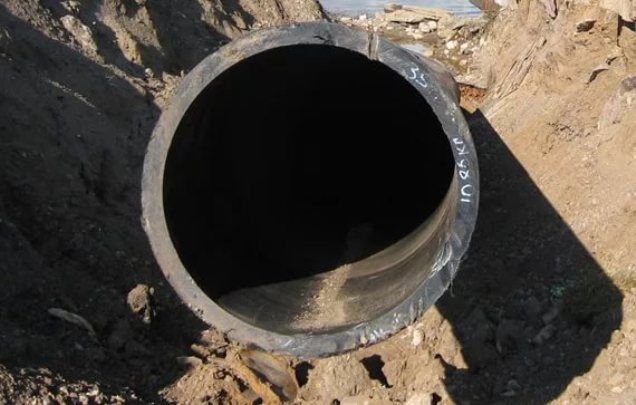
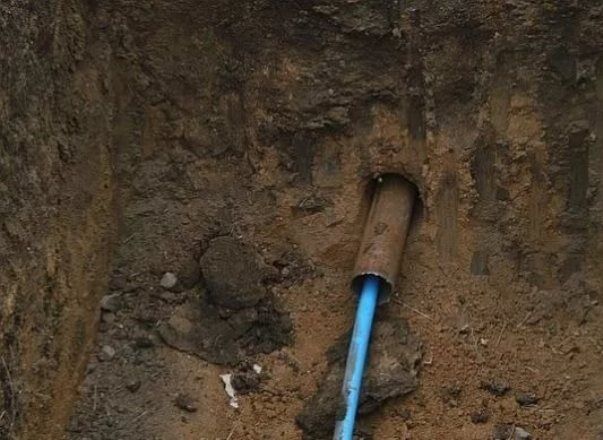
What to consider when laying cables underground:
It is worth mentioning that the underground method of introducing an electrical cable into a building is more expensive and more complex than using SIP.
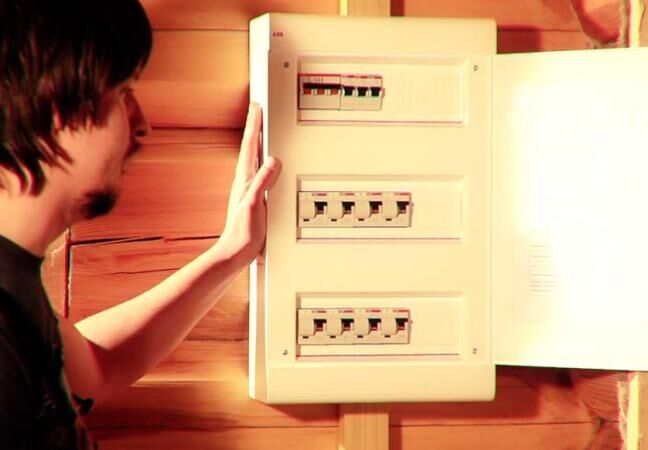
Features of the electrical panel
Externally, the distribution board is a plastic or metal (which is preferable) box with a door with fastenings for automatic machines and an electricity meter.
It has no size restrictions, and when a new box is installed, a little free space is always left for further connections.

Circuit breakers are mounted on the DIN rails provided for this purpose. Nominal meaning of automata directly depends on the parameters of the connected line: if the permissible limit of the socket group is 16 A, then the machine must correspond to this value.
If there are machines, installation RCD optional, but installation should not be neglected. Additional protection is triggered when a leakage current appears. The RCD is manually turned off when it is necessary to cut off the flow of electricity into the house.
Despite the expensive cost of the equipment, responsible electricians insist on installing zone-based protection, which increases the safe use of the electrical network in a wooden house.
The nuances of connecting RCDs and circuit breakers in the panel are described in this article.
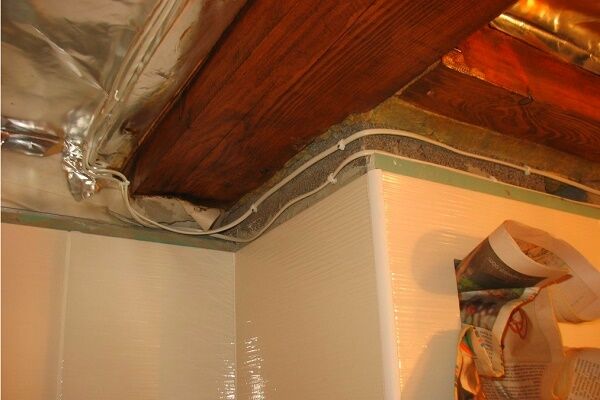
Rules for open wiring
Methods for open laying of wires should not contradict the requirements of the PUE.
Therefore, the following products can be used to attach cables to the wooden surface of walls, partitions or ceilings:
- ceramic or porcelain insulators;
- floor plinths with built-in cable duct;
- corrugated and rigid PVC pipes;
- PVC boxes;
- metal boxes and pipes.
Specific names of products are indicated in the design documentation, and in relation to wooden structures they must be accompanied by a fire safety certificate and be marked “NG” as non-flammable.

WITH choice of cable channels no questions arise, since in construction stores you can select products both by color and width, and with a set of accompanying fittings - plugs, rotating elements, adapters.
It is better to choose thick-walled, fairly wide products with a single lock, since boxes with a double lock are more difficult to maintain.
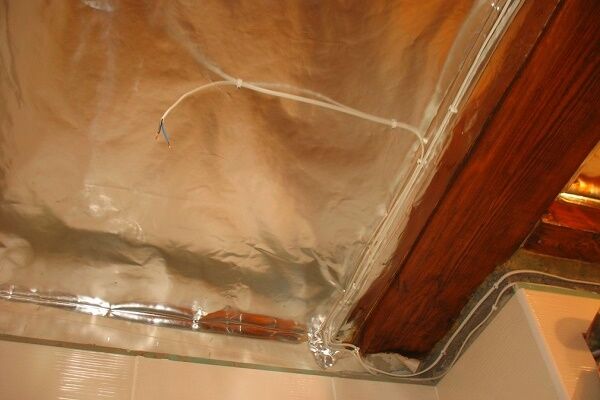
Requirements and recommendations for installation:
- The cable, like the protective fittings, must not support combustion, that is, be marked “ng”. The best option for wooden houses is VVGng-ls (with reduced smoke emission).
- The presence of a metal platform for installation is a fireproof base that increases the safety of using electrical appliances.
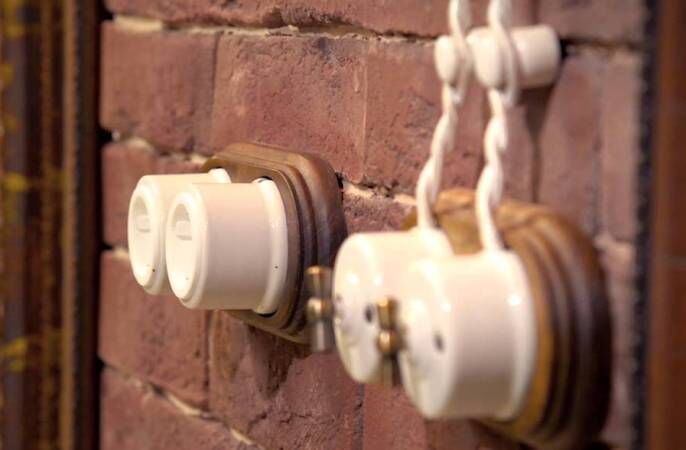
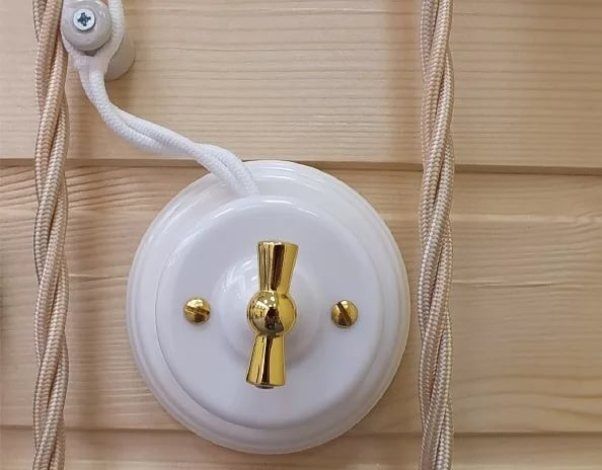
- Switches and sockets are only overhead, external.
- The use of metal sleeves to organize the passage of cables through wooden walls, ceilings, and partitions.
Feed-through sleeves are sections of thick-walled metal pipe, which should protrude 1 cm from each side of the combustible structure. To prevent the cable from being deformed, the edges of the sleeves are protected with plastic covers.
When choosing the cross-section of an electrical cable for laying in a wooden house, they are guided by generally accepted standards:
- 3*2.5mm - for sockets;
- from 6 mm² — for powerful electrical equipment, for example, electric stoves;
- 3*1.5mm - for lighting group, etc.
The formation of groups is carried out according to the principle of “as little as possible”, that is, a block of 4-5 sockets is isolated as a separate line and equipped with a separate machine.
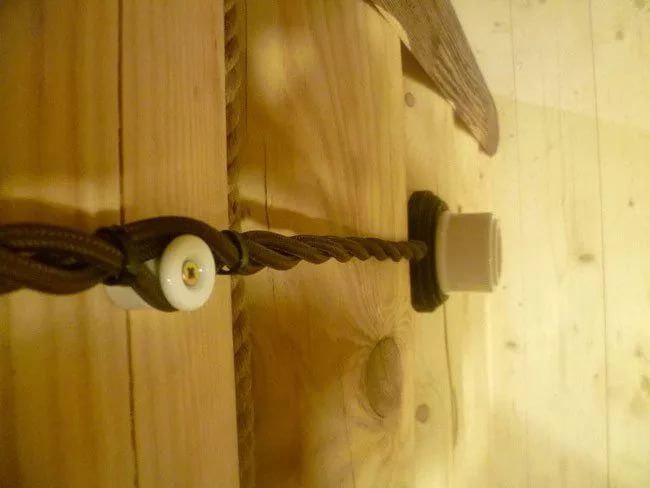
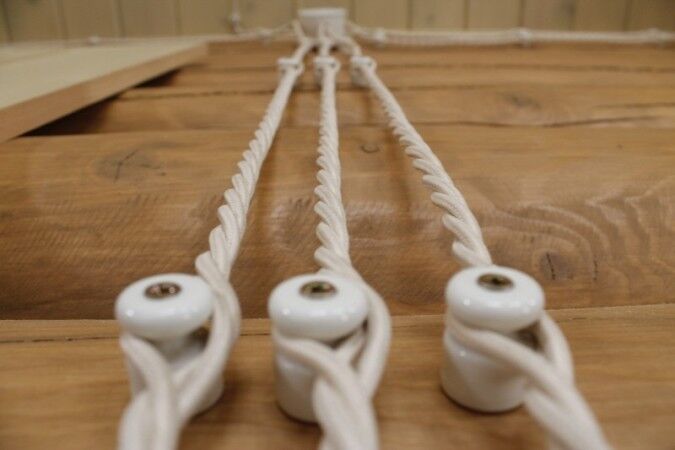
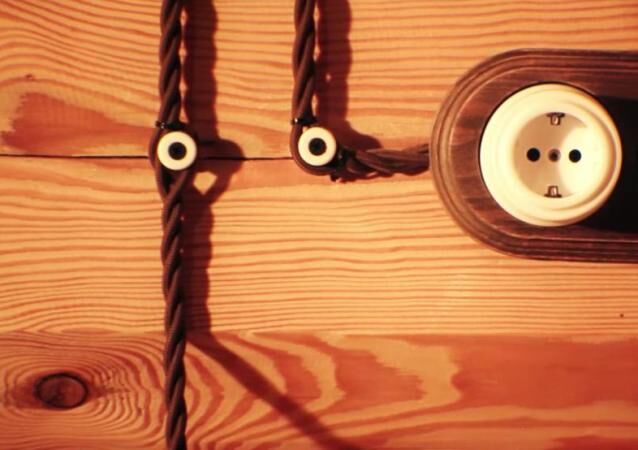
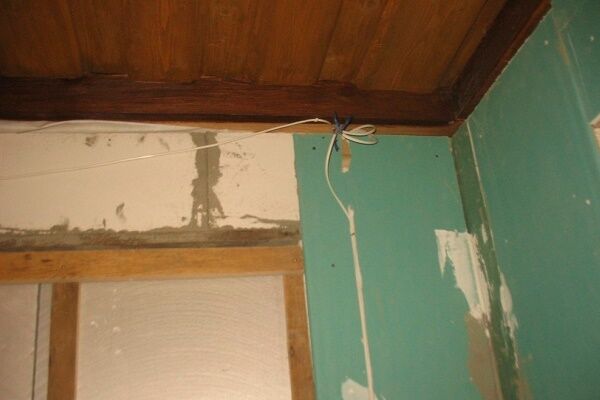
Those who want to get rid of cables use open wiring with insulators. According to the PUE standards, it is allowed to place insulated wires openly at a distance of 10 mm or more from the wooden surface.
The method, which was actively used back in the mid-20th century, is coming back into fashion, so we will also pay attention to retro wiring.
Within several years after the construction of a wooden house, it shrinks, so sagging of the wires is inevitable. To maintain a pleasant appearance of the lines without tightening, the wires are secured with ties above and below the insulators.
For more information on open wiring installation, see the article - Installation of open electrical wiring: review of work technology + analysis of the main errors
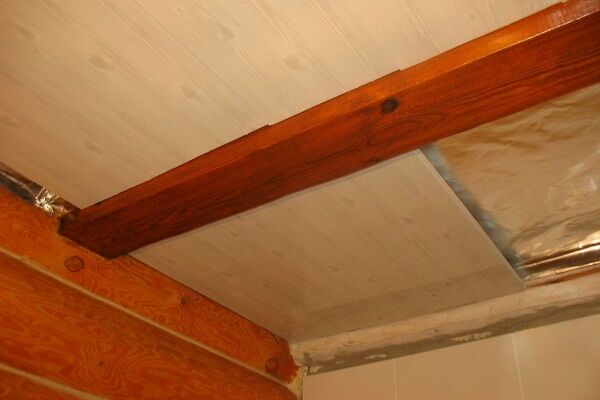
Closed wiring methods
The main difference between hidden wiring is the limitation on the use of installation methods. According to the PUE standards, more precisely, according to paragraph 7.1.38, all wiring components laid behind suspended ceiling systems, in false walls made of plasterboard and boxes are equated to a hidden option for laying electrical networks.
Fire and electrical safety rules state that only two types of products can be used for hidden wiring - polymer electrical corrugation and a metal pipe or box made of a similar material, specifically designed for these purposes.
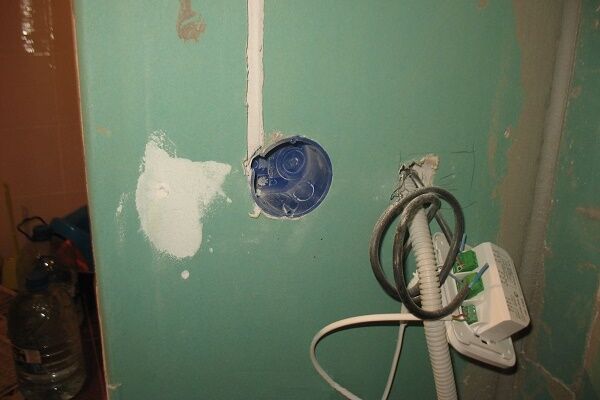
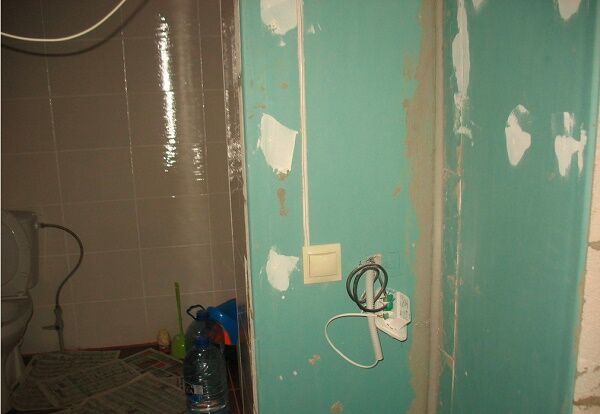
Let's consider one example of electrical wiring in a country house:
To install switches and sockets, it is advisable to choose a fixed or low-moving wall independent of the log house, for example, built from foam concrete blocks or plasterboard:
On the inside, metal elements must be galvanized or painted so that they do not become corroded during operation.
For a strong connection, a socket or similar method is not enough, so soldering, electric welding, coupling and threaded connections are used.

The use of metal hoses, corrugations and boxes made of PVC is also permissible, but subject to the installation of a lining made of non-combustible material: concrete, alabaster, plaster.
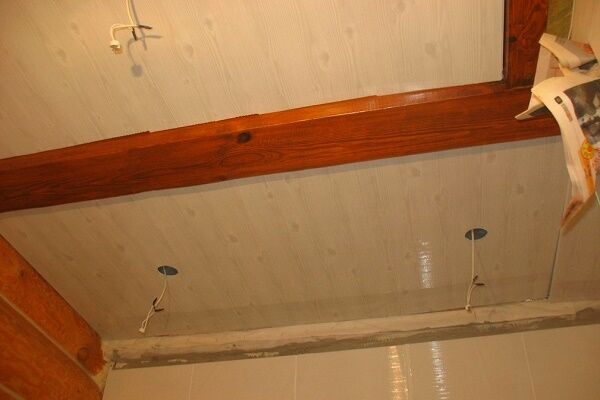
The main stages of laying closed electrical wiring:
- Route markings. It is necessary to calculate the stretch of lines so that the number of turns and intersections is minimal.
- Preparation of walls and ceilings. It includes hollowing out grooves and drilling holes.
- Laying metal pipes. The size of the product is selected so that the cable occupies no more than half of the internal space.
- Installation of metal boxes for switches and sockets. Copper pipes are attached to the boxes with flaring, steel pipes with nuts.
- Installation of junction boxes. Ideally, they should be connected to the pipes by welding or soldering to ensure 100% grounding.
- Electrical measurements. All metal elements of the installations must be connected to the PE bus (all lines, without exception, must have a grounding conductor).
- Pulling cables into pipes. To place wires inside metal pipes, special pulling cables are used.
- Installation of sockets and switches. When cutting the cable, it is necessary to make a small supply of wires in case of repair or replacement of equipment.
After the installation of hidden wiring is completed, it is necessary to contact representatives of the electrical laboratory. Many people forget that a technical report on the condition of the wiring and the quality of installation is a mandatory document.

It is worth understanding that installing hidden wiring in steel, and even more so in copper pipes, is an unprofitable undertaking from a financial point of view.
In addition to expensive materials, it is necessary to spend part of the money on good specialists, since a person far from electrical installations cannot cope with the design of hidden wiring, and installation requires a qualified specialist.
Why is a ground loop needed?
Designing electrical networks for a wooden house necessarily includes a section on installing a grounding loop, without which the entire energy supply system to the building is considered unsafe. There are several methods of grounding, and, despite the prohibitions, all of them are still used.
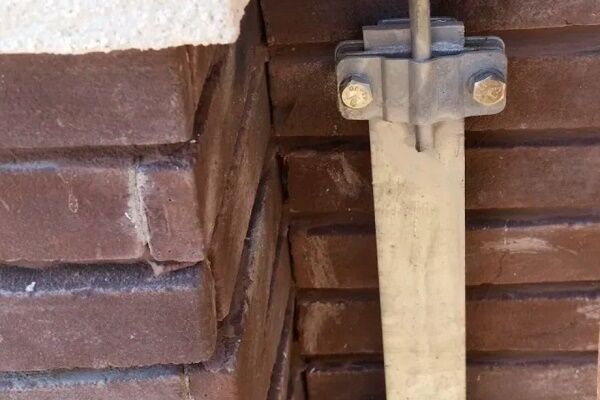
You should avoid assembling the circuit from scrap materials - this is dangerous.The traditional method of constructing a “triangle” from metal corners and a tire requires free space in the local area, moreover, since 2013 it has been prohibited as not meeting modern standards (GOST R 50571.5.54-2011).

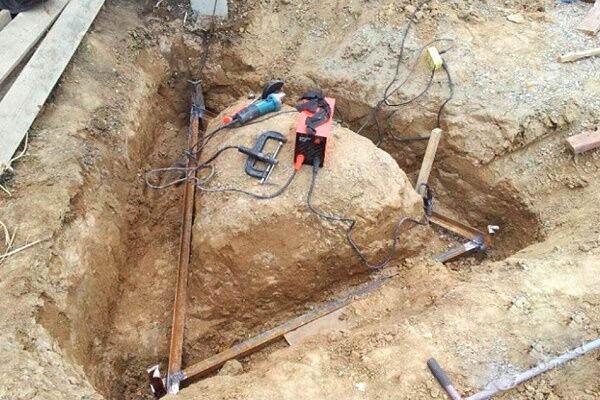
It is reasonable to use a modular-pin grounding method in a suburban area, according to which grounding electrodes are installed in a line or along the perimeter of the house.
It does not require the allocation of an impressive amount of free space on the site, because... all elements are located along existing objects. All you need is a hammer drill to place the pin in the ground.
Steps to install a grounding loop for a private home:
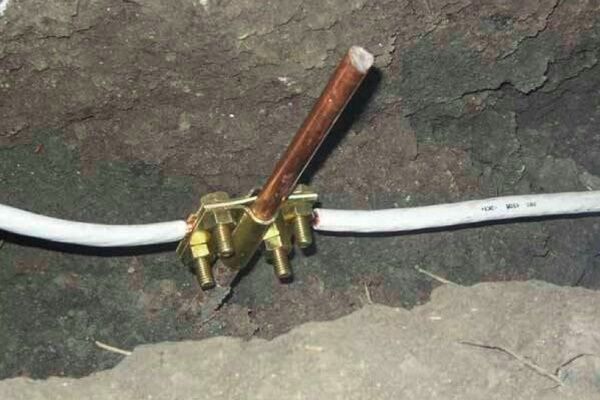
To increase the current-conducting capabilities, factory-produced electrodes are coated with copper, and all connections, threads and couplings are lubricated with conductive paste during the assembly process.
As a rule, the paste also contains anti-corrosion additives. As protection from an aggressive external environment, all connections are also wrapped with waterproofing material.
The advantages of ready-made pin-type grounding systems are efficiency, low labor costs, space saving, the main disadvantage is high cost.
It is precisely because of the high cost that many owners of wooden cottages and country houses still use pieces of metal corners or fittings for ground loop devices instead of factory products.
Fire protection measures
If we analyze the entire process of electrical installation work in a wooden house from a safety point of view, we can highlight the main rules:
- correct selection and installation of RCD;
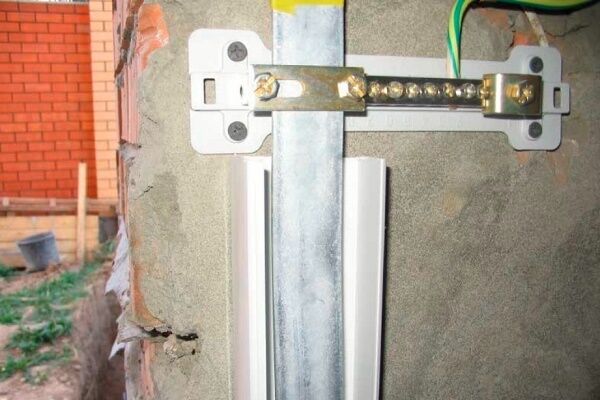
- installation of a grounding loop using a modular-pin method (with a resistance of 4 Ohms);
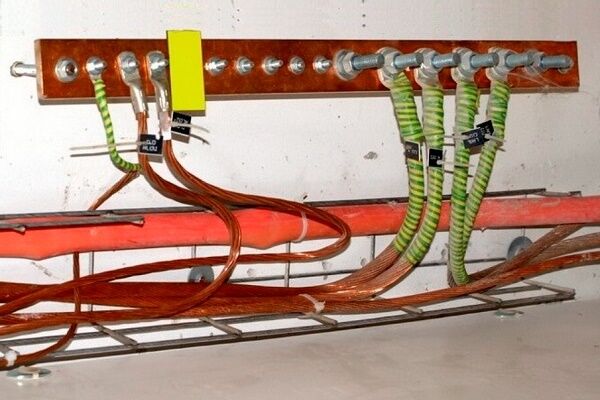
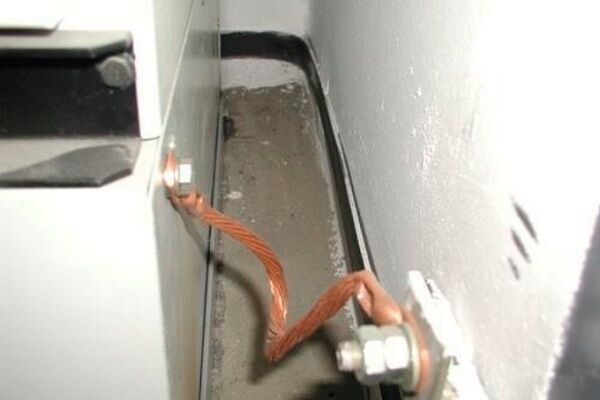
- installation of a potential equalization system;
- ensuring grounding continuity throughout the entire network;
- installation of overhead sockets only;
- hidden installation - in metal boxes and pipes.
Upon completion of electrical installation work, the risk of accidental fire or electric shock, as well as breakdown of household appliances due to unsatisfactory wiring conditions, must be completely eliminated.
Conclusions and useful video on the topic
There are many nuances in the process of laying routes and installing electrical installations, which only professional engineers and electricians can help with.
How to install a socket using a wooden trim:
Rules for hidden wiring:
General information about electrical installation in a wooden house:
Installation of electrical power in wooden structures that are considered combustible requires special attention, experience, knowledge of technical nuances and compliance with regulatory requirements.
To draw up and approve design documentation, enter electrical cables into the house, as well as install hidden wiring, we recommend contacting specialists. This does not prevent you from working on your own - for example, installing an outlet.
If you have any questions or want to share your personal experience in electrifying a wooden house, please leave comments on the article. The feedback block is located below.


Our house is made of timber, all wiring is done on top, there is not a single area that is recessed or hidden, with the exception of transitions between rooms. If you use cable channels and sockets that match the color of the cladding, then they will not be noticeable, and sometimes even look interesting.
The wiring was made of PUNGP 2.5x3 copper, with the obligatory installation of a grounding loop.
Electricity never forgives mistakes, especially in a wooden house, so if you don’t know how to work with electrical equipment, hire a specialist to avoid dire consequences.
So why didn't you hire a specialist? He would be able to tell me that this cable is not suitable for fixed electrical wiring.
It is very difficult to make electrical wiring in a wooden house hidden, unless you install wall panels. Therefore, the wiring is most often external. Due to the fact that the assortment in our stores is quite large, this is not a problem. You can choose any decorative box for your interior. A prerequisite is the presence of a grounding circuit. There should be no grounding in wooden houses.
Good afternoon, Herman.
Your statement that “There should be no grounding in wooden houses” clearly contradicts the “Rules for Electrical Installations” - start reading the “General Requirements” section (I have attached a screenshot for reference). Any washing machine, dishwasher, or other kitchen electrical installations must be zeroed - otherwise (if there is a short circuit to the body) electric shock is guaranteed.
You might argue that wood is a good insulator. However, many electric shocks have been prepared by creating a circuit “one hand on the refrigerator, the other on a properly grounded metal sink.”
I didn’t show any enthusiasm for replacing the electrical wiring in my country wooden house until a fire completely destroyed a similar dwelling on my street after a short circuit. He assumed that even a thirty-year lifespan of wires was not the limit for both them and the house. Just in case, I tried to evaluate the quality of my electrical wiring: I came to the conclusion that my house could burn down at any moment for the same reason. For today's level of electricity consumption, old electrical wiring may become unusable. When replacing, I increased the SIPs in order to be able to use a welding machine and a washing machine, and at the same time have a reserve for additional power consumption. During long-term absences, distribution panel switches allow you to reliably turn off power to the entire house, which reduces the possibility of a fire due to faulty wiring to the lowest possible level.For internal wires I used corrugated HDPE pipe with a diameter of 16 and 20 mm, which should also eliminate the possibility of a fire.
Good afternoon, Alex.
Electrical networks of apartment buildings, country houses, and other houses must be operated in accordance with the “Rules for Technical Operation of Consumers.” You don’t have to read everything, just open the section “28. Electrical installations, devices...electrical wiring up to 1000 V" (attached a screenshot of part of the table) to see many periodic tests that allow you to evaluate the performance and aging of network elements and the wires themselves.
The table was developed based on statistical data summarized by another document: Rules for assessing the physical wear of residential buildings - VSN 53-86(r). In the “General Provisions” you will see graphs of the wear and tear of communications - there is also an electrician. Here is an interesting fact for you: intra-apartment networks wear out completely in 40 years, the service life of electrical appliances is 15 years.