How to make a check valve for ventilation with your own hands: instructions on how to build a homemade product
The main purpose of the ventilation system is to ensure the flow of fresh air into the room, while simultaneously removing waste air masses.However, quite often it happens that the ventilation system does not cope with its direct responsibility, which is why, instead of clean air, foreign odors from neighboring apartments and the entrance penetrate into the home.
The only solution is to install a check valve to ensure complete ventilation. Agree, it is somewhat inappropriate to spend money on purchasing a structure that you can build yourself. Based on the step-by-step instructions, you can make a check valve for ventilation with your own hands using available materials.
The rest of the article will present the most common types of check valves, features of their installation and the choice of a suitable design for an apartment. Having understood the principle of operation and design features of the check valve, you can build and install the structure yourself.
The content of the article:
Operating principle of a check valve
The valve design is a protective device to prevent the appearance of reverse ventilation draft in the apartment. By allowing the flow of fresh air to flow in the desired direction, the valve inhibits the reverse movement of the flow.
The main advantage of the design is its automatic operation.
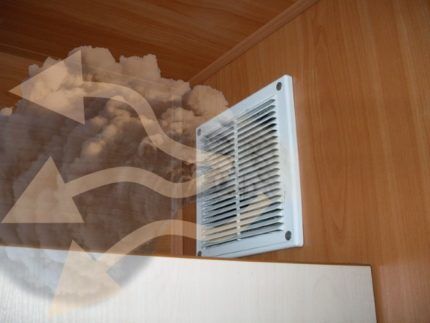
In ventilation systems valve prevents air from entering the common ventilation duct into individual rooms. Such designs work in systems with both natural and mechanical traction.
Such situations may arise due to the following problems:
- incorrect installation of the exhaust pipe;
- insufficient supply of fresh air to the system;
- installation of forced ventilation in one of the apartments;
- check valve malfunction.
The main structural element of a check valve is the shutter. When the valve is installed correctly, the valve should open under air pressure in one direction only.
When air moves not from the room, but into it, the shutter automatically closes.
Design features of the check valve
Check valves are often made in the shape of a disk, and they can come in different sizes and cross-sectional configurations.
If necessary, the device can be equipped with heating, but it is only suitable for an electrically driven ventilation system. The main advantage of a heated valve is the prevention of condensate in the system, and, therefore, ice in the cold season.
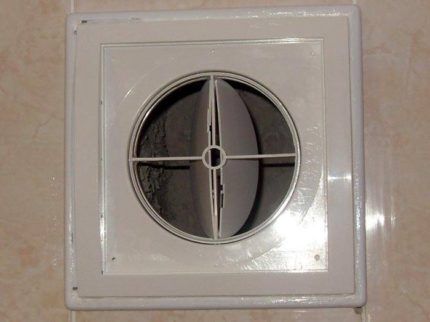
There are only four main types of check valve designs on the market today. Each of them has its own pros and cons, which should be taken into account when choosing a particular design for your ventilation system.
Option No. 1 - single-leaf design
The design is a damper mounted on a horizontal axis, which opens and closes the passage under the influence of air flow.Thus, the exhaust air is removed into the exhaust part of the system.
If there is no air movement inside the room or with reverse draft, the valve flap will not open.
It is most appropriate to use a single-leaf valve for natural ventilation of the room, since even a minimal air flow is enough to open the valve.
This design, in turn, can be of two types. In the first case, the axis on which the shutter is mounted is mounted offset relative to the center of the air channel, and in the other, a counterweight is placed inside and outside.
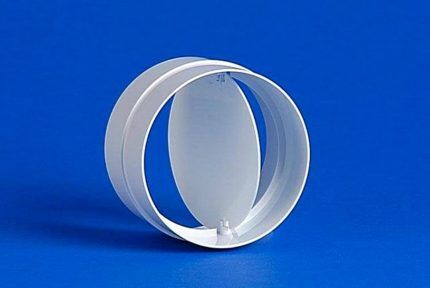
It is recommended to use a level during vertical or horizontal installation. If installed incorrectly, the valve will not close tightly, which is why it will not be able to protect the room from backdraft.
If you install a single-leaf valve near a heating radiator, the air coming from the street will immediately heat up. This will significantly increase the temperature level in the room, and therefore reduce heating costs.
Option No. 2 - bicuspid valve
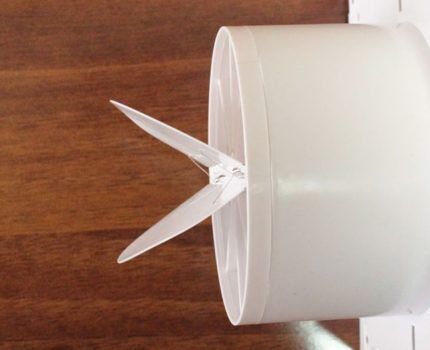
Because of its operating principle, such a valve is called “butterfly”. In the center of the round hole there is an axis with two flaps, which return to their original position using small springs.
Installation of the “butterfly” does not require special preparations, since such a structure can be installed at any angle.
Often such devices are used in a forced ventilation system with an exhaust hood. When the mechanical hood is turned off, the flaps equipped with springs return to their original position, tightly blocking the entire cross-section of the channel.
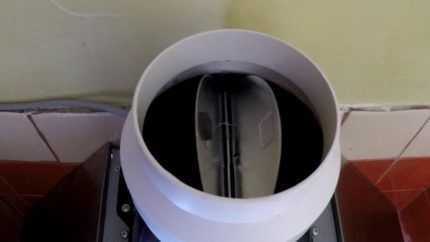
The only thing you need to do before installing the butterfly valve is to check the sensitivity of the shutters. If the air pressure in the ventilation duct is not enough for such a design, then it is better to choose a different type of valve.
This type of check valve is often installed in buildings with a large ventilation system.
Option No. 3 - inertia valve
This type of valve is a special louvers that are placed on the ventilation grille. Like the single-leaf valve, the inertia design works on the gravitational principle. The difference between these two designs is only in the number and size of the valves.
They rise freely and change their angle depending on the force of air pressure. The blinds only lower under their own weight, which is only possible if the fan stops working.
Such a gravity grid is installed with horizontal air movement. Like the “butterfly”, the inertia valve is installed only in a forced-type ventilation system.
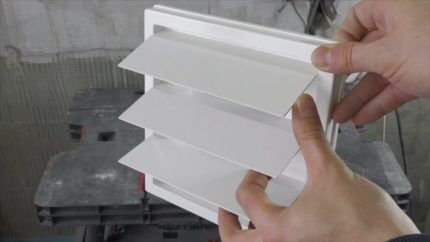
Basically, the market offers blinds of standard sizes that fully correspond to the size of the hood box and holes for natural ventilation.
If necessary, such an exhaust valve can be built with your own hands, improving the functionality of the device using a spring or membrane.
Option No. 4 - membrane type valve
The device is a flexible plate that bends under the influence of air flow.Even a small inflow is enough to open and close the valve, but in this case a lot also depends on the correct installation of the structure.
In terms of its operating principle, a diaphragm valve resembles a “butterfly”, but with more modest characteristics.
Before installing a flexible membrane, please consider reverse thrust amount in the ventilation duct, since there is a high probability of valve deformation.
If there is strong traction, it is better to choose any other type of design in order to protect yourself from additional costs of effort and money. In this case, it all depends on the size of the room and the strength of the air flow.
A membrane-type check valve is an ideal option for small houses and entrances. Unlike the three previous valves, the membrane type can be built independently, without the help of a specialist.
The next section will provide detailed instructions that will help you make a check valve with your own hands.
Instructions for self-construction of the valve
As you already understand, to create a ventilation system with backdraft protection, it is not at all necessary to buy a ready-made structure. Of course, you won’t be able to completely avoid costs, since you will have to buy exhaust fan. This will be the basis for the check valve.
Before starting work, you should prepare all the necessary tools and materials. So, to build a diaphragm valve you will need a piece of plastic and thick plastic film.It is also important to immediately prepare a drill, screws, rubber gaskets and glue.
To understand how to properly make a check valve for ventilation with your own hands, it is important to read the following instructions.
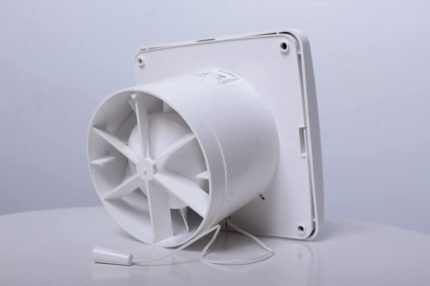
We cut out a plate from thick plastic strictly according to the shape of the hole in the ventilation duct. Actually, this will be the basis of the future valve.
Next, we drill several holes along the edges to attach the panel to the wall and fix the fan. The number of holes can be adjusted independently.
We also drill several holes in the center of the plate through which exhaust air will be discharged. You will also have to determine their number yourself, based on your personal needs. The more holes in the center of the plate, the greater the valve's capacity.
Next, we attach the hood to the finished base. First, you will need to install a rubber gasket at the connection point, and only then can you fix the fan. This will ensure the necessary tightness, and therefore improve the quality of the valve.
To avoid annoying noise coming from the fan during operation, it is recommended to place small pieces of rubber under the fasteners of the device.
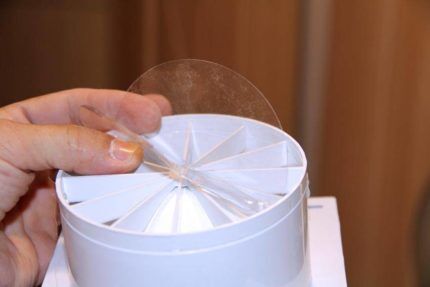
We make flaps for the valve from thick polyethylene film.First of all, you will need to cut the film to the size of the base, and only then glue it to the base of the valve. Please note that the doors must completely close ventilation holes.
The next stage is to cut the sash into two equal parts, and it is important that the cut is as even as possible. In this case, it is recommended to use a stationery knife with a sharp blade.
We install the finished valve in the ventilation duct, securing it to the wall with several self-tapping screws. Since there are gaps between the wall and the valve, it is advisable to immediately get rid of them using sealant.
This completes the process of creating and installing a diaphragm valve. By sequentially performing all of the above steps, you should end up with a reliable device that protects the room from backdraft.
Conclusions and useful video on the topic
This video provides step-by-step instructions for independently constructing a membrane valve for ventilation in an apartment:
It is now quite possible to build a check valve for ventilation yourself and save on purchasing a finished product. In this case, it is important to decide in advance on the choice of valve type, purchase an exhaust fan and begin making a homemade design.
A prerequisite is to maintain the sequence of steps presented in the instructions presented above.
If you are already familiar with the process of constructing a check valve, or know a simpler way that allows you to make a design with minimal financial costs, then please share your experience with our readers.
Leave your comment in the special field under the article, and if you wish, ask our experts questions.


