Do-it-yourself electrical wiring in the kitchen: wiring diagrams + features of electrical installation work
In order for the electrical wiring in the kitchen to serve for a long time and withstand intense operating loads, it must be correctly designed and installed in full accordance with generally accepted rules.
The work is quite painstaking and requires time, responsibility and a reasonable approach. After all, up to an hour in the kitchen is where up to 50% of the household appliances available in an apartment or house are located.
And for each device it is necessary to provide a convenient location and adequate power supply. Then all units will function in the required mode and will not cause any difficulties to the owners. In this article we will talk about how to properly install wiring in the kitchen, what materials and tools are required for this.
The content of the article:
Types of wiring - an overview of the pros and cons
Electrical wiring is installed in two ways: open and hidden. Each option has its own advantages and disadvantages. The choice of the most suitable one directly depends on the material from which the room is built, on the planned design and the presence or absence of massive decorative elements on the walls and ceiling.
Features of creating open wiring
Open wiring is the simplest and most affordable option for providing the room with the necessary electrical energy. The work does not require serious effort and is completed quite quickly.
In addition, there is no need to spoil the interior by dismantling individual fragments or the entire interior decor to lay wires. And in the event of a fire or short circuit, the problem can be eliminated immediately, without wasting time troubleshooting.

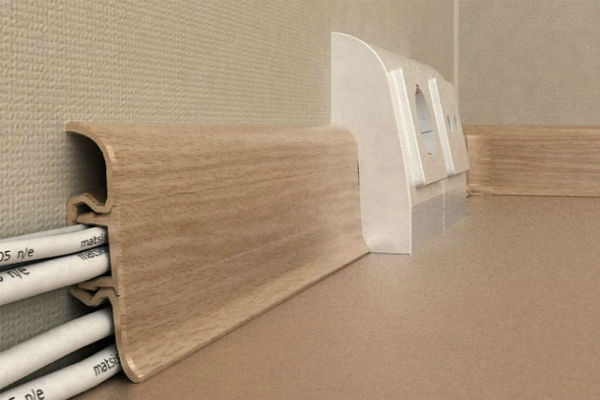
The required level of system security is ensured through special polyvinyl chloride cable channels, consisting of a box attached to the wall or ceiling and a practical overhead cover equipped with fixing fasteners-grooves.
Electrical wires are placed in them and pulled to an outlet, household appliances or lighting fixtures that require connection.

The products demonstrate high electrical insulating qualities, do not burn and have bending ductility. They are produced in a variety of wood-like shades and can be easily tinted with any type of modern construction paints.
Serious manufacturers, well-established in the market, provide a guarantee for their products for up to 25 years and promise that during this time the material will not lose its characteristics and will provide the wire with reliable and high-quality protection from any external manifestations.

Some experts consider fully or partially exposed wiring in the kitchen to be dangerous. Water vapor and sudden temperature changes caused by the use of various household appliances negatively affect the electrical network and lead to problems.
The wires overheat, lose the integrity of their protective sheath and fail prematurely, often causing short circuits and fire hazards. However, some owners neglect this advice and take unnecessary risks for the sake of design.
Options for arranging open wiring in the kitchen:
We also recommend reading our other article, where we talked in detail about the installation of open wiring and the most common mistakes. Read more - read Further.
The nuances of arranging a hidden method
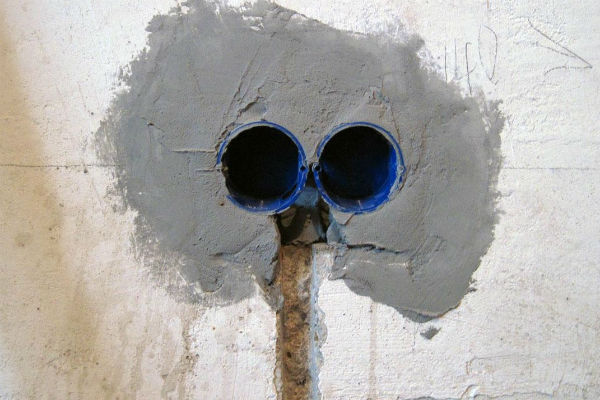
Hidden wiring involves laying all connecting elements inside the walls and ceiling. For correct arrangement, small grooves are punched in the ceilings and supporting structures, wires are laid there, and then the grooves are filled with alabaster or cement and a finishing decorative coating is applied.
This ensures a high level of safety and allows you to create any, even the most complex, interior in the kitchen.

However, this method also has disadvantages. To detect the problem area and carry out even the most minimal repairs, you will have to dismantle the external finishing and break through the wall.There is no other way to get to the location of the malfunction.
Tools required for work
To carry out electrical installation work conveniently and correctly, a home craftsman will need the following hand tools:
- a set of Phillips and straight screwdrivers;
- soldering iron;
- hammer;
- pliers;
- electric wall chaser, if you plan to do hidden wiring;
- an electric hammer drill equipped with drills with a Pobedit tip (for laying channels in concrete or brick walls);
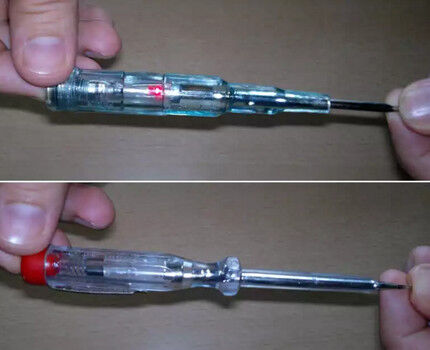
- tester for checking the presence/absence of voltage in the network.
All tools must have a complete protective coating on the handles, made of durable, non-conductive materials.
If, despite the advice of professionals and fire safety requirements, an open or combined wiring option is chosen, you will need strong and durable dowel nails. With their help, it will be possible to securely attach cable channels even to concrete walls.
For surfaces that have a softer, more pliable structure, the simplest self-tapping screws or small or medium-sized nails are suitable.

To quickly, reliably and clearly fix the wiring in the grooves, you will need plaster or alabaster. They freeze almost instantly and allow you to immediately continue working without wasting precious time. Detailed instructions on gating walls for electrical wiring can be read in this material.
How to choose the correct cable cross-section?
A wire with the correct cross-section is another important element for the correct arrangement of energy supply in the kitchen. It is chosen taking into account the total power of household appliances and lighting devices planned for use.
To connect table lamps, floor lamps, chandeliers or spotlights, they usually use copper wires or cables equipped with PPV or PV PVC insulation, capable of withstanding high operating loads (about 4.1 kW) for a long time.
The minimum permissible cross-section of the core in this embodiment is 1.5 millimeters.

The sockets responsible for connecting powerful modules of household appliances (microwave oven, coffee maker, toaster, etc.) are supplied with wires of the same class, but with a larger cross-section (from 2.5 mm).
If you neglect this point and take a thin wire, it will not withstand the operating load and will lead to a short circuit or fire in the future.

If you plan to use appliances with a metal body to illuminate the kitchen, you will not be able to get by with a thin wire for connection. To prevent voltage from entering the lamp body, you will need to connect a three-core cable or wire with a powerful protective sheath to the object.
Only with this installation option will metal lamps be completely safe.

When connecting high-power devices (multi-burner stove, oven, etc.) to the network, consuming 8-12 kW per hour, you will definitely need a separate branch of a three-core cable with copper conductors and durable, reliable nayrite or PVC insulation.
After installing the device, it will have to be grounded using the third core of the cable. The cross-section of each core in this case should not be lower than 6 mm. We also recommend reading our other article, which describes in detail how calculate wire cross-section for home wiring.
General preparatory work
All work with wiring in the kitchen begins with drawing up a project. First, the amount of equipment planned for subsequent deployment is determined.
Mandatory positions include:
- fridge;
- stove (oven, hob).
Among the additional devices that make life more convenient and comfortable are:
- microwave;
- Dishwasher;
- electric kettle;
- sandwich maker;
- multicooker;
- hood;
- food processor;
- mixer;
- coffee machine, etc.
Some complete the kitchen with all these items, others choose hotel items, and still others add a TV and washing machine to the list. All these options are considered acceptable provided that the wiring is organized correctly and a separate outlet is installed for each unit.
Then a drawing is made on paper and the expected location of furniture, lighting fixtures and household appliances relative to the layout of the room is marked on it. The location of sockets and switches/switches is also indicated there.
At the next stage, the type of network entering the residential premises is determined. If single-phase power supply is used, connecting several powerful household appliances at the same time will be problematic. You will have to either reduce the number of units used or turn them on strictly separately so that there is no overload in the network.

A three-phase network allows you to create wiring with a significant power reserve and makes it possible to use household appliances in the most convenient mode. Go to linkto learn about the most popular socket layouts in the kitchen.
How to calculate the optimal wiring power?
In order to provide all kitchen appliances and lighting equipment with the required amount of electricity, it is necessary at the stage of creating a wiring project to calculate the total power of all devices planned for use. The rated power is indicated in the technical data sheet of the unit.
By adding up all the indicators, it will become clear how many kilowatts will be required for correct operation.

Typically the value ranges from 8-15 kW, but in fact it can be either more or less. Of course, the situation when all devices turn on at the same time is extremely rare, but, nevertheless, it is recommended to create the wiring with some power reserve in case of any unforeseen situations
The nuances of installation in closed and open ways
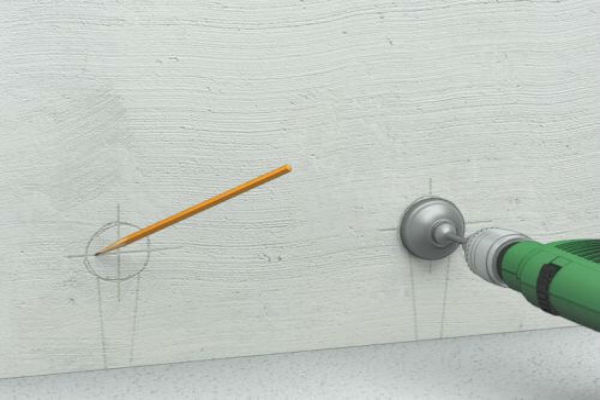
For the correct installation of closed electrical wiring, preliminary markings are first applied to the walls, according to a pre-drawn diagram.

Then, according to the drawing, with a special tool (chisel, wall chaser, drill, etc.) grooves are made in the walls for laying the wire and then disguising it under the finishing finish.
If there is a need to make a turn, it is performed strictly at an angle of 90°.

At the next stage, sockets for socket boxes and built-in sockets are prepared, and then the wires, enclosed in corrugated pipes, are laid in the grooved channel. To fix the position, holes are made in the groove every 30 cm and the cable is secured with dowel brackets. Upon completion of installation, the channels are covered with gypsum or alabaster mortar.
Plastic socket boxes are installed in the prepared recesses and wires are routed through them for subsequent connection of sockets and switches. The position is leveled to the building level and fastened with a screw and mortar.

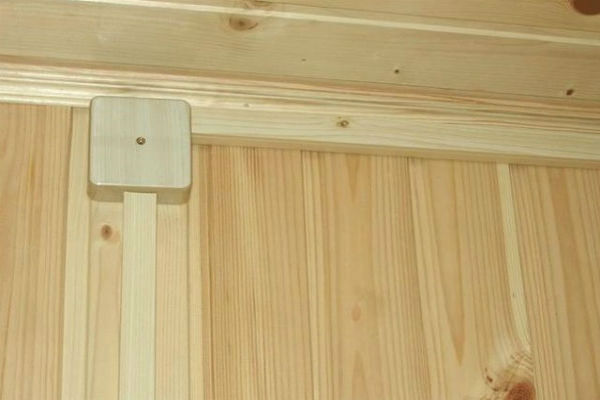
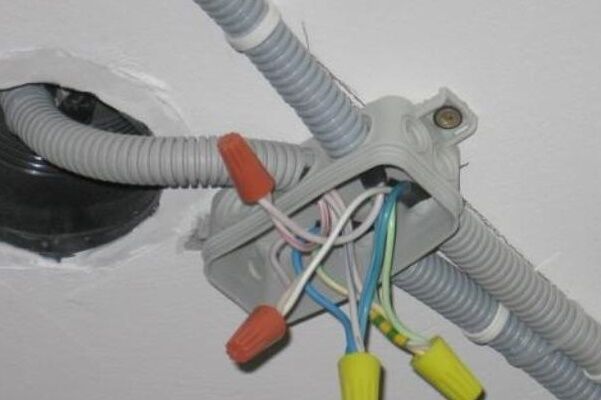
Places where several wires are twisted are masked with polymer or steel boxes, placing them flush with the wall level. At the last moment, the cables from the sockets, lighting points and on/off switches in the distribution box are connected to the main input wire of the electrical network. The connection areas are carefully protected with electrical tape or PPE.
The closed wiring process is as follows:
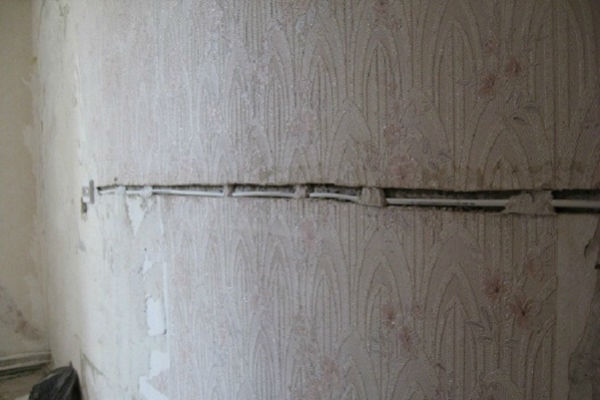
Features of the open installation option
To organize open wiring, special rubber wires with a copper or aluminum core, a separating base and an external polyvinyl chloride protective layer are used.
They are attached to the walls and ceiling with nails threaded through porcelain rollers, which have good insulating properties. The fastening blocks are placed at a distance of 500 mm from each other.
How to place sockets correctly?
Before proceeding with the installation of sockets, install the input panel. Special fuses are placed in it (residual current devices - RCD). In case of excessive voltage, they will have time to de-energize the system, preventing a short circuit or fire.

Up to 5 parallel connections are connected to each RCD element with a separate loop (depending on the need). Local and general lighting circuits are connected separately. When the shield is installed, we begin to organize the correct wiring of sockets in the kitchen.
General rules apply for such an event:
- Sockets should never be placed in close proximity to the sink or stove. The ingress of moisture and hot vapors generated during cooking can cause deformation of the part body, short circuit or fire.
- When laying the connecting cable, do not leave long wires hanging down, but pull them to the wall with suitable fasteners.
- The outlet itself must be 16 amp.Weaker parts will eventually not withstand the intense operating load, will begin to melt or spark, and will soon require replacement.
- Sockets should be located no more than 1 meter in diameter from the electrical appliance. A longer distance will require the use of an extension cord, which will be inconvenient and unsafe.
- Install sockets in strict accordance with general safety standards (at a distance of 30-40 cm from the floor). If there are children in the house, they install hidden sockets or “hide” them in the countertop or other pieces of furniture.
In order for the socket to serve for a long time and withstand full operational load, choose models equipped with nickel-plated slats and ceramic plates. They are distinguished by their endurance and work fully in active mode for a long time.
Tips and current safety rules
Kitchen electrical wiring is one of the most important sections of the entire electrical network in an apartment or private house. It is advisable that its installation be carried out by professionals who have special specialized knowledge, suitable qualifications and experience in such work.
But usually such services are highly valued, and many home craftsmen, deciding to save money, try to independently draw up a general electrical wiring diagram in the kitchen, so that they can then lay wires, distribute and install sockets using it.
This approach is quite acceptable provided that you pay close attention to the matter and know the general safety rules.After all, electrical energy is not only light, heat and other amenities in residential premises, but also a constant source of increased danger.
Safety precautions when working with electrical networks
When installing electrical wiring in the kitchen, you must strictly comply with all standards and be sure to adhere to generally accepted safety rules.
This will protect you from mistakes that could lead to wire fires, short circuits, and electric shock in the future.
- Wiring is carried out strictly with the electricity turned off. If the distribution panel is located in a public area, a warning sign about the work in progress is hung on it.
- Connection to the central network of household appliances is done according to the accompanying instructions, which are always included with the appliance.
- For work, use tools equipped with an insulating coating that does not have cracks, potholes or any other external damage.
- When installing electrical wiring, screwdrivers, pliers and pliers that have structural or fixing elements made of conductive materials are not used.
- Immediately before installation, the room is cleaned and any dampness (evaporation on the windows and ceiling, puddles or drops of water on the floor, etc.) is scrupulously removed.
- All activities with electrical systems are carried out only with dry hands. For additional guarantee, use special rubber-coated gloves, thus protecting yourself from possible injuries and burns.
Knowing these simple rules and strictly following them, even an amateur who does not have much experience in such work can install the wiring correctly while avoiding electric shock.
Conclusions and useful video on the topic
The video explains in detail how to organize wiring in the kitchen and provide all household appliances with adequate power supply. In addition to basic information, the video contains a description of interesting nuances and several useful tips for home craftsmen:
How to correctly arrange sockets in the kitchen so that they fit harmoniously into the future interior, are easy to use, invisible and absolutely safe for both adults and children:
Features of the formation of wiring in the kitchen. Tips and tricks from a professional for DIYers:
Organizing wiring in the kitchen with your own hands is a long process that requires a lot of attention, accuracy and scrupulousness. It is very important to choose the right wires for wiring, carry out all work in strict accordance with the developed and approved design documentation and strictly observe the safety regulations relevant for the installation of electrical networks.
Then the wiring will serve properly for a long time and provide all kitchen appliances and lighting fixtures with adequate power supply.
Do you have personal experience installing electrical wiring in the kitchen? Perhaps you can give valuable advice to our readers? Please share your opinion in the block below.


It is clear that vintage is in fashion now, but I would not recommend doing open wiring in the kitchen. It is clear that in wooden houses this is a necessity, but in other cases it is better to ditch the walls and hide the wiring. It's not just a matter of aesthetics, but also functionality. The kitchen will need to be cleaned periodically, and open wiring will clearly interfere with this.
Hello.Open wiring has many advantages. In particular, if you want or need to change the wiring, you do not need to go through repairs. As for cleaning, cable channels solve this problem.
The kitchen is a room with high humidity and temperature, so it is advisable to make the electrical wiring hidden. When open, it is advisable to use waterproof cables, sockets and switches. Almost all kitchen electrical appliances have increased power, so don't skimp on sockets. Ideally, each device plus one just in case (for a coffee grinder or blender). Do not make wire connections that you will later plaster!
Good afternoon, Alexander. If your kitchen has high humidity and temperature, then you need to take care of ventilation. The types of electrical wiring for the kitchen are determined by the PUE. In order not to retell it, I attached a screenshot.
By the way, the PUE includes bathrooms and showers as “special zones”. Electrical installations in these zones are regulated in detail by GOST R 50571.11-96. The document, I emphasize, does not classify kitchens as “special premises.”
If for some reason it is not possible to groove the wall for wiring, then a good option is to use cable channels. Inexpensive, but very useful and functional, and also easy to install.