Replacing a pump in a well: how to properly replace pumping equipment with new one
In a country house or country house you cannot do without an autonomous water supply system.A well is most often chosen as a source of water. This system is very effective, reliable and durable.
With proper maintenance and operation, it requires almost no human intervention, but sometimes it is necessary to replace the pump in the well. How to do it right?
We will tell you how to remove an old pump from a wellbore and install a new unit in its place. The article we presented describes in detail the methods and subtleties of the process. Taking into account our advice, all work will be completed perfectly.
The content of the article:
Reasons to replace the pump
Mechanisms do not last forever and sooner or later they fail. It is clear that it is necessary to replace the broken pump, which has previously served for decades.
However, if equipment failure occurs prematurely, it is imperative to find the cause. Otherwise, the new device may repeat the fate of its predecessor, which threatens the owner with unjustified expenses.
You can “write off” what happened to a manufacturing defect. This, of course, happens, but extremely rarely. Most often, the cause of the breakdown lies elsewhere, namely in mistakes made during the well construction process. Let's look at the most common ones.

Errors in choosing a well model
If the equipment parameters do not correspond to the actual flow rate of the well, problems will arise. If the pump capacity is exceeded, the water level will often drop below the suction pipe. In models with dry-running protection, the automation will work and the equipment will turn off. Other pumps will continue to operate.
When operating without water, which is a lubricant and coolant for the device, the bearings and impellers quickly wear out and the electric motor overheats.
The same problems arise if the dry-running sensor is installed incorrectly. The result is equipment breakdown and replacement. Another common mistake is choosing the wrong pump based on pressure.
The reason is simple: an overly powerful pump will turn off too often, which will inevitably lead to premature wear of the stator windings, impellers, and even overheating of the engine.
It must be admitted that this process will not go so quickly, but the life of the pump will in any case be significantly reduced. That is why when selecting a pump, it is necessary to take into account the relationship between water flow and productivity.
If the equipment has to raise water to a height greater than indicated in its passport, the pump will have to operate almost continuously. Excessive load will quickly damage the unit.
Some owners select a pump based on the “bigger is better” principle. They try to choose a model that overperforms. This will also lead to rapid equipment breakdown.

Typical installation errors
The equipment will inevitably fail if the height of its suspension is incorrectly determined. If you lower the device too low, it will suck up small pebbles or sand. If, on the contrary, it is raised high, it can “grab” the air.
The absence of a check valve has a negative effect on the pump. In this case, after each start-up, it must first fill the vertical pipe with water, and after turning off it is subjected to water hammer. Thus, the greater the height to which the water rises, the stronger the impact and, accordingly, the damage caused to the pump.
An excessively small diameter of the water supply pipe is also undesirable for it.The service life of the device remains unchanged, but the performance is noticeably reduced. Lack of electrical protection, especially in areas with unstable voltage, can lead to equipment damage.

When connecting electrical appliances, it is recommended to install stabilizing devices; for complex and expensive electrical equipment - special control and protection stations. The cross-section of the power cable must be sufficient, otherwise the service life of the motor will be significantly reduced.
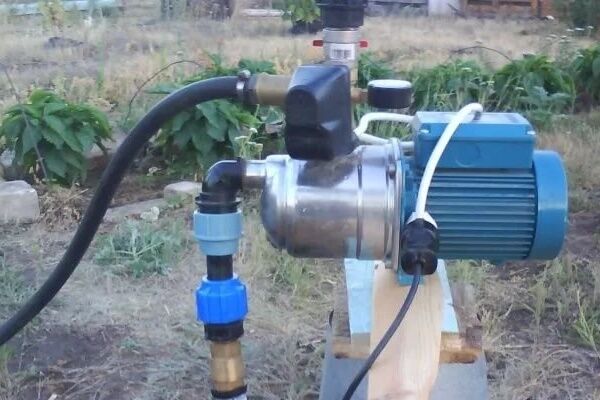
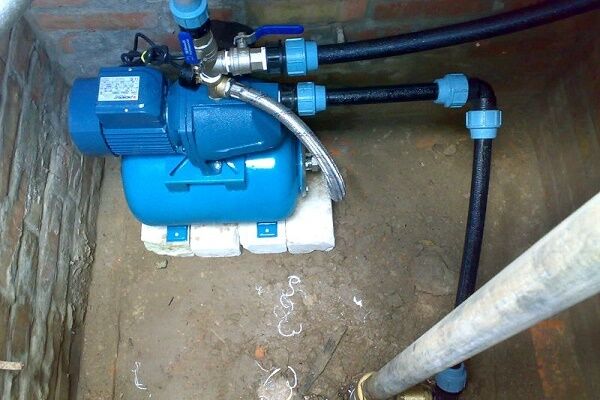
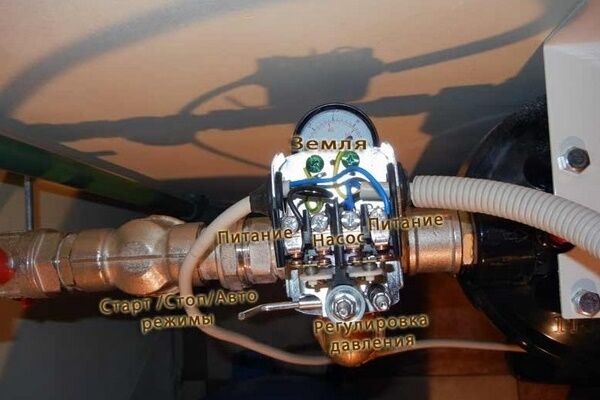
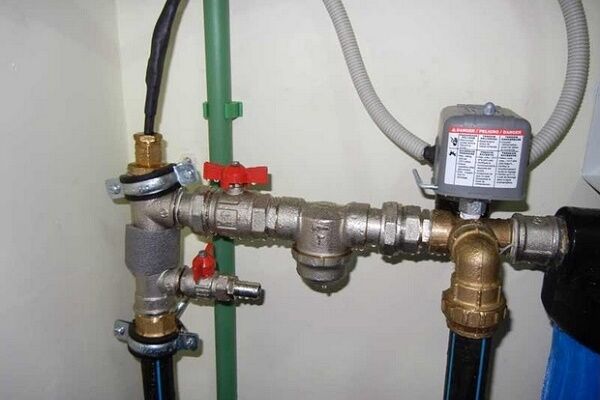
Incorrect installation of automation and instrumentation is another problem leading to an accident. The minimum set of instruments for a complete water supply systems with a storage tank and pump it looks like this: a dry-running sensor, if it is not included in the pump package, a relay, a pressure gauge, an automatic switch to turn it off/on.
Correct installation of the pump also affects its service life. A check valve must be installed between the supply pipe and the pump.

In this case, the diameter of the pipe must exactly match the dimensions of the connecting thread on the equipment. When lowering the pump, the electrical cable and cable must be secured to the water pipe.
This should be done using twisting, and not, for example, electrical tape. This is the only way to obtain a movable connection that will allow the cable to move when thermal deformations occur.
Violation of operating rules
During operation of the equipment, it is very important to ensure that the settings are correct. pressure switchinstalled for automatic system control. They must be correctly set during installation and constantly monitored, because during operation of the equipment they can go astray.
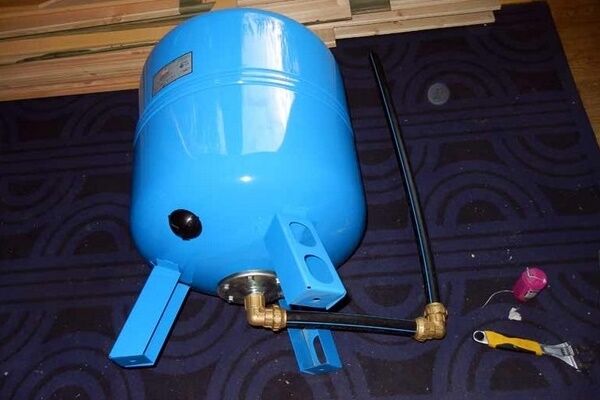
Periodic maintenance of the system should not be neglected.You should regularly check the pressure in the accumulator pneumatic element. It must correspond exactly to what is indicated in the passport.
On average, the pneumatic element has to be pumped up once a month. If you do this less often or not at all, the pressure will change and the pump will turn off/on much more often than necessary. The consequence of this will be premature wear of the element and failure of the pump.

How to get the pump out of the well?
Despite its apparent simplicity, this is a rather complex and responsible procedure. Moreover, its complexity will largely depend on the depth at which the equipment is fixed. Experts distinguish three levels of complexity of such work.
At the same time, you need to understand that it is not so much the depth of the water well, how much is the water level in the casing, that is, the dynamic and static level. For example, in a well with a depth of 120 m, the static level may be at 10 m. Then the pump will be installed at a depth of about 20 m, which will greatly facilitate its lifting.
The simplest option is to dismantle equipment located at a depth of up to 30 m. The structure of a pump and pipes in this case has a relatively short length and weight, which allows it to be removed to the surface by 1-2 people.
Pumps installed at depths of 30 to 100 m are much more difficult to lift to the top. The length of the structure of pipes and pump is much longer, and its weight also increases.In addition, the lower the pump goes, the more powerful it is and, accordingly, heavier.
We must not forget about the mass of water filling the pipe. Thus, the weight of the system is significant. You won't be able to lift the pump alone. You will need the help of several people and special devices: a winch or a manipulator.

Equipment immersed more than 100 m into a well is most often lowered on galvanized or stainless steel pipes. An option is also possible with HDPE pipes with a pressure of 16 atm.
For such structures, reinforced ends and a safety cable with an increased cross-section are used. Thus, their weight is very high. For dismantling, a truck crane or a special winch must be used.
The procedure for lifting the pump is quite simple. We start by turning off the power supply to the equipment. After this, unscrew the water pipe at the junction. Now you can start climbing.
Slowly and very carefully pull the pump to the surface, securing it with a cable. To avoid problems, pull gently but continuously.
What to do if the pump gets stuck?
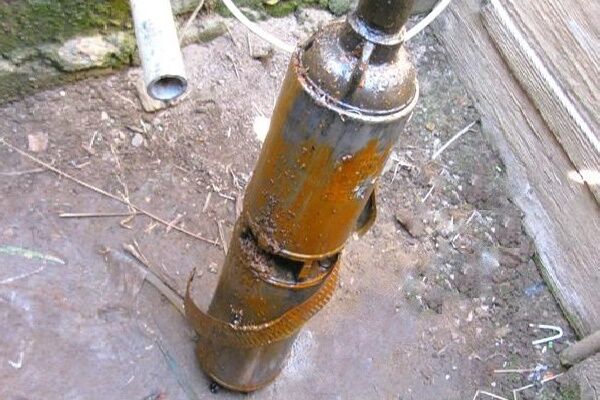
The biggest nuisance that can happen when lifting a pump is that it gets stuck or falls into the well. In especially severe cases, this may end the need to drill a new well, since it will be impossible to use the old one due to the pump stuck in it.
However, you should always try to remove the pump. Let's talk about how to do it right.
Often, when lifting the pump, slack in the cable forms, forming a loop. It can overlap around the device and become wedged between it and the well wall. In this case, it is unlikely that anything will help. The situation can only be prevented.
To do this, we carefully monitor the rising structure and do not allow any slack to appear in the cable. In addition, it must be fastened to the pipe.

It is important that the cable, the pipe, and the cable come to the surface at the same time, without noticeable slack. If it does appear and the pump is a little jammed, take the pipe and slightly push the equipment down. Then we pick up the slack and slowly continue to rise. If the pump no longer goes down, you should leave it in the position in which it is jammed and call a specialist.
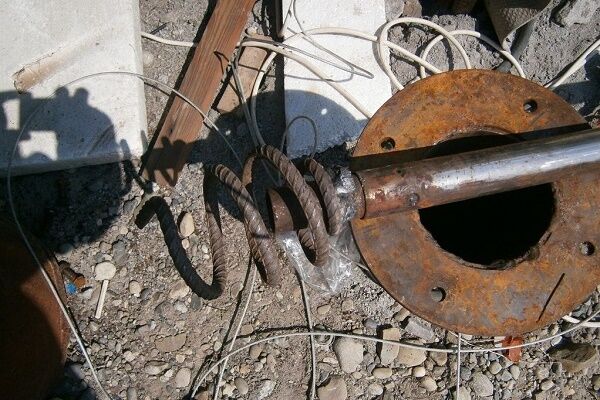
It may turn out like this: the pump came out easily and without problems. Suddenly he stopped moving upward, as if he had hit an obstacle. Most likely, the equipment encountered a protrusion inside the casing. This could be welding residue or a broken joint.
In this case, the impact on the edge of the protrusion will be clearly felt, and the pump will go down easily. There may also be a dent on the wall. Here the impact will not be felt, and the device will go down with difficulty.
To remove the pump, we recommend this method. Smoothly rotating the device by the hose around its axis, slowly pull it up. If you're lucky, the device will slide around the obstacle, go around it and pass the problem area.
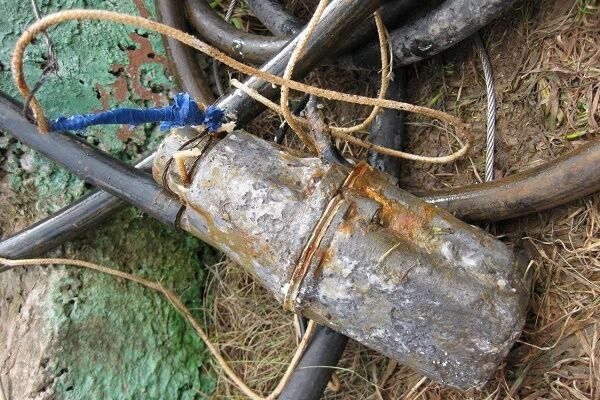
An object, such as a screwdriver or key, may accidentally fall into the well. The gap between the pump and the well wall is so small that a foreign body that gets into it will immediately jam the equipment.

In this case, the pump will easily go down, but will not be able to move up. You should remove the slack in the cable, tighten it a little and securely fix the stuck pump.
Further work should only be carried out using special equipment. In a rarely used sand well, silting of the pipe above the pump may occur. To remove it yourself, you should use the rocking method.
To do this, we evenly loosen and then tighten the cable on which the device is attached. You need to at least slightly tear the pump away from the bottom, in which case water will get into the resulting gap. It will liquefy the sludge when lowering/raising the equipment and it will most likely be able to be removed to the surface. It is very important to do everything carefully, without unnecessary efforts that could break the cable.
If all else fails and the pump remains in the well, you need to call specialists. They should have video diagnostic devices to help determine the cause of the jam, and special tools.
The same should be done if the pump falls into the well. It can only be removed using special equipment. In the most hopeless case, you can try to destroy the stuck device with a drilling machine. True, this is an expensive and rather risky operation.
Tried and tested methods removing the pump from the well in case of jamming in the barrel are given in the following article, which we recommend reading.
What to choose: repair or replacement?
You must understand that the cause of problems with filling a hydraulic accumulator or storage tank does not always lie in the pump. It is quite possible that the automation settings have gone wrong or it has malfunctioned.
There could be leaks in the water supply pipe or the well could simply be silted up. Therefore, we raise the pump only after we have ruled out damage hydraulic accumulator and automation.

After removing the equipment from the well, it is worth checking its functionality by lowering it into a container of water. This way you can see whether the electric motor is working and how the water is supplied.
It is clear that only specialists can carry out adequate diagnostics, but this way it will be possible to understand whether it is needed at all. In addition, low-hanging vibration pumps often become clogged with sand.
To bring the device back to life, it will be quite enough to disassemble the case and shake out the pebbles that have clogged under the rubber valve. If wear occurs, the valve itself may need to be replaced, but this is very simple and cheap.
After diagnosing the pump, you can decide whether to restore or replace it. It is clear that if the mechanism has served for 10 or 15 years, the wear of parts is great and it only needs to be changed.

When choosing a new mechanism, you should take into account all the nuances. To prevent the errors described above, which lead to rapid breakdown of the device, you need to adequately select a pump. Its technical characteristics must exactly match the capabilities of the source and the needs of the residential building.
Installing a new pump
Before lowering a new pump into the well It’s worth insuring yourself against possible troubles associated with its future rise. First of all, you need to know that the larger the gap between the pump and the casing wall, the less likely it is that the equipment will jam in the well.
Well-known manufacturers offer special models of minimum thickness. It is clear that their cost is higher. However, the difference in price is not comparable to the cost of repair work in case of possible jamming or even drilling a new well.
In addition, we cannot try to save money on the cable on which we will hang the pump. It is strictly forbidden to use cables made of plain steel, galvanized or with a plastic sheath for this purpose. Chains or ropes are also not suitable.

You should buy the required amount of high-quality stainless steel cable and a set of fastenings for it. This will save you from unnecessary repair costs in the future. Experts insist that using spliced cables and hoses in a well is a big risk.
There is no guarantee that when the pump is subsequently lifted, they will not separate, the piece will not wrap towards the well and jam the equipment. Thus, the fewer connections, and ideally none at all, the better.
And one more nuance. Installation well head is mandatory, otherwise small and large debris will inevitably fall into it, which is extremely undesirable.
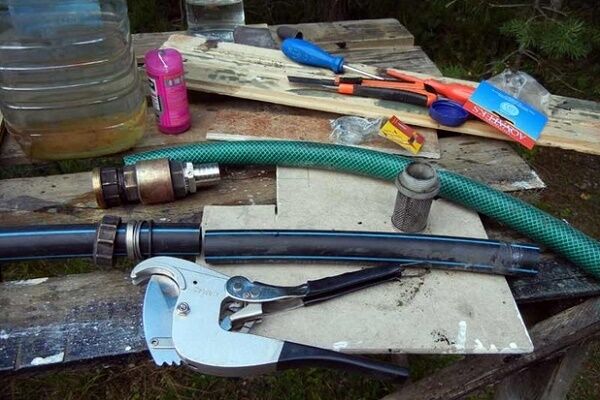
Once the necessary materials and equipment have been purchased, you can begin to work. We perform the necessary actions in the following sequence.
Casing pipe condition inspection
Before lowering the pump, be sure to check whether any curvatures, irregularities or narrowings have appeared on the walls of the casing pipe. Such defects can seriously complicate the installation of equipment and affect its service life. If there is a small gap, lowering the pump into the well will be quite difficult, and problems will also arise with its operation.
A large gap is also undesirable. In this case, the pump will not be able to provide the required speed of movement of water cooling its engine. Therefore, the minimum permissible values specified by the manufacturer in the documentation for the equipment must be strictly observed.

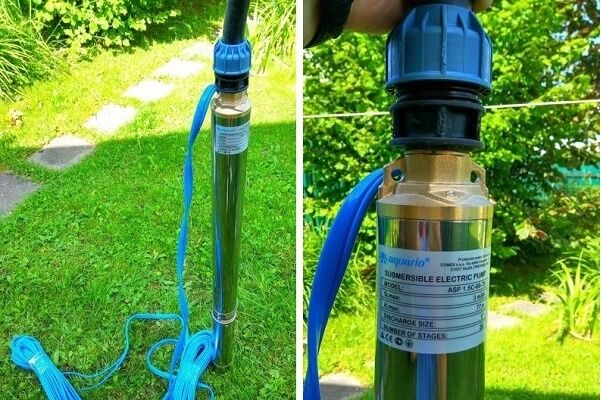
Preparing the pump for draining
We take the equipment and attach it to the cable. If there are concerns that the cable may break the fastenings on the body during pump operation, we use a strong nylon cord as a suspension.
We choose one that can withstand a breaking load of at least five times its weight. If the well depth is great, you can duplicate the suspension with a safety element.
We tie a knot on the suspension cable so that it is at least 10 cm from the pump inlets. Otherwise, the equipment will suck it up. The ends of the cord are cut off and necessarily melted.
On the device, which we will lower to a depth of less than 10 m, we need to additionally attach a spring suspension that will dampen vibration. For these purposes, a flexible rubber tape or a regular medical tourniquet is used.
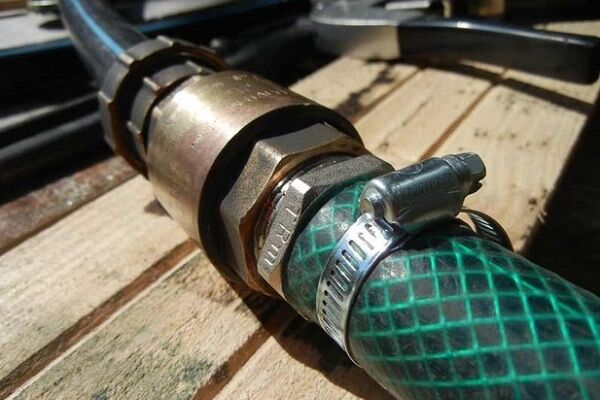
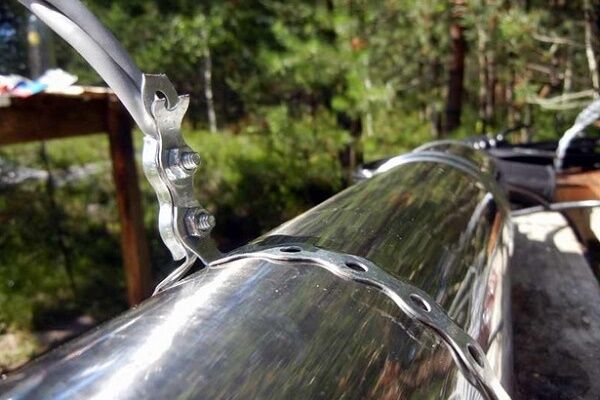
The electrical cable, metal-plastic pipe and suspension are secured to each other by twisting. The step between the fasteners should be at least 80-130 cm. In this case, we make the first connection at a distance of 20-30 cm from the pump nozzle.
Connection submersible pump to the well should be correctly performed without using a threaded connection, which is subject to destruction by corrosion and reduces the strength of the pipes. It would be optimal to make flange connections. They are more reliable and last much longer.
When fastening, be sure to insert the bolt from above and the nut from below. This is done to ensure that the bolt does not fall into the well under any circumstances. Because it can cause a serious accident.

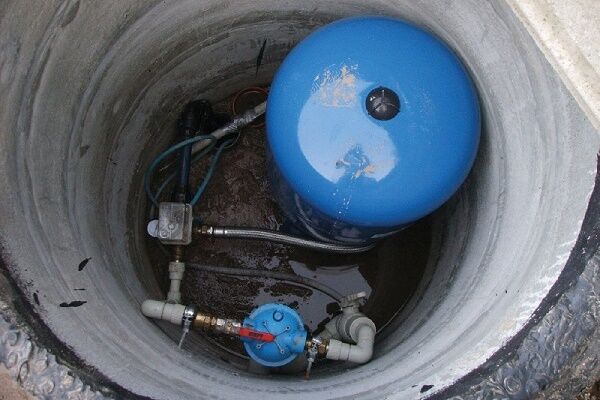
Installation of the pump unit in the shaft
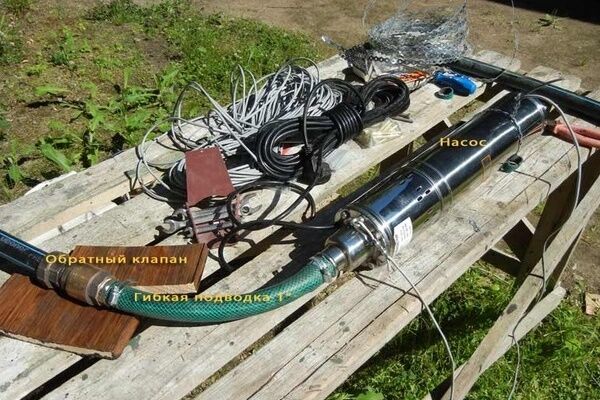
We are finishing the preparatory work. We attach the upper part of the discharge pipeline to the base plate. If the pump is not equipped with a check valve, we install it here. Then we install the valve, elbow and pressure gauge, after which we connect the equipment to the system.
Then we lift the suspension assembled from a cord, pipe and cable and fasten it to a pre-installed crossbar. Let's start lowering the pump. We carry out the operation very carefully. The equipment should not touch the walls of the casing pipe.
If it is clear that this cannot be avoided, it is better to be on the safe side by protecting the case with a rubber ring. Lower the pump to the required depth. It should be approximately two meters below the dynamic level of the well. At the same time, you need to remember that there should be at least a meter left to the bottom.
The minimum level to which the pump can be lowered is 0.3 m below the dynamic level. This depth will be sufficient to ensure that the device’s engine is cooled properly. The optimal depth for pump operation is considered to be 2-3 meters from the dynamic level.
To measure the water level in the well, we place a column of gas pipes in the hole in the base plate. We lower it below the dynamic level.
After we have lowered the pump to the desired depth, we securely fasten the suspension. Then we take a megger and take measurements to determine the insulation resistance on the motor winding with the cable lowered. And we connect the control station to the pump and check again whether it is lowered to a sufficient depth. Next, we do a test run of the new pump.

We evaluate the operation of the device, paying special attention to how correctly the electric motor functions under load. If any shortcomings are identified, we immediately eliminate them and check the operation of the equipment again. We install the top cap of the wellhead at the wellhead and tighten the bolts, securely closing the device. Now neither debris nor surface water will be able to enter the structure.
Learn more about how the water intake is maintained. written here. You should be familiar with the operating instructions to avoid situations that require removing the pump and cleaning the barrel too often.
Conclusions and useful video on the topic
Video #1. How to prepare a pump for lowering into a well:
Video #2. Replacing a pump in a well:
Video #3. How to install a deep-well pump in a well:
Replacing a well pump is a rather complex and responsible operation. It is important to remove used equipment from the barrel so that it does not get stuck or fall down. Otherwise, it will be impossible to operate the well.
The new pump should be lowered and connected in strict accordance with the manufacturer's recommendations. Only then will the equipment serve for a long time and without problems.
Please leave comments in the block below. Write about how you took the pump out of the bore of your own well in a suburban area. Ask questions, share useful information, post photos and posts with your opinion on the topic of the article.


We recently installed a pump in a well on our site, now I wonder what its working life is. Will also be used in winter. Has anyone had a well pump work in winter? How to properly equip a well for winter?
Recently they took this pump out of the excavation shaft, it was so slow, as if something had grown on the walls of the well or the pipe was bent. I would like to know the opinion of experts on how to prevent the pump from getting stuck?
There is no special prevention for getting stuck. Just make sure there is no slack in the cable so that a loop can form around the pump. If it rests on a pipe joint, then do not pull thoughtlessly, but turn it and carefully try to pull it out.
From my personal experience, I can say that there is no need to remove the pump from the well more often than maintenance work requires. Who installed your well pump to supply water? The question of winter operation should have been discussed with the foreman immediately. I can only roughly imagine how everything works there for you.
Regarding the operation of the well pump in winter: you need to carry out insulation work on the well, if this has not already been done. I am attaching an approximate diagram of how this can be implemented.
As for the reasons why the pump is difficult to remove from the well, there may be several of them:
— jamming of the pump body;
— siltation of the well;
— deformation of the well casing (including divergence of joints);
— foreign objects entering the well;
- limescale.