How to construct a well without a caisson: a review of the best methods
If a well is drilled on the site, it is worth setting up an autonomous water supply system.But organizing a private water intake in a standard way with the installation of a caisson is a very expensive undertaking. It is not necessary to spend significant sums on this large structure.
We will show you how to construct a well without a caisson. For you, we have provided step-by-step technologies, described in detail the methods and nuances of implementation. For a clear perception of information and a clear understanding of work processes, we have supplemented the material with photo and video instructions.
The content of the article:
Construction of a pit: pros and cons
If it is not possible to spend significant amounts of money on caisson device, the problem is solved in two ways: a pit is constructed and equipped or a well adapter is installed.
The simplest solution from an installation point of view is a pit.

It is a simplified analogue of a caisson that simultaneously performs several functions:
- protects installed equipment from cold;
- protects the wellhead from precipitation and domestic waste;
- acts as a structure within which it is convenient to place a set of mechanisms that ensure uninterrupted operation of the pump.
Due to insufficient tightness of the structure, pits are not installed in areas with groundwater close to the surface. When their surface is marked at a depth of more than 5 m, the construction of a pit is a completely profitable and justified solution.

The only drawback of the design is insufficient tightness. The joints between concrete rings and brickwork can allow permeate water and precipitation and domestic waste to pass through. For this reason, it is not recommended to install a hydraulic tank and an automation system in the pit.
DIY pit construction
It is advisable to carry out excavation work in the off-season. During this period, the cooled, moist soil has a more dense structure and therefore does not crumble as much.
Digging a pit for a pit
To build a pit, a pit is dug 1.5-2 meters deep. Its dimensions should be 30-40 cm larger than the internal section of the structure being constructed. The bottom of the pit is leveled and thoroughly compacted. To protect the walls of the pit from water, they should be temporarily covered with film.
The most popular and simplest to make are rectangular and round pits.

Whether it is necessary to concrete the bottom of the pit is a controversial issue. On the one hand, the monolithic “floor” is convenient for repair work and well maintenance.
It will prevent the penetration of flood waters into the annulus in the event of flooding of the structure in the off-season.However, soil movements that occur due to periodic freezing and thawing can significantly damage and distort it.
The best way to arrange the bottom of a pit is to build a “cushion” of crushed stone and sand 10-15 cm thick. Clay can be used as a waterproof layer. The holes formed as a result of soil shrinkage will only need to be leveled periodically.
Construction of the walls of the structure
Pit walls can be built using concrete rings for wells or broken bricks remaining after the dismantling of any building. To build walls of the required thickness, bricks are laid in one layer.
If desired, the walls of the structure can be made of concrete. To do this, formwork is knocked together from old unedged boards at a distance of 7-10 cm from the walls of the pit and a reinforcing mesh is installed. And then the formwork cavities are filled with concrete mortar.

After 5-7 days, when the solution has acquired the necessary strength, the pit is covered with wooden beams or boards.
To reduce the likelihood of the walls of the pit being washed away by flood water, they are covered with a layer of gravel from the outside. It is better to lay out the inside of the structure with a layer of insulation, for example, sheets extruded polystyrene foam.
The pit head can be covered according to your choice:
- concrete cover;
- metal hatch;
- a board shield reinforced with wooden blocks.
The pit cover is made removable so that it is possible to carry out a preventive inspection or carry out repair work at any time. For example: dismantle a pipe or lift a pump.
The pit is essentially a homemade caisson. Simple ways of arranging it are described in the article - How to make a caisson for a well with your own hands: design options and methods for their implementation
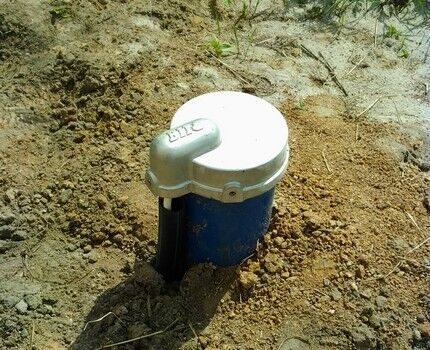
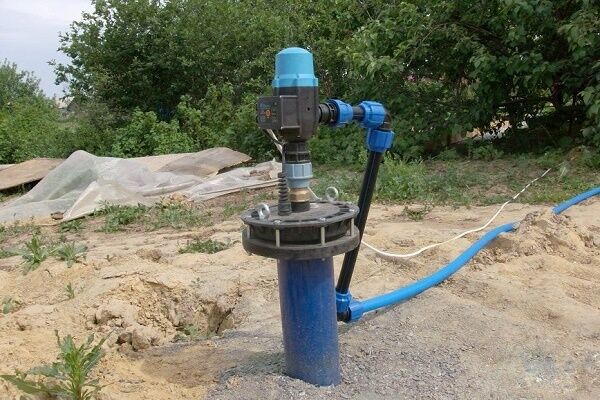
Arrangement of the wellhead with a head
If it is not planned to deepen the wellhead into the ground, it is equipped by installation of well head. It will protect water from dust and dirt, as well as from insects and rodents entering the mine shaft.
The disadvantages of an open arrangement scheme include the inability to place additional equipment near the mouth and insufficient protection from vandals.
Design and principle of operation of the adapter
The second inexpensive method of constructing a well involves the use of a special device - an adapter. In this case, the water pipes are discharged through a casing pipe.

This method of arrangement is excellent both for irregular use of the well, which involves “freezing” the structure for several months, and for continuous year-round water intake.
The adapter is installed on all types of casing pipesmade of polymer or steel alloy. The pipes must have sufficient strength, since they are designed to withstand the weight of the submersible pump and the communications connected to it.
The adapter is a device consisting of two body parts, fastened together with a quick-release threadless connection. The main task that is solved by installing this device is to protect the external branch of the water supply system from freezing.
Thanks to its use, the pipeline from the well can be laid below the horizon of seasonal soil freezing.

The main elements of the adapter are:
- Permanently fixed element. It is a threaded pipe. It is fixed to the casing below the freezing level through a specially made hole. Forms a sealed unit for the outlet of the pipeline supplying water to the house.
- Reciprocal removable element. Outwardly it resembles a tee with one blank wall. One side of it is mounted on the water intake pipe leading to the deep pump. The second connects to the stationary element of the adapter. Equipped with a connecting technical thread necessary for a hermetically sealed connection of both parts of the adapter.
In the process of pumping out of the well, water first rises up the column, then moves to the adapter, through which it is redirected and enters the pipeline leading to the house. When the elements are partially separated, the water simply begins to drain into the well.

Downhole adapters are made of bronze, brass, and stainless steel. There is a wide range of products on the market made from combined metal alloys.
Advantages and disadvantages of using the device
A well without a caisson device, equipped using an adapter, has a number of undeniable advantages.
Among the main advantages of this type of arrangement it is worth highlighting:
- Cost savings. The cost of the device is many times lower than the price of caisson equipment. And the costs for its installation and connection are minimal.
- Easy installation and maintenance. Installation of the device does not involve difficult stages of work using the same welding equipment. Even a master who has only basic repair skills can do it.
- Versatility of use. The device is used for inserting water pipes into all types of casing pipes. Due to the fact that the links of the device are tightly adjacent to each other, maximum tightness of the structure is achieved.
The compact dimensions of the adapter allow it to be installed on the walls of the well so that it becomes almost invisible to outsiders. And this is especially true given that theft is not such a rare occurrence.
True, a source equipped with an adapter also has a number of disadvantages.
These include:
- Difficulty in carrying out repairs. To perform repair operations or preventive inspection, you will first have to dig out the adapter connection point, which is not always possible.
- Power restrictions. Although manufacturers claim the device’s ability to withstand large pressure drops, when constructing a well using an adapter, you should still not choose pumping units with high productivity.
In comparison with arranging a pit, installing an adapter is inferior in that hydraulic accumulator, the taps and automation system will have to be moved to a separate room.
In addition, if the elements are incorrectly connected during the operation of a hydraulic structure, it is quite problematic to control the reverse flow into the groundwater production shaft.
Depressurization of elements can occur even if the connecting elements of the structure are made of different metals, which have different aging wear and react differently to the effects of temperature and moisture.
Adapter installation technology
When choosing an adapter for constructing a well, compare the size of the device with the diameter of the casing pipe and the size of the submersible pump, if it is planned for operation.
To complete the work you will need the following materials:
- borehole adapter;
- hole cutter;
- puller;
- connecting fittings;
- metal stakes.
When calculating the dimensions of the device, be guided by the fact that it should protrude approximately 1-3 cm from the inside of the casing pipe.

To treat structural elements before digging in the insertion points, use a neutral water-repellent lubricant.
Tools you should prepare:
- bayonet shovel;
- bucket for excavation;
- adjustable wrench;
- installation pipe;
- FUM tape.
You can make your own mounting key from a metal or plastic pipe section of a suitable diameter with a thread. As a result, it will take the form of a T-shaped structure, with a length equal to the installation depth of the device plus half a meter or a meter for ease of installation.
The thread is needed so that the mating part of the adapter can be screwed onto it. The opposite end is equipped with a tee, which simplifies the process of unscrewing the device after fixing the mounted part of the device.
Excavation work
To lay the pipeline, you need to dig a trench from the well to the point where the system enters the house. The depth of the trench is 30-40 cm below the seasonal freezing level. They are needed to form a compacted sand cushion of about 20 cm and to eliminate the possibility of accidental freezing of the pipeline.
For middle latitudes, the level of seasonal soil freezing is estimated at 1.2-1.8 m, depending on the type of soil.
When digging a trench, it should be taken into account that the pipeline must be laid with a slope from the house to the hydraulic structure in case of draining water from the system before conservation. The slope should be 3 cm per meter.
That is, we look for the depth of the adapter connection point by adding the freezing level, 30-40 cm per pillow device and multiplied by 3 the length of the external water supply branch.
If the distance from the house to the well is 10 m, the calculation will look approximately like this: 1.5 m + 0.4 m + 0.3 m.

Next to the well, the trench needs to be widened and something in the form of a hole must be dug, the dimensions of which are determined based on the convenience of placing the adapter installer in it. To carry out work on inserting the device, a hole half a meter wide is sufficient.
Equipping a well with a pitless adapter
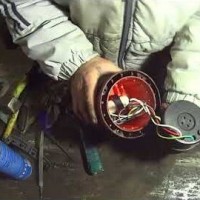
Equipment installation is carried out in two stages. First, install the main part of the device. To do this, at the depth of laying the water pipeline, a hole is drilled into the casing pipe using a core cutter. The hole diameter can be 1ʺ, 1 1/4or 2. The main thing is that it matches the size of the adapter.
The stationary part of the device is inserted into a hole drilled in the casing and secured with a union nut. Using an adjustable wrench, tighten the nut until it stops.
The rubber gasket seal ensures the tightness of the structure at the joints, minimizing the likelihood of groundwater entering the well.

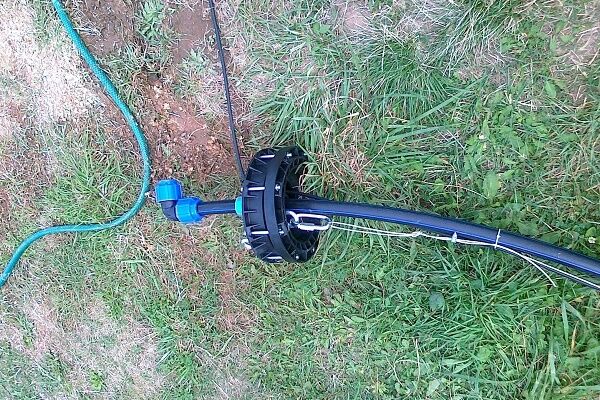
Before installing the mating part of the device, the pipe, electrical cable and cable are connected to the pump. The cable and electrical cable must be oriented so that they take place on the opposite side of the adapter.
The water pipe is fixed by means of a threaded connection through a coupling. In order to increase the tightness, the connection is sealed with FUM tape.
Since during operation the vibration of the pump, coupled with the weight of the water-filled pipe, will create significant loads, a brass coupling should be used to connect the adapter to the water-lifting pipe.
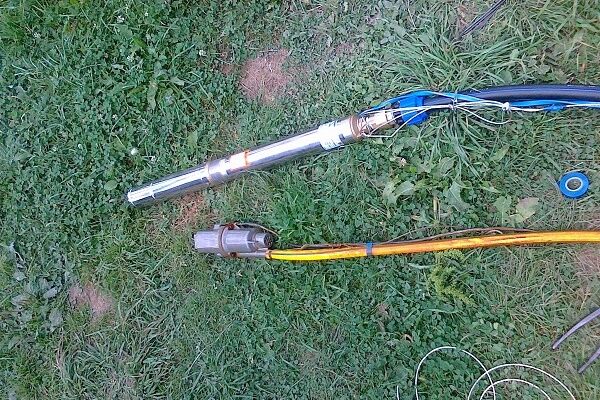
The difficulty of installing the mating part of the device lies in immersion and precise entry into the thread of the stationary element. You can make your task easier by using a T-shaped mounting pipe. To speed up the process, some craftsmen additionally illuminate the hole with a flashlight lowered on a rope.
The adapter parts are connected using a dovetail assembly. The mating part of the device is secured using a mounting pipe. After installation is completed, the installation pipe is removed to the surface.
After completing the system assembly, to a given depth lower the pump, and the end of the pipe is cut off. It is more convenient to do this work with a partner: the first one immerses the pump, the second one holds the equipment and straightens the hose.

At the final stage, all that remains is to power the equipment and check its performance.
During subsequent operation of the structure, it is necessary to check the condition of the adapter gaskets once a season. Keep in mind that the external gasket in direct contact with the ground becomes unusable within 2-3 seasons.
Over time, connecting elements can become attached to each other.To prevent this phenomenon, it is necessary to periodically disassemble and lubricate them.
Additional information about the features of installation and use of the downhole adapter is presented in this article.
Conclusions and useful video on the topic
Which is better: a well adapter or a caisson?

Video tips for pit construction:

Option for constructing a well by installing an adapter:

Each of the above methods has its own advantages and disadvantages. Therefore, when choosing the optimal option, you should focus on the location of the hydraulic device and the type of equipment used in arranging the system.
Do you have experience in constructing a well without a caisson? Or still have questions on the topic? Please share your opinion and leave comments in the form below.


From an engineering point of view, this is the simplest and most economical way to construct a well. I took note. It does not require special labor costs; all work can be done with your own hands. The main thing is that the groundwater level does not rise above 5 meters. Disadvantages include problems with performing repairs. You will need to dig out the adapter connection point. This is associated with certain difficulties and is not always possible.
Do you mean the adapter? Yes, this is an order of magnitude cheaper than a caisson, but in a sharply continental climate in winter, I’m afraid the adapter is not applicable.
Yes, Bogdan is talking about an adapter, but as for me, the benefits of using it are relative. This option will not greatly affect the budget when implemented, but on the other hand there are two significant disadvantages:
1.This makes it difficult to access the adapter itself and its elements if repairs are needed;
2. Seasonality of use.
The last point is quite important, because if the winter drags on, it will make operation impossible. Therefore, it is better to spend money on more stable options described in the article, although more expensive. But this is the case when the game is worth the candle.
Well why? The adapter is located below the freezing level. And it is quite suitable for year-round use. The only thing that confuses me is the difficulty of changing the pump depth if there are significant level fluctuations. Well, the pipe must be plastic, otherwise steel with brass and in a humid environment - electrochemical corrosion will probably eat something up.
If the water is not too far away, then my choice is a well. Still, unlike a well, you can clean it on your own and install the equipment either inside or outside. And if you can supply several pumps. Yes, and scoop with a bucket if necessary.