Do-it-yourself Indesit washing machine repair: review of common faults and how to fix them
Popularity withtirale cars Indesit Received due to low cost.But for the initial cheapness you have to pay additionally with repairs - the reliability of the brand is in question. But many causes of malfunctions can be eliminated without any problems with your own hands.
We will tell you how to repair an Indesit washing machine yourself. The article we presented describes in detail the causes of common breakdowns and methods for restoring the functionality of equipment. Our recommendations will help you achieve optimal results.
The content of the article:
- Methods for determining failure
- DIY repair guide
- No. 1: basic malfunctions in the operation of the machine
- No. 2: the heating element has failed
- No. 3: there was a problem with the drain
- No. 4: the washer’s “heart” failed
- No. 5: violations in the functionality of bearings
- No. 5: the hatch lock fails
- No. 6: replacing shock absorbing devices
- No. 7: washing powder remains in the tray
- No. 8: the control module is malfunctioning
- Conclusions and useful video on the topic
Methods for determining failure
First of all, you need to determine what kind of breakdown occurred. An initial diagnosis will help you decide whether it is possible to fix the problem yourself or whether you will still have to spend money on professional repairs.
The right step would be to first familiarize yourself with the circuit diagram of the washing machine in order to have an idea of where everything is located.
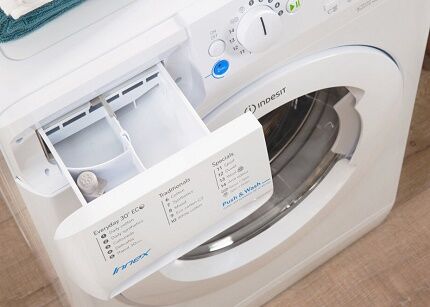
Sometimes for certainleniya The reasons for the failure of household appliances are enough to read the instructions for use, which, among other things, contain recommendations for eliminating breakdowns.
The first thing you need to do is look at the display.If it is impossible to complete the specified process, the washing machine displays special codes on the display.
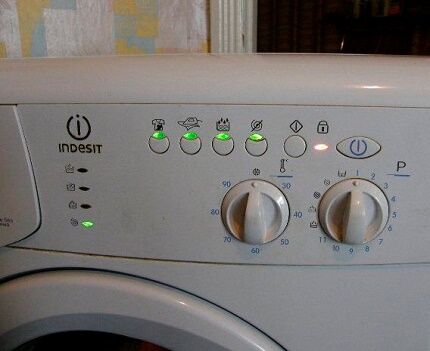
Error codes in the operation of the washing machine are given in the instructions that the manufacturer necessarily attaches to its product:
- F01 – in the control of the drive motor, the semiconductor device is closed;
- F02 – due to an open circuit or short circuitahogenerator lost the ability to signal the rotation of the drive motor; another reason for such an error is motor blocking;
- F03 – the temperature sensor circuit has been short-circuited or broken;
- F04 – breakdown of the water level sensor;
- F05 – due to an interruption in the operation of the drain pump, a clogged drain path, or a malfunction of the water sensor, the “empty tank” signal is not given;
- F06 – due to errors in the front panel buttons, the program code is not defined;
- F07 – the heating element does not heat up;
- F08 – faulty wiring, relay or tubular electric heater itself;
- F09 – EEPROM memory has failed;
- F10 – the water level sensor suddenly lost signals of both a full and an empty tank;
- F11 – the supply voltage in the drain pump has disappeared;
- F12 – communication between the controller and the display module is broken;
- F13 – a break or short circuit in the sensor circuit responsible for the drying temperature;
- F14 – a malfunction in the drying heating element;
- F15 – damage to the heating element relay responsible for drying;
- F16 – drum blocking;
- F17 – power is not supplied to the hatch door lock or they forgot to close it;
- F18 – a communication error between the controller and processor microcircuits has occurred on the main electronic module, managedyaya asynchronous drive motor.
With full decoding error codes An article fully devoted to these important issues will introduce you to the operation of Indesit washing machines and ways to eliminate violations.
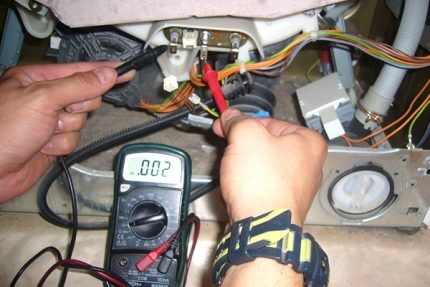
It is possible to check various contacts, wiring, sensors using a very useful device - multimeter. The device will show whether there is power everywhere.
Sometimes it is enough to listen to the sound made by the unit. When the washing machine starts squeaking, excessive noiseeat, and sometimes even rumble, then, most likely, problems have arisen in the bearings or drum, the oil seal is damaged, the counterweight fasteners are loose, and the shock absorbers are in poor condition.
DIY repair guide
Calling a specialist is the only correct solution when:
- The warranty period has not expired - if the operating rules are followed, repairs will be free;
- Ominous smoke came out of the car.
In other cases, they say there are options.
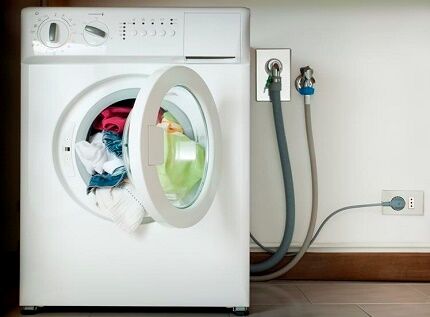
But the first stage of repair always begins with disconnecting the faulty equipment from the power supply. Electricity will definitely and severely punish you for negligence. An indispensable rule for a home master: do not act at random, use the instructions.
No. 1: basic malfunctions in the operation of the machine
If the display does not indicate a malfunction, there are no leaks, smoke, or a burning smell, then usually fixing the problem is simple:
- If your home laundry won't turn on, first you need to check whether the plug is inserted into the socket tightly enough. Sometimes the washing machine may shut down due to power surges. You must also make sure that the operating mode is set correctly on the control panel;
- When water does not enter the tank, it is recommended to press the button responsible for turning on and stopping the unit again and make sure that the door is closed tightly. Sometimes the fault turns out to be insufficient pressure in the water supply; perhaps the tap was simply turned off or the hose was damaged. The reason may lie in failuree both programs and control systems. Elimination occurs repeatnom appeal to buttone «Start/Pause»;
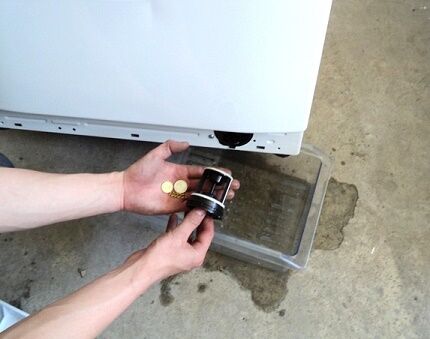
- When the drain is not working First you need to check the filter - sometimes it’s enough just to clean it.
And the source of the frightening roar can be any object (for example, a coin) that accidentally ends up in the drum.
No. 2: out of order heating element
This is a fairly common breakdown, although the stated service life heating element 10-15 years. However, numerous washes in very hot and hard water, constant overloading of the tank,low-grade Detergents do a bad job.
Over time heating device - Heating element a kind of “coat” of various salts is formed. It fails due to overheating and cannot be restored.A malfunction of the heater is indicated by a cold hatch when the washing mode is turned on and, naturally, clothes that have not been washed in cold water.
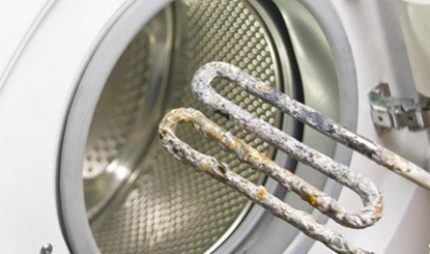
Replacing a damaged part is quite simple: manufacturers have placed heating element so that it is easy to get to by opening the back cover of the case. The only inconvenience is that the car needs to be disconnected from all communications in order to turn it the right way for repairs.
The heating element is placed under the drum pulley. When disconnecting and replacing the wire board again, you should not forget to be careful.
You will need a minimum of tools: just a flat and figured screwdriver, a wrench with a head. More to check heating element will be necessary multimeter or tester. The smartest way to buy a new heater is an original Italian one.
Sequence of operations:
- Disconnect the unit from all communications.
- ABOUTtkrutit bolts around the perimeter of the cover.
- Next, under the tank you need to find the heating element contactsA and atlay down probes for them multimeter. Normalal resistance - 25-35 Ohms, other indicators indicate a malfunction.
- Next operation: oTsoediNottion all wires with terminals, recording their position in memory.
- Then openis being calculated nutand on a bolt, the end of which is located in the center of the heater base.
- In order for the bolt to fit into the hole, it should be followed by acarefully knockugh.
- Put forward the foundation heating element, prying it up with a flat-head screwdriver.
- Rearrange temperature sensor from a damaged part to a new one heating element.
- Clean the seating area from any debris that has formed. electric heater.
- Pleavingit new heating element to his designated place,acrepitewith a bolt.
Then it remains to return the wires to their previous position, closedbe the back cover of the car and restore connection with communications.
No. 3: there was a problem with the drain
Also a fairly common problem. The pump is the weak point of automatic washing machines. In addition to clogging, when it is enough to clean the hose and filter, the impeller may jam. Located washing machine pump behind drainfilter, which should be unscrewed and removed.
Ldanger The impellers need to be tested for rotation. Too legkim it should not be: in normal condition the impeller is due to the magnet in the coil pturns around with certain delays. Sometimes threads, hair, laces and other similar debris windingut impellerthat they even block her. All these interferences must be removed.
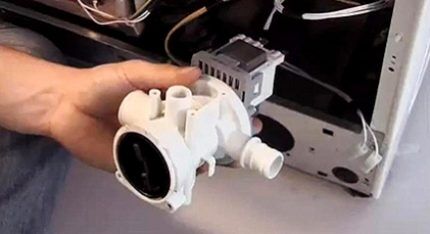
It happens that the plastic body turns out to be deformed and begins to pinch the blades. When there is no possibility of replacement, the blades need to be trimmed with a knife by no more than 2 mm, and the washer can still be used.
If after this the operation is not restored, then the breakdown is more significant and requires a detailed inspection - the pump will have to be disassembled. The car is placed on its side, youtwist the screws securing the pump to the housing are disconnected electrwires and 2 hoses.
Shlangs if necessary offpity. A tester checks the motor windings to eliminate the possibility of a break. The usual resistance value here is 150-300 Ohms.
Without relying on memory, it is worth noting the orientation of the pump relative to engineI. Then the pump motor disconnectingremoved from the housing, the rotor is removed from the stator. Often everything inside becomes clogged with dirt, preventing the rotor from rotating. In such cases, thorough rinsing is necessary.
Lubricated rotor axis bearingappears lithol, the seal is adjusted. Subsequent assembly is carried out using sealant to prevent leaks.
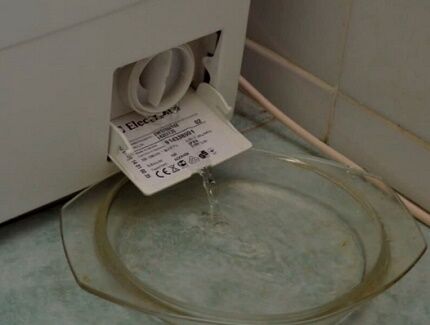
If you follow the instructions for caring for your washing machine and clean the drain hose every 6 months, the likelihood of the drain system breaking down will be greatly reduced.
No. 4: y washing machines "heart" failed
Motor Indesita well constructed, reliable and wear-resistant. However, nothing lasts forever, and at one not very wonderful moment the “heart of the machine” may fail. Preason Not only can the mechanism wear out, but also excessive overload.
Disassembly order:
- First, the outer panels of the car are removed, usually topsouth and back.
- ABOUTconnect power wires.
- Remove the belt from the pulley.
- ABOUTtwinedremove the mounts and remove the motor.
After diagnosis, a final decision is made about engine repair or replacement. Usually they lean towards the last option - restore engineIt’s difficult, it’s easier to completely replace it. Installation of the new engine is carried out in the reverse order.
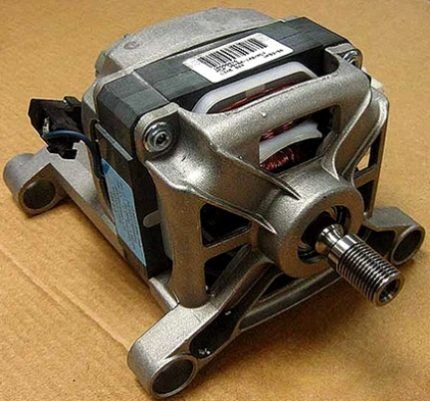
The assembly should be photographed before disassembly, then there will be no problems with what to screw where.
No. 5: violations in the functionality of bearings
When the washing machine is running, especially when spine, unusual sounds appear, and not episodic, but gradually increasing sounds, this is a clear signal of a malfunction bearings, Ofading for the ease of rotation of the drum.
Do-it-yourself repairs in such a situation are possible, but they cannot be called simple—extreme care and strict adherence to the sequence of operations are required:
- INtop and remove the back panel.
- Remove the dispenser and control unit.
- Cuff clamp otwist, remove the cuff itself and the hatch blocking device.
- Dremontirovate front wally and counterweight.
- Remove tubular electric heater, recording in memory the sequence of connecting the wires.
- ABOUTtconnectit parts connected to the drum tank, dismantlingedit driven remday and motor.
- Remove the tank, place it on a level place with the pulley up, then unscrew the pulley bolt and the pulley itself extractedwhose.
- Using a mallet (you can use a simple hammer and a wooden spacer), press the shaft down, unscrew it and divide the tank into two halves.
- Use a special puller to remove pbearing, dismantlingedit old seals.
- After installing fresh seals, press in a new bearing.
The washing machine is reassembled in the reverse order with strict sequenceAnd operationy. To prevent the tank from leaking, all seams must be sealed.
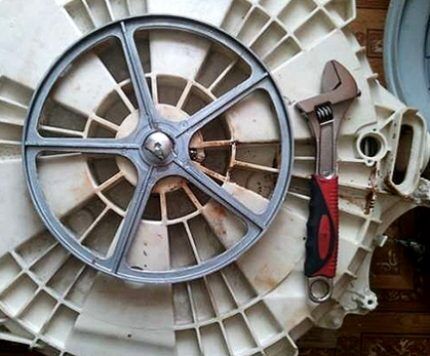
The main thing when replacing a bearing is to be careful and follow the sequence of operations.
No. 5: the hatch lock fails
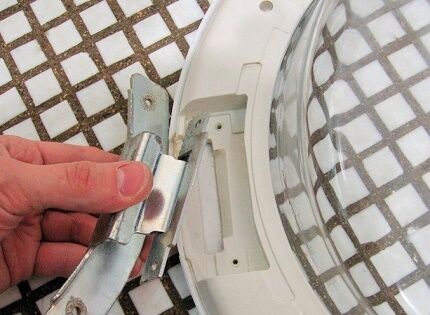
A faulty hatch lock can also cause another problem - the washing machine will stop turning on. The locking device is also equipped with contacts, and when something prevents complete closure, no power is supplied to the unit components.
Failure is usually caused by dirt accumulated in the lock. After its elimination, normal operation of the device is usually restored.
No. 6: replacing shock absorbing devices
AabsorberThey dampen excessive vibrations that occur in the washing machine. This is especially necessary during spin, when the rotating drum is onand the highest speed. Over time, they reduce their effectiveness.
As a result - excessive vibration, atypical noises, knocking in the process spin. ABOUTregular cause of failure - wear gasketand, dividing Porscheday and a cylinder, which are subsequently deformedget comfortable.
The shock absorber cylinder contains a rod consisting of a rod and a gasket treated with a high-friction lubricant. Vibrations are damped by moving the piston.
RezkThis push from the tank causes the piston to rush inside the cylinder, reducing vibrationYu. There is also a spring in the cylinder, returnpresent piston to original positionposition - that’s what they call herthere are returnOuch.
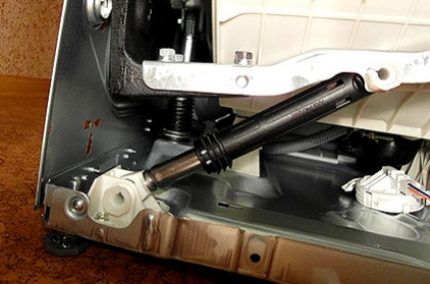
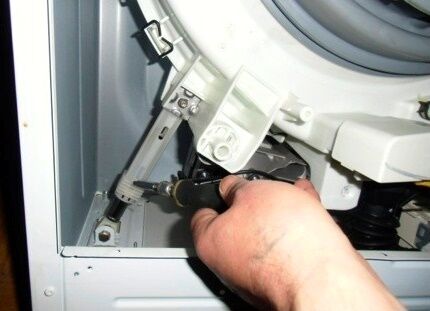
To get to the shock absorbers, you will have to remove the rear panel (in some modifications the side or front cover may be removed). By unscrewing the nut at the bottom of the shock absorber, it is disconnected from the body. In the same way, the part is released from above.
Depending on the condition and design of the parts, replacement or shock absorber repair. If a part is damaged, it is removed and a new one is installed in place of the previous one.new shock absorber and fastened in reverse order. It happens that it is enough to replace a worn-out gasket.
In the latest models, instead of shock absorbers, dampers are used, where the return spring is replaced by an entire spring system, mounted in the upper area of the tank and providing it with “suspendedy" position. This design is more reliable and better absorbs unwanted shocks.
To check the functionality of the damper, you need to remove it from the body by unscrewing the bolt in its lower segment, and try to press on it so as to compress and then release the mechanism. If the result is minimal, the device is in normal operating condition. When the piston changes position easily, the damper needs to be replaced.
It is removed from the body in the same way as conventional shock absorbers, although in some models the mounting bolts are replaced with plastic pins with latches. Install the new damper in the usual way - in the reverse order of assembly.
No. 7: washing powder remains in the tray
It happens that the washing powder does not want to leave the tray. This usually happens when it is poured in there without measure. The problem disappears if you follow the rules detergent filling. Poor water pressure may also be to blame. Worth a try clearedtit filter at the connection point washedmachine with an inlet hose.
Another option: boostit pressure in the tap supplying water. Sometimes water cannot get into the tray due toabitth valve. Then you should pull out the tray, find the key-shaped valve and carefully clean it.
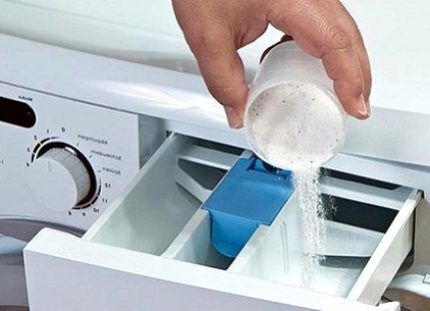
These are the most common reasons for the incorrect behavior of detergent powder, which can be easily dealt with without the help of a professional. Bmore A difficult case would be a malfunction of the water inlet valve, when the powder does not leave the tray at all.
The valve now needs to be replaced. The same can be said about the solenoid valve responsible for filling the cuvette with detergents with water.ami.
No. 8: the control module is malfunctioning
Control unit in washing machines Indesit does not have reliable protection from moisture, as a result, condensation gets on the contacts, short circuits occur, which take the device out of working condition.
Repair requires subtle diagnostics in the “Autotest” mode, serious knowledge in radio engineering, virtuoso use of a soldering iron, skills in handling microcircuits, boards, semiconductorsami. This is usually the domain of trained professionals.
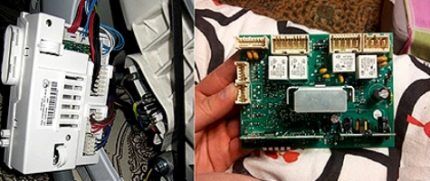
For the rare daredevils from the army of home craftsmen, the most general advice:
- remove the cover from the control unit;
- remove the module;
- inspect faulty contacts and connections;
- remove damaged parts;
- solder conditioning elements in their place.
But not everyone can handle working with electronics, so we recommend that you stop experimenting and turn to professionals.
Conclusions and useful video on the topic
You can get acquainted with the practical application of tips for repairing and replacing spare parts by watching educational videos.
Video #1. Quick replacement of the heating element in the Indesit washing machine:
Video #2. How to change a bearing yourself:
Video #3. Replacing the lock on a washing machine yourself:
As they say, the eyes are afraid, but the hands do. Good luck to those who are not afraid of repairs and who are happy to gain new knowledge and skills.
Those for whom none of the described methods helped diagnose the malfunction should probably contact certified technicians from the service center. They know exactly how to diagnose a breakdown and repair a household washing machine Indesit in any situation.
Would you like to share your own experience in restoring the functionality of your washing machine? Do you have valuable information on the topic of the article that could be useful to site visitors? Please write comments, ask questions, post photos on the topic of the article in the block form below.


Interesting article, I learned a lot from it. We have had the Indesit washing machine for three years now and it still washes clothes perfectly.
No matter what happened to our washing machine, we also had problems with the heating element, so we replaced it ourselves. The main thing is to choose exactly the same heating element so that the connector matches. Then a bra wire got stuck in the drum and a piece was sticking out, we took it out, but had to unscrew and remove the tank. Then there was a problem with the automation, but only a specialist was called because the husband did not want to mess with the microcircuits. In general, we have had this machine for more than 7 years.
As for replacing the bearings, it will work for the blonde.
Are you saying that changing the bearing is useless?
Most likely, the person is referring to the fact that the article does not describe in detail the instructions for replacing bearings. Yes, indeed, general advice is given, which may not reveal all the subtleties that you may encounter when replacing. But the material does not focus on the text part of the article regarding bearings; there is a video attached here, which, by the way, lasts an entire hour! The procedure for replacing bearings from A to Z is shown, as they say, using the example of an Indesit washing machine.
The video is noteworthy because this model has a glued tank, so it is quite difficult to get access to the necessary parts. I would also like to point out that this video will be useful for those who need to clean or replace the heating element.
In addition, from the same section there is a link to more detailed instructions - we have written a separate article to cover this operation in more detail.
You can call a specialist and not worry. But you just need to clean it, then it will last longer.
Good afternoon everyone! Need some advice.INDESIT wiu 100, was in work for a little while, about a year. It stood for 7 years. Fills in water, turns on the drum, starts washing, but after 8-10 minutes the emergency light comes on. The “rinse” and “wash” lights flash and the machine stops. The water supply is not up to standard. THANK YOU!
Hello, Yuri. Thank you for indicating exactly which indicators are on on your Indesit wiu 100 machine. Using them, you can actually determine what error code the washing machine produces. I recommend bookmarking it for the future. this material, maybe it will come in handy.
If I correctly understood the description of the blinking indicators, then you have error F03, which means that the washing machine does not heat the water. The cause of the problem lies either in a malfunction of the temperature sensor or a malfunction of the heating element.
Eliminated by replacing these parts. If these parts are in order, then repair of the control board or sensor-to-board wiring will be necessary. In this case, you will have to call a specialist, and you can replace the heating element and sensor yourself.
Indesit Wil 85. The first 2 lamps are lit horizontally. It happened that all 4 were burning horizontally. Vertical ones always go out.
Photo of the error. The 2 on the left are flashing.
Hello, p. machine witl-86 the main motor hums but the rotor does not rotate, changing the brushes did not help. Tell me the reason for the breakdown?
can anyone tell me if there is a belt on the drum on the washing machine, some kind of noise without a belt, it spins quietly by hand
We have been using Indesit for 24 years (since 1996). We often wash 2 or even 3 times a week. For the entire period - not a single breakdown. And only now they began to notice water leaks on the floor under the car. We need to look for the reason.
What happens with the machine when these indicators turn off?
Good afternoon
I bought an inexpensive washing machine, from the very beginning it didn’t wash well, there was no visible water in the tank, but the laundry was damp. I decided to increase the water level by tightening the pressure switch screw (one screw, three thin wires). The water level has increased, the programs are working, but the heating element has stopped heating the water. More precisely, the power supply to the heating element was lost. I don’t understand how the heating element or its relay is connected to the pressure switch, but the problem appeared after I changed the position of the pressure switch screw.
Returning the screw position to its original position (or almost to its original position) did not lead to a positive result. In general, I turned this screw this way and that way, and the voltage on the heating element did not go to any position.
What and in what part of the circuit could have happened and how to return power to the heating element?