How to repair washing machine shock absorbers: step-by-step guide
In matters of restoring the technical capabilities and performance of household appliances, we are accustomed to relying on service centers.However, not all breakdowns require the intervention of a specialist. Many minor problems can be easily fixed with your own hands.
One typical example is repairing washing machine shock absorbers, which you can do yourself. We will tell you how to dismantle worn parts of the shock absorption system and install new elements. Our recommendations will help you quickly and efficiently restore the operation of your washing machine.
The content of the article:
Typical causes of breakdowns
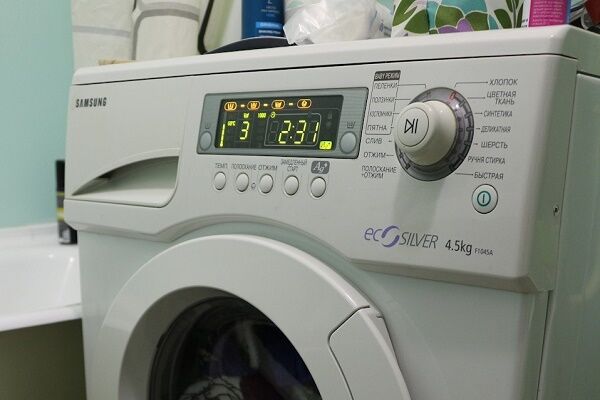
Depending on the settings, the brand of the unit and the functions performed, the washing machine drums make from 700 to 1800 revolutions per minute. Such an impressive load, and even with the application of rotational force, can easily damage contacting parts and weaken components and connections.
If shock absorbers had not been developed to dampen the vibration of the drum and the tank containing it during the spin period, the machine would have to be repaired after each washing “session”. Their purpose is no different from the functions of similar car devices.

Shock absorbers, coupled with suspension springs, eliminate direct contact between the machine’s tank and its metal body, steel and plastic parts. In the form of original supports, they are located under the main rotating part of the equipment, which is fixed in the upper part of the unit by hanging springs.
During operation of the washing machine, the supports and springs are unstable, due to which the drum, rotating at breakneck speed, can slightly shift relative to its resting position.
Those. These devices, performing spring movements, provide the drum with the ability to make the required rotations according to its status, without transferring the load to adjacent parts and assemblies.

The structural components of the washing machine, protected from vibration by shock absorbers, last much longer and are less likely to fail. True, the shock-absorbing devices themselves gradually lose their original strength during the execution of the assigned task.
Worn-out devices may require repair or replacement at an extremely inopportune moment, for example, before an evening wash, the timing of which does not allow calling a technician urgently. Or we will have to wait quite a long time for his arrival. This is where you will need information about the specifics of restoring shock absorbers and their structure.

The device of spring shock absorbers
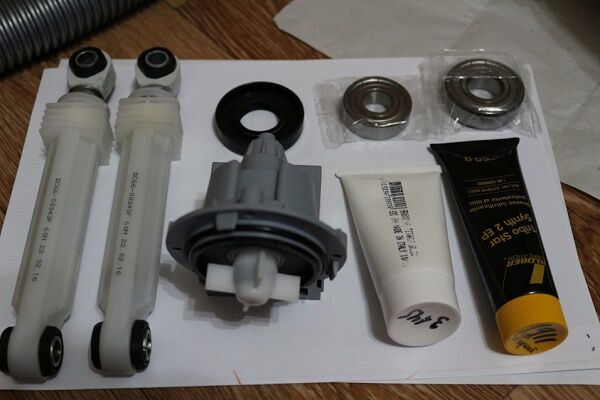
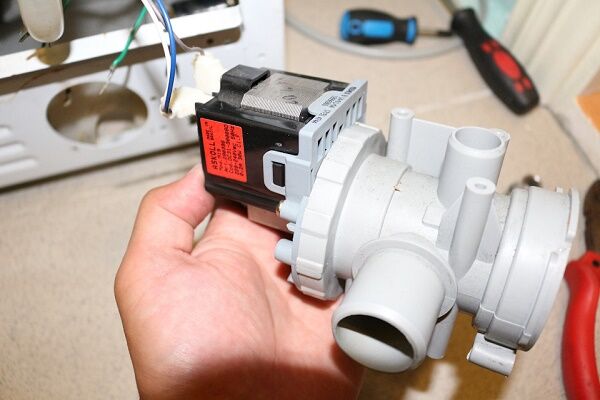
One of the most common types of shock absorbers for washing equipment has the so-called spring-piston design. To put it in exaggerated terms, it is a metal cylinder with a polymer sleeve at the top. It directs the movement of the rod installed in the shock absorber.
The upper part of the rod is “sharpened” to fit polymer liners and rubber gaskets, with the help of which it is connected to the drum. Attached to the base of the rod is a piston with a gasket heavily impregnated with non-drying lubricant. This lubricant is needed to increase the friction force when the rod and piston move along the cavity of the steel cylinder.

The operation of a spring-piston type shock absorber includes a number of sequentially repeated actions:
- During sudden vibrations, the shock absorber rod is set into linear motion.
- The piston pressed by the rod moves along the cylinder cavity.
- Impregnation prevents the piston from slipping without appropriate force.
- When the pressure is released, the rod returns to its original position.
- When effort arises, everything repeats.
To ensure that the air in the cylinder does not create additional resistance, the piston is perforated. When you press on it, a possible air lock can easily come out through the holes made through it.

Of course, such a mode of operation does not give reason to hope for the eternal preservation of parts rubbing against each other in their original technical condition. At first, just play appears, then wear. Moreover, only one spring support can be damaged, and there are 2 to 4 of them in different modifications of washing units.

The operating principle of shock absorbers for washing machines of different brands is similar, but there are some design nuances. Their size, angle of inclination, location may differ; not in all models of washing equipment they are supplemented with springs holding the drum on top.
Instead of a pair of suspensions located on top, small springs can be used, connected to a nearby upper counterweight.
In other layout options, the tank, consisting of two parts, is supported by dampers from below instead of shock absorbers. This design type is classic, therefore it is also very worth understanding the structure of these devices. It is possible that this is exactly your case.

Design features of dampers
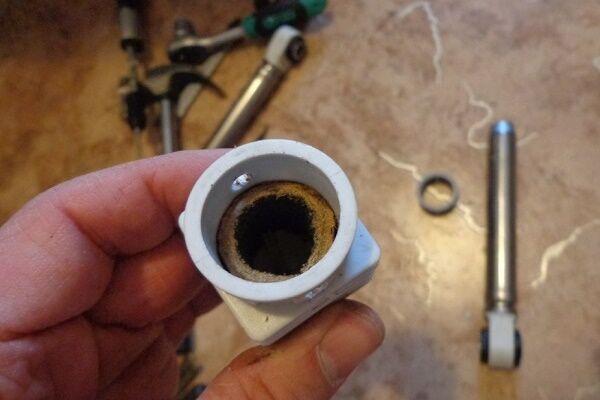
Dampers in washing machines are also used in combination with suspension springs, but their structure does not contain elements that are not very strong.In fact, this is also a steel cylinder, although it is not a rod with a piston that moves through its cavity, but simply a piston with holes in the walls to remove excess air.
The damper piston is also equipped with a friction-type gasket. It is made of porous polymer and impregnated with a non-drying lubricant that creates additional friction. There can be two or even more gaskets in the damper, it all depends on the characteristics of the device.
Both the metal cylinder and the damper moving along its cavity are equipped with rubber bushings on the outer edges, with the help of which the shock-absorbing devices are connected to the bottom of the machine and to the tank.

Dampers are available in two versions:
- Collapsible. To repair this type, most often it is enough to simply replace the pressed gasket.
- Non-separable. Their edges are rolled. Repair of this type consists of replacing the device.
The values of the maximum permissible force possible for a particular shock-absorbing device are indicated on the damper or shock absorber housings. Typically the load varies in the range of 50 - 150 newtons. When operating in the manufacturer-guaranteed mode, washers rarely exceed these limits.
When buying a new shock-absorbing device for replacement, you should not exceed the characteristics indicated on the previous part. If 100 N is indicated on the case, then there is no need to delude yourself that an element with 150 N will last longer; you need to purchase exactly the same one or with similar indicators.

Diagnosis of typical faults
Shock-absorbing devices of washing machines belong to the mechanical part of household equipment. Their repair and replacement do not require fundamental knowledge in the field of electrical or even mechanics. This means that even the intervention of an amateur will not be able to cause serious damage.
Please note that unique technical documentation is issued for each model of washing unit. Service techniques are usually authorized and devices are patented. However, there are methods for repairing shock-absorbing devices that are common to almost all types of washing machines, the specifics of which are worth understanding.
The appearance of typical damage to shock absorbers or dampers will be signaled by a specific noise that occurs during operation of the machine, or too much knocking inside its body.

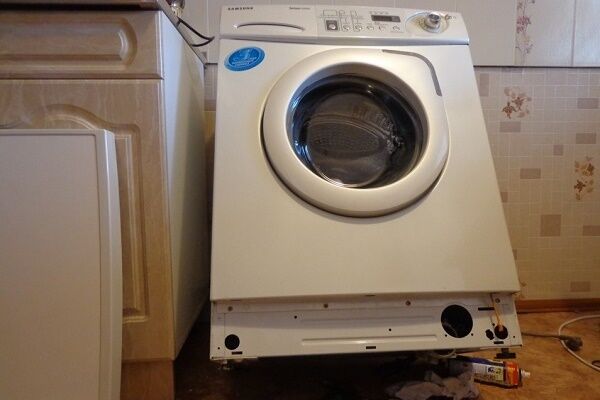
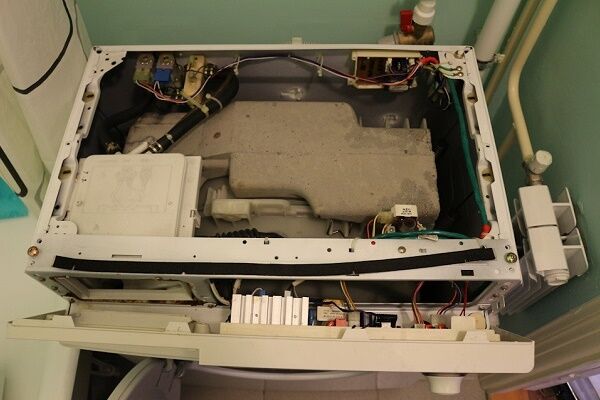
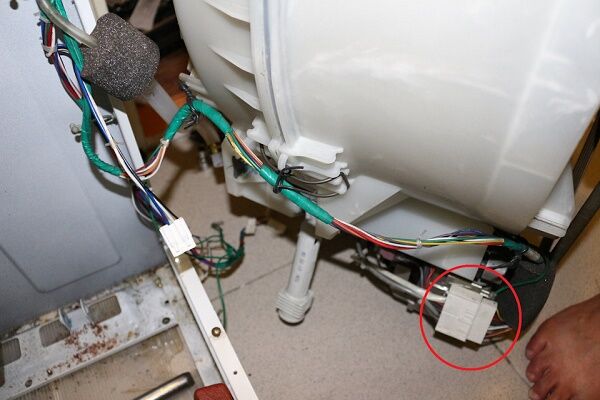
If alarming sounds are detected, their condition should be examined, and for this you need to provide yourself with access to the devices being tested. Depending on the model, for the examination you will need to remove either the top panel, the side panel, or the back panel.
Methods for diagnosing shock absorbers for washing equipment depend on the type of load:
- From the front. If, when applying force to the tank from above, folds form on the sealing collar of the loading hatch, the shock absorbers must be replaced. By the way, you can also notice a couple of folds while the machine is operating with worn-out accessories.
- From vertical. If, when applying force to the tank from above, no resistance is felt, and the tank, after interrupting the pressure, continues to swing like a pendulum, it needs to be repaired.
When carrying out diagnostics with top loading, you must definitely pay attention to how much the tank sags when pressed, if the indicated defect occurs. It would be nice to track the fact of sagging and its conditional value with a full tank load.

It is imperative to check whether there is at least some reserve for the reciprocating movement of the tank of the washing machine being examined. If it sags so that there is simply no room left for it to move during vibration, then a loud knock will occur during washing or spinning. And this is a sure sign of damage to the tank in the near future, and simply imbalance.
In normal technical condition, front-loading washing machines should not have cuff folds at all, regardless of the function being performed. Note that the formation of a single fold on this rubber seal indicates that only one of the shock absorbers is damaged.
If the folds are on washer cuff are not an indicator of damage to the shock absorbers, which means that it has worn out or become deformed from the use of substances undesirable for its structure. In this case, the seal should be replaced.
In normally functioning units with a top load, if the shock-absorbing devices are not damaged, after applying force to the tank from above and abruptly interrupting the load, i.e.retracting the hand, the tank should smoothly return to its original place without excessive swinging and vibration.

Step-by-step repair guide
A washing machine with a damaged shock absorber or a worn damper seal, of course, can still work for some time without carrying out repair operations.
But it should be remembered that without vibration damping, some extremely important parts and mechanical systems may crack or become detached. The tank and piston assembly suffer the most from this.
Making a new gasket for the damper
If noise and significant knocking are detected in a washing machine with dampers, it is often enough to change the sealing gaskets. To do this you need to partially disassemble the machine and simply disconnect the device.
Then, according to plumbing rules, you should simply cut out new gaskets from textolite or a piece of rubber of suitable thickness. After which the gaskets are replaced.

A used rubber brake pad for a car is ideal as a starting material for making your own gaskets. It is better to select the rubber thickness according to the actual size of the gap between the tank and the shock-absorbing device.
The simplest option for replacing shock absorbers
In the vast majority of situations, washing machine shock absorbers must only be completely replaced. Moreover, repairmen advise changing the entire set, and not just one device.
There is logic in the statements of experienced masters. After all, during the working process, all shock absorbers wore out approximately equally. After replacing only one device during the washing/spin period, the vibrations will be damped unevenly, which will very soon lead to breakage and abrasion of previously undamaged elements.
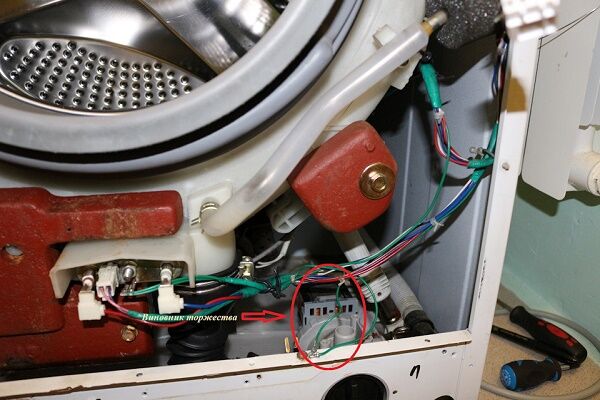
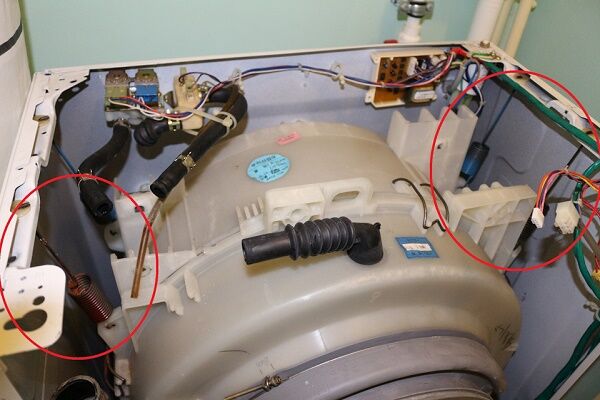
If broken devices can simply be disconnected from the bottom plane of the washing machine and from the tank, the work can be carried out without much difficulty.
To make a replacement:
- We remove and remove the part of the body located on the side required for repair.
- We dismantle damaged and failed devices.
- We install the new kit and reassemble the washing machine in the reverse order.
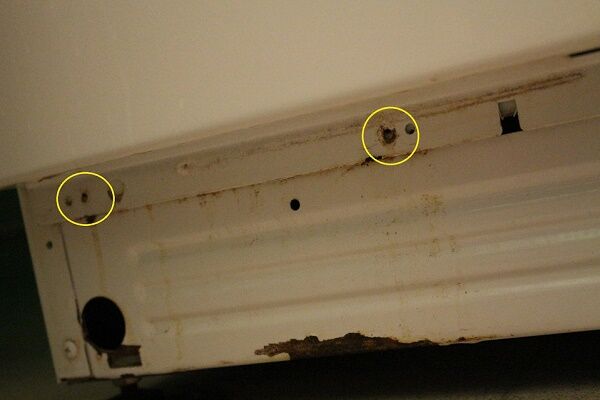
There are models in which the attachment to the tank is made in such a way that dismantling is possible only with this element. Owners of such equipment will have to almost completely disassemble the equipment before repair. In any case, before you begin repair work, you should look at the data sheet and become familiar with the fastening features.
Repair and replacement with tank removal
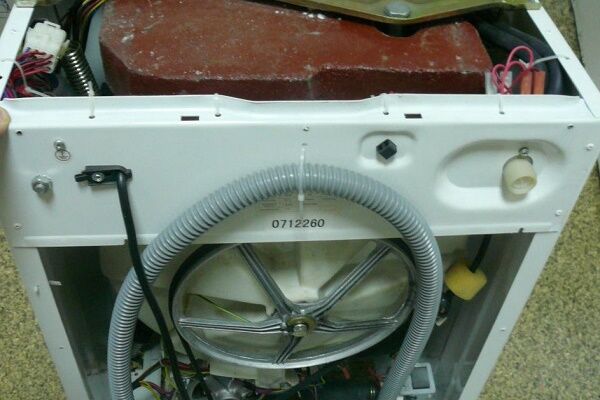
To replace dampers in such machines, they have to be almost completely disassembled.
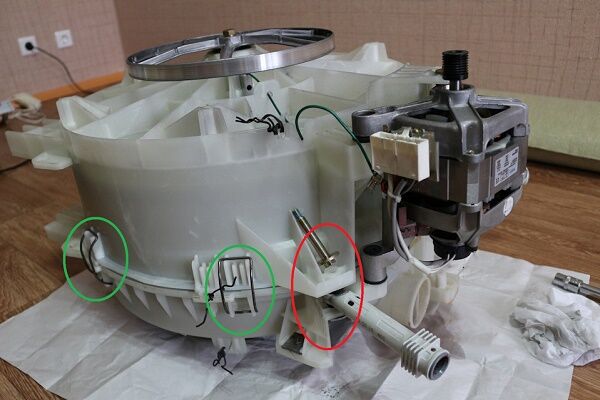
Having completed disassembling the body, we begin to remove the tank of the machine, at the same time clean the parts from rust and calcium deposits. Studying the condition washing machine drum and eliminate malfunctions if they are found.
In order not to get confused in the steps that will need to be repeated exactly during the reassembly process, we record all the stages with a phone camera.
The work is performed in the sequence below:
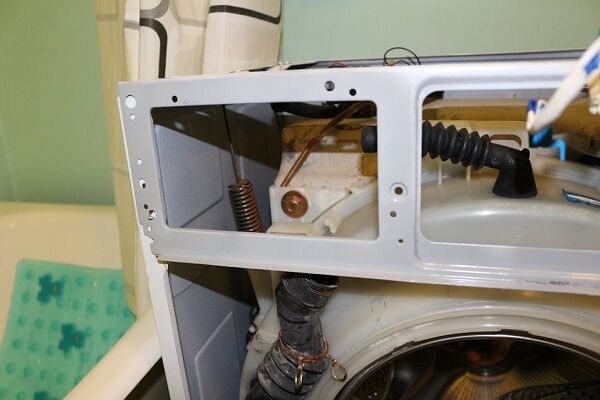
- Remove the top panel of the housing.
- We dismantle the box for loading liquids and powder.
- We remove the control panel along with the systems adjacent to it.
- Separate the springs holding the tank at the top.
- We remove the front panel and disconnect the functional components of the machine from the tank.
- We remove the tank along with the dampers.
- We replace devices, if possible, we get off with replacement of gaskets or repairs.
- We assemble the machine, strictly adhering to the disassembly sequence, only in reverse order.
In order not to make mistakes during the assembly process, it is advisable to photograph the disassembly progress.
For fastening, it is better to make an auxiliary “organizer” with several cells that can be signed along the way.

It often happens that when disassembling a machine to replace shock absorbers, a number of emerging problems are revealed, for example, the need for bearing replacement. Don't wait until a worn or damaged part causes a noticeable problem. It is better to immediately, upon detection, correct the technical condition of the unit.
Conclusions and useful video on the topic
Video #1. Video with detailed instructions for replacing shock absorbers:
Video #2. Video demonstration of repair of dampers of a washing unit:
Video #3. Shock Absorbing Device Refurbishment Guide:
Without undue self-deception, we agree that for an inexperienced home craftsman, the above repair operations can become a bit of a problem. At first, the procedure itself will be frightening with the unknown, but all this tension will oppress the performer only for the first time.
Repairs carried out by yourself will certainly become a useful experience, on the basis of which all subsequent actions will be carried out easier and faster.
Tell us about how you changed the shock absorbers in your own washing machine with your own hands. Share interesting technological nuances that will be useful to site visitors. Please leave comments, ask questions and post photos related to the topic of the article in the block form below.


Crazy brains... You need viscous PMS liquid, not sunflower oil!
Alexander, what kind of oil are we talking about?! Have you ever repaired your washing machine shock absorbers yourself? Or at least watched from afar? I use machine oil, my hobby is repairing washing machines (and not just shock absorbers, if that). The advice on recording the stages of work on a video camera is excellent, but this is when you are not working alone, and it is better to take photos (if the process has not already been debugged to the point of automation).
Alexander, let me disagree with you. I recently changed my LG F1403TDS5D. At the same time I decided to add grease to the shock absorbers. As a result, it became scary to bang the drum. The shock absorbers have lost their damping properties. I had to re-disassemble the shock absorbers and wipe the grease dry. After this, the drum stopped shaking. The machine is working fine. But just in case, I ordered PMS 60000 oil.
I received PMS 60,000 and lubricated the shock absorbers. The effect is great! It started spinning smoothly, no noise!
Is PMS 60000 silicone? Is it sold somewhere in small quantities? They offer it in barrels everywhere. I don’t understand why I need 20 liters of lubricant.
PMS 60000 is a damping lubricant, which is essentially organosilicon liquid polymers, one or two-component compounds with high-quality bonds of silicon atoms in glycerin or silicone. Popular silicone grease. Usually sold in large volumes, but there is also retail sale in small syringes. Costs about $1.5 per syringe.
Question. Why are there two sets of holes in the Margarita 2000 Ariston for fastening the eye of the lower silent block of the shock absorber?
What letters does the model have? For example, on the Ariston Margherita 2000 AL109X there are only two holes (I attach a photo). This ensures a more reliable mounting of the shock absorber. If this is the question, then everything is fine, that’s how it should be.
I was looking for suitable shock absorbers for Haier (on top there is a regular pin, on the bottom there is a bracket with a hole for a bolt; the bracket is connected to the shock absorber ear with a 10mm split steel pin). Tired of searching. Even under the M10 bolt from below (you can put a steel pin instead) there is no 100 or 120N. In general, I dismantled the old racks, placed a piece of cardboard from a box of chocolates under the foam rings and everything was fine. The shock absorbers were not completely dead yet. I didn’t even think it was their problem, because they were walking quite slowly. But the drum was already beating.I checked it by loading it with weights from dumbbells - under a load of 8 kg they don’t move, but under 10.5, if you move it, they fold up. Before the repair it was about 4 kg. Judging by the thickness of the rings, it will be possible to put them under them for a very long time, so the shock absorbers turn out to be conditionally infinitely repairable.