How to change a bearing on an Indesit washing machine: step-by-step instructions
Perhaps, any other type of repair work on a washing machine cannot be compared in complexity to replacing a bearing.This process is one of the most labor-intensive, since its successful completion requires complete disassembly of the washing machine.
If you have absolutely no idea how to change the bearing on an Indesit washing machine, and have never had experience in repairing household appliances, the work should be entrusted to the specialists from the service center. But don't jump to conclusions. Look at the replacement algorithm and maybe you will decide to carry out the repair yourself.
The content of the article:
The need for timely repairs
Traditionally, horizontal loading washing machines use two bearings. These support elements hold the washing machine drum in place, keep it horizontal and rotate freely.
Both bearings are mounted on the same shaft and are sealed from water ingress by a seal on the inside of the drum. Meanwhile, wear of the existing seal after some time of operation of the device leads to water seeping into the area of the front bearing.
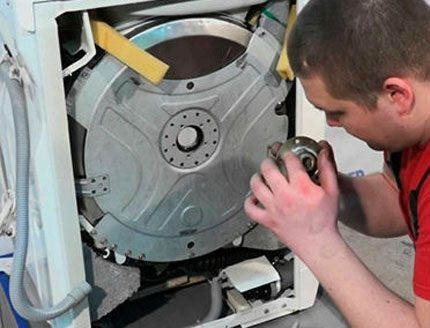
As a result, bearing parts corrode, rust and eventually fail. The drum does not rotate, loses balance, jams. It’s better not to let it get to this point - change the bearings and do other things. washing machine repair should be done in time (when noise appears).
Indesit washing machines of the latest generations are equipped with a self-diagnosis system, which greatly facilitates and speeds up the identification of existing and impending breakdowns. Car owners need to know error codes. Decoding them will help you understand whether you can repair it yourself or whether it’s better to go to a workshop.
Bearing replacement procedure
Before starting repair work, it is strongly recommended to determine the exact nomenclature (labeling) of spare parts that make up the repair unit, find suppliers and buy everything that is needed for replacement.
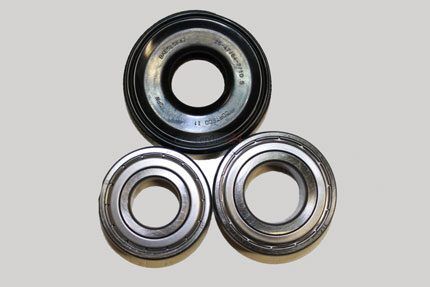
As a rule, the set of purchased components is as follows:
- single row closed ball bearing (2 pcs.).
- rubber sealing cuff (1 pc.).
It is also recommended to obtain a service manual (repair instructions) for the Indesit specific model.
Finally, you need metalworking and electrical tools, in particular:
- screwdrivers are different;
- pliers, hex keys;
- set of open-end wrenches (socket wrenches);
- knife, hammer, files;
- puller for small bearings;
- sandpaper, wooden blocks, rags.
Armed with everything you need, having some repair experience and knowledge of electromechanics, you can safely begin setting up the washing machine.
Step 1. Access to the washing tub
Start repair process, of course, - disconnecting the washing machine from the power supply line. You will also have to disconnect the water supply and discharge hoses. It is advisable to disassemble the device in conditions of sufficient free space in the room.
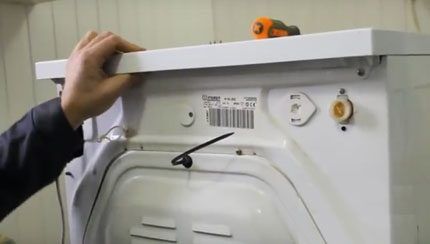
It is recommended to prepare several trays for fasteners removed from different structural elements. Separate storage of the dismantled screws assigned to fasten each individual part will simplify the subsequent assembly of the machine.
The first fasteners that need to be removed are on the top panel of the washing machine. Typically you need to remove two to four mounting screws.
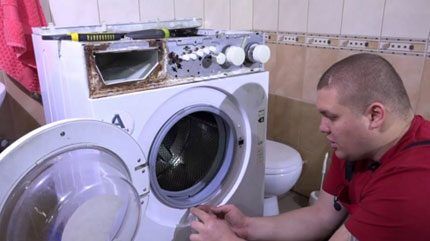
In parallel with the top panel, the dispenser for loading detergents, as well as the panel with control knobs, are dismantled. The dispenser bath is usually held in place by two or three plastic latches.
Before removal, the mechanical control panel must be disconnected via electrical contact groups. You should first draw up (draw) on paper and mark all the points of electrical connections of the control elements. Moreover, this must be done if there is no schematic diagram of the washing machine.
Step 2. Removing the tank (washing container)
The best option for dismantling the washing equipment tank is to remove this part through the opening that opens after removing the top panel of the machine body. Some models from Indesit I have a removable cover on the back wall. This option is also suitable for recessing, but is considered somewhat inconvenient.
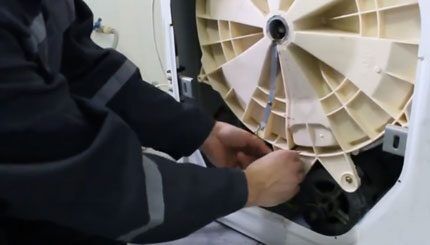
In any case of dismantling the tank, you must first remove the coupling belt between the electric motor pulleys and the drum.
You will also need to disconnect the electric motor, which is usually attached to the tank body. Remove the clamp (or paper clips) that tightens the rubber cuff along the shell of the loading hatch and separate the cuff.
Then use a socket wrench to unscrew the drum pulley mounting screw and remove the pulley from the shaft using a puller. Next, you need to unscrew the counterweight fasteners (located on top of the drum) and remove this structural part.
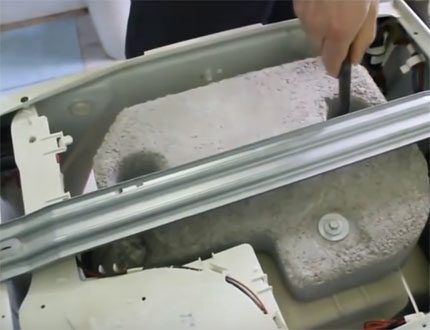
After all the noted manipulations, the washing machine tank remains hanging on the damper springs. Other models are equipped with additional lower shock absorbers. The springs are carefully unhooked, the shock absorbers are disconnected and the released tank is removed through the upper opening of the machine body (or through the opening in the rear area).
By the way, if the drum is removed through the opening in the rear wall of the washing machine body, it is not necessary to remove the entire tank structure. Why? More on this later.
Step 3. Proper disassembly of the washing machine tank
To get to the bearing assembly, you will need to separate the metal drum from the tank body, made of polyurethane. As a rule, the design of the tank of any washing machine, including the Indesit brand, consists of two halves. They need to be separated.
A tight connection of the body halves is achieved using a clamp or special metal clips. In the first case, it is enough to loosen the clamp to be able to disconnect and dismantle one half of the tank along with the drum.
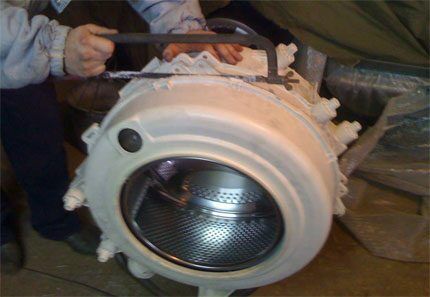
If the tie is made with paper clips, you will have to remove the entire tank, since it will not be possible to remove the paper clips from the sides without dismantling the tank. It should also be noted about the existing “soldered” version, where the two halves of the case are tightly sealed. Here, some craftsmen simply saw the tank body with a hacksaw along the solder line.
Step 4: Extracting Elements
So, the tank is removed and divided into halves, one of which holds the drum due to the bearing assembly. Now it's time to carefully remove the stuffing box and then separate (knock out) the drum shaft from the bearing assembly.
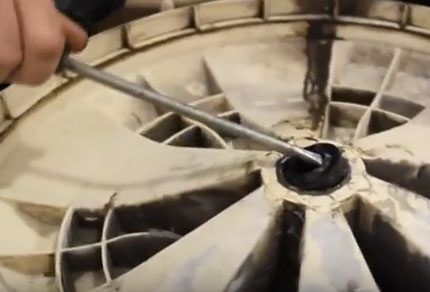
The stuffing box seal is removed using a screwdriver; you can also use a suitable puller.Next, half of the tank body with the drum is placed on wooden blocks (or other suitable supports) to provide a sagging state for the drum to separate it.
The drum should be separated (knocked out) very carefully. One of the options for the separation procedure is to make a metal pin-punch, which is screwed into the thread in place of the fastening bolt from the end of the shaft. Such a pin is wrapped tightly, after which the drum is knocked out with light blows of a hammer.
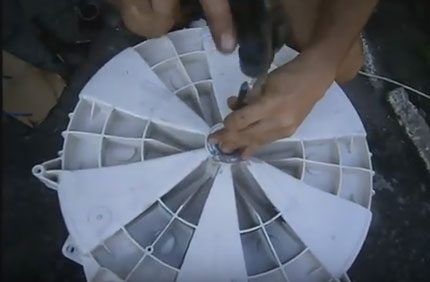
Following the removal of the shaft with the drum, the process of dismantling the bearings is carried out. Typically, a bearing assembly contains two bearings of different sizes.
They are also knocked out using a tool that prevents damage to the seats. It is better, of course, to use a pulling puller, which, if desired, can be made from scrap materials.
Step 5. Replacing damaged unit bearings
Before installing bearings in the seating areas, thoroughly clean the mounting surfaces. It is not recommended to use aggressive cleaning agents. Cleaning plastic surfaces is done quite efficiently with a soap solution.
Particular attention must be paid to pressing (seating) bearings into place. The slightest distortion at the time of pressing threatens to result in deformation of the supporting walls. If this happens, you will have to replace the entire washing machine tank.
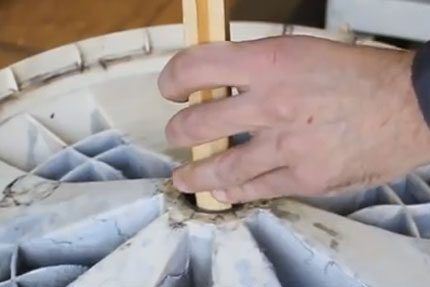
It is necessary to accurately place the bearing along the edges of the landing groove. Then, through a wooden block with a cross-section equal to the outer diameter of the bearing, slowly press the bearing into place evenly, with light blows of a hammer around the circumference. The same actions will be applied to the second copy.
After pressing in the supporting elements, you need to install a new oil seal on the bearing assembly on the inside of the tank body. Seating the oil seal also requires careful and attentive actions.
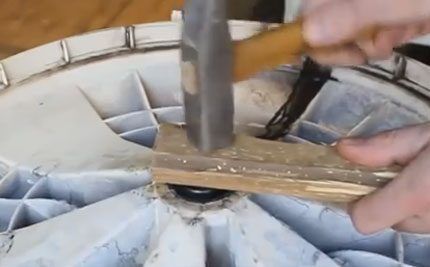
Next, place the drum shaft on the bearings, but first the shaft must be cleaned with sandpaper and the surface lubricated with a thin layer of cyathim 221 or a similar product. All that remains is to connect the two halves of the tank and assemble the car.
Step 6. Reassembling the washing machine
The procedure for assembling the device is performed in reverse order. The assembled tank is placed inside the housing, hooked onto damper springs, attached to the lower shock absorbers, and connected to the loading hatch through a cuff.
Next, place a counterweight on the top of the tank, secure this part with bolts and move to the place where the motor is mounted. Having secured the electric motor to the body of the washing machine tank, put a pulley on the drum shaft, fasten it with a bolt and connect it with a transmission belt to the motor pulley.
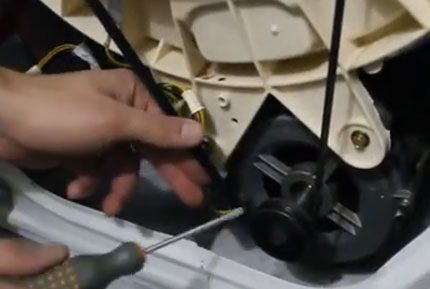
Next up is installing the control panel. This part of the structure is mounted with an eye to the previously made marks of electrical connections.
Then install the detergent dispenser housing and cover the washing machine body with the top panel. That's all, the replacement of the washing machine bearings has been successfully completed.
Upon completion of the assembly, the equipment is connected to working water hoses. Here, at the same time, it is recommended to remove the strainers (on the inlet valve and in the drain pump design), clean them or replace them with new ones.
The nuances of repairing models with vertical loading
Repair of the bearing assembly for Indesit structures for vertical loading is to some extent even simpler than for horizontal devices. The configuration of the vertical loading tank of these washing machines is characterized by the fact that to replace the bearing (one!) and the seal seal, it is not necessary to disassemble the entire washing system.
It is enough to open the side panel on the side where the drum pulley is located and remove the pulley.
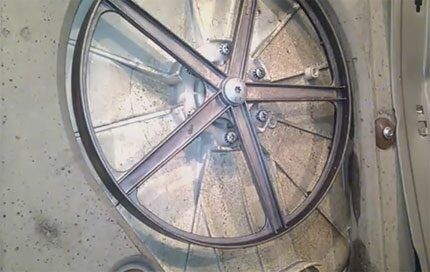
This opens access to the hub, into the housing of which a bearing is pressed and an oil seal is installed. The hub is made of a removable part. It is attached with several bolts to the tank body. After unscrewing the screws, the hub can be easily removed.
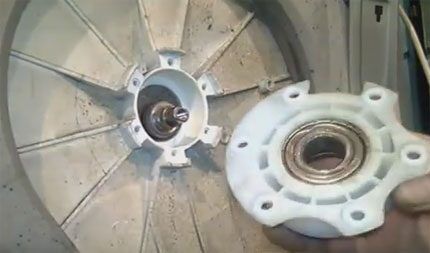
Usually, if a drum bearing is damaged, it is not replaced separately, just like the oil seal.
Purchase the hub as a complete assembly kit (together with the installed bearing and oil seal) and replace this entire part. This approach seems more practical.
Indesit will familiarize you with all possible repair operations available to the independent owner of washing equipment. next article, in which the breakdown options and methods for eliminating them are discussed in detail.
Conclusions and useful video on the topic
You can learn how to repair a washing machine with a cast tank from the following video:
Concluding the topic of replacing bearings and hubs on Indesit brand washing machines, it should be noted: most models are made as disposable ones. That is, the equipment manufacturer, by default, developed these designs taking into account their zero maintainability.
Such equipment must be completely changed after the declared resource has been exhausted. However, as practice shows, virtually every model can be repaired.
Would you like to tell us how you restored the functionality of the Indesit washing machine with your own hands? Do you have information or technological nuances that are worth sharing with site visitors? Please write comments in the block form below, share useful information and photos on the topic of the article.


Nowadays, on many models of branded equipment, you can’t change anything, because... Manufacturers deliberately produce their products with minimal repairability - so that they can quickly purchase new ones, thereby maintaining production. Washing machines are no exception. It is not possible to change bearings everywhere, because...In most washing machines, the tank is produced in a non-separable version; it is simply impossible to get to the bearings. There are videos on the Internet that show how you can cut the tank of a washing machine, change the bearings and then put it back together, how to waterproof the cut area, but it is clear that such manipulations will easily lead to a leak at best, and flooding of the apartment at worst. Therefore, it is better not to take risks. While there are still washing machines with collapsible tanks, when choosing a new washing machine, choose exactly this model so as not to throw away a tidy sum of money on a new machine ahead of time.
I also heard that new Indesits are produced with monolithic, non-separable tanks. Can you tell me exactly what year this has been happening?
Hello. I can’t say for sure about the year for Indesit washing machines, but many manufacturers have switched to non-separable plastic tanks:
1. Indesit;
2. ARDO;
3. Whirlpool;
4. Ariston;
5. Candy;
6. Beko.
This has definitely been the practice since 2015, so if you want to find an Indesit machine with a collapsible tank on sale, then you won’t succeed. The most interesting thing is that if you need to replace the bearing in a washing machine with such a tank, you will have to saw it, change the bearing, and then glue it together.
I can also note that many manufacturers continue to produce models with metal collapsible tanks:
1. Electrolux;
2. AEG;
3. Samsung;
4. Siemens;
5. Gorenje.
If you are interested in the process of replacing a bearing in a non-separable plastic tank, then watch this video https://www.youtube.com/watch?v=VTc58bQ__oM - everything is shown here in sufficient detail.