Heating element for a washing machine: how to choose a new one and replace it yourself
A heating element for a washing machine is of key importance.It heats cold water during operation, providing conditions for high-quality washing and eliminating traces of dirt, stains and streaks of any complexity.
With prolonged use, the physical properties of this product will deteriorate and malfunctions may occur. In this case, there is no need to get rid of the machine. It is enough to simply replace the old element with a new one and continue using it as usual. But how to do this without any experience in repairing equipment?
We will help you deal with this issue - the article discusses the features of diagnosing a breakdown of the heating element, and gives recommendations on choosing the right model of a new heater. Step-by-step instructions on how to replace the TEN on your own are also provided.
The content of the article:
Description and principle of operation of the heating element
The heating element is an electric heater responsible for heating cold water supplied from the central water supply system to the washing machine.
Structurally consists of a tubular part W-shaped or V-like shape, inside of which there is a conductor element with a high level of resistance, capable of withstanding heating to record high operating temperatures.
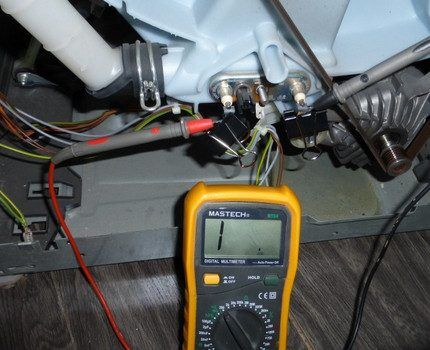
The heating coil is surrounded by a special dielectric insulator with a high thermal conductivity. It correctly absorbs the heat emanating from the heating element and transfers it to the steel outer shell.
The working spiral itself is soldered with its outgoing ends to the contacts, which receive power during operation. Nearby there is a thermal unit that measures the level of water heating in the washing tank.
When activated through the control unit of any of the processing modes, a command signal is sent to the heating element.
The element begins to warm up intensively and, releasing the generated heat, brings the temperature of the water in the washing drum to the required temperature specified by the user.
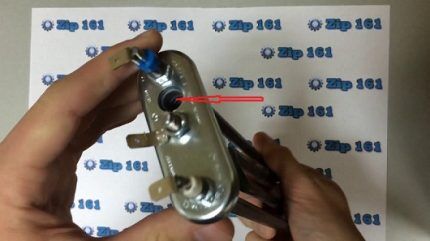
As soon as the water reaches the required temperature, the sensor records this and transfers the data to the control unit. The system reacts to the information received and automatically turns off the device, stopping water heating.
What to look for when buying a new TEN?
Before you go to the nearest store to buy a new TEN, you will have to familiarize yourself with its design features.
Design features of the heater
All heating elements of washing machines have the same internal structure, but differ slightly from each other in external design. Today it is generally accepted straight And curved form.
Direct ones are the most widespread and are used in the bulk of models of various popular brands.
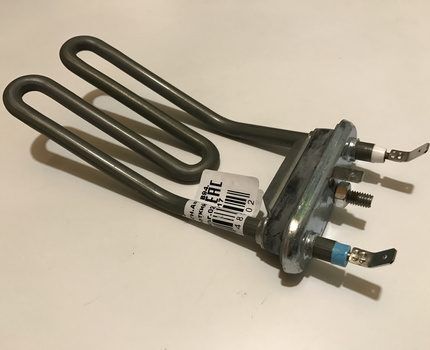
Curved heating elements look exactly the same as straight ones, but at approximately a distance of 50 millimeters from the outer bracket they have a 30-degree bend.
The operating principle of curved elements is no different from straight-shaped analogues, and the base resistance is in the range of 20-70 Ohms.
Curved parts are produced to meet the design requirements of certain types of washing machines from companies such as Ardo, some models Ariston, Indesit and others.
By the way, we analyzed the fault codes for Ariston and Indesit washing machines in detail in the following articles:
- Malfunctions of the Indesit washing machine: how to decipher error codes and carry out repairs
- Ariston washing machine errors: decoding fault codes + repair tips
Types of external coating
Basically, TENs have a metal surface with a protective anodized layer. It has high thermal endurance, demonstrates good water resistance and protects the heating part from corrosion.
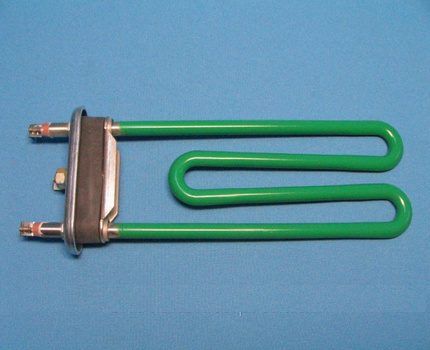
However, some brands, e.g. Samsung, additionally apply a ceramic layer to their products.
It is believed to be more durable and significantly reduce the possibility of scale formation as a result of using hard water.
We have reviewed all error codes for Samsung washing machines and troubleshooting methods. Here.
Operating power and resistance
The main distinguishing feature of heating elements is operating power. In different models it can reach up to 2.2 kW. The higher the base indicator, the faster the water in the washing machine drum heats up to the required temperature.
Normal resistance the device ranges from 20 to 40 Ohms. However, the part practically does not feel any short-term voltage drops that occur in the network. This occurs due to the presence of inertia and the rather high resistance of the heating element.
Other important parameters
When choosing a heating element for a car, you need to pay maximum attention. This will help you acquire the necessary parameters and quickly revive the washing machine for further full and productive work.
There is no point in buying a used device.. There is no guarantee that it will serve well for a long time. It is better to settle on a new product and purchase it not at the market, but at a company store or service center.
First of all, you should pay close attention to the length of the heating element. It is measured from the edge of the metal flange to the very end point of the heating element.
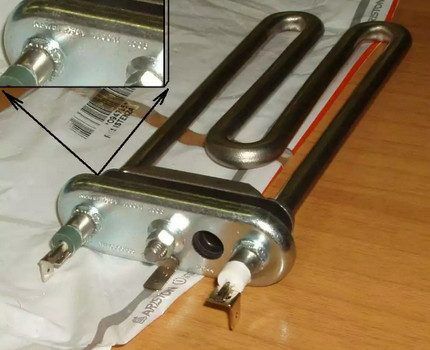
It is acceptable for the new part to be a little larger or a little smaller than the damaged original one. However, the difference in size should not exceed 1.5 millimeters.
The power indicator must also be taken into account. Usually it is indicated on the flange part of the heating element. The difference between a damaged part and a new one should not be higher than 150 W.
If this indicator is significantly exceeded, the operating load on the entire machine will increase; if it is significantly underestimated, the water will take too long to heat up and electricity consumption will increase.
The presence of a temperature sensor is another important parameter. Some models of heating elements are not equipped with this part, but only have a hole for it.
This is explained by the fact that very often when an old heating element burns out, the sensor remains in a normal, operational state and can continue to be fully used.
Heaters that only have a hole for the sensor are cheaper, so owners can save a little by using a new heating element with an existing temperature sensor.
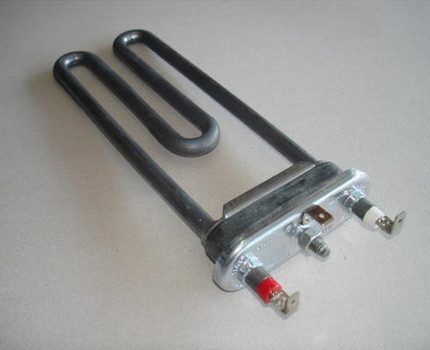
The shape of the new heater must exactly match the old one. If a bent heating element fails, it can be replaced with a similar one.These rules are also relevant for direct heating elements.
It is advisable to try to find a new “native” model. If problems arise with the search, it is permissible to buy a universal option that matches the parameters of existing household appliances.
The material from which the washing tank is made requires an absolute match. The parts installed under the plastic tank are equipped with a durable rubber gasket.
According to the basic width, it can be long or short, depending on the format of the heater itself.
On seals for heating elements under a metal tank, a special collar is provided in the flange area. It provides a clearer fastening of the part in the compartment.
The terminals and fasteners of the new product must be the same as those of the burnt-out one. If they are located slightly differently, there will be difficulties connecting to the wires and additional sealing of the installation site will be required.
Only then will the machine work correctly again and correctly perform user-programmed tasks.
The heating element material can be anything, as can the outer covering. There are no strict requirements for these parameters and any deviations from the basic indicators are acceptable, since they do not affect the operation of the washing machine in any way.
What do you need to know before repairing?
To ensure that repair work to replace the heating element is as simple as possible, and that unforeseen situations do not arise during the process, it is advisable to become more familiar with its location and the reasons for its failure.
Device location
In many washing machines of different brands and manufacturers, the heating element is located at the bottom. To carry out repairs or replace a part with a new one, you will have to remove the body cover of the machine.
The design of each individual washing machine determines where it is more convenient to get to the heating part - from the front or from the back. The home master decides this issue independently based on personal convenience and preferences.
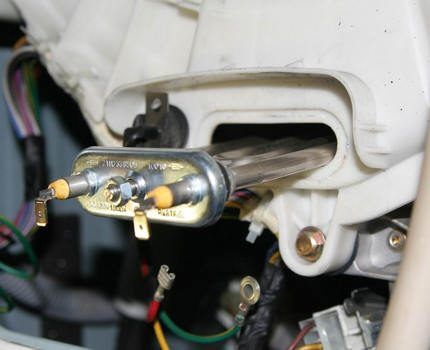
In some models, the heating element is located on the side and to check or troubleshoot problems, you need to dismantle the side wall.
Reasons for heating element failure
The main reasons why a part fails and becomes inoperable come down to two points.
The first is a manufacturing defect.. It occurs infrequently, however, it is impossible to insure against troubles of this kind.
Even when purchasing luxury equipment of the latest generation, you can stumble upon a defective model. If the machine is under warranty, the issue is resolved very simply - the manufacturer replaces the non-working heating element for free with a similar, but fully functional one.
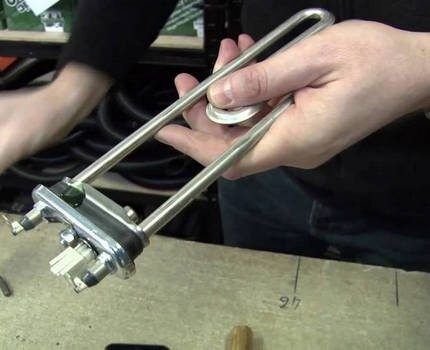
The second main reason is scale.. It is this that settles on the metal body, negatively affects the heating element and ultimately deprives it of its functionality.
The low thermal conductivity of scale prevents the device from transferring the generated heat to the water, and the device itself begins to overheat and experiences increased load. In the end, it simply burns out, unable to withstand such a volume of thermal energy.
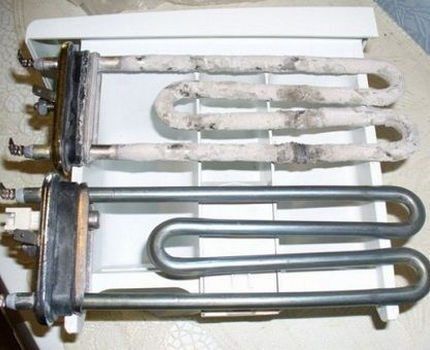
In addition to these negative phenomena, scale creates conditions for the formation of corrosion on the surface of the module. Over time, this leads to a violation of the integrity of its metal shell.
A device that has lost its seal becomes vulnerable to external influences and the risk of a short circuit, fire and other fire hazards increases significantly.
The heating element can be damaged by using the wrong detergents, for example, hand washing powders, or constantly exceeding the volume of powder per procedure.
As a result of unreasonable user actions, a dense, impenetrable film of soap concentrate forms on the surface of the part. It creates a barrier to normal heat exchange, provokes overheating of the heating element and leads to its subsequent burnout.
To avoid this, you need to properly care for the machine using anti-scale agents for washing machines.

If you do not want to use expensive store-bought detergents to clean your washing machine, we recommend that you familiarize yourself with best cleaning methods using improvised means.
How to diagnose a malfunction?
To recognize a malfunction, it is not necessary to disassemble the washing machine and test the heating element with a multimeter.
The following malfunctions that appear in operation will indicate problems:
- The washing water does not heat up to the programmed temperature;
- the machine draws water, but quickly stops washing or turns off completely after 5-6 minutes;
- almost immediately after activation of the unit in the house or apartment, electrical plugs are knocked out;
- feels an unpleasant, burnt smell in the room while working;
- the quality of washing noticeably deteriorates;
- When touched, the body produces an electric shock.
If at least one of the listed problems is identified, the heating element must be replaced or repaired as quickly as possible.
Self-replacement instructions
You can remove a broken heating element and replace it with a new one without involving a technician from a service organization. To do this, you will need a minimal set of tools, a new heating element and a couple of hours of free time.
The lack of experience in such work should not be intimidating; in this matter, accuracy and consistency in performing all stages are important.
Stage #1 - preparation for repairs
When planning to replace the heating element in a washing machine, you need to be well prepared and follow basic safety rules that are relevant for working with household appliances.
Among them are:
- Disconnect the unit from the power supply by removing the plug from the socket.
- Disconnect the machine from the water supply and remove the drain pipe. This point is relevant for models where the heating element is located in the rear.
- Use high-quality working tools with handles that have a protective rubber coating.
- Prepare a plastic container, such as a bucket or basin. It will be convenient there drain the water, remaining in the tank or in internal communications.
After all the above steps, you can proceed directly to disassembling the machine, and then to removing the damaged heating element.
Stage #2 - selection of necessary tools
To replace the heating element, you do not need any specific and expensive equipment. Everything you need can be found in the arsenal of every home craftsman, even those who do not have much experience in carrying out repair work of this kind.
The list of such items includes screwdrivers of various configurations. Instead, you can use a screwdriver with a basic set of bits, including hexagons and sprockets, necessary for unscrewing “tricky” screws.
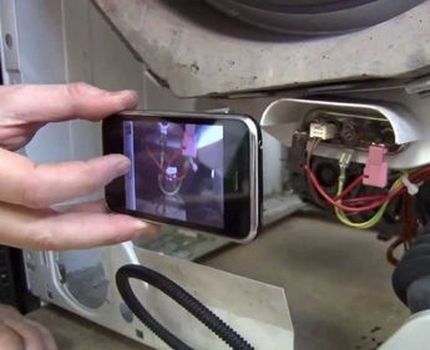
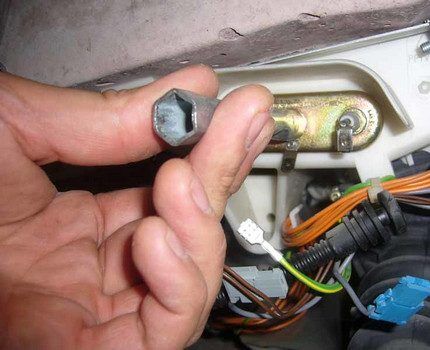
Additionally, a ten-size wrench or simple pliers will be useful. With these tools you will be able to correctly remove the fasteners from the heating element.
To ring the TEN and understand its condition, you will need a multimeter for dialing.
Before starting work, it is better to place these items nearby so that they are at hand and the master does not have to throw everything and waste time looking for the right tool.
Stage #3 - gaining access to the heating element
Replacing the heating element through the front panel is a labor-intensive and painstaking process. First you need to remove the top outer cover.
To do this, you will have to unscrew the screws located at the back of the washing machine, carefully pull the lid, first slightly towards you, and then up.
You need to act very delicately so as not to pull out or damage the plastic fasteners, without which it will be physically impossible to return the cover to its original place.
Next, slowly pull the powder container forward a little, press the locking button inside and carefully pull out the container completely.
For models that do not have a locking button, the container must be lifted and pulled towards you. When the fastening screws become clearly visible, use a screwdriver and unscrew them, and then remove the container.
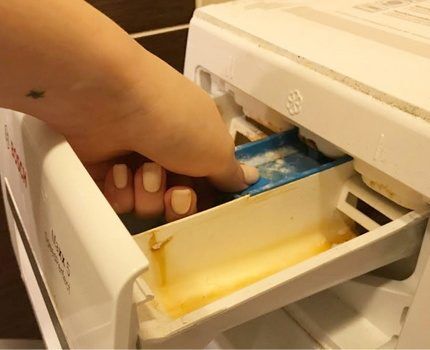
Then unscrew the screws holding the control panel, remove it and, without disconnecting the wires, place it on top of the washing machine.
Open the door of the loading hatch located at the front of the unit. Using a screwdriver, pry up the clamp-type spring holding the sealing collar and carefully remove it, slowly pulling it out in a circle. After this, simply remove the rubber from the body and set it aside.
Find the locking screws on the hatch and unscrew them with a screwdriver of a suitable configuration. Push the released lock inside.
Then unscrew the external screws securing the front panel from the bottom and top. Sometimes they are located under the decorative trim at the bottom or on the sides or near the drain filter.
Finally, carefully remove the panel and place it side by side. Having opened access to the heating element, calmly begin replacing.
Stage #4 - installation of a new heating element
Regardless of where the heating element is located, front or rear, it can be replaced in only one way.
First, from the contacts of an old, failed device, all wires are disconnected. Usually, they are set very tightly and to remove them you will need to help yourself with a screwdriver.
All actions must be performed slowly and carefully so as not to damage the fragile area of the terminal connection.
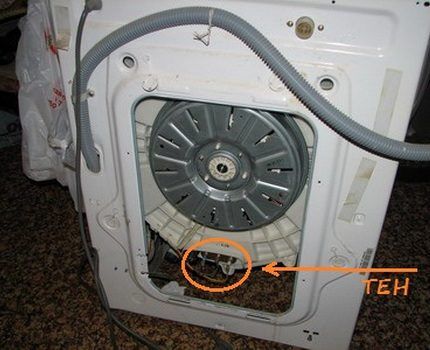
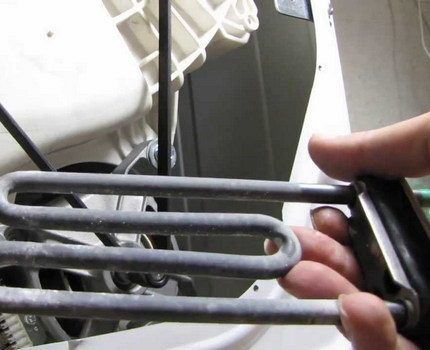
At the next stage you will need remove the retainer - Unscrew the screw holding the heater in place, and then slowly remove the heating element.
Before installation of a new heating element it is necessary to clean the locations from the operating products that have settled there and insert a new fully working element.
All that remains is to check the functionality of the equipment. Why do you have to first assemble the machine in reverse order? connection to water and sewerage and test it. If the wash takes place in the standard mode, then everything was done correctly.
Conclusions and useful video on the topic
How to properly replace heating elements in a washing machine through the back cover. Easy-to-understand video instructions:
How to check the heating element for performance and identify possible problems. Detailed diagnostic instructions and some interesting tips from the personal experience of a home master:
Step-by-step process for replacing a broken heating element in a washing machine. An employee of an organization that repairs household appliances of different brands shares information:
How to quickly and efficiently remove scale formed on heating elements.A complete analysis of the process on video with tips and a description of all the nuances:
With proper care and strict compliance with all operating requirements, the heating element will work for a long time and smoothly, without causing any trouble to the owners.
If the heating element fails for some objective reason, it can be easily and quickly replaced. Responsibility and scrupulousness will help you calmly cope with the task yourself. For people who do not have such experience, it is easier to contact a service center and pay for the replacement service.
Would you like to supplement the above instructions on how to replace the heater in your washing machine yourself? Or would you like to leave useful recommendations on choosing a suitable heating element to replace a burnt one? Please write your comments and additions in the block below.
If you still have questions about replacing TEN, ask them to our experts in the comments under this publication.


We have a Zanussi washing machine, it is already more than 10 years old. It washes just great, never had any problems. But then the heating element failed. We noticed it purely by chance, because it continued to work, the error indicators did not light up, and the water did not heat up. I called the service workshops and they asked for almost 3 thousand for repairs. The heating element rang at work to understand that it was definitely the problem. And so it turned out.
I decided to repair it myself, although everyone dissuaded me. They assured that it was impossible to do this without special knowledge. I went to the radio market and bought exactly the same one, taking mine as an example. I replaced it and fiddled with it for an hour and a half, no more. I took photos of everything I disconnected, and then reconstructed the sequence of actions from the photos. That's all.So, it’s quite possible to handle this work yourself.
I absolutely and completely support it. Replacing the heating element is generally a piece of cake. I have Indesit vertical. The heating element itself is located on the side. He did it in a cunning way. Since I myself am not a master, I called from a local service, and also clarified that the call would be free, or at a minimum price. In short, they had some kind of promotion and in any case they provided free diagnostics.
This master arrived, disassembled the washing machine, checked it, confirmed that it was the heating element that was broken and began to talk about 4k rubles for replacing the original one and 3k for a non-original one. In general, I refused, and therefore did not pay a penny. I went on Avito and found out the prices for different heating elements. In most cases, they need a size or a photo via WhatsApp and they immediately deliver the one they need. In general, they brought a spare part, I unscrewed the old heating element, inserted a new one and everything worked in the best possible way. The heating element cost 700 rubles + delivery 200 rubles. People, be smarter, learn to Google. And this is my life hack for you =)
Our washing machine is already 10 years old, and during this time the heating element in it has not deteriorated at all due to scale. Only because we use high-quality washing powder. It prevents the water from being hard and still washes well. Washing machine repair technicians have repeatedly told us that our heating element is fine. We are very happy, because it is not that cheap.
I wonder what they would do if the sensor flew or was installed crookedly and the machine burned out? Should everyone mind their own business, or do you want a master to fix everything for you at the cost of courier delivery?
The temperature sensor is a reliable element and practically does not “fly out”.It is impossible to install it crookedly into the seat (even with “crooked hands”). In addition, the SM has a self-diagnosis mode, including temperature sensor malfunctions.
Regarding “everyone should do what he is ... a master of” (quote from the film “About Little Red Riding Hood”), I agree - I’m not an “electrician”, but a radio engineer with ten years of experience and am friendly with a soldering iron, an avometer, radio components, etc. including thermistors. Good luck and health to you!
Somehow my wife (I don’t do laundry) noticed that one hundred SM does not go into the rinse and spin mode, so I have to end the “hand-to-hand” washing mode. My cheerful mood diminished due to living in the MKAD region and in the Urals, where there is terrible tension with heating elements, and the wait through the mail is long.
As a result, it turned out that the terminal from the heating element had rusted and burned out and the wire was hanging freely without touching anything (the SM is used in the bathroom). Business: clean the heating element terminal with a file, replace the terminal on the wire (in the store such a terminal costs rupee per kilo), seal the wire. The comment may be off topic, but it has something to do with the heating element. And to place the SM in another place, well, there is no way, excuse me generously...
“The heater, equipped with a practical coating made of heat-resistant, high-strength ceramic, is more reliable and durable, even with intensive daily use.” I agree with the statement, if this coating is truly high-strength ceramic. But.. this was in a time “when the sky was bluer, the trees seemed bigger and the grass was greener.”
However, such heating elements often fail because the coating is not ceramic, but ordinary green paint applied to the heating element heater to mask the cheap material of the metal surface of the heating element. Just watch the last video in this article. Let's not forget the purpose of the main work of marketers...
I was wondering about replacing the SMA Electrolux heating element, the question was what parameters are applied to the part, I read the author’s article (how much water......), then I read the comments and came across a post by Renat, who was going to replace the heating element for 4 thousand, which costs 1300 max, replacement -400 RUB. My SMA worked without heating the water for about half a year (it didn’t bother us) then the electronics failed, it costs 19,000 in the store, not flashed. While I was looking for used electronics via Avito (it needs to be washed, my wife doesn’t want to switch to FEYA), I had to look for an alternative. There was another Kandi machine with a broken drum, I completely removed the electronics from it and transferred it to an Electrolux, installed a pressure switch from CANDY, and left the rest 3 weeks have passed, it works fine, the motor contacts had to be switched to the CANDY style. The front panel has been roughly attached - it will not go to a design exhibition. I found used electronics for Electrolux, I had to replace 2 triacs, I haven’t installed them yet, I’ll let you know how it goes.