Installation and connection of the dishwasher: installation and connection of the dishwasher to the water supply and sewerage system
Correct operation of the dishwasher depends not only on the quality of spare parts and assembly.The uninterrupted functioning and normal performance of the unit’s main tasks is influenced by the correct connection of the dishwasher to the communications. Do you want to do this work yourself, but you doubt that everything will work out?
We will help you realize your plans. The article describes in detail the stages of installing equipment, connecting an outlet, supplying water and arranging a drainage system. In order not to encounter an accident, leakage or quick repair, you need to adhere to the manufacturer’s recommendations indicated in the instructions.
The content of the article:
Selecting a location based on installation method
The sooner you think about purchasing equipment, the less hassle you will have with further improvement of your kitchen.
The ideal option is a comprehensive renovation, including:
- drafting;
- laying water supply and sewerage pipes;
- conducting separate power lines for powerful units;
- decoration of the premises;
- installation of furniture and equipment.
In this case, the risks that there is not enough niche for the dishwasher or its dimensions are not suitable are reduced to zero. Walls with exposed connectors for connections look neat, and safety requirements are met.

The installation location depends on the type of machine and, accordingly, on the method of its installation.
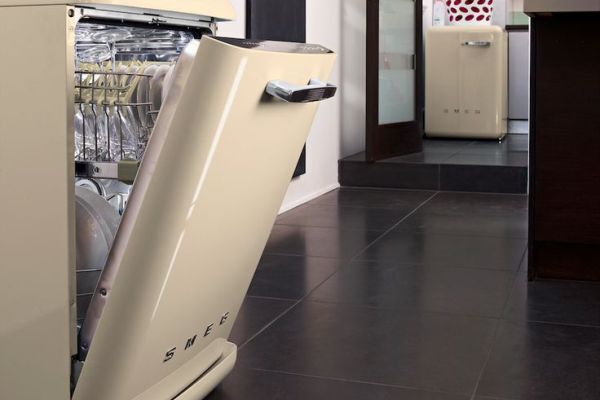
All devices are usually divided into two categories:
- freestanding, portable, representing a mobile unit;
- built-in, stationary, for installation of which a cabinet is required.
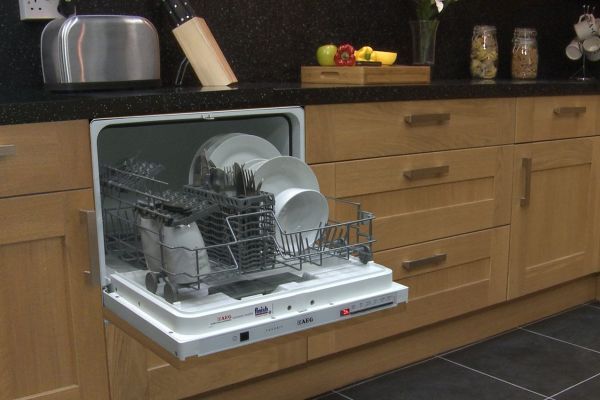
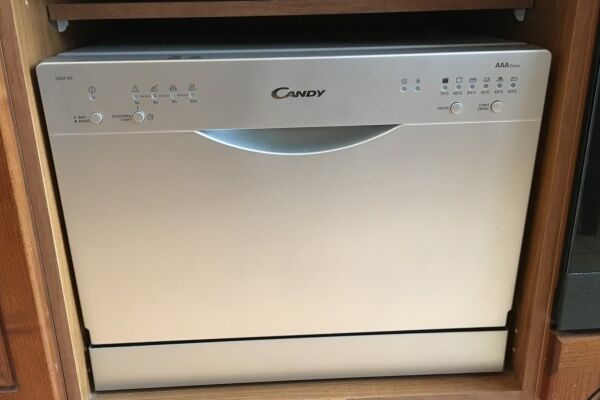
For proper installation, the size of the dishwasher is also important. Select a subcategory compact machines, with reduced dimensions.
Among them there are both free-standing devices designed for installation on a countertop or in a cabinet niche, as well as built-in ones.
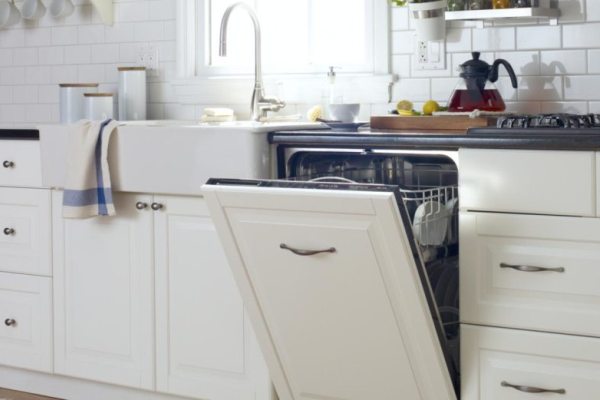
Dishwasher placement options:
You need to think about how and where to install the dishwasher in advance. The main thing is to correctly position the unit relative to the communications - bring it as close as possible to the pipes.
We also recommend installing cabinets within easy reach for dishes and other utensils that are intended for washing in the PMM.
The cleaning process will go much faster if you clear the plates of large pieces, loading dishes in the dishwasher trays, putting clean dishes on the shelves will happen from the same place.
The importance of using instructions
Manufacturers are responsible for the quality of their products, so new dishwashers have a warranty - from 12 months to 5 years. A faulty Chinese unit can often be returned for service within 1 year, while a European unit can be returned for service within 2 years.
However, incorrect installation of the machine, contrary to the manufacturer’s requirements, deprives the buyer of the right to free repair or replacement of the equipment.
Consequently, the manual becomes the main document and guide for installing a dishwasher. This is a booklet with a detailed description of the process of installing and connecting a new dishwasher to the water supply and sewerage system.
The instructions also contain technical requirements that relate to the parameters of the connected electrical network, pressure in the pipes, etc. The characteristics of the machine also need to be taken into account.

Thus, fully built-in PMMs with a large mass are placed on the floor, additionally fixed on the cabinet walls or countertop. But compact models can be integrated into a cabinet that can support their weight, even taking into account loaded containers and water.
If within six months some dishwasher spare parts If they fail due to incorrect placement of the hoses or strong vibration of the housing, they will have to be replaced at your own expense - the warranty will be voided.
Connecting PMM to communications
In order for the machine to work, it is necessary to ensure the supply of electricity and cold water, as well as arrange for the drainage of used liquid into the sewer.
If a separate socket for the PMM is installed during repairs, the first step can be skipped, but the next two are performed during the connection process in any case.
Stage #1 - installation of a separate outlet
We do not recommend using an extension cord inserted into a common outlet, a filter or a tee.
Such “intermediaries” may not withstand the load, fail, or even melt.You will definitely need a separate electrical installation product of “Euro” standard, with grounding and high degree of protection from moisture.

It is not recommended to fix the socket block too close to the floor - during a leak, water may get inside the product. The minimum distance from the floor covering is 15-20 cm.
This is true for built-in models, when the socket is located on the wall behind the dishwasher body. For free-standing units, the usual location is at a distance of 40-90 cm from the floor.
In addition to the socket, you will need a wire, preferably in non-flammable insulation and with a cross-section designed for increased load. A suitable option is copper 3-core wire VVgng 3*2.5.

Installation sockets with grounding It is one of the most basic household skills, so many people can handle its installation on their own. However, if you lack skills, it is better to entrust all electrical work to a specialist.
From the outlet the wire runs to the electrical panel, where a separate circuit breaker. It is recommended to provide similar machines for each powerful household appliance - if necessary, you do not have to turn off the entire “kitchen” line.

Even if you theoretically know how to install a switch on a DIN rail, all electrical work in the panel must be performed by a representative of the management company or another service organization.
After installation is completed, you need to check how the outlet works. To do this, turn on the machine and insert the plug of a simple device, for example, a table lamp, into the socket.
Stage #2 - ensuring water supply
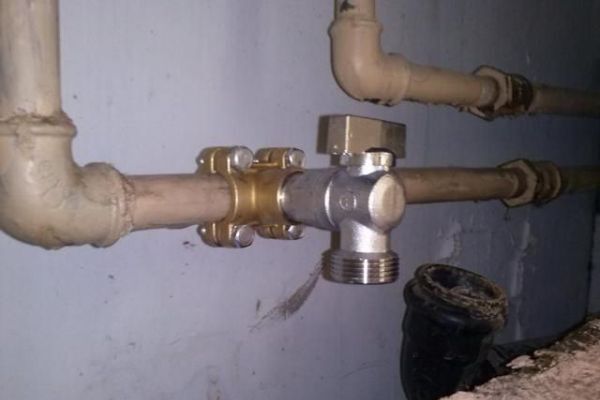
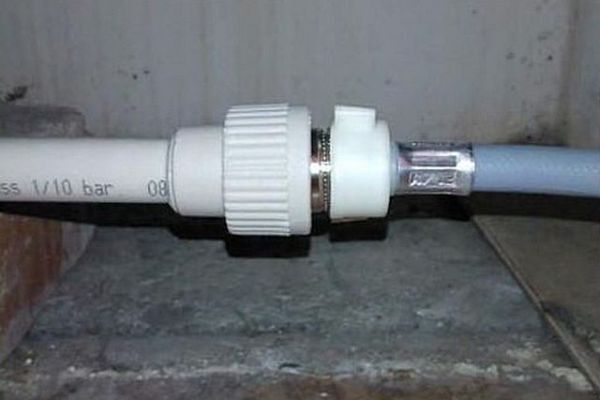
So that the machine can be used at any convenient time, the water supply hose should be connected to a pipe or flexible connection with a threaded connection using a tee or adapter.

The length of the water supply hose is 1-1.5 m. It is at this distance from the main line that manufacturers recommend installing the dishwasher so that it functions correctly.
Procedure:
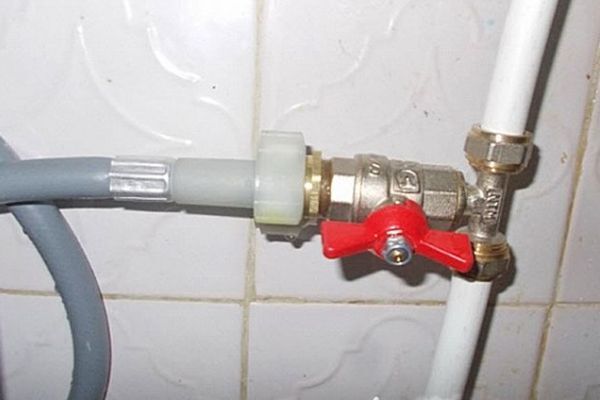
- unscrew the flexible mixer hose from the pipe;
- we attach a tee with dimensions of ½ inch “mother” and “father” along a straight section, with a ¾-inch outlet on the side and a water shut-off valve;
- to seal the connection, we use fum tape or another sealant;
- place the ¾-inch pipe in a direction convenient for connecting the hose;
- screw the flexible hose onto the ½-inch outlet and the dishwasher hose onto the side outlet;
- testing the water supply and tightening connections if necessary.
Depending on how far the car is from the wash, one or another connection method is selected.
All methods are functional and good in their own way, so the owners of the unit will have to decide how to connect a new dishwasher with their own hands, based on specific conditions.
Connection parts are sold in plumbing stores, so there should be no problems purchasing tees, manifolds, and seals. Try not to skimp on parts and choose even more expensive, but high-quality components and gaskets.
Features of connecting compact devices
The instructions for mini-dishwashers indicate an installation method without a permanent connection to communications. Before washing, the water supply hose is put on the faucet spout, and the drain hose is lowered into the sink.

Some people use this method, but it is fraught with inconvenient moments:
- you have to do extra steps every time;
- hoses lie in a visible place and spoil the overall appearance;
- due to frequent connection/disconnection, the connection points quickly become loose and wear out;
- strong water pressure can “knock” the hose out of the sink, resulting in a flood;
- The sink remains busy while the dishes are being washed and rinsed.
Therefore, for reliability, it is better to choose a specific installation location and ensure a permanent sealed connection.
About connecting to hot water supply
Buyers consider the ability to connect to both pipelines - hot and cold water - as a useful option and are even willing to overpay for a “useful” addition.
However, there are many reasons why you should not “save” on heating the machine and use hot water:
- The composition of hot water can be worse than cold water;
- the electronic unit will “crash” if the water temperature in the network is higher than programmed;
- With centralized supply, hot water is often turned off.
The savings themselves are also being questioned. Modern models are already considered quite economical, given their low energy consumption.
And with the use of hot water, some components may fail prematurely, and you will have to spend a significant amount on repairs.

It is considered a grave mistake to connect a hot line to a device designed exclusively for supplying cold water. Machine parts will not withstand high temperatures and will quickly break.
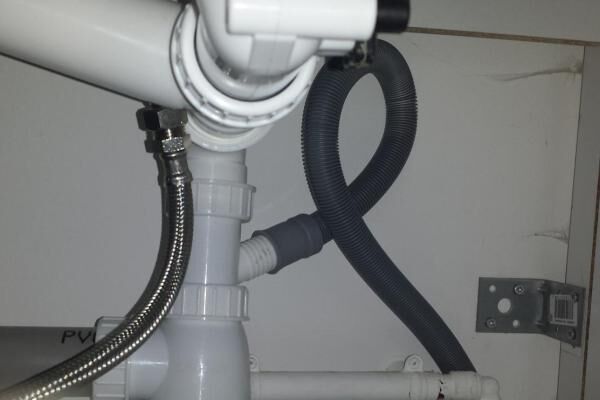
Stage #3 - drainage device into the sewer
Drainage is a necessary condition for proper operation of the dishwasher; a drain hose is provided for this purpose.
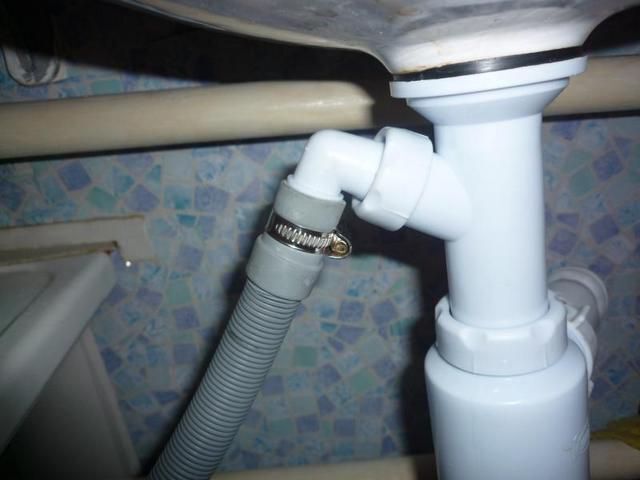
There are two ways to connect it to the sewer main:
- directly into the pipe using a rubber coupling;
- through a siphon located under the sink.
The second option is the most successful, as it immediately solves all problems: eliminates odors, protects against reverse flow of liquid, creates the necessary pressure in the pipe, and protects against leaks.
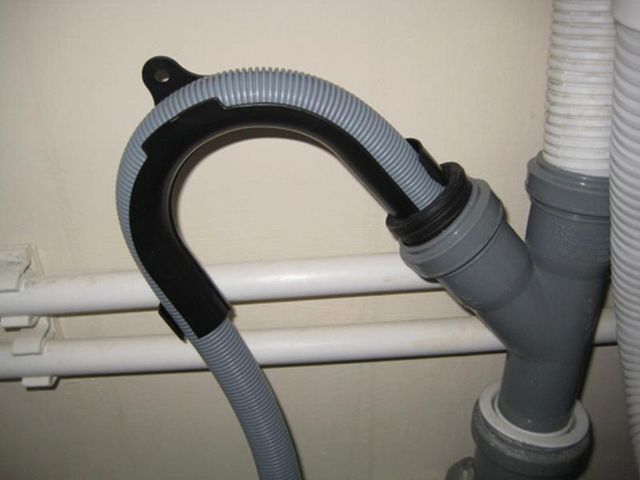
You will have to purchase a new siphon if the old one is not designed to connect household appliances, and think about the location of the drain hose.
In order to simultaneously maintain the tightness of the connections and normal, without vacuum, pressure in the line, with a direct connection (without a water seal), an “anti-siphon” valve is used. This is an inexpensive plastic product that fits directly into a slot in the hose.
At this point, the connection of communications can be considered complete. After a test run, it will become clear how correctly the hose connections are made and whether additional sealing is needed.
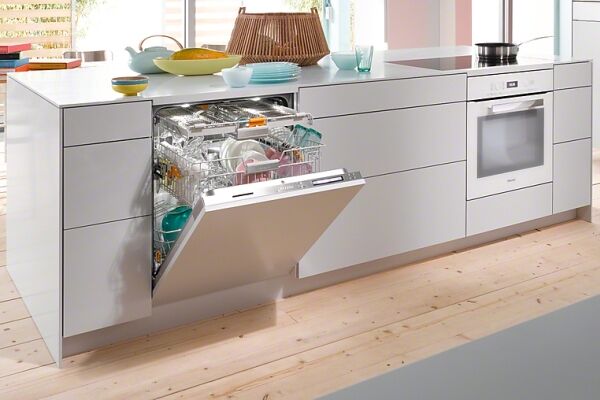
Nuances of installing built-in equipment
Free-standing units are simply installed in the place provided for them, and then connected. Built-in models need to be integrated into a furniture set.
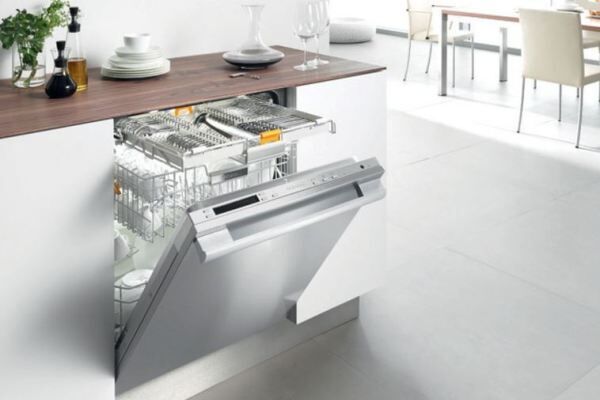
Here are some useful tips that may come in handy during the process: installation of built-in equipment:
- the dimensions of the built-in cabinet must correspond to the dimensions of the dishwasher body; for comparison, you need to check the diagrams provided by the manufacturer;
- be sure to use the protective devices that are included in the kit - a metal strip to strengthen the tabletop, a vapor barrier film;
- To level the body, twist the legs, usually there are three of them - two are in the front and one is in the back;
- do not forget to insert the side bushings and secure the body with self-tapping screws;
- Fix decorative panels strictly according to templates or stencils, which are also included in the delivery set.
Dishwashers from different manufacturers may have structural differences, so you should rely only on the instructions for the specific model.
The document clearly outlines how to properly install the dishwasher, in what order the installation and connection of communications should be carried out.
Conclusions and useful video on the topic
The nuances of connecting hoses to pipes are discussed in the following video:
Detailed instructions for hanging the facade:
Providing power to the dishwasher is discussed in the following story:
At first glance, all the steps to install a dishwasher seem simple and do not require special skills. However, during the installation or connection process, questions often arise, so there is no need to rely only on your own strength.
If you have no experience in such work, enlist the support of specialists. This will be especially necessary where safety requirements must be met..
Do you have personal experience installing and connecting a dishwasher? Do you want to share your accumulated knowledge or ask questions on the topic? Please leave comments and participate in discussions - the feedback form is located below.


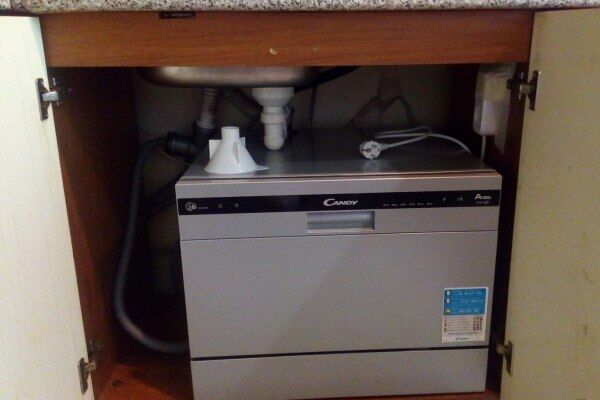
We spent a long time choosing a dishwasher and settled on a compact model, which we plan to place under the sink. In this regard, the question arose: is it possible to place it on the bottom of the cabinet under the sink or should it be on the floor? The bottom is quite thick, there is free space underneath. Removing it will damage the design of the sink cabinet. Maybe some extra legs for the bottom?
For a compact dishwasher, it makes no difference whether you place it on the floor or not. Friends have it under the sink and no problems.
Hello. Additional legs are needed if the bottom of the cabinet sag under the weight of the dishwasher.In this case, the legs will create support and prevent deformation of the bottom. It makes no difference to the device what surface it sits on. The main thing is that it is smooth. You can check the evenness of the bottom of the cabinet using a simple mechanical level with a bubble (price from 200 rubles).
Hello. The instructions for the dishwasher indicate how to position it correctly. Of course, if you violate the instructions, most likely the warranty will not apply.
In general, yes, you can install the device in this way on a stable surface, observing the clearance above its upper part (if required by the instructions) and safety precautions.
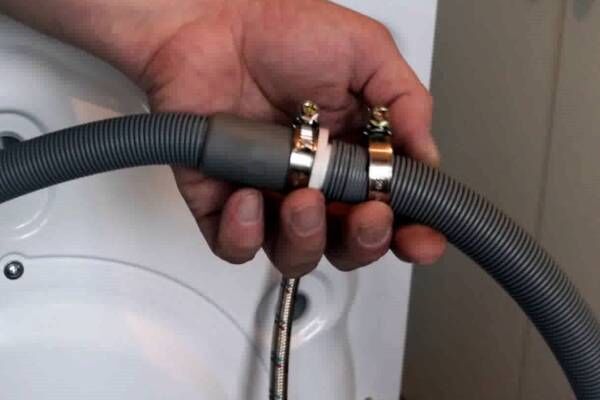
It is not clear what type of compact dishwasher you are planning to install. For example, a tabletop dishwasher (2-4 sets) is prohibited from being installed “downstairs” - it will choke on water. Compact for 6 or 8 sets (55 cm) can be installed both at the top and bottom, you just need to make an S-shaped bend in the hose to create a water seal and an air seal (lower the drain below the drain tank, then raise it 15-20 cm above the drain tank and lower from this height into a siphon or drain). Connection options are in the instructions. Instructions are posted online for dishwashers in product cards in online stores.
I've wanted a dishwasher for a long time, we even left a place for it right next to the sink. When the time came to buy it, we carefully chose to buy the right one. The installation turned out to be not very simple, my husband looked at the parts and instructions for several days, and also watched a lot of videos on the Internet.As a result, after several connection tests, the machine was installed and now does its job perfectly.
Good afternoon, I need to install a dishwasher. I ask a specialist to write to me by email.