Installing a built-in dishwasher: step-by-step installation instructions
Modern built-in kitchen appliances are designed for do-it-yourself installation, so washing machines, dishwashers, refrigerators and ovens are equipped with detailed instructions, diagrams, templates, and sets of fasteners.
But first you need to prepare the place, pay attention to the issue of supplying communications, and think through every single nuance of connection.
To make it easier for you to understand the rules for installing a dishwasher, in this article we have provided step-by-step instructions, where each stage of work is discussed in detail. With this guide, installing a built-in dishwasher will be quick and easy.
The content of the article:
Preliminary work before installation of PMM
There are two options for installing a dishwasher: yourself and with the help of specialists. In the first case, you risk connecting the car incorrectly; in the second, you will have to part with part of the family budget.
Sometimes the skills of one craftsman are not enough; you have to call a team of specialists: a furniture assembler, a plumber and an electrician.

However, if you carefully study the installation instructions, think about connecting hoses, find or install an additional outlet, you can save money and acquire new skills by doing everything yourself.
Choosing a location based on size
An important step is choosing a location for installation. For the built-in model, furniture modules of the first level are suitable, that is, cabinets standing on the floor.
But if you liked compact mini dishwasher, then its installation is a little easier - such equipment can be inserted at waist or chest level (for ease of maintenance).
There are several conditions for choosing a good location. If they are not followed, you may later encounter problems with water supply/discharge or PMM maintenance.
Many installation difficulties arise when a dishwasher is integrated into an already installed kitchen set. You have to adjust cabinets to fit, and sometimes dismantle and remodel some of the furniture.
We recommend that you take care of the installation location before purchasing furniture. This also applies to other household appliances that require integration. Usually, the models you like are first selected, and when drawing up a sketch of the headset, their location and exact dimensions are taken into account. We have provided recommendations for choosing a built-in dishwasher in this material.
Preparation of tools and materials
Manufacturers of built-in PMMs sometimes list in the instructions what tools may be useful during the installation process. However, they expect that preliminary work has already been done.
If measures are required to lay a power line or tap into a pipe, the list of necessary items will increase.
To be on the safe side and save time, you should stock up on the following tools:
- hammer drill or powerful drill;
- adjustable wrench;
- hammer;
- a set of screwdrivers, including flat and Phillips;
- chisel;
- pliers;
- laser level;
- tape measure, square, pencil;
- screwdriver
In addition to tools, you will need connection parts. It is not recommended to use used elements - this will reduce their service life.
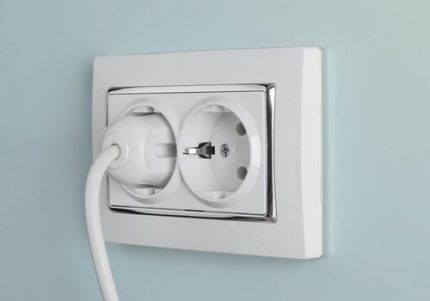
To install a socket, you need to buy the electrical installation product itself, a socket box for it, a three-core copper cable, and an additional automatic protective device.
To connect water you will need a metal tee for inserting into the water supply system, fum tape, water shut-off valve, rubber gaskets, clamps or ties for fastenings.
If the siphon is not provided for connecting another drain hose, then it will also have to be changed.
If the mains voltage frequently fails, we recommend purchasing stabilizer. It can be installed on several devices at once.
Stages of connecting communications
When connecting the dishwasher, it is necessary to prepare an electrical line suitable for the power characteristics.
And also provide a connection point for the hose with the cold water pipe (or mixer outlet), and a hole for the drain hose - it is better not directly into the pipe, but into the siphon, which is located under the sink.
Stage #1 - electrical wiring
To ensure that a dishwasher or other household appliance does not experience interruptions or emergency problems with the power supply, it is necessary to take care of the stability and safety of the entire line, which begins in the electrical panel and ends with the outlet.
The following construction and installation activities may be required:
- Wall chipping for internal electrical wiring. “Rough” work of this type is carried out using a wall chaser or hammer drill even before installing the kitchen unit.
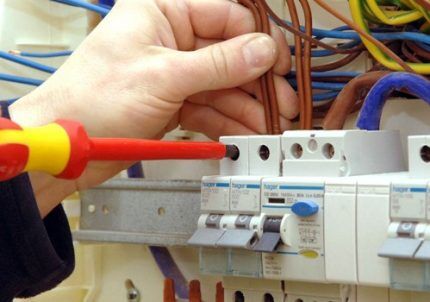
- Installation circuit breaker in an electrical panel rated 16A, class “C”.For each powerful unit - boiler, washing machine, dishwasher - it is better to install a separate protective device.
- Laying copper three-core wire from the electrical panel to the location where the outlet is installed. One of the options is VVGng 3*2.5. This is a non-flammable wire that can withstand loads of up to 3.5 kW.
- Wall mounting socket box and wire output.
- Installation sockets, cable connection.
After connecting, be sure to test - turn on the machine, and then use any household appliance to test.
Instead of one socket, it is allowed to install a block of 2-4 sockets, but so that the total load of all electrical appliances connected to the line corresponds to two important indicators: the cross-section of the VVGng copper cable and the rating of the machine.
Stage #2 - insertion into the water supply system
Connecting the cold water supply is a little more complicated than connecting the drain hose.
A tee should be installed at the outlet of the pipe or at the connection point of the mixer so that water flows simultaneously in two directions - to the dishwasher and the sink faucet.
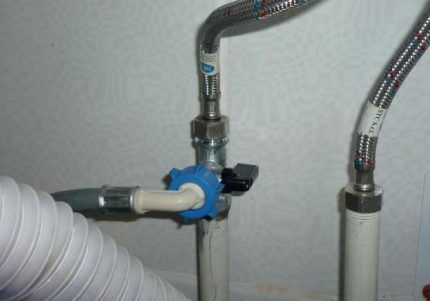
If you only need to connect the dishwasher inlet hose, the procedure is as follows:
- We turn off the water and relieve excess pressure by opening any water-folding mixer.
- Unscrew the flexible faucet connection from the water pipe or adapter.
- To make the connection tight, screw fum tape or flax with Unipak paste onto the thread.
- We mount the tee so that the tap is in a comfortable position.
- Attach the flexible mixer hose. If the old gasket is worn out, replace it immediately.
- We check the operation of the tap: turn it off and open the water supply to the kitchen. If a leak appears, tighten the threaded connections or replace the defective product.
- Attach the drain hose by tightening the union nuts. Before doing this, check that the o-rings are in place.
It is important that the water supply hose is not twisted or kinked, otherwise the dishwashing process will be difficult.
If preparations for connection are made in advance, and you plan to install several household appliances that require water, then it is better to use a collector rather than a tee.
The distributing device (collector) has from 3 to 5 outputs. This is enough to ensure water intake for the PMM, washing machine, water heating boiler and filters.
Stage #3 - drain device
There are several options for integrating a drain hose into a sewer system.
The most successful is to connect the outlet end to the siphon pipe, which is installed under the sink.
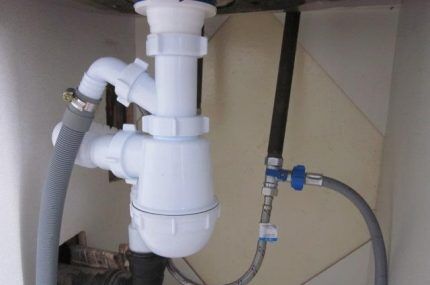
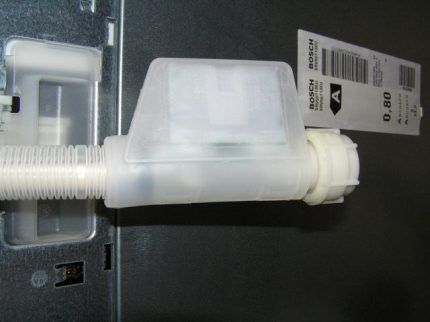
Not all siphon models are suitable for additional PMM connection. If the water seal is not intended for this, it may be possible to expand it with a separate element with a pipe.
However, the cost of the products is low, so it is better to buy a new device, initially designed for the additional connection of a washing machine or dishwasher.
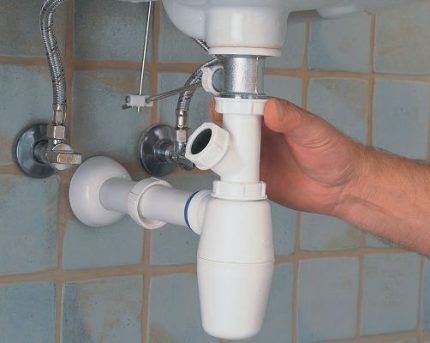
Due to the fact that the water first flows into the siphon, sewer odors from biological waste drains will not spread throughout the entire apartment.
For this reason, it is not recommended to discharge the drain directly, without a water seal or at least a loop, into a sewer pipe.
Subtleties of installing a dishwasher in a cabinet
If the cabinet was ordered to fit the dimensions of a specific model, then there should be no problems with installation.
The dishwasher body fits freely into the niche, leaving small gaps on both sides. To reduce vibration, seals are glued to the walls.
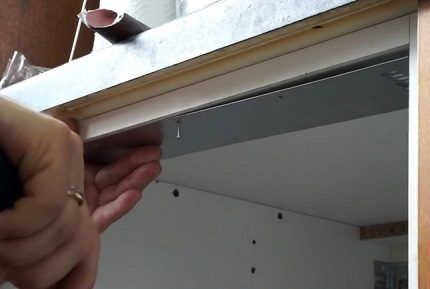
To take into account all the connection nuances, the machine must be installed in this order:
- do a fitting first – push the unit into a cabinet or niche, check the dimensions and connectivity;
- put forward and carry out preparatory activities – fix the mounting panels, fasteners and vapor barrier;
- connect the hoses, push the housing into place;
- install decorative panels.
The difficulty is that models from different manufacturers differ, and therefore some installation points also have discrepancies. To avoid mistakes, you must carefully study the instructions and follow all the recommendations step by step.
A few tips that may come in handy during the dishwasher installation process:
Before “planting” the decorative facade on the car door, first degrease its surface, then glue double tape and the panel onto it. This is necessary to be able to adjust the position of the overlay.
When it becomes clear that the holes on the door and the panel match, you can take a screwdriver and tighten the screws. We recommend that you read the detailed instructions for façade installation to the dishwasher.
Lastly, the side fastening is done. Insert self-tapping screws from the inside of the case into the holes opposite the bushings and also tighten them with a screwdriver. It is prohibited to use nails, otherwise machine parts may be deformed during dismantling.
Connecting hoses and testing
We connect the hoses to the machine at the very end, but before the side fastening is made.
The housing moves forward to provide access to all components. Both hoses are usually attached to the body on one side, at the top or bottom.
They protrude a few centimeters, and to provide space in the closet, the back wall is usually simply removed.
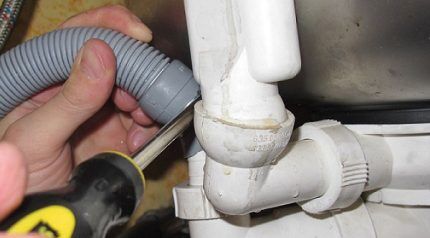
Once connected, the machine is placed in place for testing. We turn on the machine on the panel, then plug it into the socket, ensure the water supply and press the “Test" or "Start" How to perform testing correctly is explained in the instructions.
If there are no leaks, the machine does not hit the countertop or walls, and the test wash cycle went through without incident, then you succeeded in installing the dishwasher yourself.
But before you start using it, it is advisable to familiarize yourself with rules of operation and maintenance cars.
Conclusions and useful video on the topic
Serial installation of a Bosch machine:
Subtleties of calculations for the built-in model:
Tips for connecting a tee:
You can begin to carry out any steps to install a built-in model if you are confident in your abilities and have experience installing household appliances of this type. Otherwise, it is better to either act under the guidance of a master, or invite specialists.
Do not forget that connection errors can play an unpleasant role when the question of warranty repairs arises.
Are you a professional installer and connector of dishwashers and want to share your knowledge with other users? Please write recommendations below under this article, share your wealth of experience with beginners.
If you still have questions about installation or you can’t figure out a specific installation nuance, ask our experts for advice.


I would like to clarify some points about installing a built-in dishwasher. We have already chosen a model and are designing a kitchen set. Is it possible to install a dishwasher next to an oven and stove? We have a compact kitchen, and for now we plan it in this order: sink, dishwasher, oven with stove. So it is possible? Or is it better to put another cabinet between the stove and the dishwasher?
Good afternoon
Almost all instructions for dishwashers contain mandatory recommendations for installing the device. The instructions indicate that placing the dishwasher next to a gas stove or oven is unacceptable. There should be a distance of at least 40-50 cm between two devices.
What are the dangers of installing a PMM next to an oven? There are two dangers: if the dishwasher malfunctions, water can get into the oven, which will likely lead to an electrical short, in turn, heating the cabinet can damage the PMM electronics. In addition, even if such incidents do not occur, you will lose the warranty on both devices if service center specialists see this installation method. You write that you have the opportunity to separate the dishwasher and oven with kitchen cabinets, and I strongly recommend that you do this.
If for some reason this is impossible to do, then try to create the largest possible gap between the devices, inside which lay insulation, for example, foil insulation 5 mm thick. And try not to turn on electrical appliances at the same time.
For 9 years now I have had a built-in Bosch dishwasher next to the gas stove; they are separated from each other only by a panel made of chipboard from the kitchen unit. When we were drafting the kitchen, to be honest, we didn’t even think about it. But throughout the entire period of use, there have never been any problems with the operation of the dishwasher. The dishwasher was installed for us by those who installed the furniture. But we connected it ourselves, slightly modifying the wiring for cold water.
Of course, there are plenty of nuances; we actually called a professional to install our dishwasher, otherwise we don’t understand much about this matter at all.
I read in one article that it is desirable that the dishwasher be connected to a separate network. Can you tell me if this is true? Otherwise we are planning to buy a PMM for ourselves, but there are still questions regarding the installation.
Is there a regulation on who should install a decorative panel (facade) on a car? For example, a kitchen was purchased from some, and not from others... both parties claim that this is not their work