Drawing of a country toilet: popular construction schemes for an independent project
Are you hesitant to build a full-fledged bathroom in your dacha, but have decided to limit yourself to amenities in the yard? Agree, it would be great if this building was convenient to use and looked decent, and not only did it not rain on your head during your visit? But on the way to realizing your plan, you need a drawing, but you don’t know how to execute it correctly?
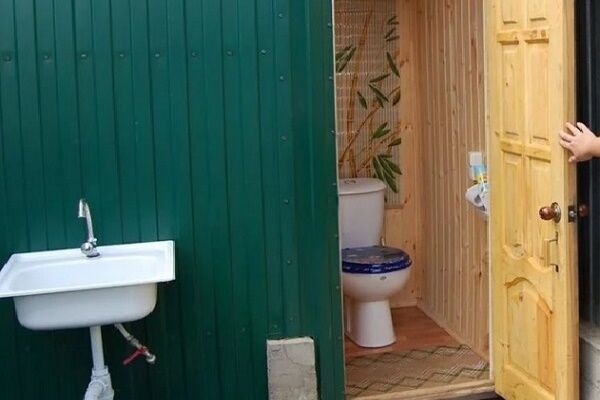
We will show you how to make a comfortable restroom out of an ordinary rural toilet. To do this, it is worth building not “by eye”, but according to a pre-developed project. In the article we have selected the simplest solutions, providing them with detailed diagrams and drawings. We also looked at popular types of closets for dachas, their features and types of materials used for construction.
In fact, you don’t have to make a drawing of a country toilet yourself; you can use the ready-made solutions given in our article. Decide on key features of the restroom, such as the materials used and the presence of a cesspool, and then choose a toilet model that you like. To help the novice designer, we have provided a detailed video on creating a drawing.
The content of the article:
Features of drawing construction
A country toilet is not such a simple design as many novice builders tend to think. There are a number of features that are important to consider when developing a project and drawing drawings.

Toilet installation rules:
- Dimensions. Consider the size of the restroom interior. The minimum allowable area is 1 x 1 m. If you save money and make the booth smaller, it will be inconvenient to use. Also, special attention should be paid to the choice country toilet.
- Height. There is also a height limitation. It is not advisable to build a toilet less than 2 m in height. You will soon get tired of entering it bent over.
- Roof slope. When installing a pitched roof, the rear wall is designed slightly lower than the front. This is done to form the slope of the roof and drain rainwater behind the building.
- Lighting. If you do not plan to install electric lighting, ensure that daylight enters your toilet even when the door is closed. If you don't want to bother with windows, cut at least a small hole in the top of the door.
- Ventilation. The country toilet is a poorly ventilated building. To fix this, a ventilation pipe is run along the back wall.
- Shadow. To keep your country toilet from being stuffy in the summer, place it in a shady place.
- Place on site. Another tip for choosing a construction site: avoid the proximity of a septic tank or cesspool to water intake sources, wells, and boreholes. This is done for sanitary and hygienic reasons.
If you take all these recommendations into account, it will be much easier to design a country toilet yourself.
Selecting the appropriate project type
To design a drawing, you need to decide on the type of toilet. This may be a toilet with or without a cesspool. In addition, the cesspool can be used for the benefit of the household and compost can be produced in it.
A building with a sealed container instead of a cesspool would be appropriate in an area where groundwater is located too close to the surface of the earth.
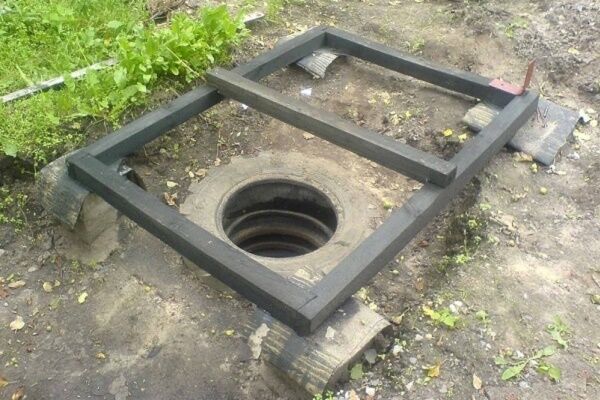
No. 1 - classic country toilet with cesspool
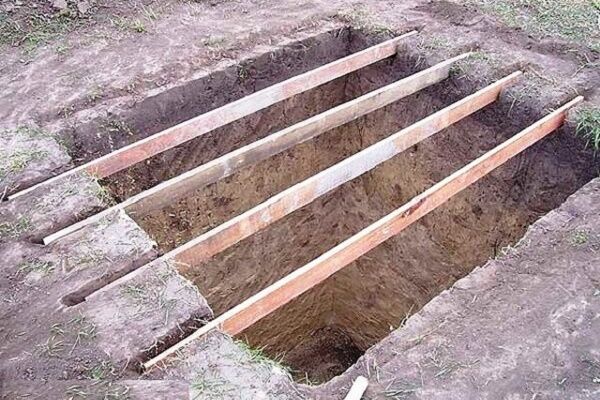
The most common and familiar design of a simple toilet for a summer residence is a model with cesspool. The principle of this design is simple: all waste falls into a deep hole, which is located directly under the toilet booth.
If the cesspool is full, they call a sewer man who pumps out all the sewage, and the toilet can continue to be used.

Since a shower in a country house is just as necessary as a toilet, some try to combine these two projects into one.
If you build a summer shower in one part of the site, and a toilet house in another, you will have to do a lot of shoveling work, because a drainage pit is needed in both cases.
By combining amenities, you can significantly reduce labor costs for excavation work and the amount of materials required.
No. 2 - powder closet or toilet without a pit
A simple way to make a drawing of a toilet for a summer cottage is to design it according to the powder-closet principle.
This type of toilet does not require a cesspool; all waste goes into a tank directly under the toilet seat. This can be a plastic or metal tank or bucket.
Since the main problem with such toilets is an unpleasant odor, the sewage is sprinkled (powdered) with adsorbent substances, which protect the restroom from the appearance of a specific “amber.”

Wood ash, peat, sawdust, and sand are used as adsorbents. By and large, a powder closet with peat is a homemade variation of ready-made industrial dry closets that use the same peat as a filler.
No. 3 - toilet with compost pit
Another option that is ideal for a summer cottage is a compost-producing toilet. As you know, compost is an excellent organic fertilizer for plants.
Natural fertilizer will never be superfluous, and special technology allows it to be produced at an accelerated pace from almost nothing.

The toilet is equipped with a compost pit.It is better if there are two of them, so you can use each of them in turn while the compost matures.
The pits are designed in such a way that the finished fertilizer can be easily removed. This additional functionality will appeal to those who are concerned about the environment.
Subtleties of choosing building materials
Once the decision on the type of toilet structure has been made, you need to select the material that will be used in construction. The choice of building material is important even at the stage of drawing development.
Most often used:
- tree;
- brick;
- metal.
These are familiar materials for summer residents, which almost everyone knows how to handle.
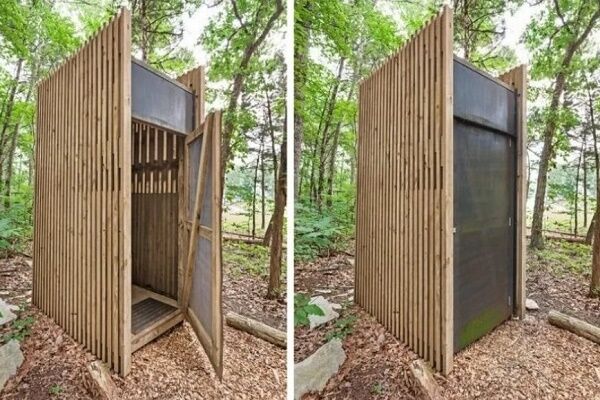
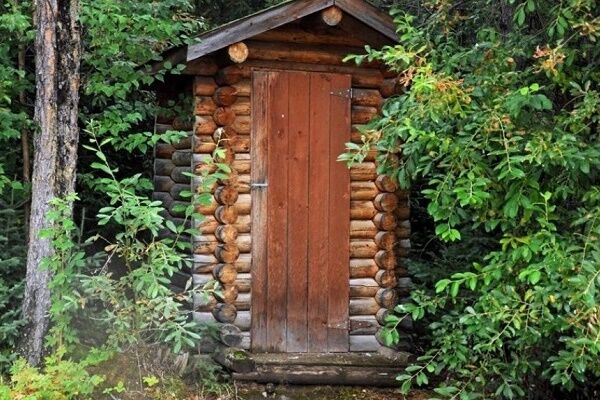
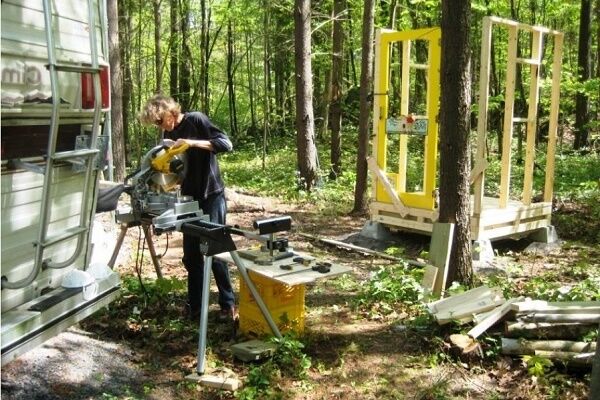
Option #1 - a simple and reliable wooden toilet
When it comes to country house construction, the first thing that comes to mind is all kinds of buildings made of wood.
Boards and beams made from inexpensive, but quite strong and durable coniferous wood are easy to obtain, and the work does not require complex equipment. In extreme cases, you can work with wood even without the use of power tools.

If you want to make a toilet not just practical and functional, but also a full-fledged decorative element at your dacha, try building it from a log house. It will take a lot longer, but the result is worth it.
A country toilet is not the most favorable environment. Wood can rot and collapse if it is not treated with special means. Impregnation with an antiseptic is a mandatory condition when constructing a latrine from lumber.
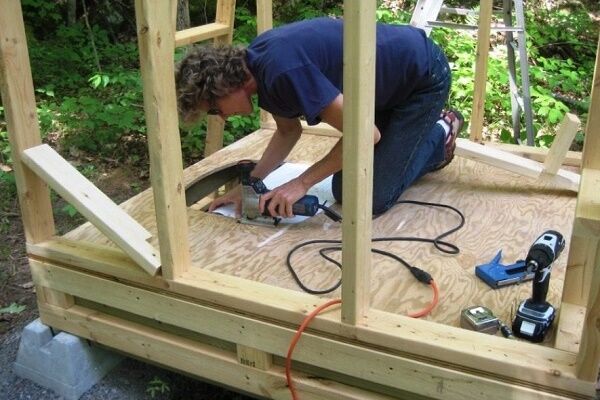
The construction of a toilet house using frame technology includes a number of traditional stages:
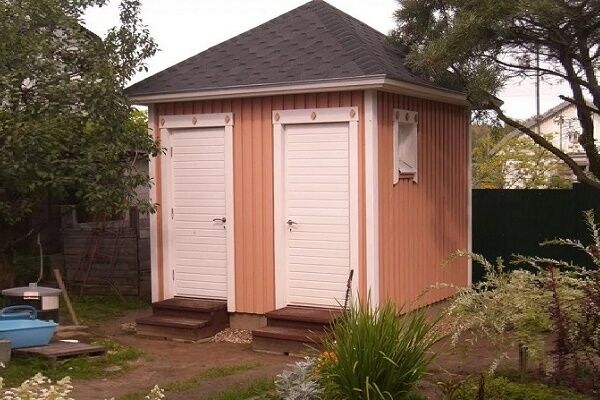
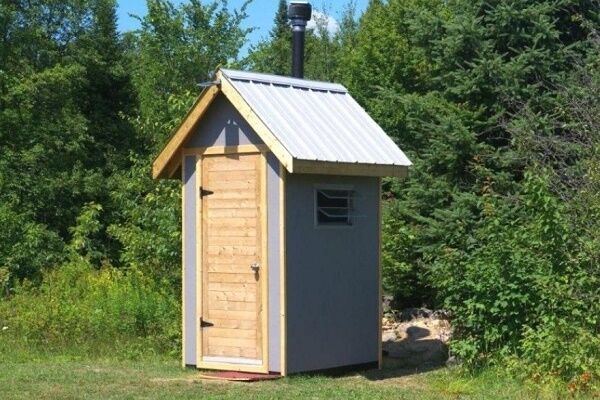
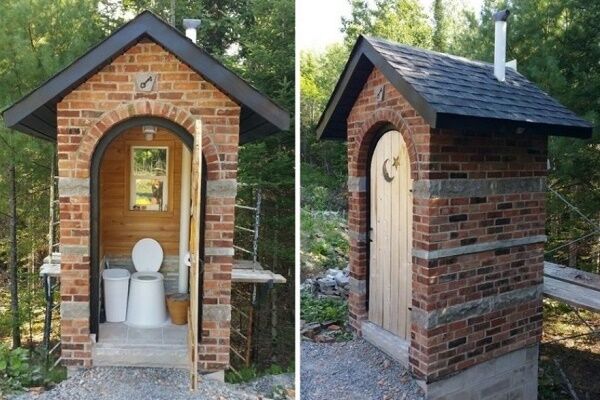
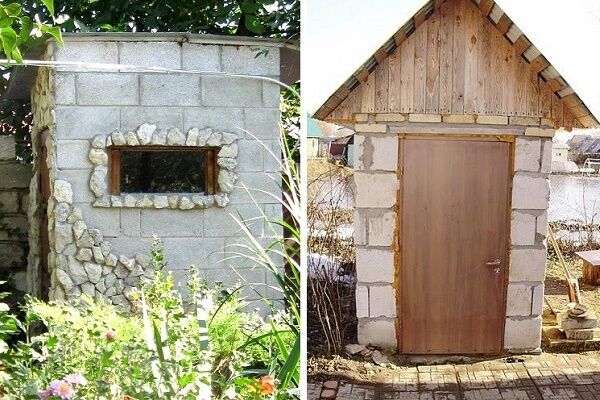
Option #2 - permanent construction made of bricks
The advantages of brick buildings over wooden ones are known to everyone from the fairy tale about the three little pigs.
In addition to strength, a brick toilet has low thermal conductivity, which is important if you go to the country in the cold season. A brick country toilet looks like a house with a single or gable roof. Windows can be designed.

The design of such a toilet includes not only a drawing of the above-ground part of the toilet, but also the foundation. In this case, it will not be possible to do without a foundation, since the dead weight of the brick building is quite large.
Without support, the soil will soon become compacted and sag, which will cause cracks in the walls of the toilet.
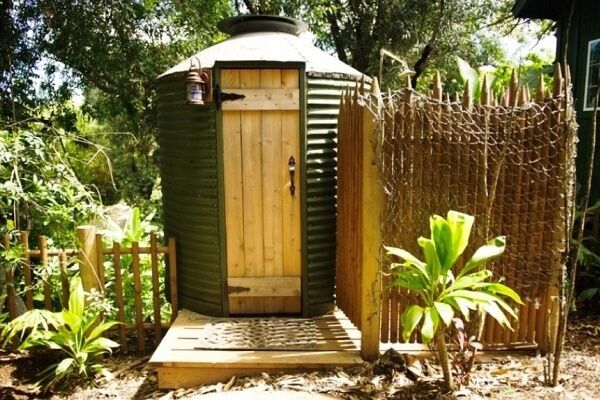
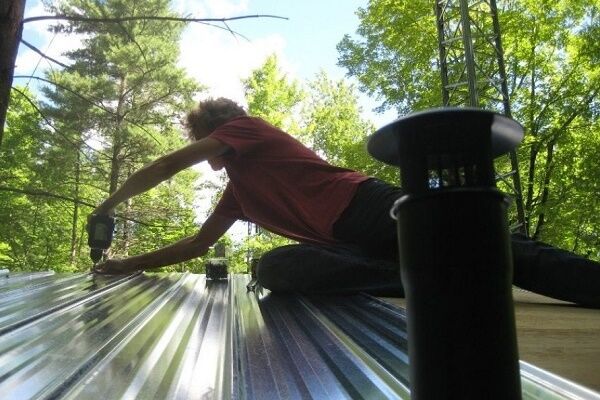
Option #3 - metal toilet
Metal is a material with a high thermal conductivity coefficient.A closet made of metal sheets will be unbearably hot in summer and very cold in winter.
Without the use of thermal insulation materials, an iron toilet in a country house can only be a temporary project - until the construction of the main toilet.

It is difficult to achieve tightness at the joints of such a thin and flexible material. There will be cracks in the corners through which the wind will blow through the house, which also does not add comfort.
If you apply modern technologies and use sandwich panels as wall materials, you can get a completely comfortable restroom. Polystyrene foam or mineral wool is used as insulation.
We also recommend that you study our material on how to build toilet in the country with your own hands.
Ready-made drawings and diagrams of a wooden toilet
Once you have decided on the material for the above-ground part of the toilet house, you need to develop drawings to find out how much material will be needed. It is important to detail every element so as not to miss anything important. In order not to reinvent the wheel, you can find a ready-made drawing.
The most commonly used models of restroom houses are:
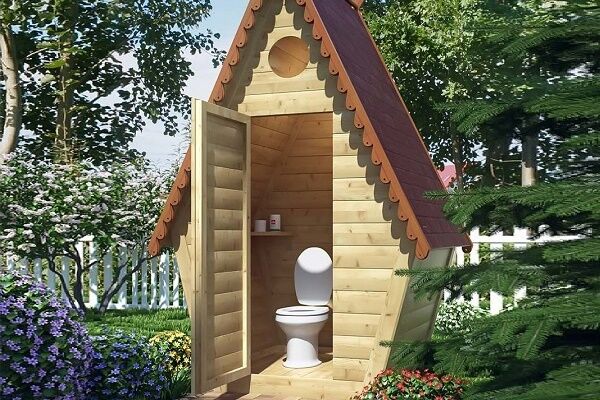
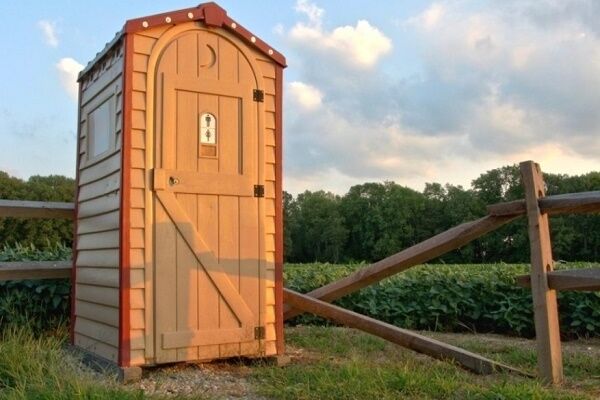
- hut;
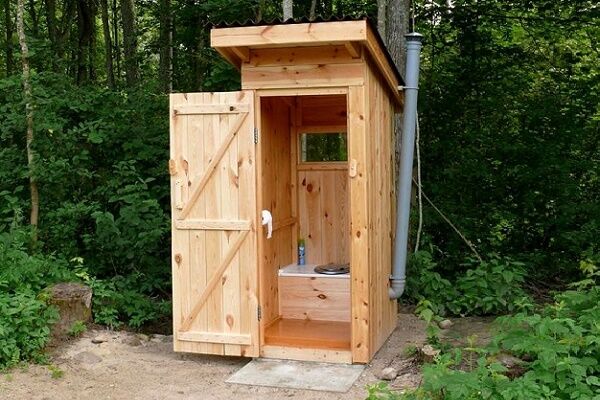
- mansion;
- birdhouse.
The scheme for constructing a wooden toilet in a country house is chosen based on practical considerations.
No. 1 - “hut” diagram with dimensions and description
A country toilet-hut is a compact and economical project. All structural elements have a simple geometric shape, which speeds up the construction process and simplifies the construction of the drawing.

Start with the front and back wall of the restroom. They make a frame in the shape of a triangle with several stiffening ribs in height. The length of the cross beam is 150 cm, the width of the vertical posts is 15 cm, the step between the intermediate posts is 30-40 cm.
The height of the corner posts is 177 cm, the intermediate posts are 287 cm. The inclined elements in this drawing are selected to be 312 cm long.

The design of the front wall differs in that the vertical posts are located at a greater distance from each other. This is due to the need to install an entrance door.
The distance between the posts will depend on the design of the door. Typically, an opening 70 cm wide is suitable. At the top of the opening, a ceiling is installed at a height of 2 m 15 cm.
The remaining geometric dimensions of the frame itself coincide with the dimensions in the drawing of the rear wall.

The walls are connected by longitudinal beams, each 122 cm long. Another cross beam 150 cm long is placed in the middle. The design of the main supporting structure is ready.
Start building the pedestal. Its height is selected in accordance with the wishes of the summer resident. The average size, suitable in most cases, is 50 cm.
Install 2 half-meter vertical posts at the level of the vertical intermediate posts of the rear wall.The vertical elements are connected by crossbars. Their size is also 50 cm.

These sizes are suitable for a medium-sized toilet. It is worth noting that the useful height of the interior is 2.15 m. In this case, the total height of the building will be 3.5 m.
This is due to the fact that the roof slopes connect at a very acute angle. The ceiling is sewn up at a height of 2.15 m, so the restroom will be warmer and more comfortable. Read more about the process of building such a toilet Further.
No. 2 - drawing of a “birdhouse” with a cutting table
A more complex architectural form is a country toilet-birdhouse. This option is most common. The drawings show that the side walls are in the shape of rectangular trapezoids, and the rear and front parts are rectangular.

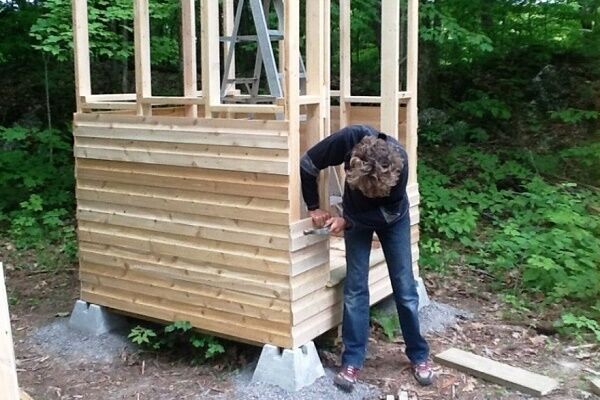
To prevent the wood from becoming moist and deteriorating from constant contact with the ground, it is recommended to make the toilet slightly elevated.
Special runners for the base are installed, about 12-15 cm high. The drawing shows that the back wall is shorter than the front. The height of the latrine is 2.08 m at the rear and 2.78 m at the front.

Thus, with a building length of 1.72 m, the roof slope will be about 22 degrees. The width of the “birdhouse” built according to this drawing will be 1.45 m.
Design solution with insulation:

Each wall is designed and manufactured separately, and then they are connected to each other to form a spatial model of the restroom. Each of the walls is depicted in detail on separate sheets of the drawing.
A very important nuance is the plan for cutting the boards. This addition greatly simplifies construction.

Particular attention to the sizes of individual elements:

Opposite wall without window:

In addition to the walls, you also need to take care of the ceiling. In this case, only one ceiling is used - at the bottom of the toilet. The drawing shows the frame of this element and a table for cutting boards.
In addition, there is a plan for cutting a standard OSB sheet that can be used to cover the floor.

It is necessary to consider insulation:

Rafter system drawing:

A table of materials helps you create an estimate.

The table of materials shows that the country toilet according to the project will be finished with siding on the outside. Roofing is at the discretion of the customer. Slate or corrugated sheeting, as well as roofing felt or tiles are often used.
Designing a brick toilet with drawings
The foundation for a brick toilet can be a reinforced concrete curb buried in the ground, or concrete blocks located at the corners of the structure.
A standard small cabin with a wall area of 8 square meters will require about 300 bricks to build. The calculation is approximate and very exaggerated, but for a general understanding of the process this information is enough.

For such a volume of masonry, you need to design about 60 kg of cement to prepare the mortar. The dimensions of a brick country toilet can be taken from the drawing of a birdhouse toilet.
If the wooden walls are made separately, then the brick outhouse is laid out in rows along the entire perimeter.
Cement mortar takes time to gain strength. If you lay out all the rows of masonry at once, the lower ones will bear a large load, under the influence of which the unset mortar will simply be squeezed out of all the seams.
To prevent this from happening, the laying is carried out in several stages. Optimally – 4-5 rows per day. Construction will be delayed, but the result will be much better.

The roof can be pitched, as in the case of a wooden country birdhouse-latrine, or gable. Depending on this, the layout of the rafter mesh changes. The toilet is covered with the same slate, corrugated sheeting or other covering materials.
In addition to the listed types of closets, our website has an article on how to design and build toilet with shower. This is especially true if the territory of the summer cottage is not too large.
Conclusions and useful video on the topic
How to make a project for a wooden country toilet in SketchUp:
Developing a project and drawings for a country toilet is not an easy task, despite the modest size of the building.
Follow the instructions above, and building a country toilet of any complexity will seem easier than a steamed turnip. The main thing is to approach work with responsibility and a dose of healthy enthusiasm.
If you have ever built a closet on your own at your summer cottage, please share your experience with our readers. You can attach photos of drawings, calculations and finished buildings to your comments. Also in the comments block you can ask questions about the topic of the article that interest you.


I advise you not to skimp on the construction of such an important facility. Initially, it seems that it will be used only in the summer. In fact, it will come in handy in the winter as, for example, in our country, because we started going to the dacha often all year round. That’s why I built a brick toilet: it’s not as cold in it as in a wooden structure.We have a cesspool, and it’s quite deep (because it will be problematic to drive up and pump it out).
I would advise you to decide on a location before construction; the toilet should be located at a distance from a well or water well. In addition, you need to think about the design of the cesspool and how to empty it. Well, plan according to your taste and wallet. I built a wooden toilet in the form of a hut in a country house, having previously dug an impressive hole.
I wonder if this theoretical author, who provided the cutting drawings, has he built at least one structure himself? There is a 5 cm thick board everywhere! It remains to recommend the material - oak. And then, ideally, the implementation of the advice is not to save... What, an ordinary inch, which is used everywhere, is not enough for this?! There should be rationality in everything, but to such an extent as here... Well, yes, now you can come up with a lot of nonsense - it’s stronger, it’s even warmer, it’s even more reliable that it won’t fall apart.
There are no toilets in the villages and there never were. Where have you seen a two-section “M” and “F”? ) In the village there is a toilet)