Tile tray for a shower cabin: detailed instructions for construction
The stores have a huge selection of pallets made of various materials, but the opinion of manufacturers may not always coincide with the consumer's.In this case, you can always make a container for collecting water in the shower box yourself. However, for optimal results you need to know the rules of construction. Do you agree?
We will tell you how to properly make a tile tray for a shower stall. We’ll show you how to choose the shape and size of a homemade structure that is ideal for the hygienic room you are setting up. The construction of such a useful homemade product will allow you to simultaneously solve several important problems.
The content of the article:
Tools for arranging a pallet
Any preparatory work begins with the acquisition consumables and tools. Work goes faster and easier when everything is at hand, and you don’t have to constantly run to a specialized store for this or that.
So, to implement the project we cannot do without:
- Capacities, where we will mix concrete for screed, mortar for bricks and adhesive base for tiles.
- Short rule for screed and grater.
- Construction level.
- Trowel and spatulas - rubber and serrated for tile adhesive.
- Screwdriver - cross or straight, depending on the type of fastener heads with which the ladder is assembled, and screwdriver, if you need to assemble formwork and make spacers.
- Drills with mixer nozzle, if you are too lazy to stir the solution manually.
- Grinders with a disc for ceramics, if you have to cut brick, and with a metal disc, if you have to cut metal mesh and reinforcement.
- Grouts.
- Mallets (rubber hammer).
- Brushes for applying mastic.
Surely, almost everything necessary is already in the owner’s arsenal, otherwise the missing tools will have to be either purchased or borrowed from relatives, friends or neighbors.
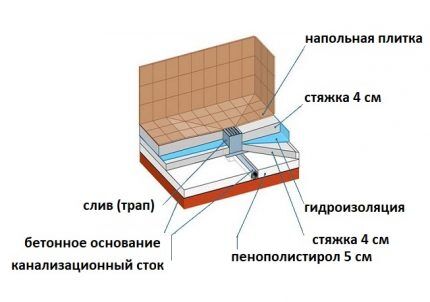
What else is needed for the job?
When all the necessary tools for the job have already been collected and a diagram of the future pallet has been drawn, you can begin purchasing construction and consumables.
So, during construction you cannot do without:
- Ladder or drain system.
- Bricks. When solid concrete pouring, you will need to stock up on formwork boards. In the case of constructing the side of the pallet in the shape of an ideal quarter circle, it is better to make the formwork from Fiberboard.
- Mayakov.
- Waterproofing material for bathroom and a roller for applying it.
- Bitumen, roofing felt or dense polyethylene film - depending on preference.
- Expanded polystyrene - if insulation is required.
- Sand and cement M400, or universal mixture M150, or M200.
- Plasticizers and hydrophobic moisture-repellent additives
- Metal mesh for reinforcing the screed, if its width does not exceed 10 cm.
- Reinforcement if the side is reinforced concrete and not brick.
- Waterproof tile adhesive and cross stitches.
- Tile or mosaic tiles are a must non-slip varieties.
When everything is ready, you can safely begin building the shower tray.
Step-by-step instructions on how to construct a pallet
If the bathroom has a concrete floor, as is the case in apartment buildings, or there is already a concrete screed, this is good. You can immediately begin constructing the sides and waterproofing, having first thoroughly cleaned the surface.
If the base is not ideal, there was previously a wooden floor, etc., before the actual construction of the structure, you should definitely fill the screed.
Stage #1 - surface preparation
To make a mixture for screed, a regular cement-based mortar is suitable. M400 and mixed in a ratio of 2 parts sand to 1 part cement.
In order not to bother with measuring the ingredients for the solution, you can simply purchase a universal mixture M150 or M200.
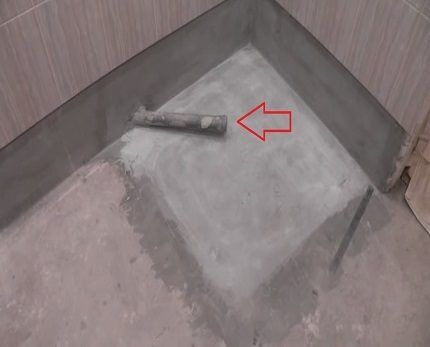
Mixed with a drill mixer nozzle in the required proportions indicated on the bag, and the solution is ready.
Actions should be performed in the following order:
- Making layering For drain into sewer pipe in advance, so that later you don’t have to crumble the new concrete slab with a hammer drill.
- We set up the formwork shape and size of the future pallet, not forgetting that its future sides will also be located on this pallet.Therefore, when marking, it is worth keeping in mind the thickness of the tile and the thickness of the tile adhesive layer (on the front and outside, and therefore double) and the width of the brick. If the screed will be poured around the entire perimeter of the bathroom, for example, in the case of installing a heated floor or a major renovation of the floors, formwork will not be required. The sides of the pallet can be initially erected on the screed.
- If the base is 7 cm wide, install metal mesh at a height of 3 cm above the floor. If the screed is wider than 10 cm, reinforcement will not be needed. The slab will still be of excellent strength.
- Preparing the mixture according to given proportions. In the case of expanded clay concrete, expanded clay is added to the mixture at a rate of 1×1, that is, per bucket of mortar – bucket of expanded clay.
- From the inside of the formwork and on the walls put level marks at the height of the future screed.
- Filling the screed. We align with a small rule, grater or a trowel.
Now we wait until the screed sets and dries. It will be possible to return to the continuation of work no earlier than on the third day after pouring the screed.
When solid concrete mixture, the weight of a poured rough slab measuring 90x90 cm and height 10 cm will be at least 180 kg. Therefore, for residents of multi-storey buildings, it would be best to dilute the concrete with expanded clay. A slab made of expanded clay concrete will be 4 times lighter.
Stage #2 - waterproofing and installation of the ladder
Waterproofing can be of two options - roofing felt or polyethylene film. Some prefer to completely fill or coat with bitumen.
The effect of any of the selected materials in the case of a shower stall for private apartments and houses will be excellent.
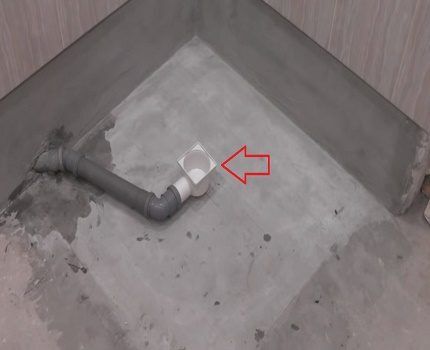
If you need to insulate a future pallet, now is the time to do it. Let’s make a reservation right away that choosing polystyrene foam is solid, and it is advisable to lay it immediately on a rough screed around the perimeter of the side.
In the case of insulation shower drain can be partially recessed in expanded polystyrene. Having taken this point into account, we now boldly undertake the installation of the selected and prepared ladder. All parts of which must be assembled perfectly.
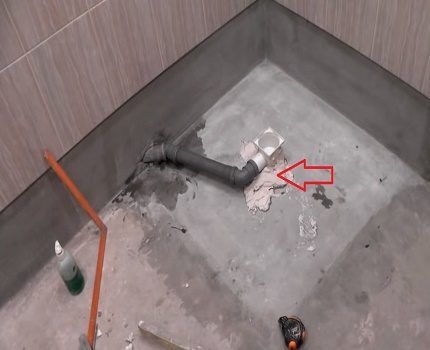
If, when installing the ladder, you did something somewhere or assembled it incorrectly, then in order to fix the problem, you will have to “unscrew” the entire pallet with a hammer drill, and the ladder will most likely have to be thrown out and a new one installed.
Stage #3 - erection of sides
It is best to erect the sides immediately after the poured cushion has hardened and the ladder has been installed. In the future, they will serve as a natural boundary for waterproofing and insulation, as well as formwork for the main screed.
Now let's do the calculation. We calculate how high the side of 1 brick laid on the side edge will be:
- layer of mortar above the rough screed (under the brick) - 5 mm;
- the brick itself is 120 mm;
- layer of tile adhesive - 5 mm;
- tiles - 3-5 mm.
It turns out that the height of the brick side will be 135 mm, at the maximum value.
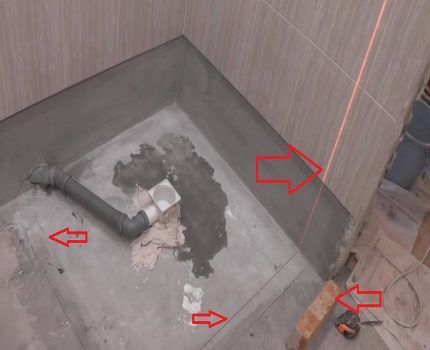
But we need to take into account that on the inside of the booth we still have to lay:
- waterproofing layer – 1-2 mm, if it is mastic and roofing felt;
- insulation - 50 mm, if it is polystyrene foam;
- screed – from 4 to 10 cm, depending on the height of the drain drain device;
- layer of tile adhesive – 5 mm;
- tiles – 3-5 mm.
Then the internal arrangement of the pallet will be 82 mm high at maximum values. Now we subtract 82 from 135 mm, we get 53 mm. This is the height of the side that should be relative to the inner finishing surface of the pallet. In fact, this height is slightly larger than a matchbox.
If it seems small to someone, you will have to, armed with a grinder, cut blocks of the required sizes from the bricks and lay them on top of a solid brick. In the calculations, it should be taken into account that in this case another layer of mortar will be added to the size of the cut block.
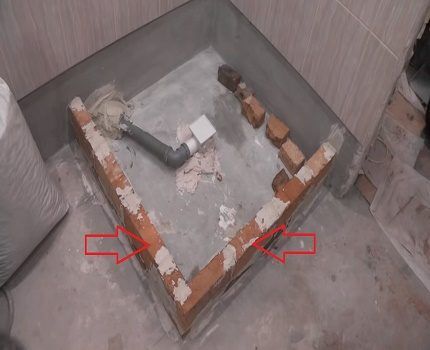
In order to start laying a brick side, you should prepare a mixture of water, cement and sand in a ratio of 1:1:3 with the addition of plasticizers and hydrophobic additives.
It is better to use red brick M-125. It has the highest moisture resistance of all varieties. When laying, it is advisable to use a special reinforced mesh.
Upon completion of the masonry, in order to proceed to further stages, you will have to wait a couple of days until the mortar completely sets and dries.
Stage #4 - pouring the main screed
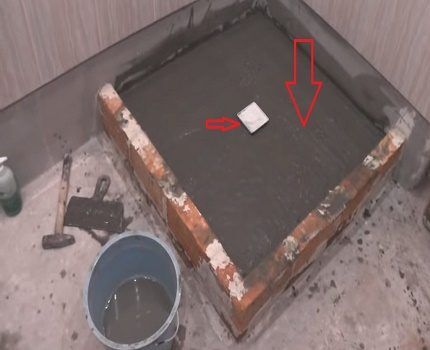
When pouring the screed, pay attention to the fact that the upper grate of the drain will have to be located above it at the height of the layer of glue and tiles.
This reserve is made so that later, when laying the tiles, the drain grate can reach “zero” or slightly lower, depending on the design features of the drain itself. After erecting the main screed, you will have to wait again until the concrete hardens before the next steps.
Stage #5 - re-waterproofing
Repeated waterproofing should not be neglected. By spending money and time on purchasing and applying waterproofing mastic, you will protect yourself from leaks and moisture accumulation in structural elements.
This means that the neighbors downstairs, whom you constantly flood, and you yourself will be saved from eternal dampness and fungus in the bathroom.
After applying the mastic over the entire surface of the screed, along the inner and upper parts of the sides, you should again wait until it dries. Only after complete hardening can you begin laying tiles or tiled mosaics.
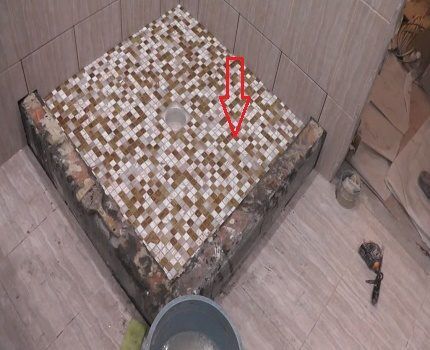
Stage #6 - tiling with ceramic tiles
Any options will look great, but those where the side is tiled and the inside of the pallet is tiled mosaic are especially impressive. In any case, everything depends on the choice of the owner.
So, in the case of facing work, the actions look like this:
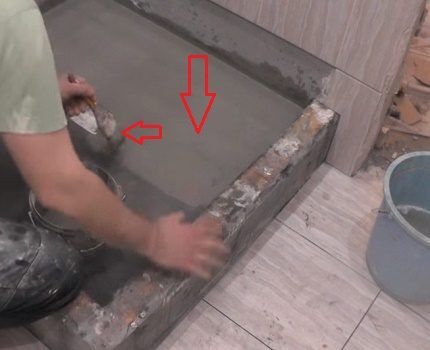
- We prepare the adhesive mixture based on the proportions and consistency specified in the instructions for the purchased type of tile adhesive. Some manufacturers produce glue that can set very quickly, so you shouldn’t mix a whole bucket at once. At first, especially if you have never done this before, you should try making batches in small batches.
- If you are faced with laying tiles for the first time, then know that this is not as difficult a job as experienced “tilers” and “tilers” like to talk about it. The main thing is patience and accuracy. The very first thing you need to know is finishing should always start from one of the corners. We scoop up the glue with a notched trowel, apply it to the back of the tile, apply it to the pallet from the corner, and press.
- Each tile must be checked for level. In the case of a slightly inclined bottom, the horizontal level itself is not so critical. The main thing here is that all the tiles are in the same plane. A rubber mallet is used for leveling. For perfect evenness of laying the tiles, use special crosses located between the tiles at the corners. Each tile should fit snugly against the inserted sides of the crosses.
- If the tiles at the edges do not fit in size, you will have to cut them with a grinder equipped with a ceramic wheel.
- Upon completion of laying the cladding the next day, you should remove the crosses, clean the seams from excess glue and grout with a specially prepared grout mixture using a rubber spatula. Afterwards, excess grout is removed from the joints using a slightly damp sponge.
- It is advisable to seal the joints where the plane of the pallet meets the walls and sides, as well as the corners of the sides, with a transparent sealant.
- Only after the grout and sealant have completely hardened is it recommended to wash the laid tiles.
Often craftsmen prefer to apply glue directly to the surface rather than to the tile itself. You can try this and that. Whatever you like more and whatever is more convenient for you, do so. But do not forget that there should be enough glue under the tile so that there is no empty space under it that is not filled with the adhesive mixture.
Stage #7 - hardening and drying
It is advisable to start installing the fence and taking a shower only after the newly made pallet has thoroughly set and, as they say, “reaches”.
To speed up this process, ensure the bathroom temperature is between 25-30 °C, good air circulation and lack of humidity. It is advisable to keep doors in the room open. In a day or two it will be possible to install the fence and wash.
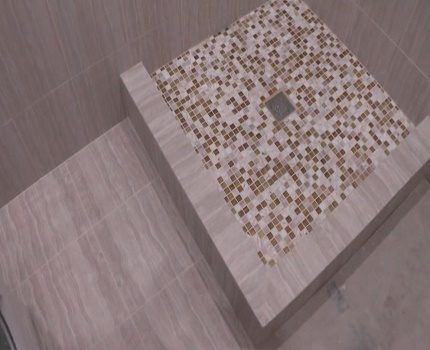
Features of the construction of sides
If it has been decided to build a pallet with a solid reinforced concrete side in the shape of a quarter circle, then it is worth taking into account some features.
In this case, the construction of the sides begins with the stage of pouring a rough screed under the future pallet. You will have to initially make a high formwork for it, so that it will later serve as the outer side of the formwork for the side.
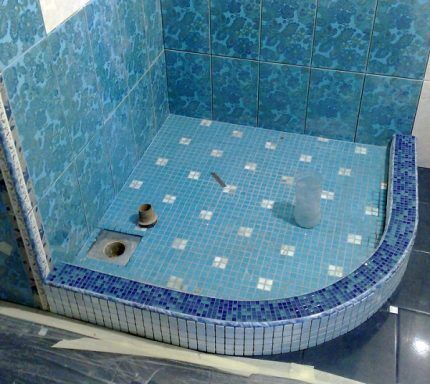
Immediately after pouring and leveling the base, 4-5 sections of reinforcement with a section of 10 should be sealed into its edges along the perimeter. These will be the ribs for the longitudinal reinforcement of the side.
So that you don’t have to cut them off with a grinder later, adjusting them in height, it is better to initially cut them slightly less than the height of the future side. Its height can be calculated in the same way as in the case of a brick side.
Formwork is best made from Fiberboard. Hardboard bends perfectly, and reinforced with supports and spacers will be as strong as a board. It is best to make corners of bars under it as stops, which will provide the future side with a stable vertical level.
After the screed has hardened, a couple of rows of 8-piece reinforcement should be tied onto the reinforcement bars that have frozen along the perimeter of the base. This can be a solid circle, bent according to the required parameters, reinforcement, or pieces with which it is necessary to tie the vertically protruding reinforcement rods longitudinally with knitting wire.
After from Fiberboard Using spacers, the inner wall of the side formwork is constructed, after which it can be poured.
Conclusions and useful video on the topic
The entire process of constructing a shower tray is presented in the following video:
As you can see, the construction process is not particularly complicated. The main thing is to develop a project and take the time to bring it to fruition. Well, the tools. If you have them at home or can borrow them from a neighbor, in a word, you won’t have to spend money on buying them.
The entire construction of the pallet will cost the owner several times cheaper than the cost of the same acrylic pallet of dubious production, which, most likely, will have to be thrown into the trash in a year and a half.
The resulting shower tray with finishing made from tiles with your own hands, and even if slightly imperfect in some ways, will always faithfully serve not for years, but for decades.
Please leave comments in the block below. Ask questions and post photos related to the topic of the article. Tell us about how you or someone you know built a shower tray with your own hands.


I hired someone to make a tray lined with small square tiles. Still, it requires painstaking work. It is necessary that the structure does not allow water to pass through, etc., it is better if this is done by a professional. I would like to warn everyone who is also planning to decorate with tiles or mosaics: it is not very convenient. It slips a lot underfoot and heats up slowly, so I had to lay a rug on top. In the end, I regretted choosing such a pallet.
There is only one difficulty in creating a pallet from tiles: it is necessary to ensure waterproofing, that is, all materials must be waterproof. The first time I did it without mastic, but even so the pan lasted for about 3 years, then it began to leak.Otherwise, all the work is the same as when laying tiles: accuracy and perseverance are required, well, and a little experience in this matter. Without experience it will be difficult.