How to install a shower drain in the bathroom floor: step-by-step installation instructions
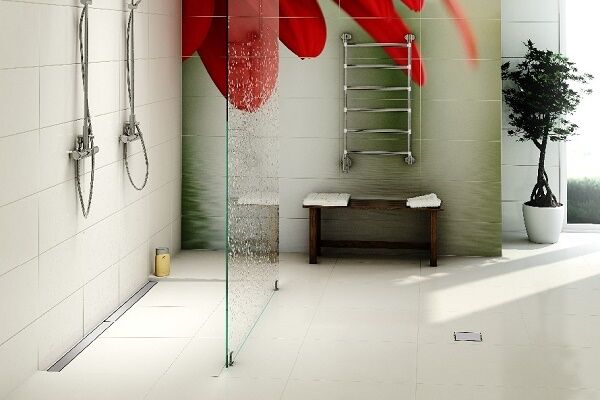
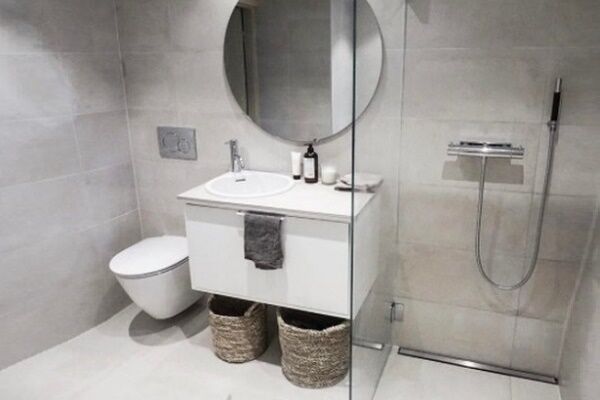
Shower stalls experienced a moment of popularity and began to gradually leave modern apartments and houses.They are being replaced by simple but superior design shower areas, separated only by a translucent partition.
One of the important elements of a device without a tray is the shower drain in the floor - a drain. You can equip it yourself by understanding the basic rules and procedure for installation work.
We will tell you which version of the drain design is best to use, how to choose a water seal, and also describe the step-by-step work on arranging the drain and finishing the shower area.
The content of the article:
How to choose the right shower drain
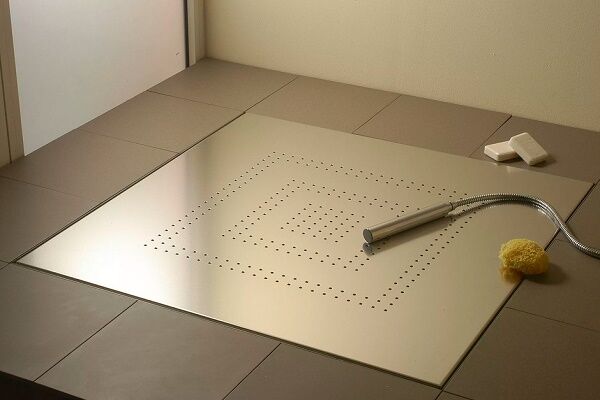
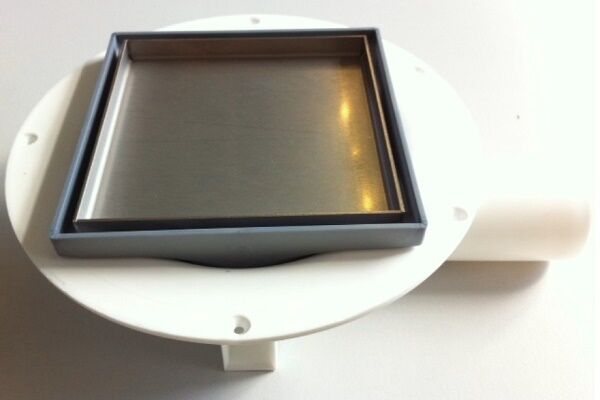
The simplest design of a drain is a device that collects and drains water from the shower into a sewer pipe. The material of manufacture is stainless steel, glass fiber reinforced plastic or metal-plastic. The upper part is closed with a decorative lid, which has a round, square or rectangular shape.
Design features of the models
When choosing a drainage device, it is important to take into account its design and the type of valve - the drainage device directly depends on its type.
Plumbing stores offer three types of products:
- point — a funnel-type device collecting water;
- linear - collecting water in a tray.
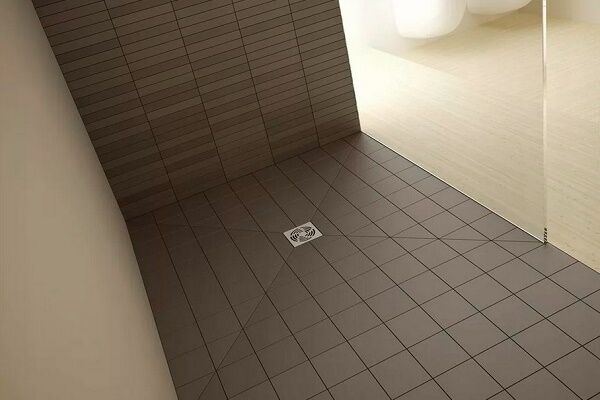
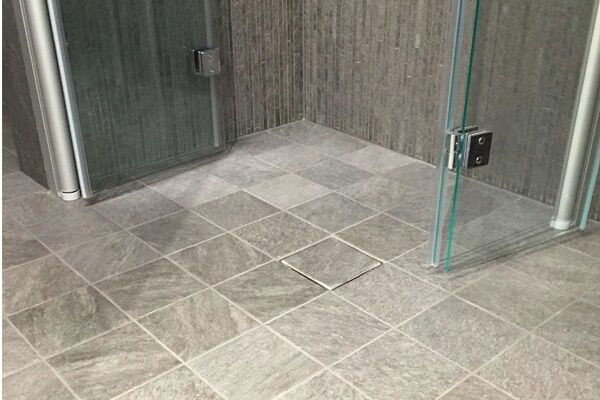
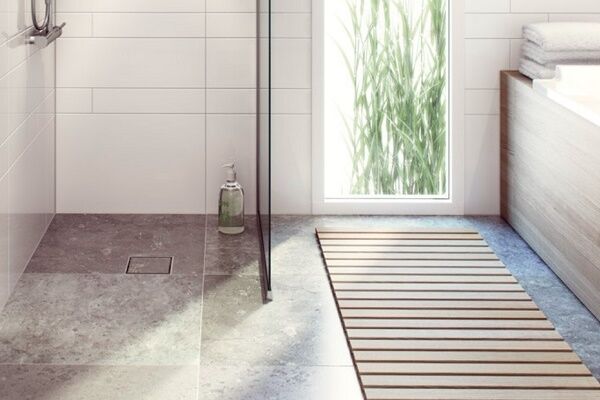
Point drains for drains are the most common type, which is easily explained by the ability to install the drain in any convenient place on the floor: in the center, on the side, in the corner. A slope must be provided towards the point collection of water in the room or in the shower tray for gravity drainage of water.
Point solutions can have two release options:
- vertical - downward outlet; more suitable for private homes;
- horizontal - an outlet that goes to the side, where sewer pipes are usually located in city apartments.
They are installed in close proximity to the water supply facility, for example, from a permanently fixed shower head.

If it is important that the drain has a small height, it is better to pay attention when choosing a model with a cutting glass. Some of them can be reduced to 2 cm.
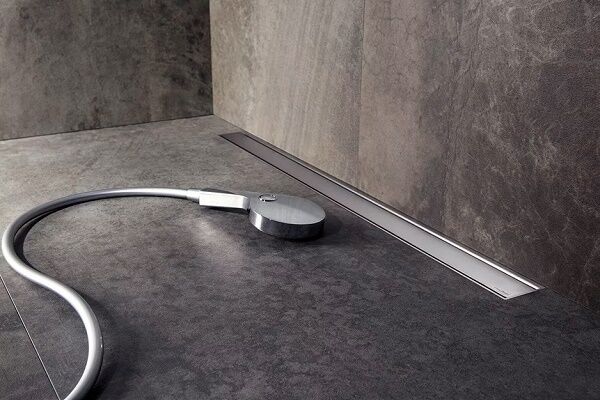
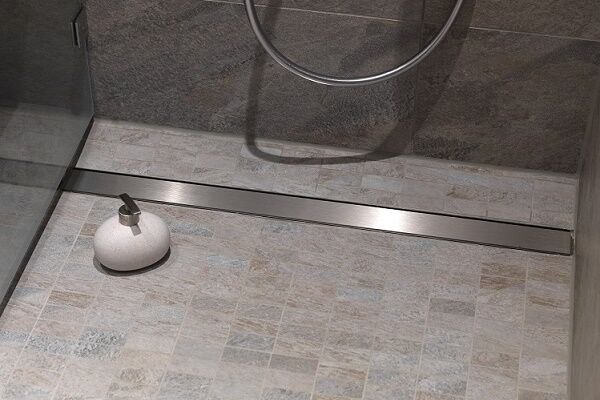
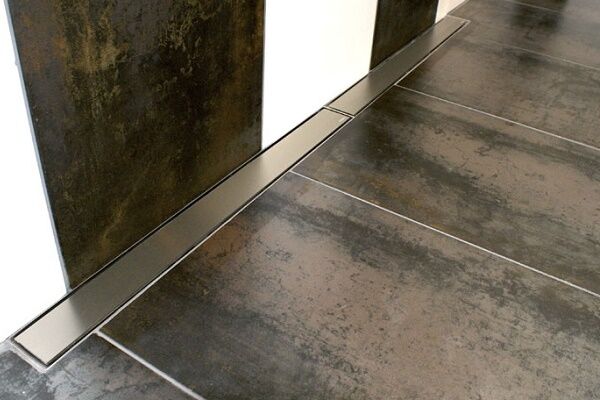
The linear ladder (tray) has a completely different appearance. Thanks to the increased working area, it has greater throughput than its point counterparts. The linear type includes both wall-mounted and centrally located rooms, for example, a washing compartment in a bathhouse.
Accordingly, when installing both a wall-mounted device and a device installed elsewhere, it is necessary to organize the tilt of the floor surface in one direction. It is much easier to organize a slope towards one of the walls than to build two inclined planes with a decrease towards the center.

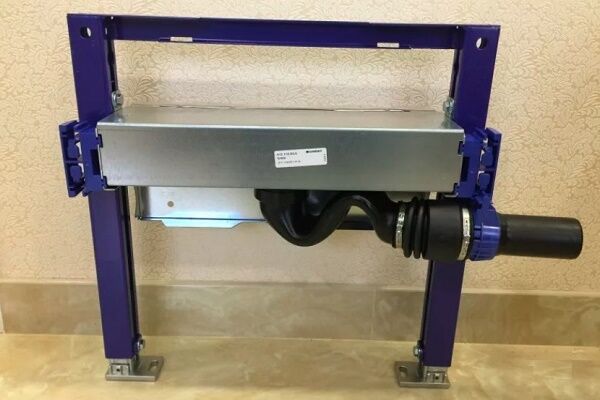
A number of wall-mounted linear structures have improved options, complemented by devices for splashing water on the wall. One typical example is the modification of a drain from the well-known company Geberit, which specializes in the production of plumbing fixtures with installations.
A wall drain is also an installation mounted partly into the wall and partly into the floor. Installing a wall drain in a city apartment is a troublesome and irrational task. In addition, it has a high cost, which is impractical. For these reasons, owners of houses and apartments choose alternative options - point and linear.
When choosing a drainage device, you should focus on the following factors:
- physical capabilities of the installation - dimensions;
- direction of the sewer pipe;
- location of the shower area;
- tile design.
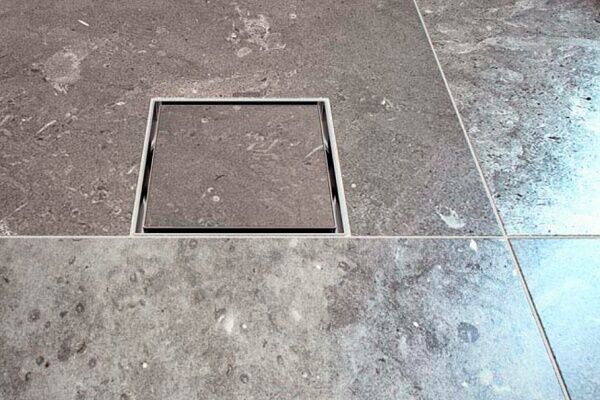
It is also worth noting that “tiled” models have appeared. Instead of a decorative grille, a fragment of floor tiles is installed in the drain body, and slotted holes are provided along the edges to drain water.
The drain drain in the interior of the shower area should look natural and harmonious: it should resonate with the design of the plumbing elements and not be conspicuous.
Types of safety shutter
Choice water seal designs depends on the regularity of taking water procedures. If you plan to use the shower daily, then a traditional device will do. A siphon-type water seal is a curved piece of pipe that traps odors by creating a water barrier.
However, this design takes up more space, and for some this is unacceptable. In addition, there is always a risk of the shutter drying out during long-term departure of residents.
For this reason, in modern modifications, manufacturers are increasingly installing a “dry” valve, which can be membrane, pendulum or float.

There is no fundamental difference in the operation of “dry” valves, so you don’t have to focus on this when choosing a ladder.
Installing a drain for a shower enclosure without a traditional tray includes a number of standard, but very labor-intensive steps:
Drain installation instructions
As an example of installing a drain, let's take a point device with a horizontal outlet, which is easiest to connect to the sewer main. The installation location does not matter much; if you wish, you can do it in the center, in a corner or near the wall.
Step #1 – preparing tools and materials
First, we are preparing a project - a rough diagram of what the drainage system will look like after installation.
It is important to determine what materials will be involved in installation in order to purchase them in advance.
Most often this is the following set:
- sheets of expanded polystyrene - they are dense, light and durable;
- dry cement mixture;
- bitumen polymer mastic for waterproofing;
- damper tape;
- sealant;
- tile adhesive;
- grout for tiles.
The tiles should be non-slip and ideally the same as in the entire bathroom. To make accurate calculations, you should use the manufacturers' recommendations.

Among sealants, it is better to prefer silicone waterproof compounds intended for work in bathrooms, for example, plumbing sealants KWIK SEAL, Ceresit, UNIPAK.
To assemble a drainage system, no special tools are required, but to install screeds and lay tiles, you need containers for mortars, a drill with a mixer attachment, spatulas, trowels, a laser or bubble level (the first is preferable), and marking tools.
Step #2 - choosing a location for the ladder
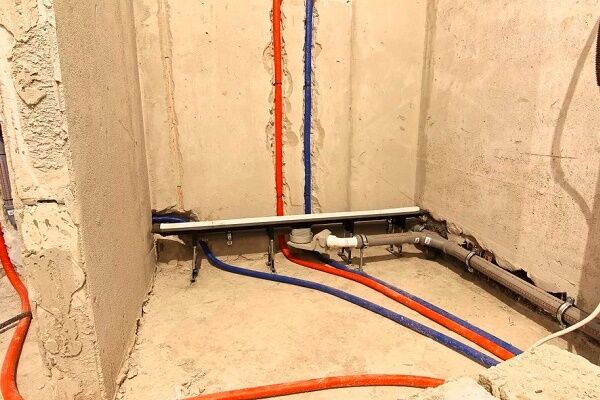
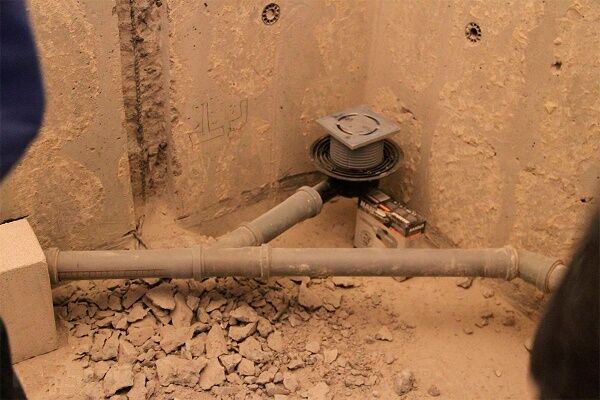
It is better to determine the installation location of the ladder in advance, but often adjustments occur during the work process. For example, after removing the old tiles and screed, it becomes clear what needs to be changed laying out sewer pipes.
Consequently, it is necessary to move the installation site of the ladder “on the fly”. The closer it is to sewer lines, the better the water drains and the fewer parts need to be used to assemble the system.

Often the location of the drain is chosen based on the shape of the decorative lining of the drain. For example, a square one is installed in the middle, and a linear one is installed on the side, along the wall.
If you decide to choose a corner adjacent to the wall for mounting the device (due to its close location to the sewer), you should take a closer look at corner models.
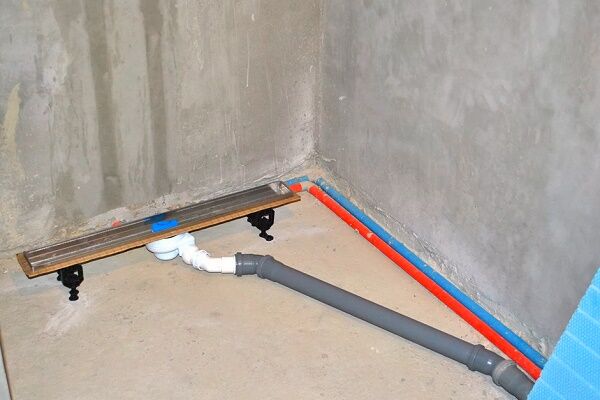
Step #3 - assembly and installation of the ladder
When assembly begins, it is necessary to completely clear the floor and walls of the bathroom from old structures - remove tiles, old plaster and screed.
For dusty and dirty work you will need a hammer drill, a drill and a chisel.But if the concrete base and walls are prepared in advance (cleaned, primed, covered with waterproofing mastic), you can begin assembly.

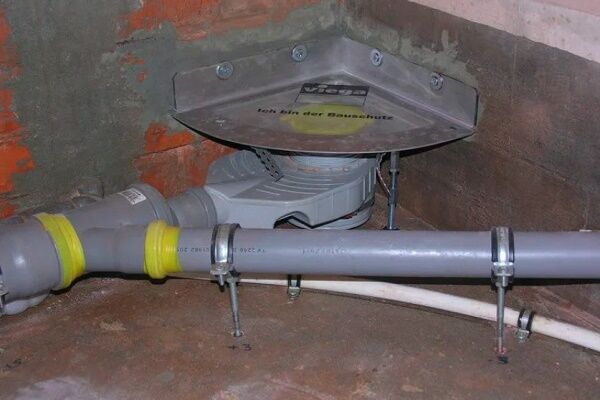
For a more durable and airtight connection of the elements of the drainage system, we use plumbing sealant - the pipes will be walled into the floor, so there is no point in leaving detachable joints.
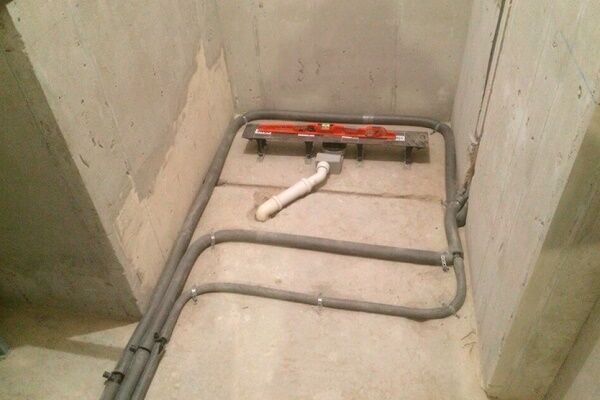
Be sure to measure the assembled ladder in height - the thickness of the layers of screed and insulation depends on its size. Do not forget that the finishing layer, consisting of ceramic tiles and glue, also requires a reserve.
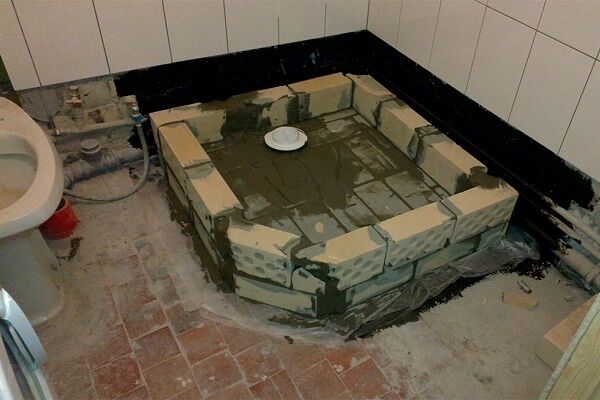
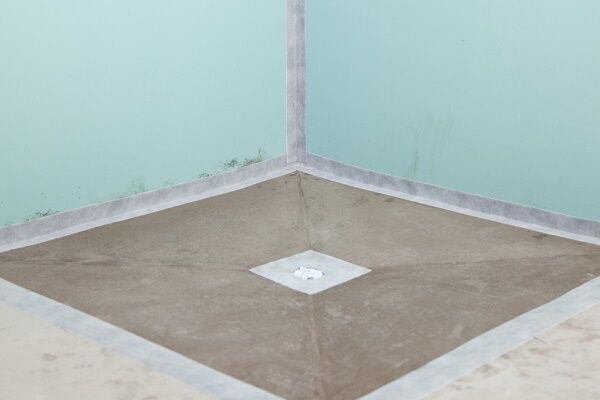
Step #4 – installation of podium sides
When installing a screed, one way or another, the shower area will be elevated above the rest of the floor. Unless there is a desire to raise the floor of the entire bathroom to the level of the drain.
The slope of the screed will guarantee the direction of water drainage towards the ladder; however, to keep the rest of the floor dry, the edges of the podium are framed with low sides.

After this, we make a rough screed, but first lay a waterproofing membrane. Instead, you can use polymer-bitumen mastic, which we carefully coat all corners, joints, joints and sides on the inside and outside.
We make sure that the upper surface of the side is approximately 1.5-2 cm above the level of the ladder.At the same time, we check whether the slope of the sewer outlet pipe has been broken (2 cm per meter). The upper part of the ladder, on the contrary, should be located strictly horizontally.
Step #6 - order of the screed
This stage is considered the most critical, since it determines whether water will flow into the drain in the right direction. First of all, we lay a backing made of extruded polystyrene foam, suitable Penoplex slabs.
This material performs several functions at once:
- heat and sound insulation role material - makes the cabin more heat-intensive and partially absorbs the noise of falling water;
- Lightens the weight of the structure, which is fundamentally important in an apartment building;
- protects the gangway and elements of PVC communications from mechanical pressure;
- allows you to save money on cement mortar.
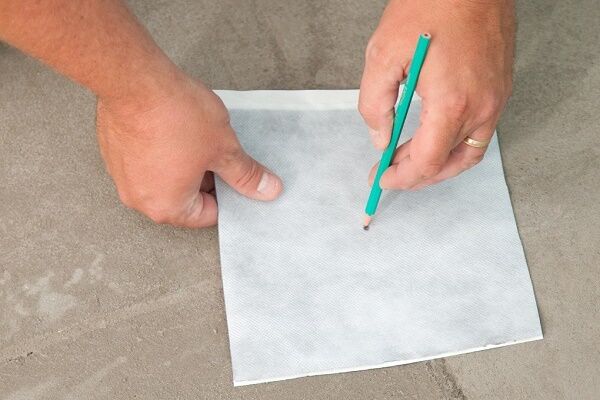
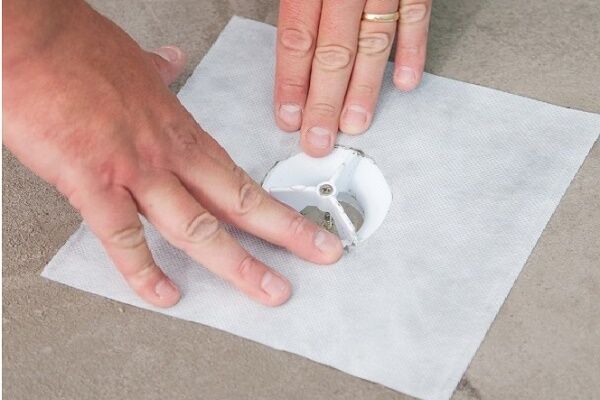
For installation work, extruded polystyrene foam grade C31 or C35 (with fire retardants) is suitable. There are slabs on sale from 30 mm in thickness, but for a shower podium it is better to take 50-60 mm. We cut the large slab into separate fragments, which we lay around the structure of the drainage device, as in the following photo.

After waterproofing and laying polystyrene foam boards, we proceed to installing a rough screed. First, we attach a damper tape along the walls - an alternative option for expansion joints. It is better to use self-adhesive tape, which does not require additional fasteners or special effort to fix.
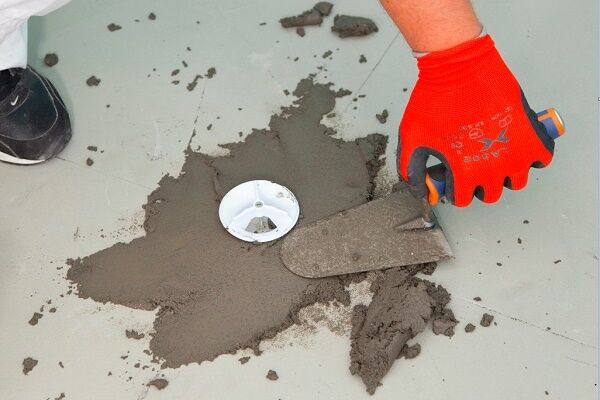
Then we prepare the solution using the proportions of water and dry mixture recommended by the manufacturer. To do this, you will need a small container (bucket, deep basin) and a drill with an attachment.
In order to save material, there is no need to dilute the mixture with a reserve - it is better to prepare small amounts several times.

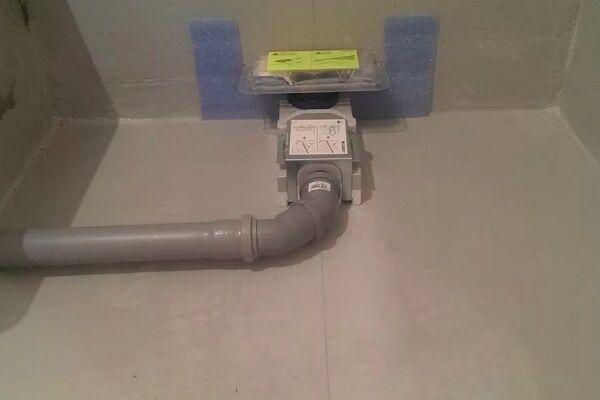
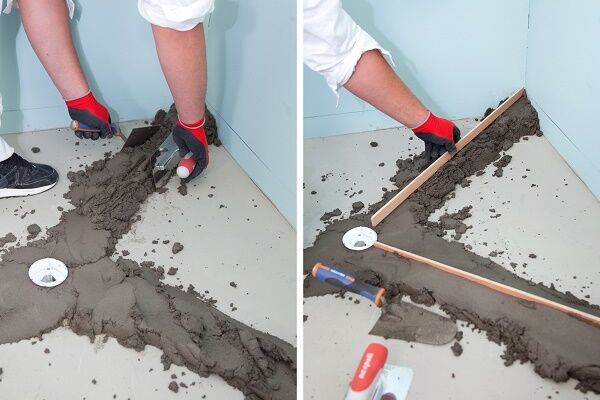
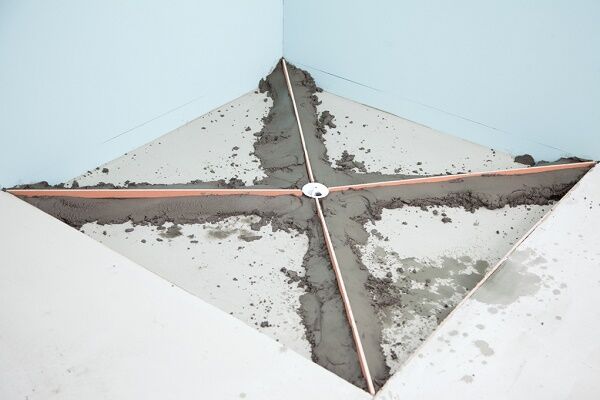
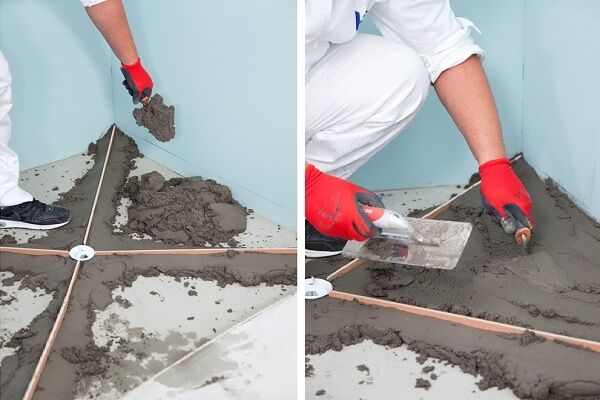
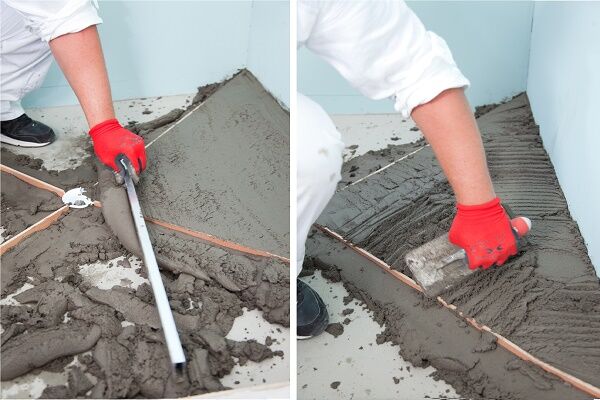
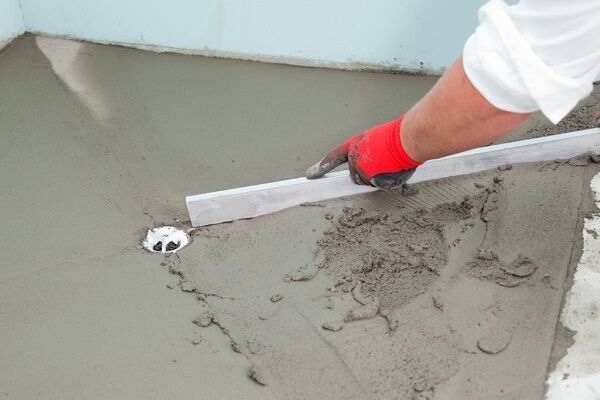
When pouring the screed, we do not leave empty spaces. The structure of the drain must be completely immersed in the solution, with the exception of the flange and the upper part to which the decorative grille is attached. The surface of the screed is leveled with a long crossbar with smooth edges - the rule.
In order to maintain the required slope towards the drain, you can use a system of beacons, installing them according to a level or level. The following selection of photos will introduce you to the technology of the slope device:
Responsible manufacturers offer to purchase a frame for screeding together with the ladder. This is a system of lightweight slats with a lowering height in the area where the ladder is installed.
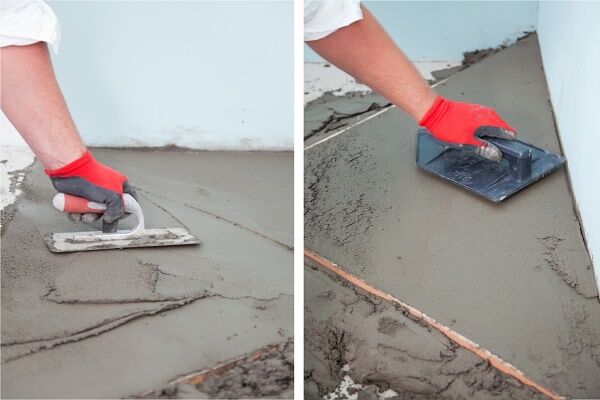
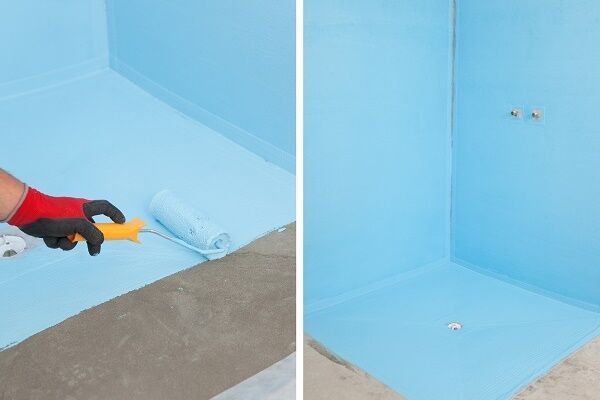
The disadvantage of cement mortars is that they require time to dry completely. We wait until the screed has finally “ripened” (the approximate drying time can be found in the instructions), apply another layer of waterproofing, and then perform a finishing screed.

When the coating is completely dry, you can begin waterproofing and installing ceramic tiles or mosaics.
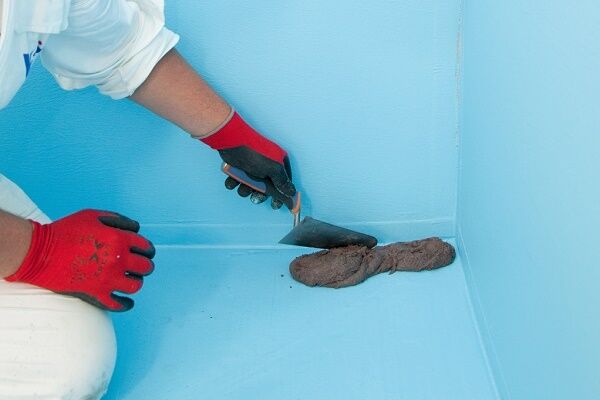
Protection of the subfloor from water penetration is carried out in the following order:
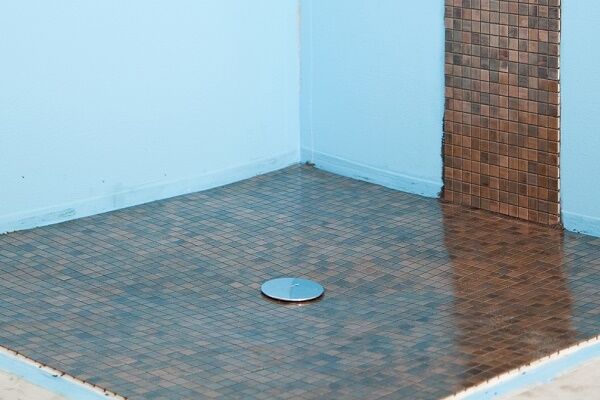
Step #7 - laying tiles taking into account the drain
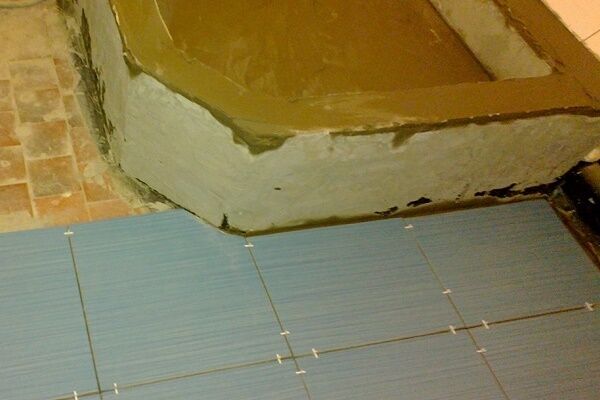
The appearance of the shower area can easily be ruined if you do not coordinate the installation of the drain with the laying of the tiles. It may turn out that even if you lay tiles from the drain, the places along the walls will have to be covered with sections.
Starting the cladding from the walls, you can approach the ladder “crookedly”. What do professionals do? They create a layout of the screed in advance and choose the location for installing the drain so that there is as little cutting as possible at the joints.

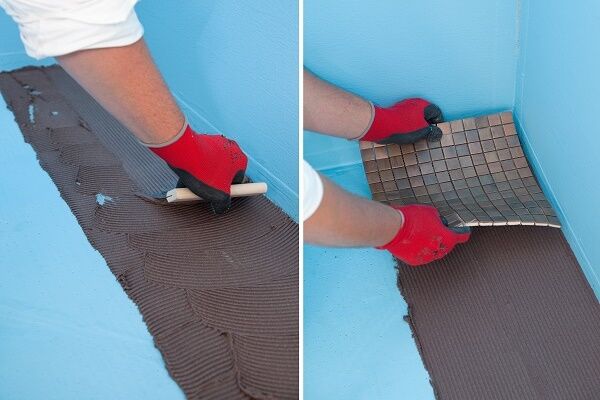
Next, we follow standard technology: dilute the glue, apply it to the floor and lay the tiles one by one. What to do if the screed slope is not calculated in advance? Before starting the gluing process, finishers lay out all the tiles and mark the level of the finishing layer on the walls so that the slope towards the ladder is maintained.
Then, during installation with glue, they simply follow the marks on the walls.It turns out that on one side there will be a thick layer of tile adhesive, and on the side of the ladder - minimal.
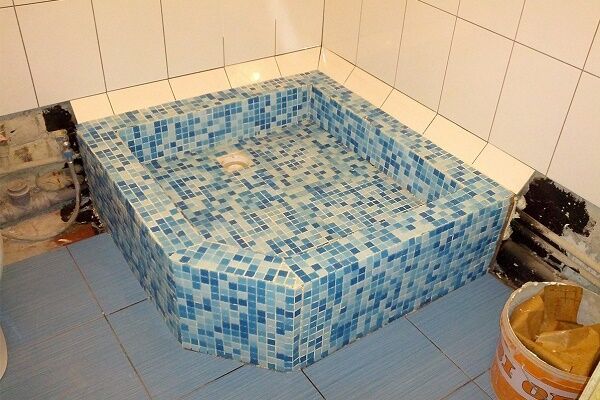
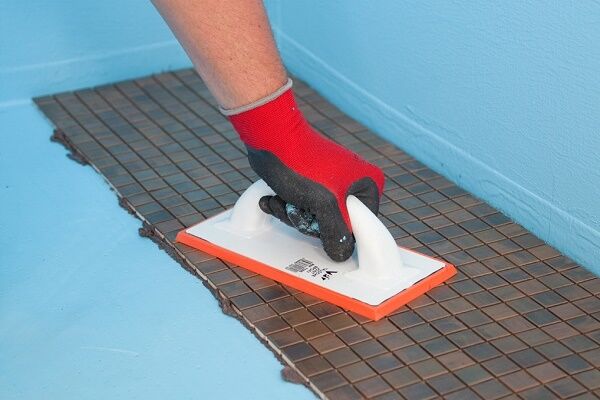
The following gallery will present the steps for laying mosaics on the shower floor:
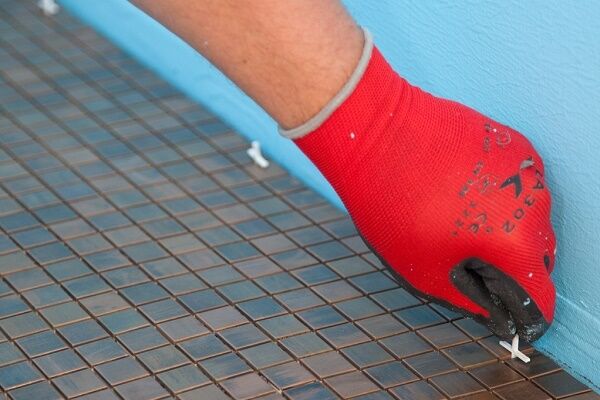
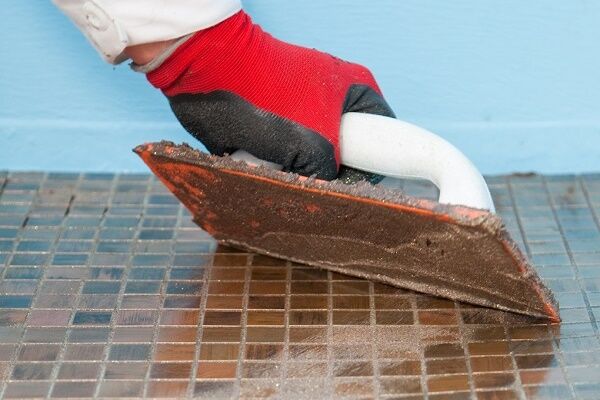
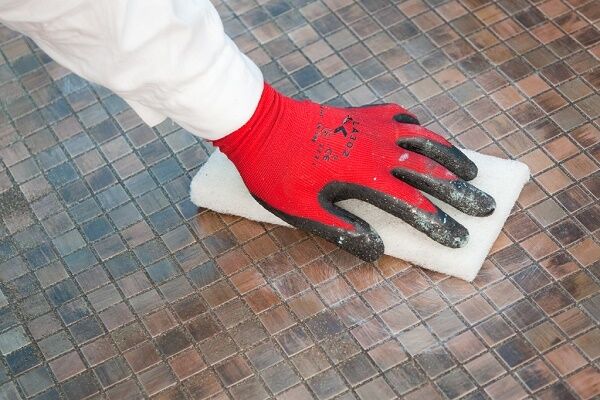
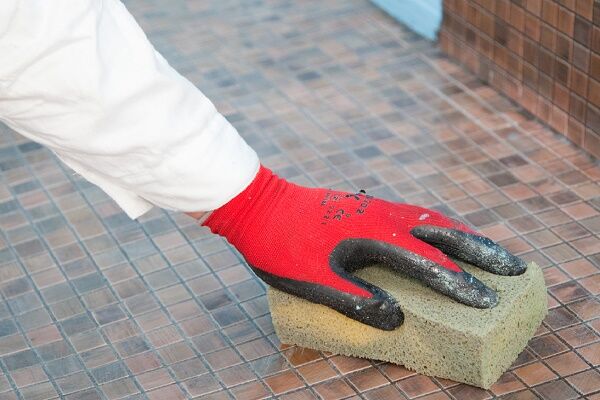
When the tile laying work is completed, it is necessary to process the seams.To do this, we first clean them of glue, then grout (joint) with a rubber spatula.
After 15 minutes, remove the remains of the fugue from the tile and do not touch the lining for about 24 hours. This completes the finishing of the floor drain in the bathroom or shower.
Detailed instructions for constructing a tile pallet are given in this article.
Conclusions and useful video on the topic
A good theoretical basis is the key to productive application of knowledge in practice, but nothing is more valuable than advice from experienced professionals.
How to make a screed using beacons:
Overview of the Alcaplast drain with two water seals:
Helpful tips for laying tiles in a shower:
Why installing a drain is a tiler's job:
Installing a drainage device in the shower only at first glance looks simple and does not require qualifications. If you try hard, you can properly assemble the ladder yourself. But work on screeding and installing tiles without experience can reduce all efforts to nothing.
To save on the work of professionals, you can do some of the work yourself, and entrust more complex stages to experienced craftsmen.
Do you have practical skills in installing a drain for a shower tray? Share your accumulated knowledge, ask questions on the topic and attach photos of your structures. The comment form is located below.


