Installing a toilet on a wooden floor: step-by-step instructions and analysis of installation features
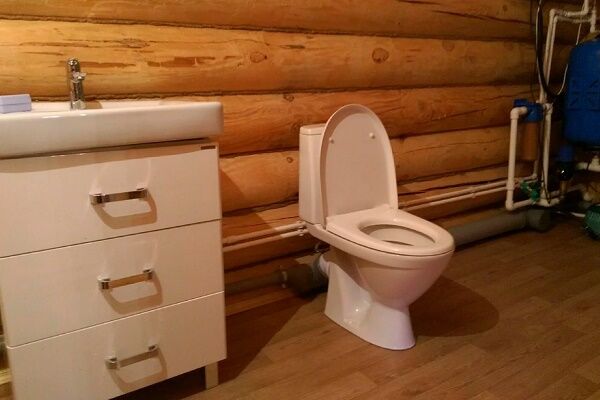
Wooden floors can most often be seen in private homes or country houses.If the floor in the toilet of your home is made of wood, this is not a reason to give up basic amenities such as a toilet. Installation will be a little more difficult, but there shouldn't be any problems.
We will tell you what features are involved in installing a toilet on a wooden floor, how to prepare for the work and carry out the installation yourself. The given instructions will help novice craftsmen in choosing, placing and connecting a plumbing fixture.
The content of the article:
Features of installation on a wooden floor
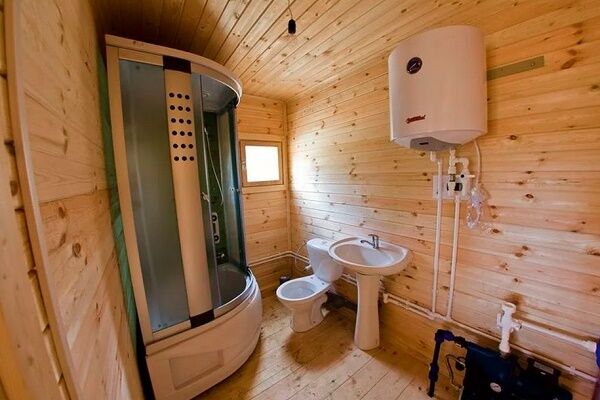
The use of wood for flooring in private homes is ubiquitous. At the same time, only a subfloor is often wooden, covered on top with another material: tiles, laminate, etc. A completely wooden tongue-and-groove floor in a bathroom is rarer: in a country house, in a bathhouse or sauna.
To install plumbing fixtures and secure them firmly, self-tapping screws must be screwed not just into the floor covering, but into the support joists. The problem is that the toilet, or rather its mountings, do not always coincide with the location of the beams.

The most reasonable solution is to add beams under the floor so that plumbing can be installed. To do this, you will have to temporarily remove the floor covering, but only this option guarantees the stability of the toilet.
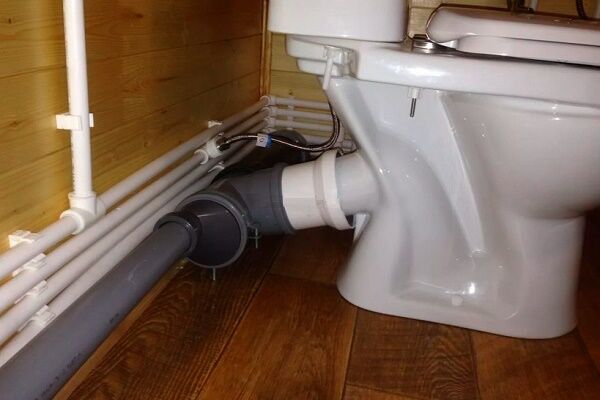
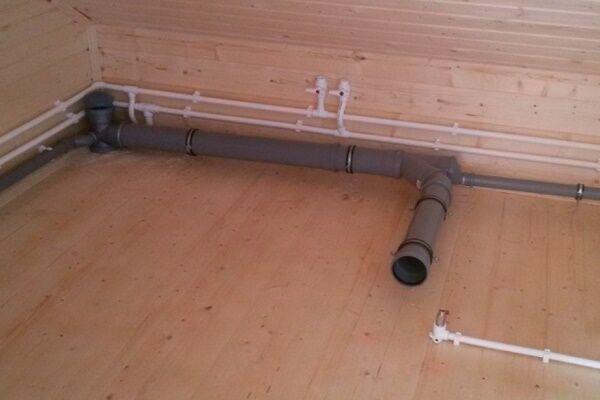
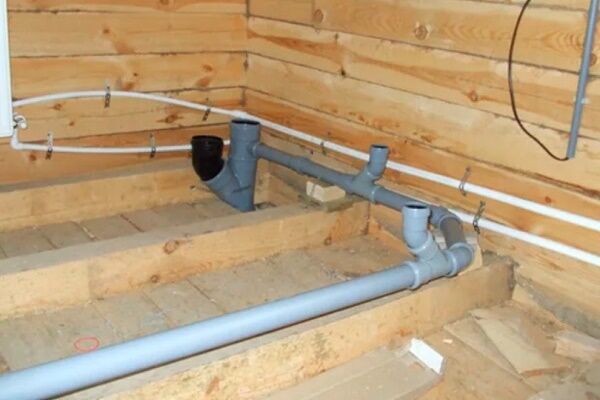
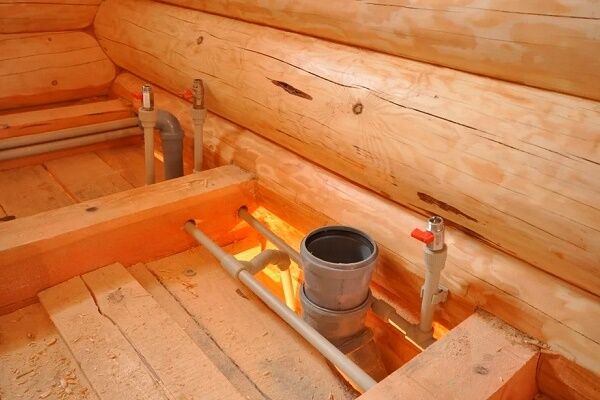
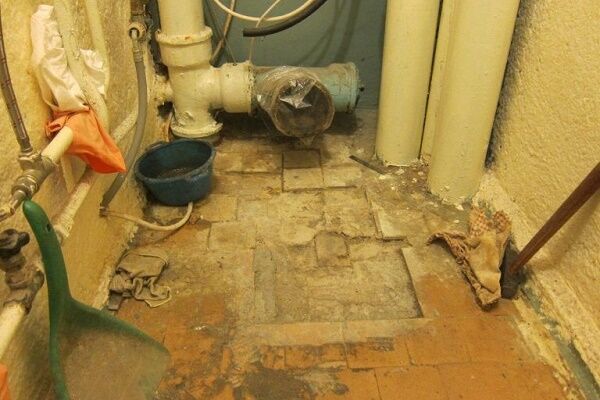
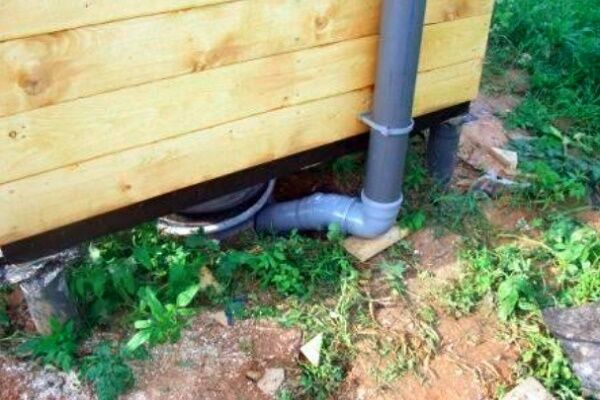
Do not forget that the toilet is mounted near the sewer riser.

Even the upper floors are equipped with a vertical sewer pipe riser. The purpose of this section is to create draft and improve the drainage of wastewater through pipes. Instead of fan boner a check valve is often installed.
Preparation for installation on boards
To install plumbing fixtures on a wooden floor, you need to prepare. First of all, choose a suitable toilet. Decide what, in addition to the plumbing fixture itself, you will need and purchase all the missing materials and tools. Among other things, if the installation will be carried out using taffeta, you also need to take care of it.
Choosing a toilet - which type is better
Choosing a toilet is not as simple a task as it seems. Especially when it comes to installing plumbing fixtures on a wooden floor in a country house. First of all, you need to have a sewerage layout project on hand, indicating the height of the pipe and its diameter. This will help you choose the right model.
Then choose from the proposed varieties, depending on the location of the sewer pipe:
- with horizontal outlet;
- with outlet at an angle;
- vertically oriented.
Horizontal release. They are presented in our plumbing market in the largest selection. This option for connecting the device to the pipe is optimal. A minimum number of fittings are used, and the likelihood of installation errors is reduced to zero.

Release at an angle. Such toilets are less popular. There is a high probability that when installed on a wooden floor, the height of the insertion point into the sewer pipe will be higher than the toilet outlet. In this case, you will have to think about raising the plumbing.

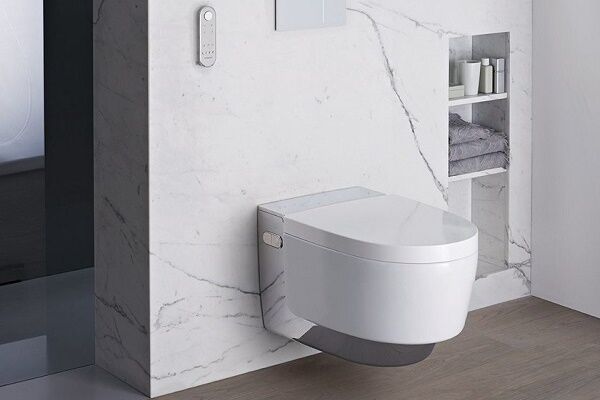
Vertical toilets You almost never see it in our homes. Although they are in great demand abroad, for example, in the USA. The bottom line is that output is directed strictly downward. The installation is carried out under the floor, as is the laying of all communications.
More information about different types of plumbing fixtures and features of choosing a toilet in the articles:
- Types of toilets by technical characteristics and design
- How to choose the right toilet: what to look for before buying + review of manufacturers
Taffeta - what is it and is it needed during installation?
Taffeta is a wooden base that is used when installing a toilet on a wooden floor.It is made from a piece of thick board. The thickness of the taffeta can be 20-30 mm. To prevent the wood from rotting due to high humidity in the toilet, it is treated with drying oil.

Lacking high-quality power tools for drilling holes in a concrete floor, Soviet builders were forced to get out and resort to similar methods, especially in conditions of high rates of construction of standard high-rise buildings.

Nowadays taffeta is not used to install a toilet on concrete. There are modern hammer drills that eliminate this need. But in wooden houses in private construction, the use of such an element of installation work is still justified.
The taffeta is cut along the contour of the base of the plumbing fixture and mounted flush with the surface into the wooden floor.
Purchasing consumables and tools
To complete the installation of a toilet on a wooden floor, you need to prepare the following materials:
- mounting kit;
- screwdriver;
- screwdriver;
- drill;
- hammer;
- building level;
- corrugation;
- plumbing key.
The standard mounting kit that comes with the toilet is not suitable for installation on a wooden floor. The screws and dowels that go into it are used to install plumbing fixtures on a concrete floor.
Soft wood, prone to cracking, cannot guarantee a strong fixation. For wooden floors, long wood screws are used.
A drill is needed to drill holes for self-tapping screws, a screwdriver or screwdriver is needed to tighten the screws. A building level is necessary to ensure that the toilet stands level, perpendicular to the floor and does not deviate.

To connect plumbing to the water supply, you will need a plumbing wrench. The toilet is connected to the sewer using a corrugated pipe. Being flexible and pliable, corrugation is well suited for installing plumbing fixtures with both horizontal and oblique outlets on a wooden floor.
Installation process - three possible options
Installation on a wooden floor can be carried out using the following methods:
- on screws;
- on glue;
- on taffeta.
Find out how to install using all three methods and choose the one that suits your needs.
Using screws - traditional method
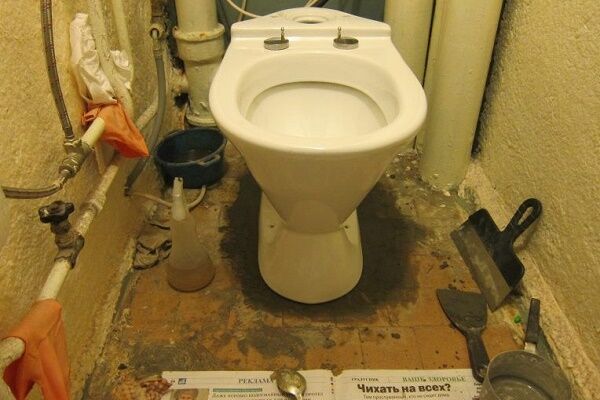
The toilet is mounted using screws in a certain order. First of all, you should make sure that in the place chosen for installation, under the sheet floor covering, there are beams and their position coincides with the fastening points.

Then you need to place the toilet in its future location, trace its outline with a simple pencil and mark the places for the screws.After this, you can remove the toilet again and drill holes according to the marks.

The next step will be to directly install the plumbing fixture in place and screw the screws into the drilled holes. To avoid damaging the coating of the plumbing, it is better to use special plastic washers. The toilet mounting kit includes plugs that hide the screw heads.
Glue - an alternative to using a drill
Installation with glue is the most gentle method. In this case, you will not need to drill any holes and spoil the floor covering. The toilet bowl is simply glued along the contour using liquid nails, silicone sealant or epoxy resin.

First of all, you should prepare the surface. The wood is thoroughly degreased; if there is a varnish coating, it is lightly sanded for better adhesion. The ceramic base of the toilet bowl is also treated with degreasing compounds: solvent or alcohol.
You can make your own glue for attaching plumbing fixtures to a wooden floor.
The composition includes the following components:
- epoxy resin;
- solvent;
- cement;
- hardener.
As for the proportion, for 50 g of epoxy you need to take 10 g of solvent, 100 g of cement and 15 g of hardener. First, you need to heat the resin in a container of suitable size.The optimal temperature at which the reaction will proceed best is 50°C.
A solvent and a hardener are added to the hot epoxy resin, mixed thoroughly and cement is added.

Place the toilet on a wooden floor and trace the outline of the base with a pencil. Then apply a little adhesive mixture along the contour. The epoxy compound must also be applied to the base of the plumbing fixtures.
The layer of the substance must be at least 4-5 mm. The total setting area should be about 20 square meters. cm, otherwise the glue may not hold the heavy toilet.

Put the plumbing fixture back in place. Make sure that the contour of the base coincides with the outlet of the sewer pipe. Press down firmly on the seat so that the excess mixture comes out.
Immediately, without waiting for it to dry, remove the excess with a rag. Leave the toilet for 12 hours. After this time, you can begin installing the tank and connecting communications.
The old-fashioned method - we use taffeta
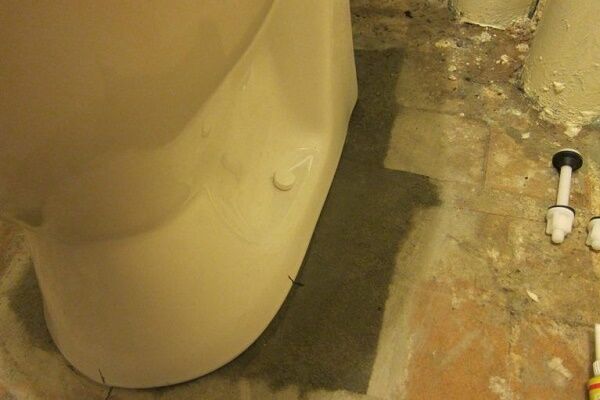
Installing a toilet on taffeta is often used in situations where it is necessary to install it on a wooden floor. A hole should be cut in the floor to follow the contour of the plumbing fixture. Then the hole is filled with a cement screed, into which the previously prepared, processed taffeta is immersed.
Alternatively, you can use a rubber backing. A contour is cut out of a thick sheet (from 10 mm) and used in the same way as a wooden element.The advantage of rubber is its resistance to wet environments. Over time, unlike wood, rubber will not rot or dry out.

The stand needs to be pressed down a little so that its top edge is flush with the floor surface. For better fixation, nails are driven in a checkerboard pattern at the bottom of the wooden board.
After the cement has hardened, install the toilet using screws, as in the first installation method described. Use a drill to drill holes at the fastening points. They install the plumbing fixtures and screw the screws into the holes with a screwdriver. The heads are closed with plugs.
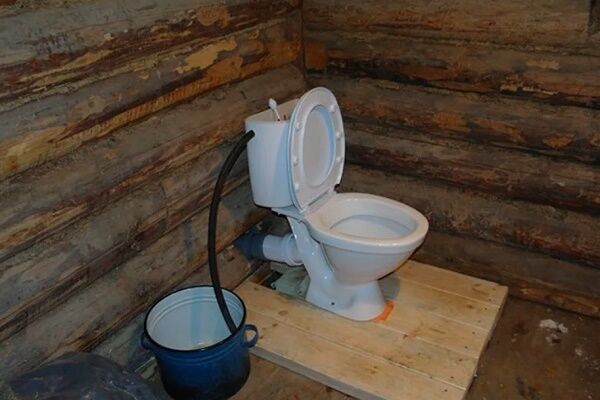
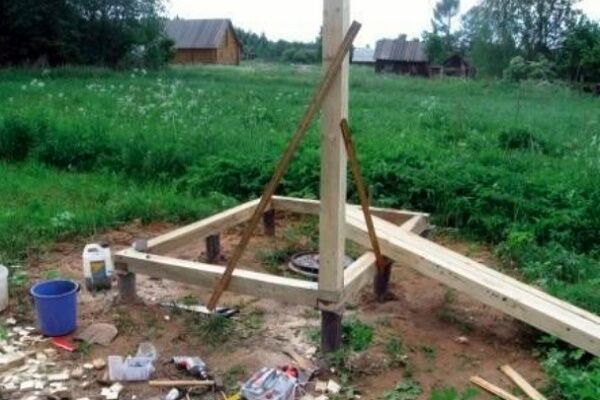
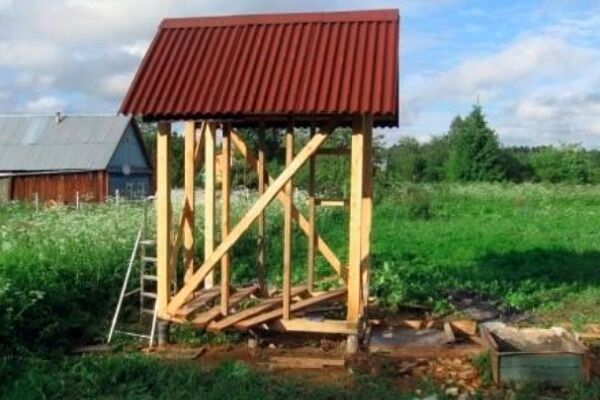
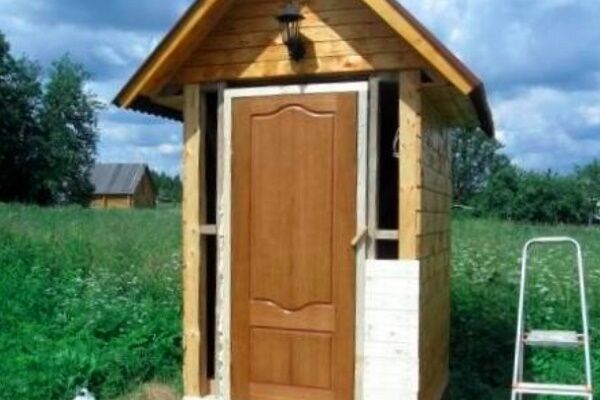
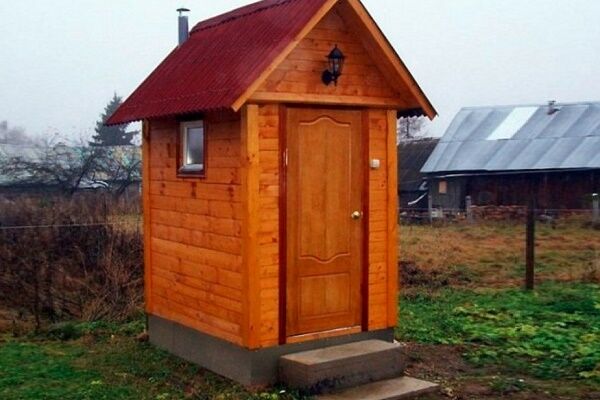
Construction of a country toilet with a toilet
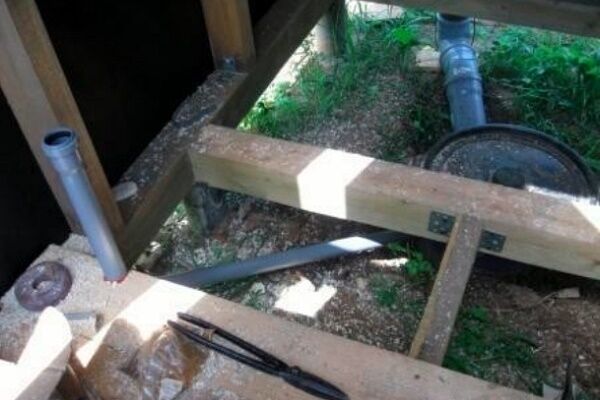
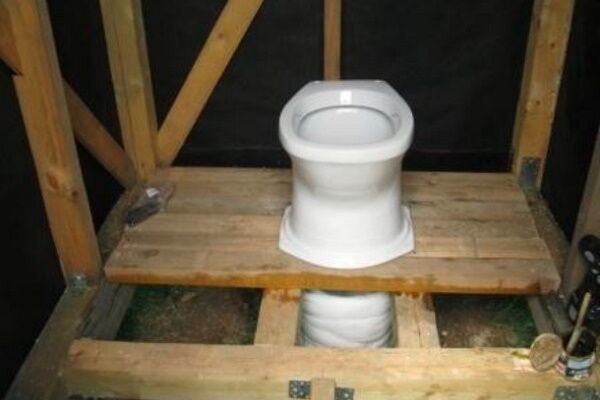
A comfortable sanitary facility with a convenient toilet can also be built on a summer cottage. It is better to connect it to a plastic storage tank or to a brick cesspool with plastered walls. The main thing is to make a sufficiently reliable ceiling that serves as the basis for installing the toilet.
Installation of the tank and connection to communications
When the bowl is installed on a wooden floor, it is time to install the cistern and connect the entire structure to the communications. Sewer pipes and water supply are connected separately. Detailed instructions and further steps will help you do everything correctly.
How to install a flush tank on a toilet
When the toilet bowl is firmly installed and leveled on the wooden floor, proceed to installation of a cistern. The installation process resembles a simple constructor. There are mounting holes at the bottom of the tank. It is enough to connect them to the holes on the toilet itself and secure it using the bolts that come with the kit.

Before installing the tank, it must be assembled. The included drain mechanism is assembled according to the instructions, and the fitting is placed in a special hole in the bottom of the tank. Then, after fixing the ceramic part, water pipes are supplied.
How to connect a toilet to water supply and sewerage
Traditionally, the toilet is connected to the sewer system first. If you start with connecting the water supply, then checking the correctness of the installation will be problematic: it will not be possible to let water in until the sewer pipe is connected.
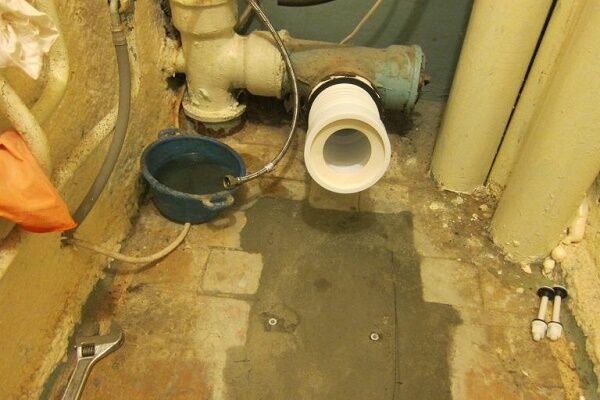
To connect a toilet on a wooden floor most often use a corrugated adapter or a hard plastic element with a cuff.

The connection begins by inserting the end of the corrugation into the sewer pipe. The joint area is carefully treated with silicone. The free end is connected to the toilet outlet. All joints are again sealed with silicone sealant.
To check, pour a bucket of water into the bowl. At this point, it is important to carefully inspect all connections for leaks.

A rigid eccentric element for connecting a toilet requires precise adjustment of the pipe, tee and toilet outlet. Rubber O-rings must be inserted into the sockets of pipes and bends. All connections are lubricated with sealant for reliability.
It is advisable to fix the toilet on a wooden floor after connecting the outlet; after installation it will be more difficult to do this. When the sewerage system is connected, you can finally tighten the screws and treat the junction of the toilet base with the floor with sealant.

To supply water to the drain tank, a flexible nylon-reinforced hose is connected to the pre-installed outlet of the water pipe. The toilet must be equipped with a separate ball valve to turn off the water supply.

Connect all elements of the plumbing system. Use gaskets, thread sealing tape or silicone sealant at joints.
Plumbing leaks are much more common than sewer leaks. A big problem - dripping tank. Up to 200 liters of clean tap water can go into the pipe per day. So, unnoticed, you will use up a cubic meter of water in 5 days only because the installation of the tank and the connection of the toilet to the water supply were carried out incorrectly.
Conclusions and useful video on the topic
Without detailed video instructions, it is risky to carry out installation work without having experience in similar installations. See how professionals recommend installing toilets on wooden floors and gain experience. With such advice, the likelihood of something going wrong tends to be minimal.
How to install a toilet on a wooden floor:
Temporary installation of a toilet in a wooden house:
If you have to install a toilet on a wooden floor in a country house or country house, now this will not be a problem for you. Recommendations for choosing a toilet and several working instructions for installation in different ways will be useful not only for novice craftsmen, but also for experienced builders.
Share with readers your experience in installing a toilet on a wooden floor. Please leave comments on the article and ask questions that interest you. The feedback block is located below.


This was the situation at the dacha. My brother and I put the toilet on a tree. We took the simplest one with a horizontal outlet, so as not to adjust it to the pipe.In fact, installation is not much more difficult than on concrete. The difference is in the taffeta and wood-look screws, but everything is as usual - make sure with a level that the toilet is level and off you go! If you already have experience with installation, then it’s not very difficult.
My parents have their own house in the village. Construction work was completed in the summer, so the sewerage system was installed quite recently. They decided to install the plumbing fixtures on their own, without calling in specialists. After installing the toilet, we discovered that when flushing, water flowed under it. I had to apply sealant at the point of contact with the floor. In general, the problem has been resolved. The main thing is not to forget to secure the toilet well so that it does not walk on the floor.