Attaching the toilet to the floor: an overview of possible methods and step-by-step instructions
Usually, fixing the toilet to the floor is carried out at the stage of housing construction and is carried out by professionals.However, during operation, sometimes there is a need to replace equipment, and this is where owners sometimes find themselves at a dead end.
Some people immediately turn to a company that provides the relevant services, but some home craftsmen decide to save money and make the change themselves. There are no big difficulties in this, and the installation methods are quite accessible even for people who do not have much experience in repair work.
In this article we will talk about different ways to attach a toilet to the floor, as well as what tools and materials you will need for this.
The content of the article:
- Methods for attaching toilets to the floor
- Preparatory activities before installation
- Tools and materials for work
- How to install a toilet on dowels?
- Installation using adhesives
- Installing a toilet on cement
- How to attach a toilet to taffeta?
- The most common mistakes at work
- Conclusions and useful video on the topic
Methods for attaching toilets to the floor
There are several different ways to attach a toilet to the floor.
The most popular include:
- fit on the installation kit (dowels);
- use of various adhesives;
- installation on cement mortar;
- taffeta fixation;
- side mount.
The choice, first of all, depends on the quality of the floor in the toilet or bathroom and on the material of its finishing coating, since the same method of fastening is not relevant for all surfaces. Features and nuances of different installation options depend on the design and type of discharge into the sewer.
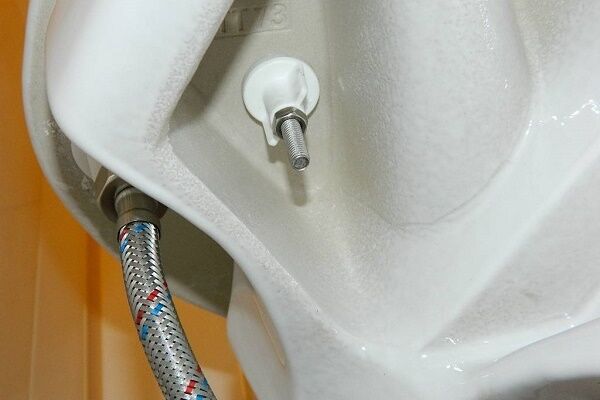
Toilet bowls of almost all modifications come with a standard installation kit (dowel-screw).It is suitable for mounting equipment, but requires the compact to be placed on an absolutely flat surface that does not have errors or slopes.
Plumbing fixtures attached to the floor in this way have good structural stability and do not wobble even during intensive use. However, the method is not suitable for all models and is usually applied to toilets of small size and light weight.
Fastening toilet to tile Cement is considered one of the most durable options for connecting the base of equipment to the floor. Experts reproach this method only by the impossibility of quickly dismantling the product in case of urgent need.
That is why only those compacts that are intended to be used for a long time without replacement are “planted” with cement.

The hidden fastening method is not much different from the open one, it only requires more effort and labor costs. But all this completely pays for itself, because externally the structure looks more attractive, neat and aesthetically pleasing, and the connecting elements are hidden from view and do not spoil the interior design.
Preparatory activities before installation
Regardless of how you decide to fix the toilet to the floor of the bathroom, work always begins by assembling the cistern.The process directly depends on the compact model and is usually described in detail in the instructions included with the equipment.
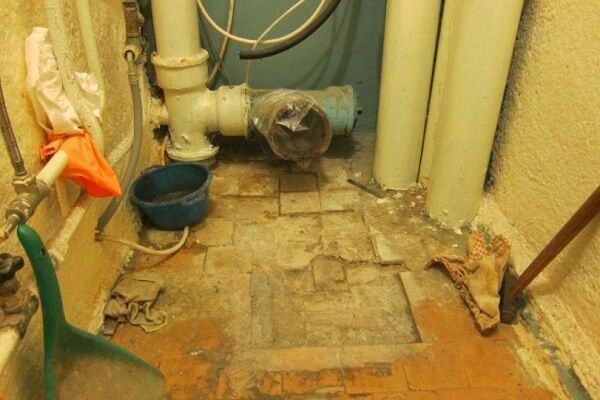
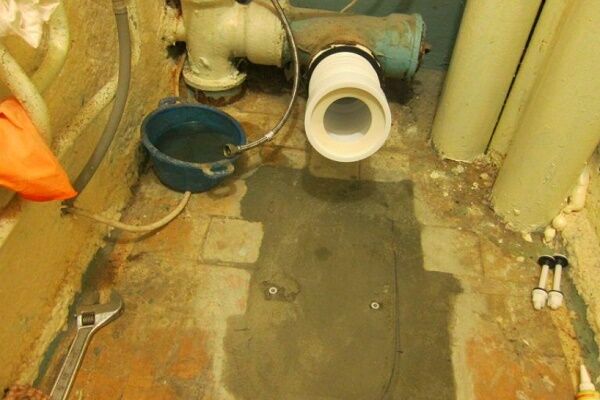
At the second stage, water supply and drainage units are prepared. If the connection is made to an old cast-iron riser, it must first be cleaned and dried well so that later there are no problems with the tightness of the corrugation.
Having completed these two steps, proceed to the third and ensure the availability of all connecting elements, materials and suitable tools for carrying out the necessary installation and plumbing activities.
Tools and materials for work
During the work, depending on the type of floor in the bathroom, the following tools are used:
- a hammer drill with drills of different diameters (when you plan to drill concrete or cement);
- hand drill and drill bits for wood or ceramics;
- set of screwdrivers, hammer, pliers, keys;
- tape measure, marker;
- coarse and fine sandpaper;
- spatulas (if you plan to mount the equipment with glue, epoxy resin or cement);
- scissors, construction knife.
In addition to the items listed above, the following will definitely come in handy:
- dowels, screws with head gaskets;
- connecting corrugation;
- flexible hose for supplying cold water to equipment;
- cement;
- adhesive composition (silicone sealant, epoxy resin, liquid nails);
- a fragment of thin rubber for a sealing gasket under the base;
- a board 28-32 millimeters thick, if it is necessary to raise the plumbing fixtures above the floor or if they are attached to a wooden surface.
Having all this at hand, coping with the task will not be difficult.
How to install a toilet on dowels?
Fastening plumbing fixtures to the floor with dowels is considered the most affordable and practical option, requiring the least amount of time to complete the work. However, for correct installation it is necessary that the surface of the bathroom floor is perfectly flat and smooth.
Even the slightest differences in height negatively affect the quality of the flush and make it difficult to fully use the plumbing for its intended purpose.
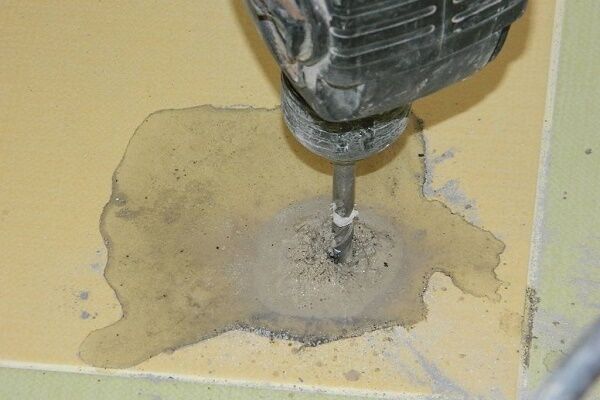
If the floor surface is tiled, you will have to drill holes in the tiles for installation. This event requires accuracy and some skill.

When working, do not rush or press too hard on the tool, otherwise cracks may appear on the tile and the fragment will have to be removed.
In addition, the dowel mount is designed primarily for compact, lightweight toilets of small dimensions. For heavy, massive models, this option is considered not the most suitable, since it does not provide a reliable and stable position for the plumbing fixture.
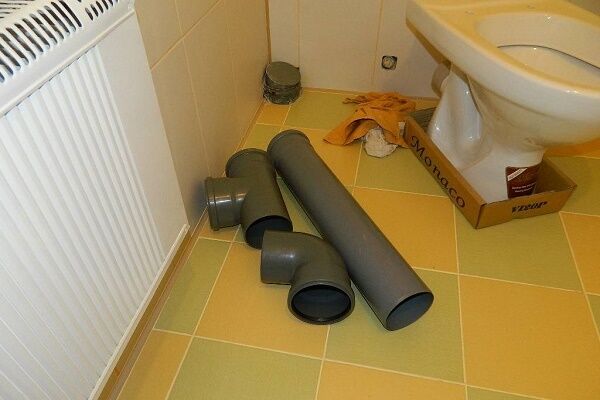
The following photo selection will clearly show you the steps of installing and fastening a toilet using dowels:
The listed steps are a preparatory stage; having successfully completed them, you can begin the main work:
Detailed installation instructions
To properly fix the toilet with dowels to the floor, first make a mark and mark the future location by tracing the sole of the compact with a marker or pencil.

Then they mark the location of the centers of the holes for the dowels and carefully drill them with a drill. Drills are used depending on the floor covering. For tiles, use a ceramic drill, and for parquet or laminate flooring, use a wood drill. When a hole is made in the tile or wood, the drill is replaced with a construction hammer.
A drill is placed on the tool for working on concrete. To ensure that the fastener fits correctly and does not dangle, make a mark on the drill using electrical tape and drill a hole that ideally matches the length of the part.
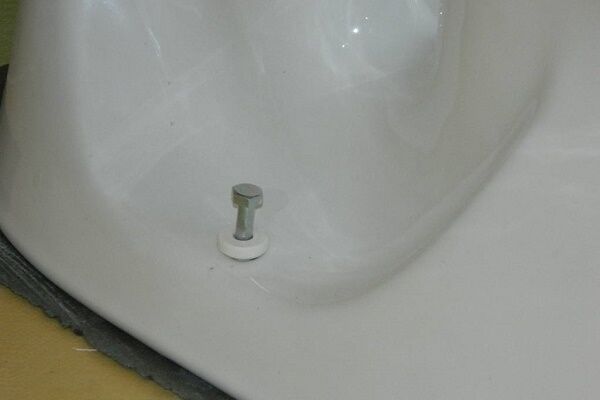
Then the dowels and the toilet itself are inserted, and then the holes in the base of the plumbing fixture are aligned with those drilled in the floor.

The pipe coming out from under the toilet bowl using a corrugation is connected to the sewer drain. Through the holes in the lower supporting part of the toilet, connecting bolts are inserted into the dowels along with plastic spacers or rubber washers.
During the work, they act very carefully so as not to overtighten the screws and damage the integrity of the toilet.
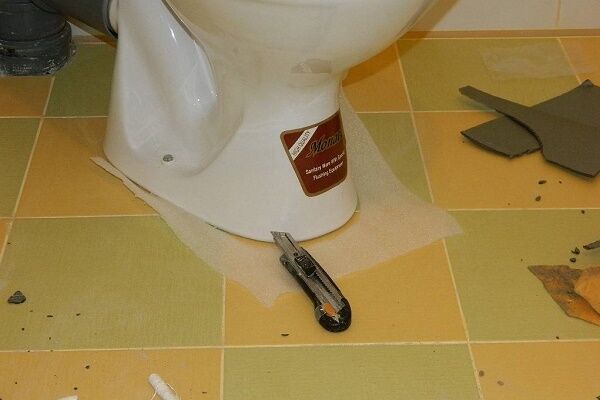
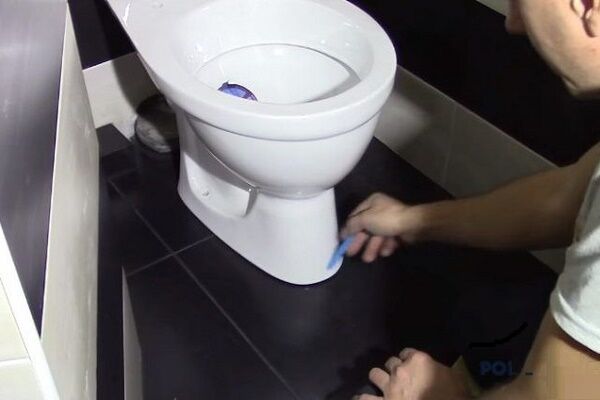
They carefully screw the plumbing fixtures to the floor and cover the fastening caps with decorative polymer overlays. The connection of the corrugation to the sewer is treated with sealant or some other product with similar parameters.

At the finish, carefully examine the area of contact between the base of the equipment and the floor and cosmetically mask the cracks, if any. Then the entire structure will not only hold securely, but also look aesthetically pleasing in the interior.
There is also an article on our website with step-by-step instructions on how fix the toilet to the tiles, we recommend reading it too.
How to make a side mount?
The side fastening option is similar to the dowel method. The only difference is that all the connecting elements are located inside the toilet base leg. Before installation, markings are also made for them, and only then the plumbing module is placed on top.

The work is painstaking and requires additional time. But in the end, the design looks much more aesthetically pleasing and attractive.
Installation using adhesives
Planting a compact with glue is a very simple way of attaching equipment to the floor, but the implementation of the event requires a significant amount of time. The adhesive mixture must harden properly, and this usually takes 12 hours or more.
Fixing the toilet with adhesive is extremely simple:
If you start using the plumbing module earlier, the base will quickly become loose and will not withstand even six months of full use.
This installation method is absolutely safe. During the work, there is absolutely no risk of damaging the plumbing itself or the tiles. After installation, there is no dust or dirt left in the bathroom, so extensive subsequent cleaning of the room is not required.

The contractor does not need to have any professional skills or extensive experience in carrying out repair activities. Everything is limited by the ability to use a glue gun and the tendency to carefully and meticulously carry out assigned tasks.
Initially, marking is carried out and the future placement of the compact is determined. It should be located comfortably for use, be accessible to sewer lines and connect to a water tank without any problems. When all conditions are met, the base of the sole is outlined with a marker or pencil.
Before attaching the toilet to the floor with an adhesive mixture, both surfaces to be joined are thoroughly cleaned, simultaneously removing possible debris and dust from around.
If installation is carried out on slippery, smooth tiles, then first the tiles are processed with a drill with an attachment in the form of a metal brush. It will partially remove the varnish on top and make the tile a little rougher, which will significantly improve its future adhesion to the glue.

Then the surface is treated with a rag soaked in solvent, acetone or ammonia.
After this procedure, no fat will remain on the surface, and its adhesive qualities will become much higher. Then wipe the area dry with microfiber.

Carefully apply adhesive or silicone sealant, previously purchased at a hardware store, to the base of the toilet bowl.
Then the plumbing fixtures are transported to the place of future deployment and installed in the place previously marked with a marker. The area around the sole of the toilet is sprayed with a soap solution from a spray bottle.

This treatment is required so that during the subsequent finishing correction, excess sealant is easily cut off and does not stick to the tiled floor.
A silicone spatula is moistened with a soapy solution and the adhesive that has protruded from under the base of the toilet is removed. This is done immediately after installation, when the mass has not yet had time to harden.
After all the manipulations described above, leave the plumbing fixtures for 12-24 hours so that the composition (sealant, silicone glue, epoxy, etc.) settles and dries completely. During this period, the toilet is not used or even touched. Compliance with this point is extremely important and ensures subsequent reliable and comfortable operation.
A day later, when the glue firmly adheres to the floor, connect the toilet to sewer lines, supply cold water and install the seat with a lid.
Installing a toilet on cement
Installing a sanitary module on cement is a more outdated method of fastening, which is now chosen much less frequently. In its main points, it resembles the above-described option for installing on glue, but instead of modern mixtures and sealants, it uses a self-prepared cement mortar.

To make the bathroom look more attractive in the future, make a small depression in the place designated for installation, thoroughly clean it of debris and dust, fill it to the brim with the prepared solution, and place the toilet on top, after wetting the edges of the base with water.
Excess cement is carefully removed with a spatula and the structure is left to harden for a day. After the time has passed, it is connected to the drain and water is supplied to fill the tank.
How to attach a toilet to taffeta?
This method is most often used for installing compacts on a wooden floor. Taffeta - a lining made of high-strength wood with a thickness of 28 to 32 millimeters - is cut to the size of the support post of the plumbing fixture.

Anchors are attached to the part from below or ordinary nails are driven in in a checkerboard pattern so that they protrude 2.5-3 centimeters from the base.The recess previously made in the floor is filled with cement mortar. Taffeta is placed on top with anchors down. As a result, it should become flush with the general surface of the floor.
After 12-15 hours, when the solution dries and hardens, the toilet is screwed to the resulting wooden base with screws. Rubber or silicone gaskets are certainly placed under the heads so that the structure holds more securely and does not lose stability during operation.

According to plumbers, a wooden part can easily be replaced by a rubber one. It is cut out of high-density material (average thickness 5-15 mm). To prevent the edges of the rubber from sticking out, it is cut slightly smaller than the size of the base base of the toilet sole.
The photo gallery will introduce you to the stages of work on installing a toilet on taffeta:
The most common mistakes at work
When carrying out plumbing work, it is necessary to observe clarity and sequence of actions. This will ensure that the bathroom is free of leaks, unpleasant odors and other negative aspects in the future.
When attaching a compact toilet to the floor, it is very important to carefully level the surface on which the plumbing fixture is placed.

Ignoring this point happens quite often and leads to a violation of the integrity of the system, the appearance of leaks and subsequent equipment failure.
Another important point is the 100% tightness of all butt joints and the rigid installation of fasteners. It is especially important to pay attention to the connection area corrugations to the toilet outlet.
In the future, sewage liquid may be released through a poorly processed edge, which will cause the appearance of sharp, unpleasant odors in the bathroom.

To guarantee, you can apply sealant not only to the inner surface of the pipe, but also to make an additional outer layer, thinner on top and thicker at the bottom. Neither liquids nor odors will penetrate through such a barrier.
When attaching the toilet to the floor with dowels, you need to act carefully and without haste.If you overdo it and screw the plumbing fixtures too tightly, they may crack during use.
Very weak fasteners are also not an option, since the compact will begin to wobble and water will ooze from under the base. It is advisable to maintain the “golden mean” here and create an optimally reliable, stable mount.
Careful attention to the process and taking into account all the above points will help you attach the toilet to the floor accurately and clearly, avoiding the need to redo everything or make adjustments to the work in the future.
Conclusions and useful video on the topic
The video explains in detail how to quickly, easily and without the use of expensive electrical tools to securely and firmly fix a toilet on a tiled floor:
The video describes the method of fixing a toilet with silicone sealant and describes some interesting nuances of installing plumbing equipment on a “warm floor” system:
Features of fastening to the floor and installing a toilet with a bottom connection - useful tips, recommendations and tips from an experienced technician:
Make a decision regarding method of fixing the toilet Only the owner of the property in which the equipment is being installed or replaced can access the bathroom floor. You will have to choose based on the finish of the bathroom floor, the model of the toilet itself and the overall design of the room.
Attentiveness, accuracy, scrupulousness and the useful tips outlined above will help you do everything correctly, quickly and no worse than it would have been done by professionals.
Do you have any questions about the topic of this article? Or maybe you have experience in attaching a toilet to the floor yourself, and you can give practical advice to a novice home craftsman? Please leave your comments, share your experience, and ask questions in the block located under the article.


Where were you before? I installed a toilet with cement mortar 15 years ago. There was nothing else then. A builder I know advised to put 5 cm of concrete on top for strength. That's exactly what I did. I laid more tiles on top. I'm doing renovations now. I can’t imagine how to dismantle it more easily? Maybe you can tell me. Now, of course, I will do it using the right technology.
In such a situation, you will have to be patient and act carefully. Using a thin drill, you need to drill holes around the perimeter of the toilet in increments of about half a centimeter. This is done in a couple of rows. Then use a chisel to carefully knock it down and pull out the toilet.
Last year, our apartment building underwent major renovations. They changed a lot, right down to the toilets. All this is good, but the professionalism of the teams performing the work leaves much to be desired. They work the old fashioned way, but this is the 21st century. The toilet was placed carelessly on the cement, which had hardened unevenly. Now, a year later, I’m thinking about redoing it. I'll remove the cement and try to plant it with glue.