How to install a toilet on tiles with your own hands: step-by-step instructions + installation features
Replacing plumbing fixtures yourself is not a problem for an experienced technician.He knows how to install a toilet on tiles with his own hands in order to securely fix the device. But a person without experience can also perform plumbing installation quickly and efficiently.
To do this, you just need to read the step-by-step guide and accurately implement it in practice. Let's figure out together what tools you will need for the job and the sequence of actions to install the toilet.
The content of the article:
Necessary tools for fixing the toilet
Good tools are the key to a successful job. They will also be required for reliable and beautiful installation of the toilet.
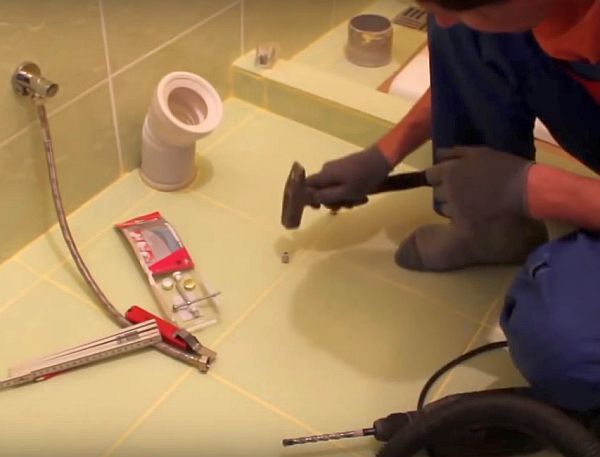
Despite the minimal amount of work, installation will require a fairly large list of tools and materials:
- drill;
- 8-10 mm drills for concrete and tiles;
- adjustable wrench;
- hammer;
- core;
- rubber spatula;
- silicone sealant in the color of the tile or toilet;
- marker, chalk or pencil;
- dowels 8-10 mm.
You must prepare these tools yourself.

Fastening hardware is usually included with the plumbing fixtures; you do not need to buy them. You should also make sure that you have water hoses and sewer pipes to connect the toilet to the utilities.
Preparing tiles and plumbing
Before installing the toilet on the tiles, you must clean the installation site. The presence of sand, earth, and solid dust particles between the floor and plumbing fixtures can lead to a constant crunching sound when using the device.
Therefore, before installation, you should wipe the tiles clean and check them by hand for the absence of protruding elements.

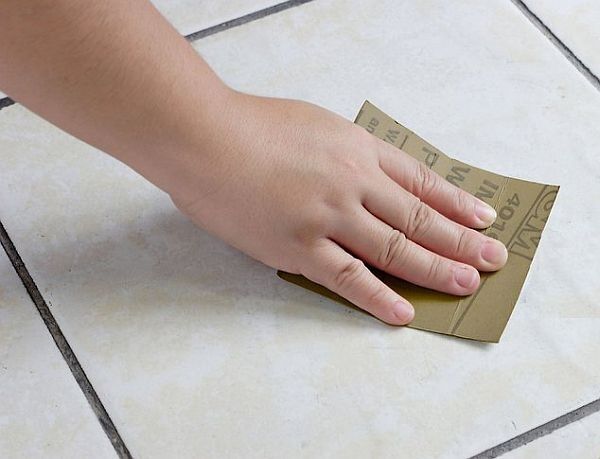
If there are rough spots on the floor, you can gently rub them with sandpaper or knock them out with a chisel, but such a need arises rarely.
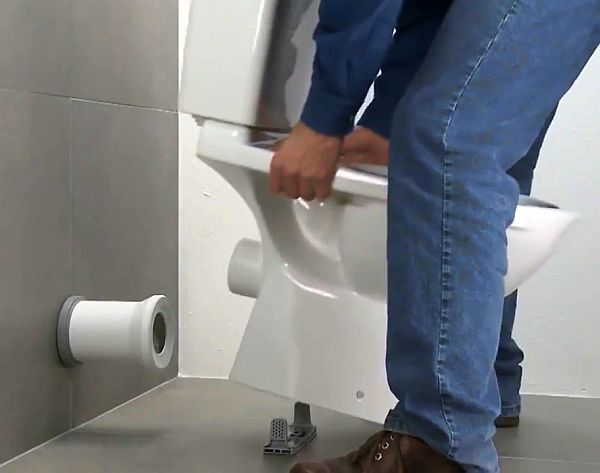
Since the back of the toilet is installed flush against the wall, it is necessary to take care of the sewerage supply to the installation site in advance. The plumbing drain hole must be at a level higher than the inlet pipe of the sewer pipe so that water does not stagnate in the connecting fitting.
You can use plastic products or corrugation. Ideally, the toilet outlet is directly inserted into the connected sewer pipe.
Step-by-step installation of a toilet on tiles
When starting to install a toilet on tiles, you need to decide on the method of fastening it. The device can be fixed in three ways: glue, bolts, using a bracket. Next, all options will be considered with the corresponding photographic materials.
Bolting to the floor
The type of toilet mounting is determined by its design. To fix the device directly to the floor, special through holes are provided. The sequence of actions for installing a toilet on tiles with bolts consists of several steps.
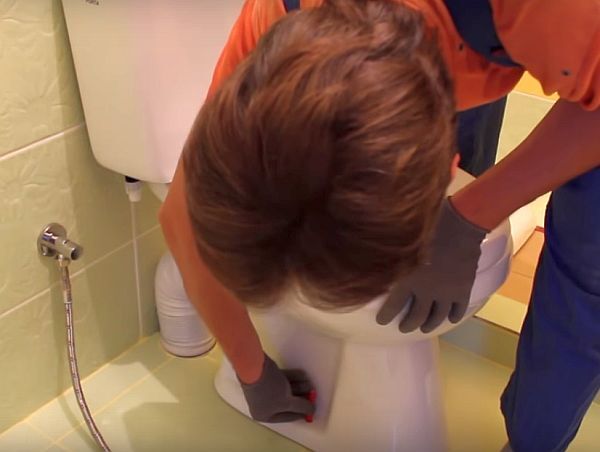
Step 1: hole marking.It is carried out on both sides by rotating movements of a pencil or marker in the corresponding hole in the toilet. It is also necessary to make several marks along the edges in order to accurately place the device in place later.
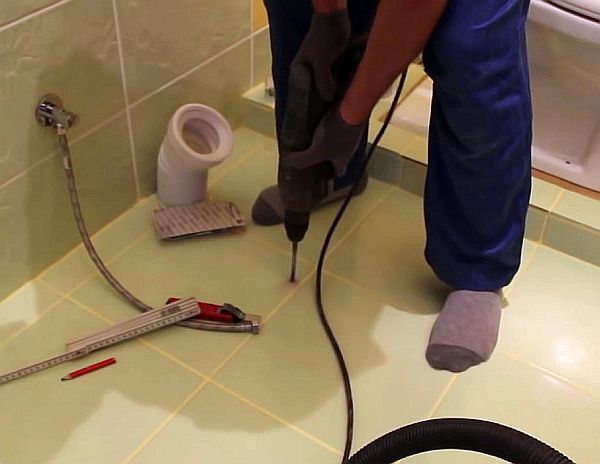
Step #2: drilling the floor. First, a notch is made on the tile in the center of the intended hole with a core and a hammer for better positioning of the drill. Then you can start drilling. First, a feather-shaped gimlet is used for ceramic tiles, and after penetrating through it, a Pobedit drill bit for concrete is used.
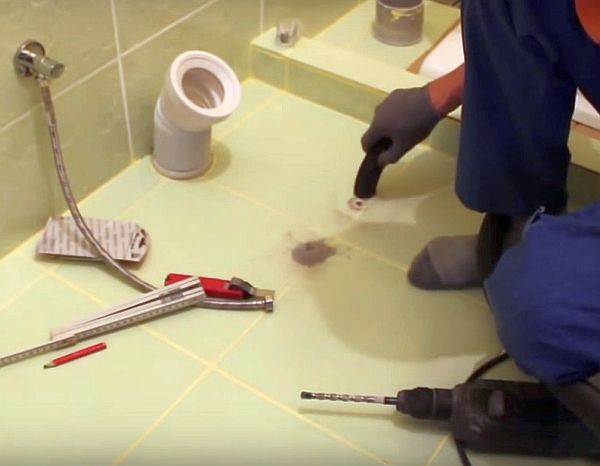
Step #3: intermediate cleaning of the workplace. To suck drilled dust out of the holes, it is better to remove it with a vacuum cleaner.
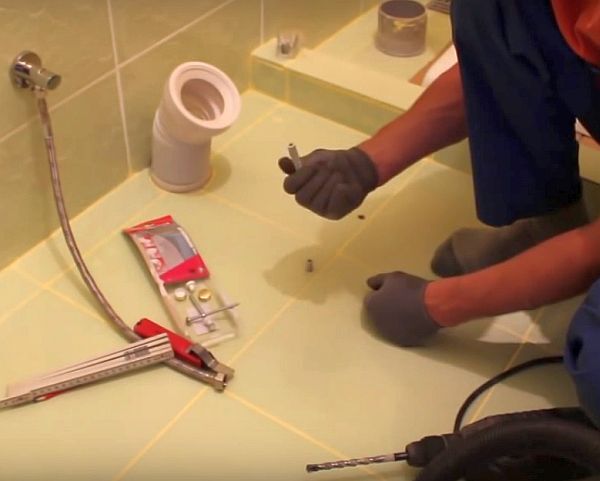
Step #4: insertion of dowels. They should be fixed tightly and without loosening in the floor. It is undesirable to use products less than 8 mm in diameter, because they may stick out when using the plumbing.
Step #5: driving in dowels. Their top edge should be below the level of the tiles so that the toilet sits directly on the floor. It is advisable to use a mallet for driving in, but you can also do this with a hammer.
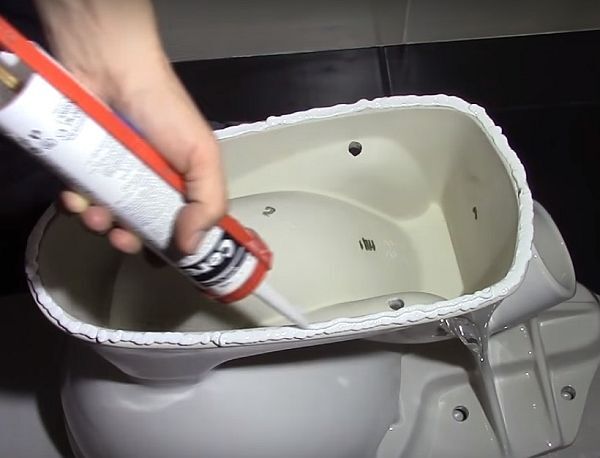
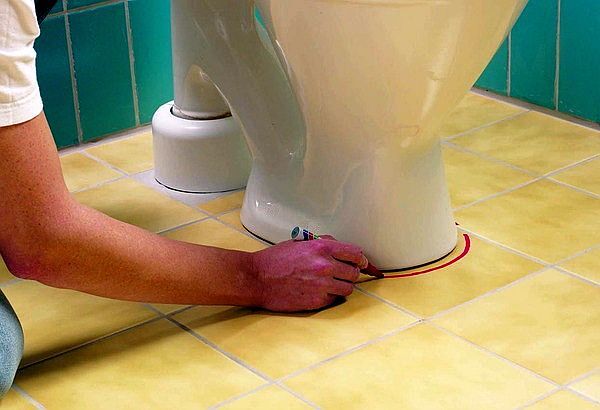
Step #6: applying silicone. The sealant is squeezed out in a 3-5 mm strip onto the bottom edge of the toilet bowl or onto the corresponding place on the tile. Its excess can be removed later with a rubber spatula.
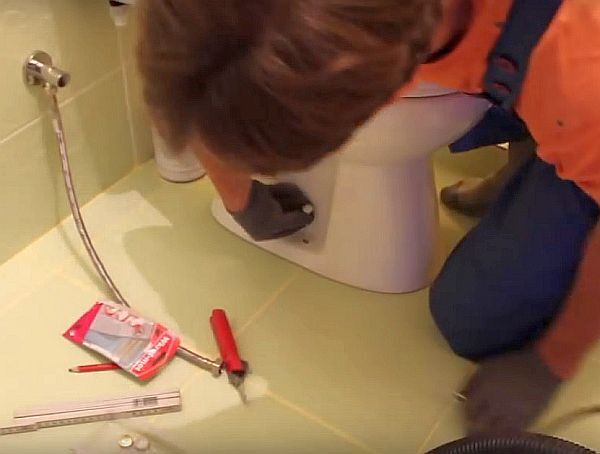
Step #7: installing the toilet in place and fixing it. There must be a rubber gasket between the bolt and the porcelain so as not to split the toilet when tightening. The tightening force is applied to ensure that the device does not wobble during use. It is better to tighten the bolt later than to split the toilet with unnecessary pressure. Decorative caps are placed on top of the hats at the end.
Direct sewer connection This is done carefully so as not to smear the sealant from the sole of the device.
Step #8: removing excess silicone. The sealant protruding from under the bottom edge is removed with a rubber spatula. If there are holes, you can cover them with the resulting excess.
The installation is complete, all that remains is to connect the pipes and hoses. If the toilet is located close to the wall, then before installation you can attach the flush tank to it. This will save time and eliminate the need to perform work in limited space.
Fixing the toilet to a hidden bracket
Some manufacturers make the side walls of the toilet bowl even for design purposes.This makes its shape more classic and eliminates the need to wipe dirt in the side recesses.
Such toilets are attached to hidden brackets, which are pre-screwed to the floor. Below are step-by-step instructions for this process.
Step 1: hole marking. Initially, the toilet is turned over and brackets are fitted to it. Then the plumbing fixtures are placed on the floor and the places opposite the mounting holes are marked on the tile with a pencil. Then the brackets are placed on the floor according to the marks and places for drilling are marked.
Steps #2-5 identical to the steps described above when attaching the toilet to the floor with bolts.
Step #6: screwing the brackets with bolts to the tile at the intended level.
Step #7: Applying silicone to the tiles or bottom edge of the toilet.
Step #8: installation of plumbing fixtures in a pre-marked location.
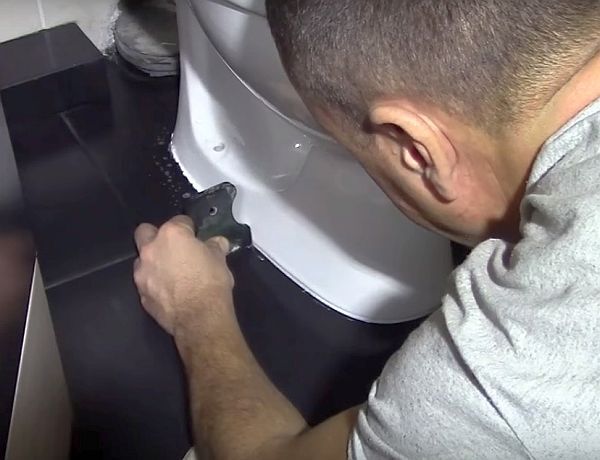
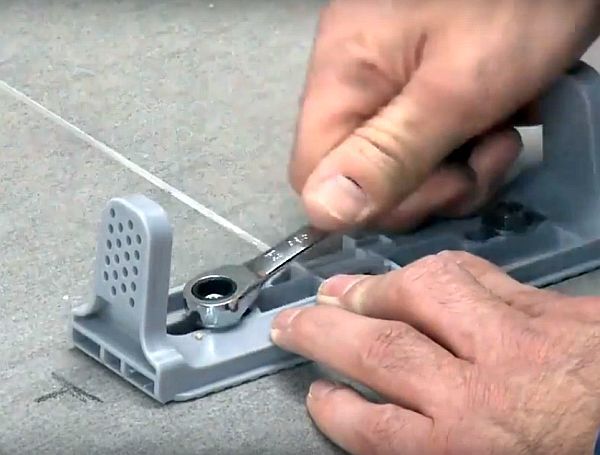
Step #9: fixing the toilet. Bolts inserted through the side holes secure the device to the brackets. The kit may include decorative caps, which are then placed on the screw heads.
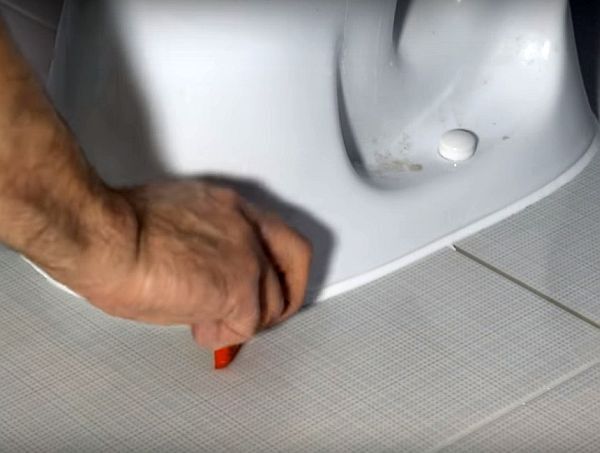
Step #10: remove excess silicone with a rubber spatula and seal the gaps between the floor and the toilet with sealant.
After completing the work, you must allow the sealant to dry.
The toilet comes with mostly plastic brackets that do not provide rigid fixation. Therefore, it is important that the device is installed on a perfectly flat surface, then it will not wobble or move to the sides.
Installation without dowels
Sometimes drilling tiles in a bathroom is not possible, and the toilet is fixed using glue or liquid nails. This situation may arise when installing a heating system in the form of a heated floor in the toilet or when planning to move the plumbing to another place.
Only toilet models with a large base area are suitable for gluing to tiles. Therefore, it is necessary to decide on the method of fixing the device before purchasing it.
You can install a toilet on tiles without bolts using the following steps.
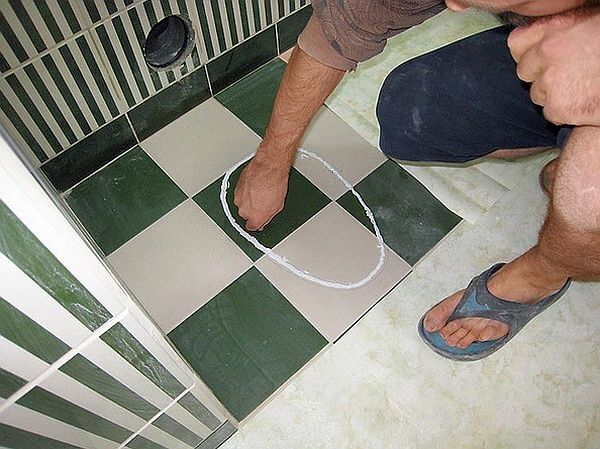
Step 1: marking the location of plumbing fixtures. The toilet is placed in a permanent place and outlined around it with a pencil or marker. The device is then removed.
Step #2: floor preparation. The smooth ceramic surface of the tiles has poor adhesive properties, so to increase adhesion it is recommended to treat the floor at the contact point with sandpaper. After this, the surface is thoroughly washed and dried.
To prevent the tile from being smeared with glue, regular tape is glued along the outer edge of the intended contour.
Step #3: applying a bonding agent. The following can be used as a means of fixation:
- epoxy adhesive;
- adhesive mixture for tiles;
- liquid Nails.
The product is applied with a thickness of 3-4 mm to the maximum possible area of the sole.If the bottom surface of the toilet has a simple shape, then the adhesive can be applied to the tiles in the appropriate place.
Step #4: installing the toilet on the floor. The plumbing fixture placed on the tile is pressed firmly, after which the adhesive tape is peeled off from the tile, and the excess glue along its edges is removed with a spatula.
The installed toilet should not be touched for 24 hours until the adhesive has completely dried.
The strength of a connection with epoxy glue is comparable to installing plumbing fixtures using bolts. And when detached from the floor, the device can always be easily re-glued.
Installation of other toilet systems
The algorithm for installing plumbing fixtures in a toilet may differ, depending on the design of the equipment and its layout.

After fixing the toilet bowl to the tile, the following sequence of actions is possible:
- Connecting the toilet to the sewer with a direct connection using a corrugation or elbow.
- Installing a drain tank and connecting it to the water supply system.
- Testing the operation of plumbing fixtures, identifying leaks.
- Cover fastening.
After successful completion of the work, you can use the toilet for years without worrying about the need for repairs.
If the fastening becomes loose and the device begins to wobble, you can always tighten the bolts with a wrench, pressing the plumbing fixtures more tightly to the floor.
We also recommend reading the material where we compared all the advantages and disadvantages of various methods of attaching the toilet to the floor. Read more - read Further.
Conclusions and useful video on the topic
The presented videos on fixing the toilet to the tiles and sealing its bottom sole will help ensure trouble-free use of plumbing fixtures.
Installing a side mounted toilet:
Installing a toilet on tiles with bolts:
Technique for sealing the gap between the toilet and the floor:
Self-mounted toilet on tiles there is nothing complicated. All you need is the necessary tool and an hour of time. And after installing the plumbing on the floor, a more difficult stage awaits - installing the tank and connecting the entire system to the water supply lines. This will require much more time and patience.
Are you trying to install a toilet on tile yourself and are having difficulties? Or do you already have experience in carrying out similar work and can you give practical advice to our readers? Please leave comments, share your experience, and ask questions in the block below.


From my (sad) experience I will say: if you plan to install the toilet, as I did, without screwing it on, using an adhesive, wait until no one is home (at least for 24 hours).I installed a toilet at home and warned everyone not to touch it for a day! But there were figures who simply forgot... and took advantage of the night... 🙂 in the end we had to start everything from scratch.
Putting it on glue is not a good idea. Well, or I was unlucky with the glue, but after a year, the toilet began to “move” from side to side when people sat on it. I had to take it off, clean everything, and glue it back on. It’s still standing, but if it gets loose again, they’ll put it on the bolts, it’s more reliable. The only thing I'm afraid of with the bolts is that I won't drill correctly and the tile will crack.