Do-it-yourself plumbing installation: classic wiring diagrams and installation instructions
Do you want to seriously renovate and update your apartment? Then it will not hurt to know that one of the most basic stages of major home renovation is replacing old plumbing and pipes with new ones. In addition, this is the most impressive item of expenditure in the budget allocated for this work.
Reducing already impressive costs is a normal desire of every prudent owner. Do you agree? It’s quite possible to reduce them: installing plumbing fixtures yourself will help. We will tell you how to do the wiring, how to move and connect plumbing equipment, and what equipment is needed. tools and materials.
You will learn how to change the pipes in the bathroom and connect plumbing fixtures yourself. And in order to make it easier to understand the repair issue, the article provides thematic photo guides and video instructions.
The content of the article:
Project development and drawing
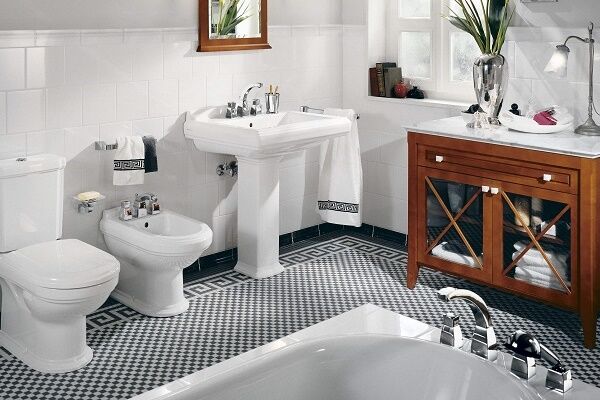
Standard designs for high-rise buildings do not suit everyone, and apartment owners try to redo the plumbing according to their preferences. This set of works is very troublesome and time-consuming, however, if you study the theoretical side of the issue well and follow the instructions exactly, most of the work (if not all) can be done independently.
Creating a detailed pipeline laying diagrams - an important part of renovating any, even the smallest bathroom. With the help of a finished project, even a non-specialist will be able to evaluate all the advantages and disadvantages of the new arrangement of plumbing fixtures.
A simplified design option will allow you to determine the most suitable method for laying pipes and make a list of the necessary materials in the required quantity, as well as select tools.

Based on these records, you can calculate the approximate cost of materials, draw up some kind of estimate and purchase everything you need in one or two times.
The most convenient and easiest way is to draw up a diagram in several stages. First you need to draw a floor plan of the bathroom, indicating the doorway.
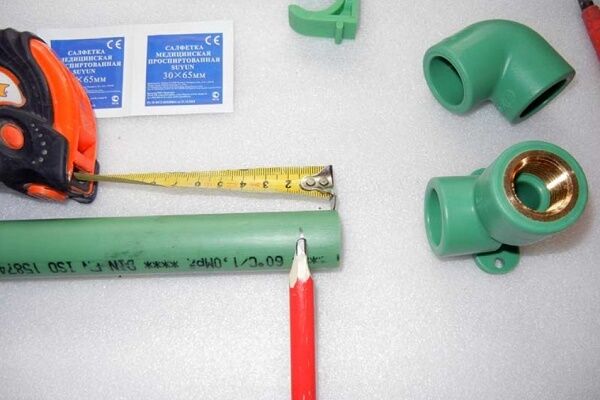
In this case, there is no need to measure the size of the room in steps or by eye, with an approximate indication of the location of plumbing fixtures. There is a roulette for this. Your comfort when using the plumbing unit depends on how accurately the measurements are taken.
Next, we indicate in the drawings the location of all plumbing fixtures, taking into account scale. It is very important to arrange the plumbing fixtures correctly; you can’t rush here and you need to think everything through carefully. All devices must be positioned in such a way that there is enough space next to each of them.
For convenience, you can cut out conventional images of devices from cardboard and move them according to the drawings, choosing the best location.
Detailed development of a communications project and its subsequent implementation is possible under the following conditions:
Which is better: series or collector circuit?
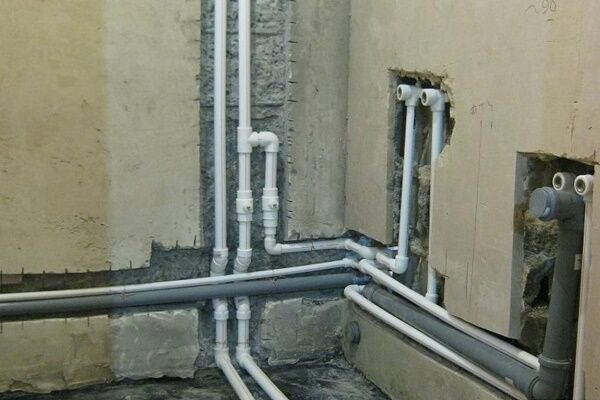
Today there are two generally accepted wiring diagrams – serial and collector.
The sequential (or as plumbers also call it, tee) system is considered classic. It is used in all standard apartment and private buildings with small bathrooms.
The system is very simple - from the central risers, through which hot and cold water is supplied to the apartment, it is laid under one main pipe, from which every plumbing fixture in the apartment is powered.

The amount of work involved in installing bathroom fixtures with your own hands is also not very large. However, this is where the advantages of the sequential circuit end. The main disadvantage of this type of connection is that all devices are powered from one pipe, and when one device is working, the pressure in all the others drops.
That is, when the washing machine pumps water, the pressure in the kitchen tap will be very weak, and vice versa.
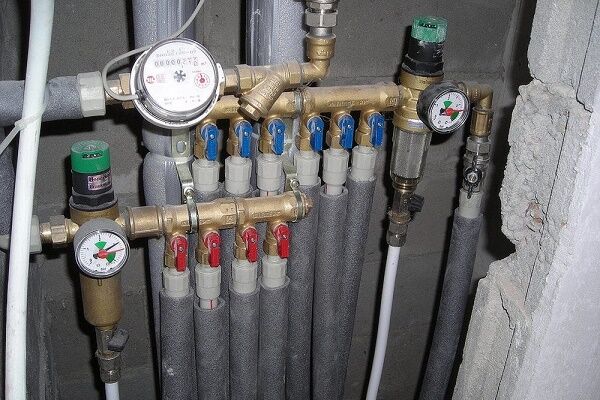
Another drawback lies in the shutdown method. If one plumbing fixture breaks, then in order to repair it, you will have to completely shut off the water in the apartment. The collector system is used in those houses where there is a large load on the water supply system. In this case, all plumbing points are connected to the collector.

Most often, the collector is hidden in a special cabinet or closed niche for aesthetic reasons. Each plumbing fixture is connected to the collector separately, through a personal outlet. This connection method will require a large number of pipes, and installation work will take a lot of time.
Although you will have to tinker with connecting such a system, the advantage is obvious: the pressure in all plumbing fixtures will be stable under any mode of operation of the water supply system.
In addition, each device can be turned off or dismantled if necessary. In this case, there is no need to turn off the water completely - just turn off the tap at the desired outlet.
Wiring device in the bathroom
Herself piping in the bathroom does not differ on a large scale, so you can do without professional calculations to determine pipe diameters. Water supply risers are most often made of an inch pipe or an inch and a quarter diameter pipe. The wiring is usually done with pipes with a diameter of half an inch.
As for the sewer riser, you need to take a pipe of DN 100 for it, for wiring - DN 50. It must be remembered that the sewer pipe, which is in a horizontal position, must be laid with a slight slope towards the riser - this is from 5 mm to 3 centimeters per one meter of length depending on the diameter.
Step 1. Choosing a pipeline installation method
The fastest and easiest installation method is open. At the same time, all pipes remain visible. However, it is not suitable for those people who are serious about bathroom design. In this case, you need to do hidden pipe laying.This method involves laying the pipe in a specially made channel (groove), which is laid in the wall.

Concerning sewer pipe, then it is laid in a special channel, which is then closed and lined with ceramic tiles on top. Of course, with a hidden installation method, the requirements for the quality of pipes and their connections greatly increase.

Below we will tell you which pipes can be used for laying inside walls and which ones cannot. When planning to install hidden pipes, place the devices so as not to damage the main walls, since this is prohibited by building codes and regulations.
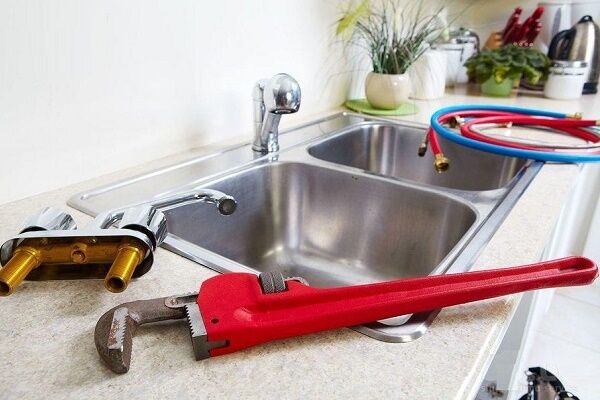
Step #2. Dismantling old pipes
If you have modern tools, dismantling old pipes will not be difficult. If they are hidden in the walls, they need to be opened with a hammer drill. Next, we cut off the pipes with a grinder.
Carrying out dismantling of old water pipes before replacement, you need to remember about safety precautions. For example, a cutting wheel on an angle grinder can burst due to careless movement of the tool and fly at high speed right into the face of the unlucky craftsman.
Therefore, when working with such power tools, you need to use special glasses or a transparent plexiglass visor, and to protect against dust - at least a simple cheap respirator.

In general, dismantling the old pipeline occurs as follows:
- Completely shut off the water supply.
- Cut off or unscrew the root taps if they need to be replaced.
- Install new valves on the outlets of the risers (in this case it is better to use ball valves).
- Resume water supply.
- If possible, the water is drained.
- All plumbing fixtures are disconnected from the water supply and sewerage.
- Pipes are untwisted or cut.
If old pipes are held on by dowels, it is enough to cut off the dowel heads so that they do not interfere with finishing. Before cutting off the old parts, you need to put thick plastic bags on the new, just installed faucets. The bags are tightly wrapped with string or tape.
This is necessary to protect the new shut-off valves from dust and dirt, which will appear in abundance when gating walls and dismantling old equipment.
Step #3. Pipe selection
Metal pipe, which until recently was used wherever possible, is used extremely rarely today. This is explained by the disadvantages of the material: difficulty in installation (the need to involve a professional welder), susceptibility to corrosion, deposition of salts and scale on the inside of the pipes and, as a result, a decrease in throughput.
Here we should also add the rather considerable cost of a metal pipe.

Today for water pipe laying and do-it-yourself plumbing installation in the bathroom, predominantly polymer (plastic) pipes are used. They are devoid of all the disadvantages that are inherent in metal products, and are inferior to them only in strength and melting point, which in this case does not play an important role.
Let's list the pipes, starting with the cheapest.
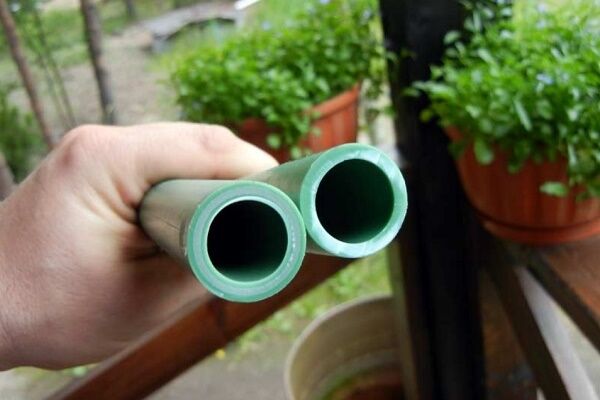
Polypropylene (PP). Very light, corrosion-resistant material. The surface of the pipe is smooth, resulting in low hydraulic resistance.
Polypropylene pipe is available in two variations:
- PN 10 and PN 16 - intended for cold water only and designed for a pressure of 10 and 16 atmospheres, respectively.
- PN 20, PN 25 - used for installation of a heating system, intended for supplying hot water, designed for pressure of 20 and 25 atmospheres.
To prevent expansion under the influence of temperature, these grades have special reinforcement made of aluminum or fiberglass. The main feature of a polypropylene pipe is its thick walls, which means large connecting fittings. But all the parts are quite cheap and are very easy and quick to install.

Polyethylene pipe. Has several variations:
- HDPE (made of low-density polyethylene);
- PEX-A, PEX-B, PEX-S – cross-linked polyethylene (all listed brands are manufactured in different ways);
- PE-RT is polyethylene with molecular compaction.
Most often, polyethylene pipe is used for external wiring.

Metal-plastic pipe. The walls of this pipe consist of different materials, as the name implies - several layers of polyethylene and an aluminum layer. Metal-plastic pipe and fittings for it are more expensive than polypropylene and polyethylene. However, they are considered more durable, and at the same time have modest sizes. The pipe itself bends very well and holds its shape.

A little higher we mentioned hidden pipe routing. Only polypropylene pipes are suitable for this method, since when installing plumbing fixtures with your own hands, they are welded into a monolithic structure, and the possibility of a leak is practically excluded.
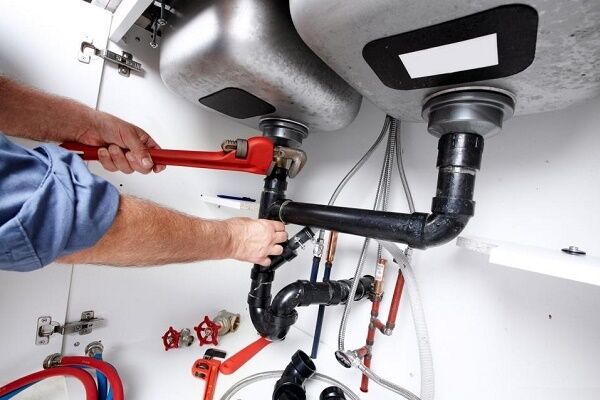
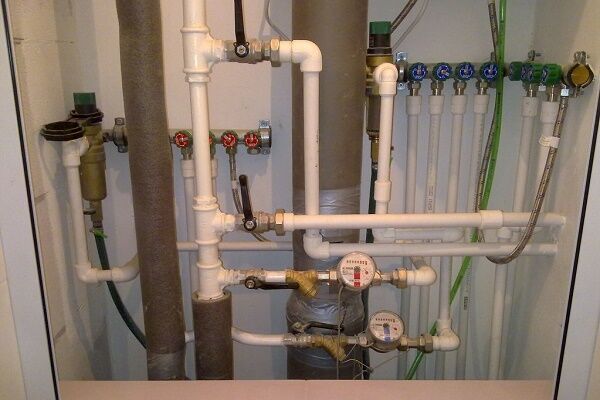
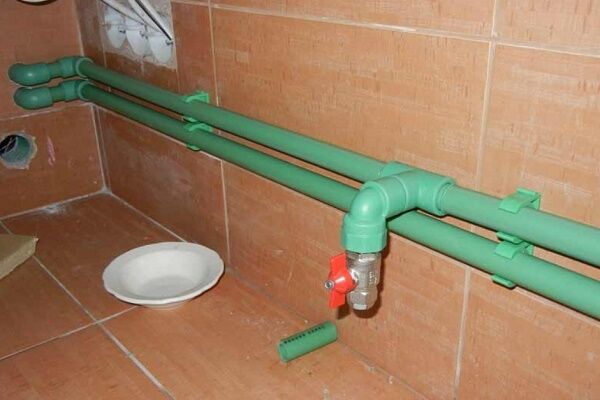
Step #4. Installation of polypropylene wiring
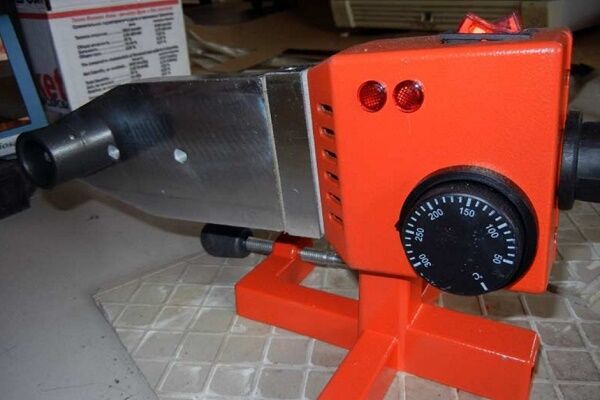
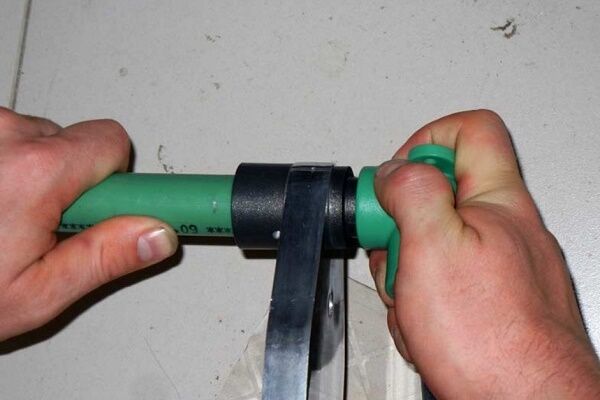
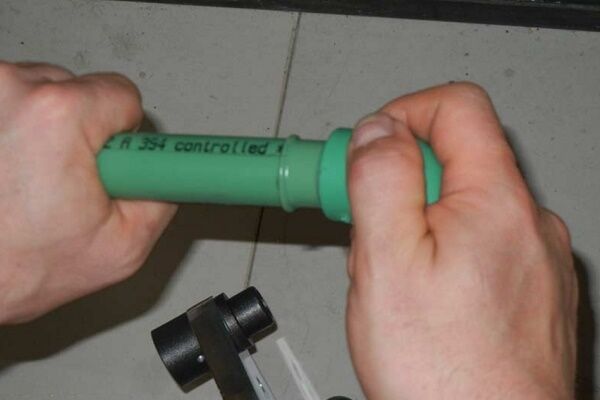
Main advantage PP pipes lies in their strong connection. For this, a special soldering iron is used, which heats the ends of the pipes almost to the melting point. After heating, the parts are pressed tightly against each other, after which they are tightly connected - a monolithic structure is obtained.
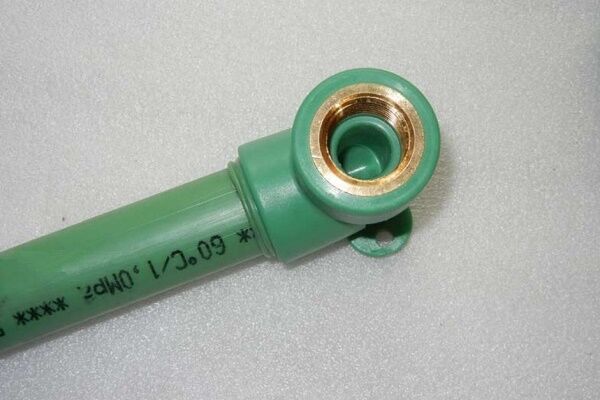
In order to make a connector or transition to a metal pipe, use a special fitting with a metal thread inside. A soldering iron for heating pipes is a fairly simple and inexpensive device that can be bought at any specialized store. As a rule, nozzles for pipes of different diameters are sold along with the soldering iron.

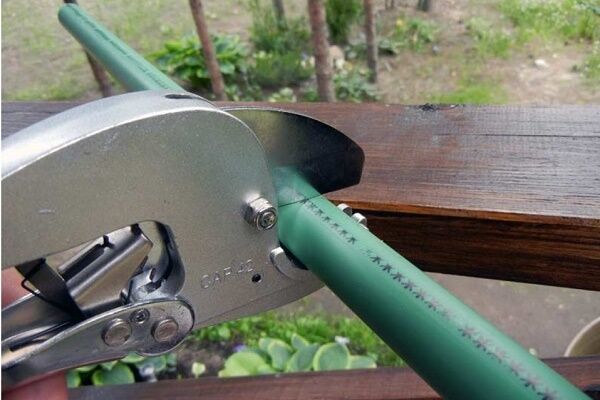
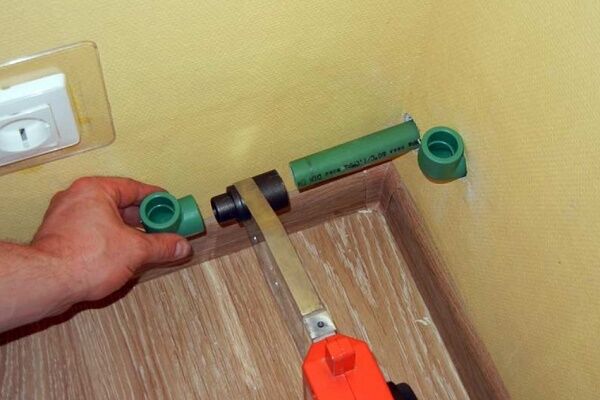
The popular name is “irons” equipment for soldering PP pipes received due to its external resemblance to a traditional household ironing device. To cut polypropylene pipes, you need special scissors, otherwise the cut will be uneven and sloppy.

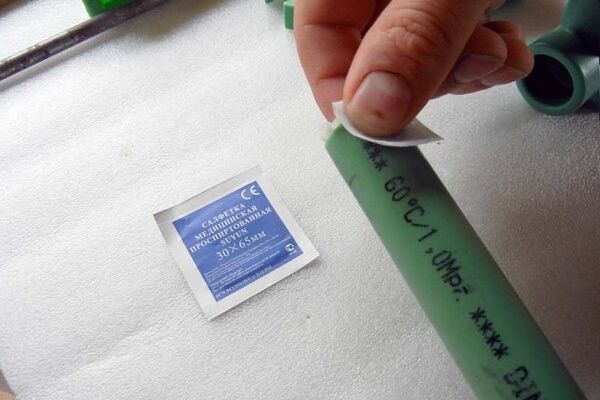
If the polypropylene pipe is reinforced with aluminum foil, the cut must be cleaned with a special tool - a scraper. If this is not available, buy a pipe with fiberglass reinforcement. The cut of such a pipe does not require cleaning. You can do the same if you buy a pipe from an unknown manufacturer.
The fact is that fiberglass reinforcement is inexpensive, so the likelihood of buying a defective product is much lower.
When laying hidden wiring, you need to put a special insulation made of foamed polyethylene on the polypropylene pipe. This way you will ensure that there is free space necessary for the polypropylene to expand under the influence of temperature.
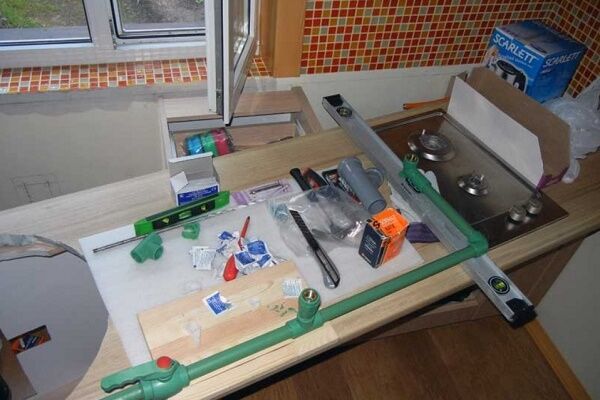
The following photo gallery will familiarize you with the sequence of work on assembling and installing the water supply system:
Assembling a pipeline from polypropylene pipes has its own tricks that you should pay close attention to:
How to properly connect a regular sink?
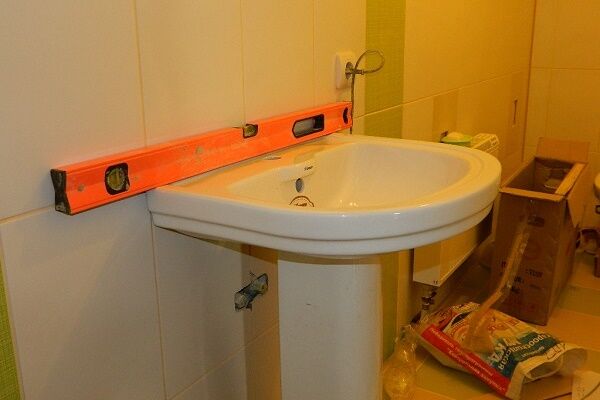
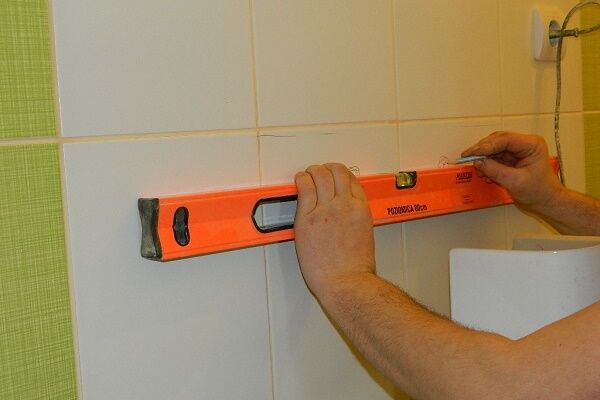
First you need to calculate the height sink installation. In most cases, it is no more than 80 cm. However, if there are small children in the house, the washbasin can be lowered a little. Once the height is determined, we place a mark on the wall.
Focusing on it, we mark a horizontal line on the surface of the wall. After this, you need to measure the width of the back wall of the washbasin and set this distance down from the mark.

Before attaching brackets to the wall, you need to accurately calculate the distance between them. This is not difficult to do: turn the washbasin over and place the brackets on top so that they fit into the special grooves. Next, measure the distance between the brackets and transfer it to the wall.
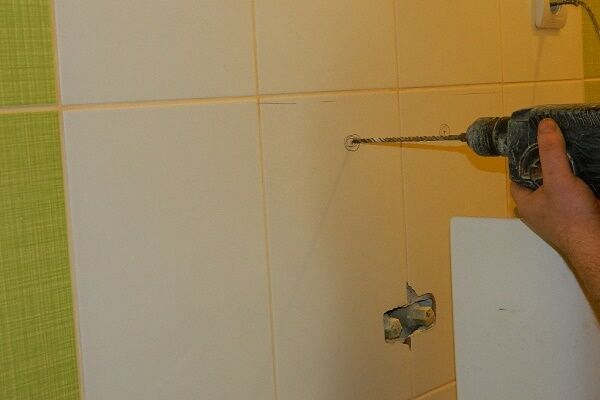
Now you can make holes, beat dowels, tighten bolts. Next, you need to install the faucet on the sink, then secure it with bolts and washers, check the level of the sink and secure it with nuts.
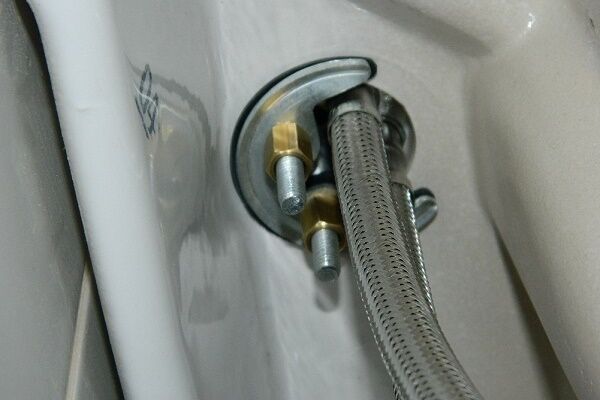
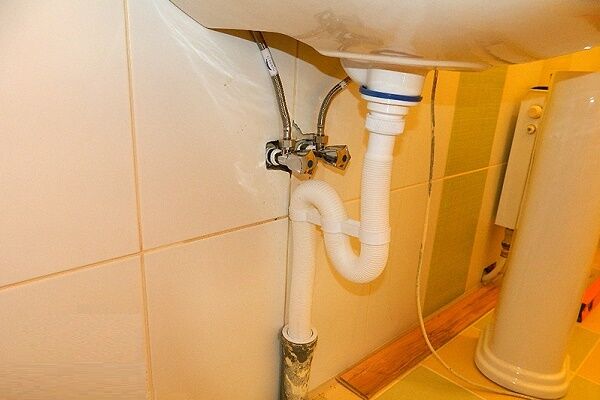
We install a rubber gasket on the drain hole and mount the drain, connecting it to the siphon. Using an adapter, we connect the siphon outlet pipe to the sewer. Using flexible hoses, we connect hot and cold water to the mixer.
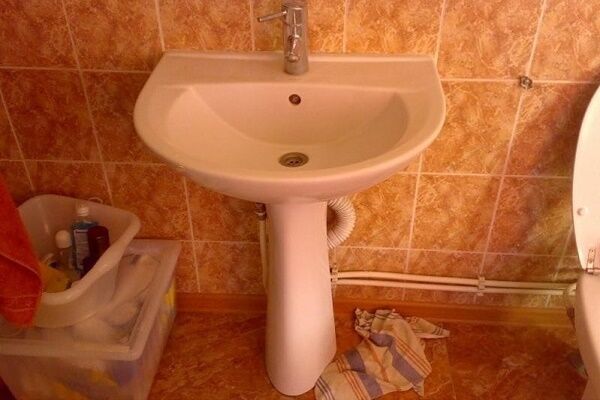
How to install a pedestal sink?
In this case, it is very important to make the markings correctly. We place the pedestal and place the sink on top of it so that the drain is exactly in the center of the stand. We check its location using a building level.

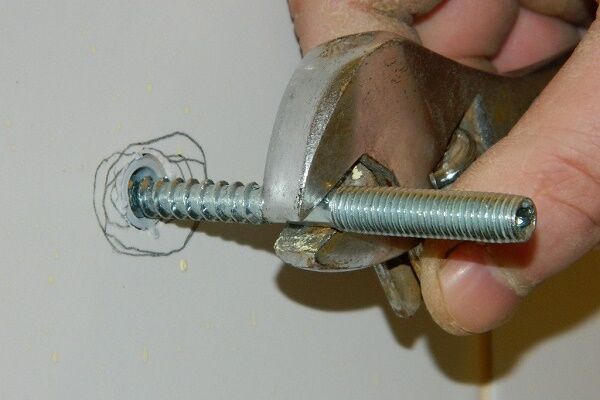
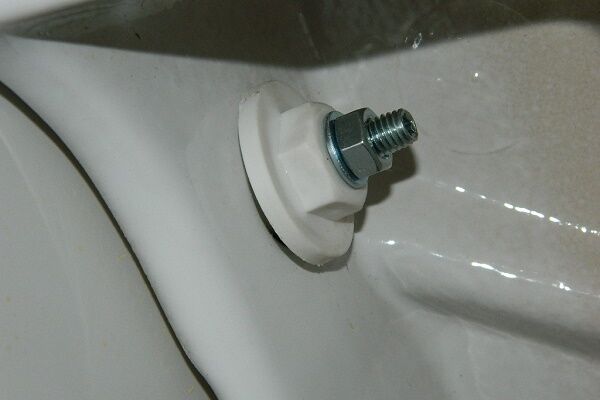
After this, carefully mark the mounting locations for the bowl on the adjacent wall. The entire structure can be temporarily disassembled to make holes in the wall. After this, we beat the dowels, twist the screws, and put on the spacer nuts.
Now all that remains is to screw the washbasin bowl to the wall. The main thing here is not to overdo it, as the ceramic can crack if you tighten the nuts too tightly. You need to install a siphon inside the pedestal and connect it to the washbasin, and the outlet pipe to the sewer.
In order to visualize the process of installing a sink with a pedestal, we suggest that you familiarize yourself with the following selection of photos:
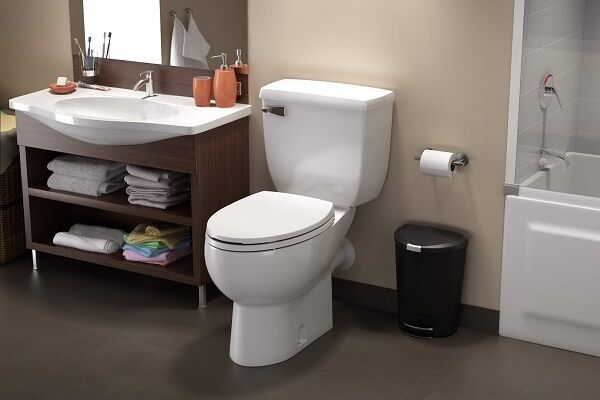
Recommendations for installing a toilet
The most popular toilet model is floor-standing. If the bathroom floor is tiled with ceramic tiles, you need to place something soft under the toilet - for example, a piece of linoleum or rubber. To connect toilet to sewer, you need to use a special cuff. One end of it is connected to the toilet outlet, and the other to the sewer pipe.
The toilet is attached to the floor with special pins, which are inserted into dowels fixed in pre-made holes.

In some cases, the toilet is glued to the floor using epoxy glue. In this case, the toilet cannot be used for approximately 12 hours until the glue has completely hardened.
Conclusions and useful video on the topic
Tips on wiring and self-installation of plumbing equipment can be found in the following videos.
Video #1. How to make wiring from PP pipes:
Video #2. Useful tips for welding PP pipes and installing plumbing:
Within the framework of this publication, we have provided only general information on replacing plumbing and pipe routing - this topic is too extensive to be fully covered in one article. However, we hope that this material will help you in planning and carrying out renovations in the bathroom, choosing materials and replacing plumbing fixtures.
Please write comments in the block below. We are interested in your stories about your personal experiences in installing plumbing fixtures yourself. We are waiting for messages with useful facts and questions on points of interest.


I also installed my own heating system. Wiring is essentially very similar to water supply. I would like to separately note the issue with the choice of pipes. Everyone mostly chooses metal-plastic ones. They are more resistant to high and unstable temperatures, but at the same time they are much more expensive than polypropylene. If the financial issue is acute and you want to keep temperatures at 90-100 degrees, I can recommend reinforced polypropylene: it will surprise you at the price and will not bend due to heat.
Now I’ll just install the plumbing in the bathroom myself! I already trusted the “professionals” once - they managed to install my washbasin WITHOUT a siphon, with an ordinary corrugated pipe! They were motivated by the fact that “your machine under the sink won’t fit otherwise.” A month later, the corrugated pipe was completely clogged, I had to remove the washer and redo everything. It’s better to study the issue and, if your hands are in the right place, do everything yourself than to run into trouble like this.