How to make a gate with your own hands from corrugated sheets: drawings + step-by-step instructions
A high and solid fence is needed to fence and protect private property. But every fence must have a way out.And very often a regular gate is not enough, even if you don’t have a car. Sometimes situations arise when you need to bring something into the yard and then you simply cannot do without a gate. Do you agree?
Of course, you can purchase a ready-made product or order the manufacture and installation of gates from a specialized company, but to save money, we suggest building a gate with your own hands from corrugated sheets, especially since it is not as difficult as it seems at first glance.
Next, we will tell you what types of gates made of corrugated sheets are, give their advantages and disadvantages, and also provide detailed instructions for constructing gates on your own.
The content of the article:
Types of gates made of corrugated sheets
Gate structures made from corrugated sheets can be: sliding, swing, forged and lifting. They also differ in their shape and manufacturing method. In addition, many designs can have a built-in gate.
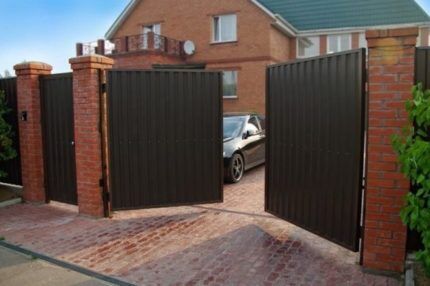
Swing gates – the simplest option both in execution and maintenance. Even an inexperienced home craftsman can cope with the construction of such a structure.
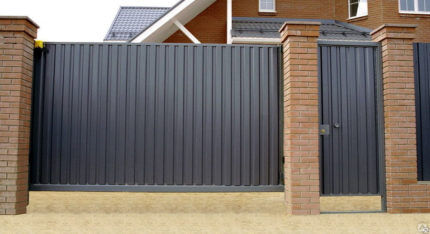
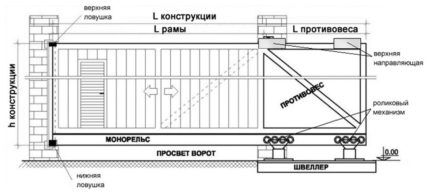
Sliding gates, perhaps, one of the most practical and aesthetic solutions for decorating an entrance group in a private house or on a summer cottage. Unlike the previous option, they do not require much space.
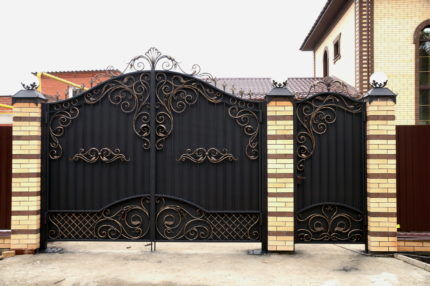
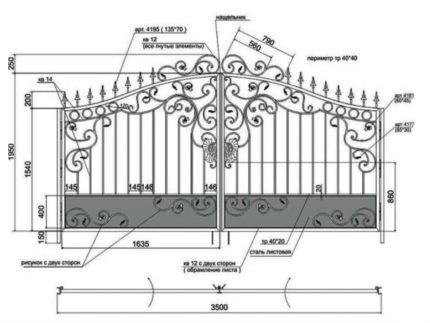
Forged gates – can be either swing or sliding. Their only difference from ordinary ones is that they are decorated with forging elements.
But it is worth noting that such an addition to conventional gates made of corrugated sheets can be quite expensive, so it is better to plan your budget in advance.
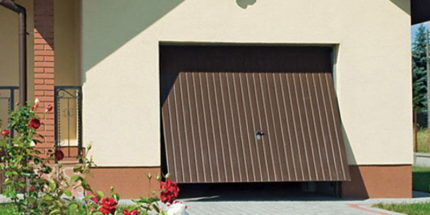
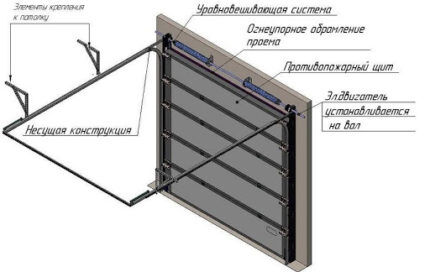
Lifting structures, according to many users, the most convenient of the above. They can be sectional and lift-and-swivel.
It is the second option that is more popular. Using a lever-hinged mechanism, the door leaf is completely raised to the garage ceiling, freeing up space for a car to enter/exit.
Installation instructions for swing gates
Above we have given several popular designs for gates made of corrugated sheets. Swing gates are an affordable and easiest option that even a beginner can handle.
The only caveat is that they take up quite a lot of space on the site. If there is enough space, then you can safely get to work.
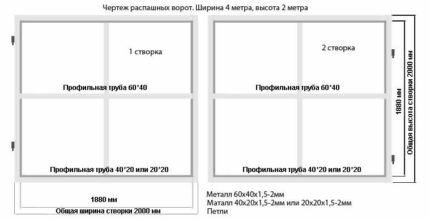
Stage 1 - creating a gate drawing
As a rule, swing gates made of corrugated sheets have dimensions of 3-4 meters in width and from 2.2 meters in height. It should be taken into account that in front of their placement there must be at least 2 meters of free space for the unhindered opening of the valves.
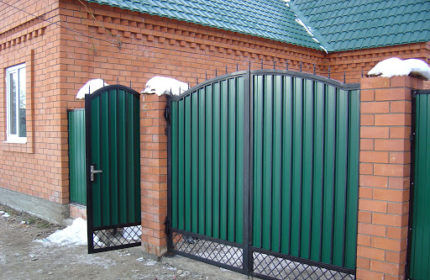
In addition, swing gates can be manufactured in several variations: with one leaf or two, with or without a wicket. It is better to give preference to the second option, since single-leaf structures require a lot of space to open and have a large windage area.
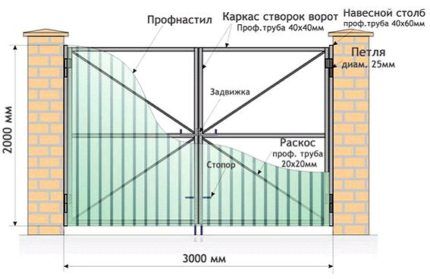
If there is not a lot of space on the site, then it is better to give preference to swing gates with a built-in wicket.
When starting to create a design drawing, you should consider:
- The location of the gate and its dimensions.
- The number of supports and their height, taking into account the digging depth.
- Dimensions of each sash.
- Places for attaching hinges, locks and internal fasteners.
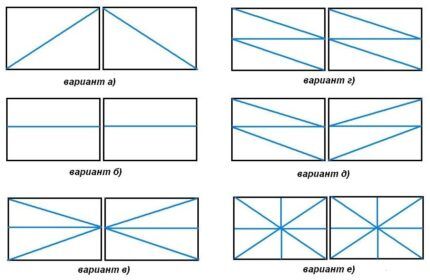
To extend the service life of the structure, professionals recommend strengthening the gate in one of the following ways: welding corners to strengthen the structure, making a frame inside or above the frame, or installing lintels.
Stage 2 - preparation of tools and materials
Based on the drawing you prepared with all the dimensions of the future gate, you need to prepare:
- corrugated sheeting (it is advisable to purchase a grade of at least C18);
- hollow metal pipe for support pillars, cross-section not lower than 60*60 mm;
- pipe for the base - it’s better to take 40*40 mm;
- pipe to strengthen the base – 20*20 mm;
- plates for fastening reinforcement under the lock;
- self-tapping screws;
- fasteners, hinges, lock;
- concrete solution for installing supports;
- primer and paint.
In addition to these materials, you will need: a level, a tape measure, an angle grinder, a screwdriver, a welding machine, a shovel, metal scissors, and brushes.
Stage 3 - installation of structure supports
The installation of corrugated gates begins with the installation of support pillars. To do this, you will need to dig a recess approximately 1/3 of the length of the support. And the larger the diameter of the support, the larger the diameter of the recess will be needed.
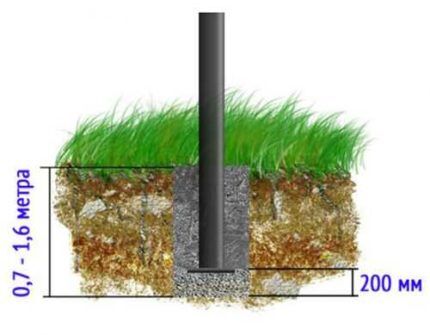
Next, supports are installed in the prepared holes. They must be positioned clearly vertically, since even the slightest tilt will lead to skew of the entire structure.
After checking the correct installation, the supports are fixed with reinforcement or bricks and only then filled with concrete mortar. Fixation is necessary to ensure that the supports do not tilt after pouring the concrete.
To prevent water from getting inside the support pillars, you can concrete them from the inside, or cover the upper part with a special metal cover.
Stage 4 - making the frame and installing the hinges
First you need a pipe cut with a grinder onto the blanks, clean them of dirt and arrange the prepared fragments in accordance with the drawing of the future gate. Next, using a welding machine, the workpieces are connected to each other.
After the frame is completely welded, it is reinforced, if required. After the welding seams have completely cooled, they are thoroughly cleaned.
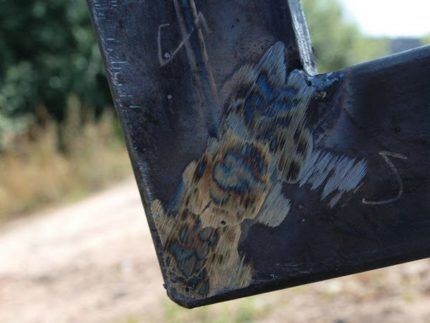
Then the frame must be completely degreased, thoroughly primed and painted, paying special attention to the joints of the parts.
When the frame is completely ready, hinges are welded to it and to the support posts - three on each side. They are installed at a distance of 25-30 cm from the top/bottom edge.
Have you ever done welding? We recommend that you read nuances of electric welding for beginners.
If you want to open the gate in both directions, then the hinges must be butt welded to the support post, and if in one direction, the hinge must be placed on the frame.To prevent the sash from hitting the fence when opening, you can install a limiter next to it.
Stage 5 - installation of corrugated sheets and installation of fittings
At the next stage, using metal shears, the corrugated sheeting is cut and attached to the gate frame.
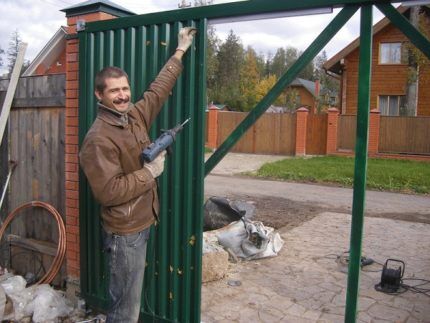
For reliable fastening, the profiled sheet should be fixed along the lower waves through one to the horizontal beams of the frame, and the sheets are attached to the vertical beams in increments of 15 to 25 cm. Please note that per 1 sq.m. The gate should require at least 6 screws.
If the frame has been reinforced, then a profile sheet must also be attached to the vertical or horizontal jumpers.
The last thing left is to install the lock.
Typically one of three types is used:
- Mortise. It cuts directly into the plane of the pipe.
- Overhead. It is installed on the transverse lintel of the sash and requires additional reinforcement with a metal plate.
- Mounted. If you plan to use this option, then you should weld the hinges for the lock at the stage of welding the frame.
For gates made of corrugated sheets, it is recommended to use special locks for installation in a metal profile. It is better to give preference to models with an opening mechanism with a rotary element from the inside and a key from the outside. It is better not to skimp on locks and purchase products from well-established manufacturers.
Usually the handle and lock are installed at a height of approximately 90 cm from the ground, but this distance can vary depending on the height of the owner - the main thing is that it is convenient to open the gate.
Advantages and disadvantages of swing gates
Above, we talked in detail about how to independently design and install swing double-leaf gates from corrugated sheets.
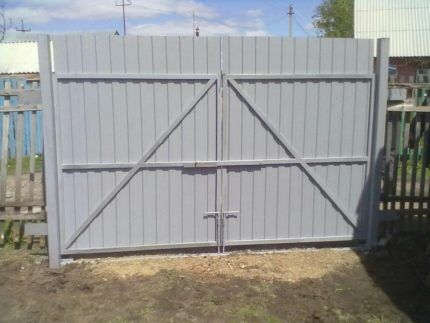
This type of gate has become very popular among residents of the private sector and here’s why:
- affordable cost of materials;
- ease of installation;
- attractive appearance;
- ease of care;
- long service life;
- opportunity automation installations.
Despite the large number of advantages, gates made of corrugated sheets have some disadvantages: they require a lot of free space to open; Due to the large area, they are subject to significant wind loads.
Do you need a gate with a wicket and you don’t know what material to choose? Our next article discusses types of gates with wicket, their advantages and disadvantages.
Conclusions and useful video on the topic
Detailed video instructions for installing a gate with a wicket yourself:
Another option for manufacturing and installing gates from corrugated sheets, as well as fences and gates:
As you can see, there is nothing complicated about making gates from corrugated sheets yourself. All that is required is minimal skills in working with power tools, the desire to make the gate yourself and some free time.
With a little effort, you can make your own gates that will become the calling card of your site and protect your house from unwanted guests.
Have you ever had to manufacture and install gates from corrugated sheets yourself? Tell us which design option you preferred, were there any difficulties during the work and how did you deal with them? For clarity, you can attach a photo of your own gate in the discussion of the article, and also ask our experts any questions you may have.


