Warm floors under laminate: installation and installation of an infrared film system
By installing a heated floor under the laminate as the only or additional way to heat the room, you can significantly increase the degree of comfort compared to other options. To draw up a diagram of the placement of elements and install the entire system, you need to familiarize yourself with the specifics of the work being carried out. Do you agree?
We will tell you how to choose a floor covering that can work in tandem with a heating film system. Here you will learn how to correctly arrange the components of a heated floor and how to connect them correctly. Taking into account our advice, you will be able to independently complete all stages of difficult, but quite accessible work.
The content of the article:
Materials Basics
The quality of work and service life of a heated floor laid under laminated panels depends on the parameters of the purchased equipment and material, coupled with an understanding of the features of their combination.
To independently develop a layout for infrared stripes, it is necessary to take into account the physical features of such heating.
Parameters of infrared film floor
A film heater is a flexible, narrow sheet placed under the floor covering and containing a heating element. It converts electrical energy into infrared heat waves.
Heating of a laminate or other material occurs from below due to radiation hitting it. After heating the floor surface through its thickness, heat is released into the air of the heated room.
The heating element of IR systems is carbon continuous or striped coating, covered on both sides with lavsan or polyurethane film. Current-carrying bimetallic busbars are installed along the edges of the canvases, transmitting energy to the heating element.
The thickness of this design varies from 0.2 to 2 mm, most often panels with a thickness of 0.3 to 0.5 mm are available for sale. Standard width sizes for one strip are 50, 60, 80 and 100 cm.

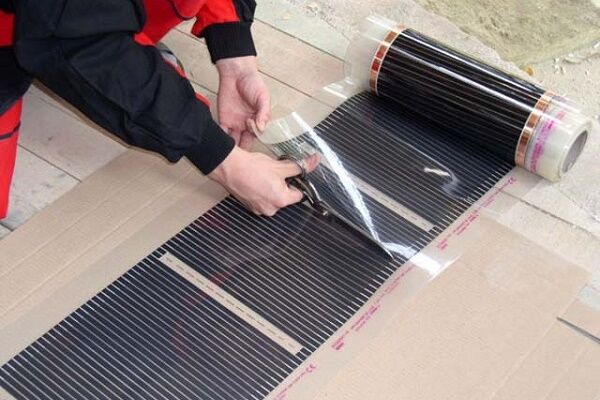
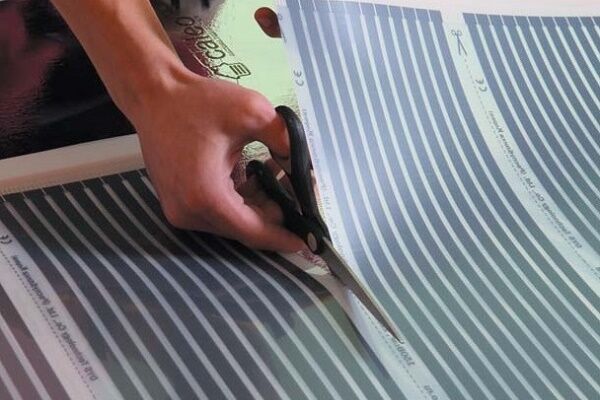
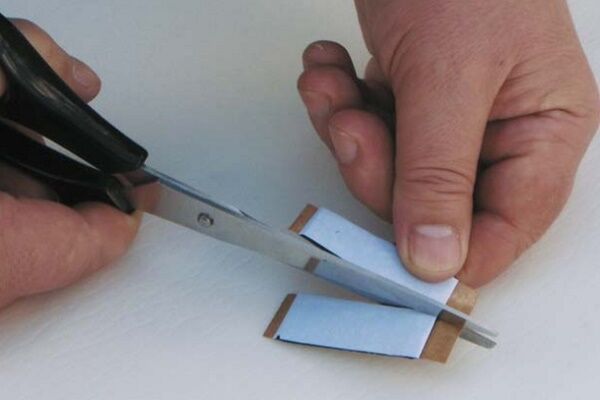
Any film can be cut to length in places specially designated and marked for this purpose. The cutting step size is approximately 20 cm, so you can easily obtain panels of the required length.
Maximum power infrared film for laminate is from 120 to 230 W/sq.m. Devices with high heat generation are not used due to the limited heating temperature of the laminate. Sometimes, the manufacturer indicates power depending on the linear meter. In this case, dividing it by the bandwidth can calculate the desired value.
Requirements for laminate as a coating
An ordinary laminate may have three properties that prevent its use as a topcoat in combination with a heated floor:
- curvature of plate geometry under high temperature;
- pressing through the plates when exposed to heavy objects;
- high thermal insulation properties of the material.
Therefore, improved models have been developed for the joint use of laminate and the film heated floor located underneath. They are marked with special symbols placed on the packaging of the material or in the instructions for it.
There is no uniform marking standard, so when purchasing, you need to clarify this issue with the seller, since there are solutions only for water or electric cable heated floors.

The total value of the thermal resistance coefficient of the laminate and the substrate on which it is laid should not exceed 0.15 sq.m*K/W. Therefore, when choosing a material, it is necessary to ensure that this technical specification complies with regulatory requirements, otherwise there is a risk of overheating and breakdown of the heated floor system.
The connection of the lamellas can be made using glue or locks located at the ends of the plates. In combination with a heated floor, only a floating design of a laminated floor made from interlocking panels is allowed.
Those. The covering assembled from panels should not have a rigid adhesion to the base, and a gap must be left around the perimeter of the room, around architectural details and pipe penetrations as a reserve for linear expansion of the material.
Laminate is produced by pressing sawdust with the inclusion of resins containing formaldehyde. The manufacturer indicates the maximum permissible heating temperature, above which the toxic substance begins to evaporate. This usually happens when it reaches 28-30 degrees Celsius. When calculating heat release, this factor must be taken into account.
The arguments in favor of installing an infrared heating system under laminate and comparing the advantages of IR film with water options are outlined in detail in the next article, which we recommend that you familiarize yourself with.
Rules for placing underfloor heating strips
The area of a separate room that should be equipped with a warm floor is calculated based on the heating needs of this room.
In the absence of other heating systems, an average of 70% coverage of the total area is sufficient. In the presence of radiators and fireplaces, the need for heat from the floor is reduced, which leads to a decrease in the number of laid strips or less energy consumption for heating.

The absence of the need to place an infrared heated floor under the laminate over the entire area of the room makes it possible, as a rule, to easily bypass the following restrictions when designing:
- Do not place heated floors under heavy objects such as cabinets or sofas with legs. They push through the laminate, which leads to an uneven fit and excess pressure on the film.
- Do not cover heated laminate flooring on top with heat-insulating material, such as carpets or furniture without legs. This leads to disruption of heat transfer to the air and overheating of the system.
- It is necessary to avoid heating the laminate simultaneously from the infrared film and another heat source. The size of the floor area under which film cannot be placed is determined individually for each type of heating device located nearby.
- It is necessary to retreat from walls and stationary objects by at least 3 - 10 cm, depending on the manufacturer's recommendations, since the heating zone in plan slightly extends beyond the boundaries of the film. Elevated temperatures can have a bad effect on baseboards and wallpaper.
When planning the placement of infrared film, they often retreat from the walls at a distance of 50-60 cm. This is due to possible redevelopment or rearrangement of furniture in the future.
A significant distance from the walls leaves a wider range of solutions for changing the design of the room. In addition, residents of the house use the space near the wall much less often than in the middle of the room.

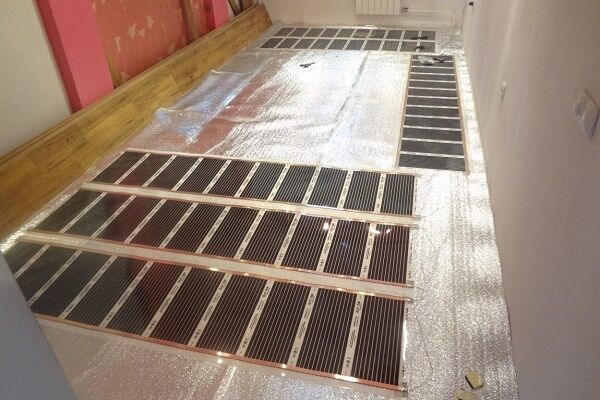
If the heated floor area is rectangular, then it is better to plan the location of the film fragments along the long side. In this case, the number of strips and, as a result, the operations for their installation, insulation and connection are reduced.
Additional information on the structure
In a vertical section, the heated floor device consists of five layers, each of which has certain requirements. The subfloor must be firm and as level as possible. For a concrete base, it is recommended to level it by pouring a leveling mixture, and for a wooden base, by laying plywood.
The insulation between the base and the heating elements is designed to prevent heat loss. Considering that the heated floor runs on electricity, the substrate should not conduct current.
Therefore, insulation with a reflective surface based on aluminum foil is not used. Most often, roll polyethylene foam insulation or cork backing is used, complete with a reflective layer.

Before laying underfloor heating strips with electrical wiring and a temperature sensor, you must read the instructions included with the kit. The general principles of installation are the same, but there are some nuances regarding the distance between the elements being placed, as well as the method of connecting to the electrical network.
Polyethylene or vinyl film should be used as a substrate located between the heating elements and the laminate. It transmits heat well, but serves as a barrier to water and dust, which should not be allowed to enter the heating strips.
One of the characteristic representatives of film heating systems is PLEN brand products, the installation and operation features of which are described in detail in our recommended article.
Stages of system installation work
One of the major advantages of infrared bands over electric cable or water pipes is the possibility of self-installation of a heated floor under the laminate. Therefore, the installation of such a system is cheaper, which justifies the more expensive cost of its elements.
If all stages of work are carried out correctly, the heating will function efficiently for the period of time declared by the manufacturer.
Leveling the base and laying thermal insulation
Waterproofing and leveling the subfloor for subsequent installation of infrared strips under the laminate are carried out according to standard rules. The coating must be smooth, rigid, with a slope of no more than 2 mm per 1 meter.

Before installing thermal insulation, it is necessary to ensure that dust is removed from the room.If work on organizing a heated floor is carried out during construction or major repairs, it is advisable to complete the procedures for installing thermal insulation, heating strips and top waterproofing in one go. In this case, dust contamination of the heating elements will be minimized.
Heat-reflecting material is inexpensive, so it is laid over the entire area of the room close to the walls, even if the infrared stripes are not located under the entire floor surface. The thickness of the insulating substrate under the heated floor is 3-4 mm and this placement eliminates a slight difference in height, which is undesirable when installing the laminate.
To avoid shifting of the material during further work, it is secured to the floor with a stapler or double-sided tape. Strips of isolon or other insulation are secured with tape between each other.
Photo guide for assembling the IR system
When laying a warm film floor, a number of standard actions are performed, presented in the following selection of photos:
Having completed the preparation of the infrared strips for assembling the heated floor, we proceed to the main work:
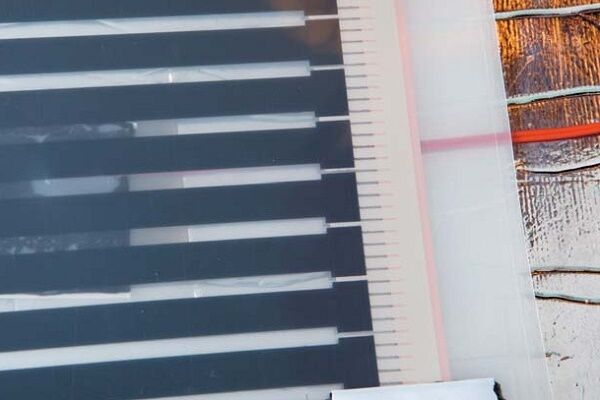
Placement of thermal film fragments
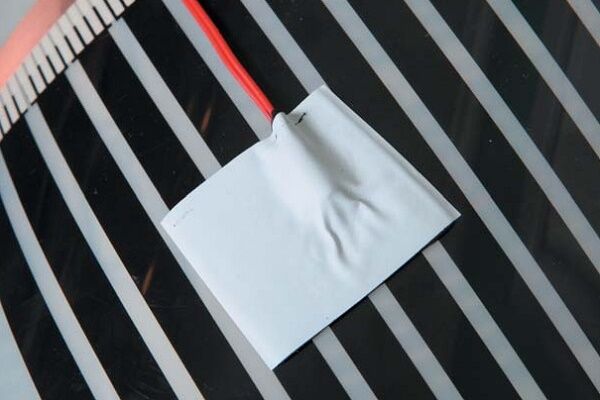
Thermal film strips are cut into pieces of the required size and laid with the copper strip down or up, depending on the manufacturer's instructions. They must be positioned in such a way that the electrical cable can be connected on only one side.

As a rule, heated floor heating strips are laid end-to-end under the laminate. However, for some models there is a minimum permissible distance between them, which is indicated in the instructions. This must be observed to avoid overheating of the system. In no case is it permissible to overlap strips of current-carrying busbars on top of each other.
Increasing the distance between the strips more than the minimum allowable will not cause the heated floor to malfunction. In this case, the heating of the laminate will be uneven, which will lead to the creation of warm and cold zones on the floor.However, such zones are practically not noticeable due to the small temperature difference and the existence of the heat dissipation effect.
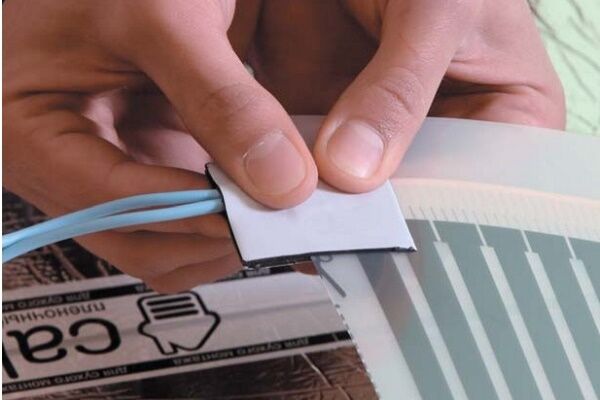
Insulation and electrical connection
Typically, in addition to the thermal film, the package includes self-adhesive insulating bitumen (butyl rubber) tape and contact clamps for connecting the floor to the electrical network. Sometimes the set also includes wires with the cross-section necessary to pass a current of a given power.
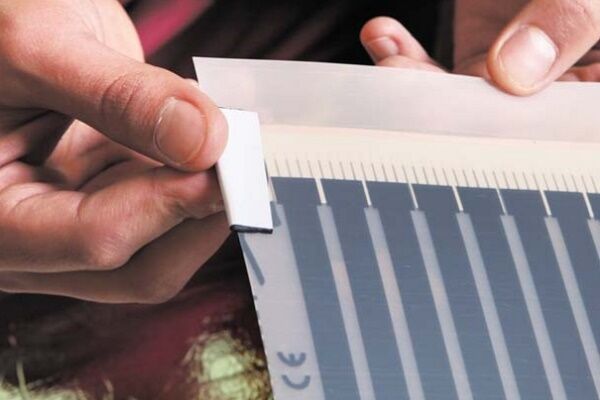
Bituminous self-adhesive insulation covers those places where the copper-silver bus is cut and on the opposite side of the strip of its “open” contacts that will not be used when connecting to the electrical network. It is important to prevent air bubbles from forming between the insulation and the busbar.

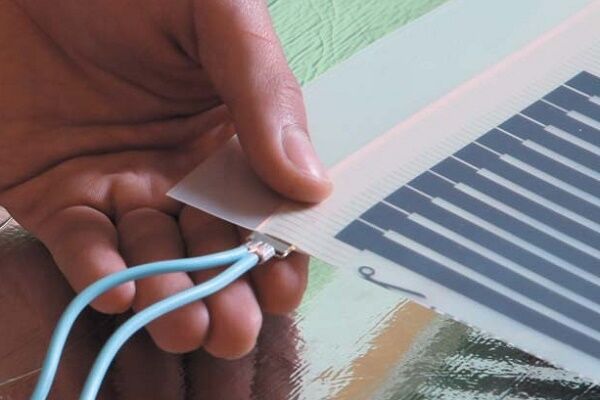
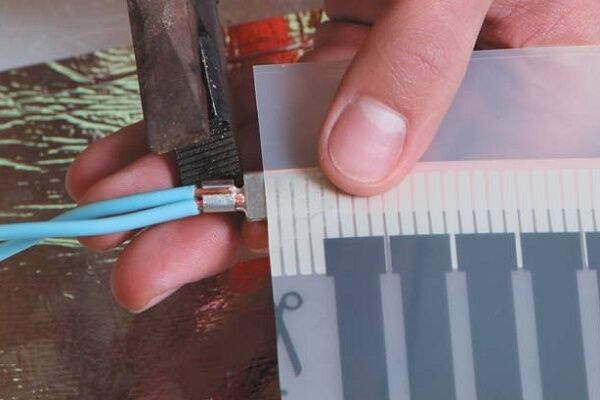
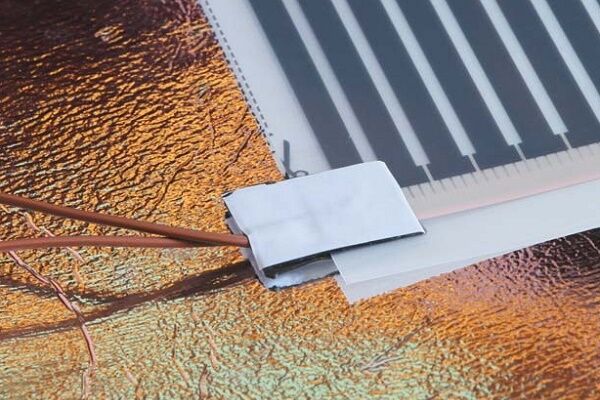
A contact clip is installed at each point where the wires are connected to the copper bus so that one side of it goes inside the thermal film, and the other remains outside, on top of the copper strip. Then, using pliers, the clip is tightly crimped.
After this procedure, the strips of thermal film are fixed with tape to each other, and are also connected to heat-reflecting material to avoid shifting during subsequent work.
The stripped ends of the wires are connected to the clips using the crimp method. Each such place must be covered with bitumen insulation, applying it above and below the connection.
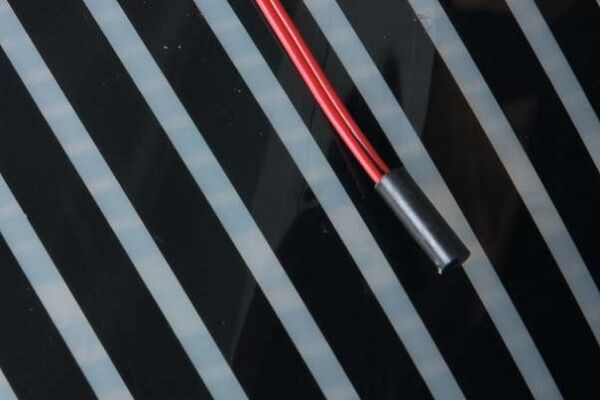
Connecting the thermostat and testing the system
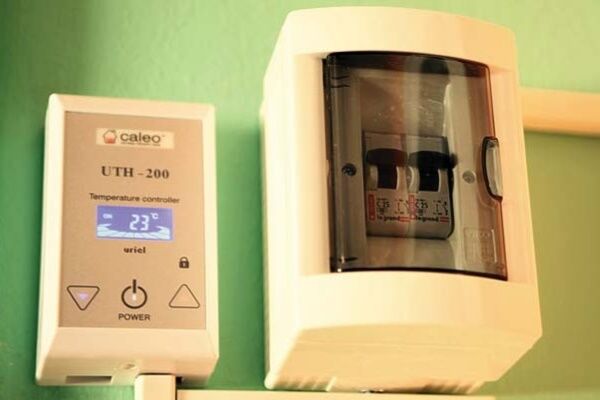
The control device is rarely included in the scope of delivery, so thermostat for heated floors need to be purchased separately.Since high precision in adjusting the heating temperature of the laminate is required, it is necessary to use an electronic device rather than a mechanical one.
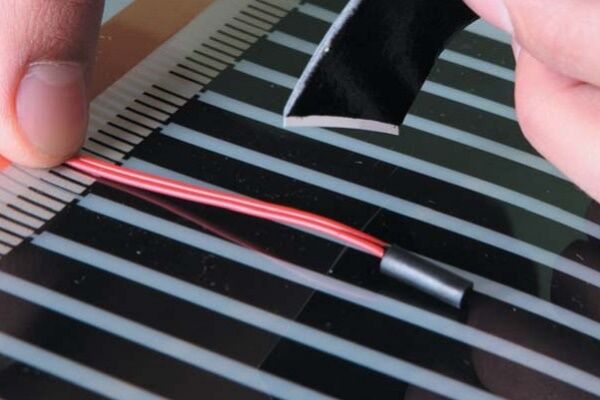
The floor temperature sensor is attached to the bottom of the film to the black strip of the heating element. This procedure can be performed using bitumen insulation.
Special cutouts are made in the heat-reflecting material for the temperature sensor, as well as places for installing clips and laying wires. This is necessary to maintain a smooth surface for laminate installation work. Having placed the sensor in the recess, it must be sealed with bitumen insulating tape.

The thermostat is mounted on the wall in a place most convenient for the apartment residents. The wires are connected according to the instructions for the device.
If the maximum power of the heated floor exceeds 2 kW, then the connection to the electrical network is made through a separate machine. For wet rooms, such as a bath or toilet, in the absence of grounding, it is necessary to include a residual current device in the electrical circuit.
Before laying the waterproofing layer and laminate, it is necessary to test the system. The testing temperature can be low, since the main goal is to check the connections of the wires with the elements of the infrared floor for the absence of sparking, as well as the fact that each fragment is heated.
Waterproofing and laminate flooring
A protective waterproofing coating in the form of a film is laid on top of the heated floor.Taking into account its insignificant thickness, which does not affect the surface topography, it is enough to cover only the heating elements with a small protrusion at the edges, equal to 10-20 cm.
The film strips are connected to each other using ordinary tape to avoid their shifting during subsequent installation of the laminate.

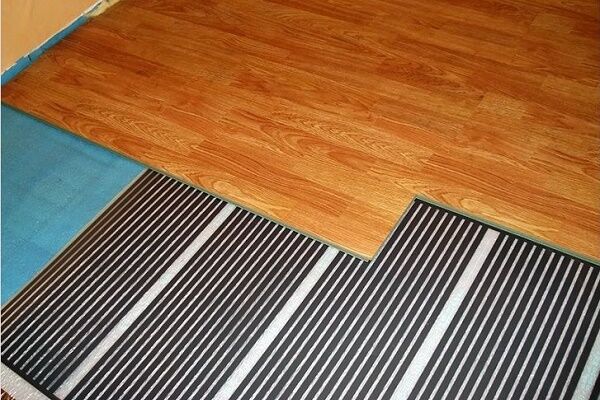
Laminate floor panels are laid directly on top of the plastic film, without any additional backing. It is advisable to carry out these procedures in soft shoes, and also to observe other safety measures so as not to damage the waterproofing and heating elements.
Nuances of using infrared floors
It is necessary to sketch a plan for installing a heated floor under the laminate, including a diagram of the arrangement of strips and wiring. This will help prevent in the future the incorrect rearrangement of furniture and the creation of strong pressure on the surface in the places where the heated floor is installed.
It will also be necessary to eliminate the possibility of damage to the film or electrical wiring when installing interior items that require through fastening to the subfloor.

Electronic thermostats are often equipped with two devices for measuring floor and air temperatures. When programming the system, it is impossible to use only the air sensor due to restrictions on heating the laminate.
There are two ways to correctly set the operating mode algorithm for a heated floor:
- Use only the floor sensor readings. For example, set the heating to turn on when the temperature is below 25 degrees, and turn it off when it reaches 29 degrees.
- Use the readings from both instruments. For example, set the heating to turn on when the room temperature is 23 degrees, and turn it off when either the air sensor readings reach 26 degrees or the floor sensor readings reach 30 degrees.
Breakage of the floor sensor leads to the need to replace it with dismantling part of the laminated panels, lifting the waterproofing film and the damaged heating panel. To avoid this time-consuming work, you can purchase an additional sensor, install it when installing the floor as a backup option, and route the wire from it to the thermostat.
Then, if the main device fails, you just need to unscrew the two wires from the non-working sensor in the thermostat and connect the contacts from the spare version.
With the rules and features of the organization infrared heating of a wooden house The article we recommended will introduce you.
Conclusions and useful video on the topic
Step-by-step work on installing an infrared floor under a laminate. Soldering wires to copper conductors instead of using clips:
Installing an infrared floor under laminate in a room with complex geometry. All stages of work are shown. Here is the breakdown of prices at the end of autumn 2016:
Installing infrared film under the laminate allows you to implement the most comfortable way for a person to heat a room “from the bottom up”.
Understanding the physical laws of the functioning of such a system and following the rules for its installation contributes to the correct choice of location and power of heating elements, as well as long-term and high-quality operation of the heated floor.
Would you like to tell us how you laid and connected an infrared film floor with your own hands? Do you have any questions while reading the information presented? Is there any useful information for us and site visitors? Please write comments in the block below.


Quite an interesting method of floor insulation. I think that such equipment and its installation cost a lot of money. But you can try. My godfather has a similar system and heats the floor very well. And I'm wondering if it's safe. What if there is a short circuit? What if water leaks? But my godfather says that it is 100% safe. That may be true, I'm not a pro. Still, I think that this is the future, and soon everyone will have such a heating system.
Personally, I did not choose underfloor heating as an alternative to heating. Yes, of course, this is a source of heat, but not the main one. And the coverage areas should not occupy the entire floor surface. Regarding the question: is it expensive or cheap, I would say: “not cheap.” And savings in this case are not appropriate, since capital work is being carried out. And you shouldn't skimp on it. It's better to trust the professionals. The problem of crooked floors and poor-quality insulation has not been canceled.
It is expensive not only and not so much at the time of purchase and installation, but in terms of electricity consumption for heating.If you use it as the main source of heating, it will be several times more expensive than gas. But as an additional heating, warm floors are very good.