How to make an electric heated floor under tiles: film and cable options
The heated floor system is widely used today in the design of residential premises.Such heating helps to distribute the temperature evenly and maintain a comfortable microclimate in the room. The choice of system and its installation technology depend on the type of floor covering.
Let's figure out how to make an electric heated floor under tiles and indicate acceptable installation methods. In addition, we will provide step-by-step instructions on arranging underfloor heating and describe the important points of connecting the system to the power supply.
The content of the article:
Options for electric heated floors under tiles
With all the “advantages” of floors finished with tiles and its competitor, porcelain stoneware, it is difficult to classify them as warm coatings.
The easiest way to eliminate this drawback is to install a floor system that can operate all year round, which is especially important for apartments that depend on centralized heating.
When choosing the type of electric floor system, they are guided not only by the area of the heated room.
Three main parameters are taken into account:
- compatibility with the selected floor covering;
- the ability to build a concrete screed;
- price range.
The power consumption of the selected system and the cable length specified by the manufacturer based on a given area averages 140-160 W/sq.m. But, planning to use porcelain stoneware similar in structure to stone as the finishing cladding, it is better to choose a system with a rated power of 220 W/sq. m.

Cable type system
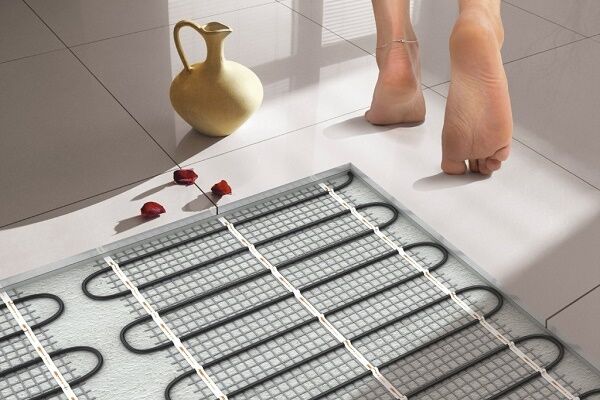
The basis of this heating system is made up of single- and double-core electric heating cables embedded in a monolithic cement screed.

The difference between them is significant:
- Single-core – the heating of their conductor is based on the resist principle, which operates during the operation of a heating element or an iron spiral. Single-core ones, although they are famous for their affordable price, are very inconvenient to install, since they require that the ends meet at one point, and the wires themselves do not intersect when distributed over the floor.
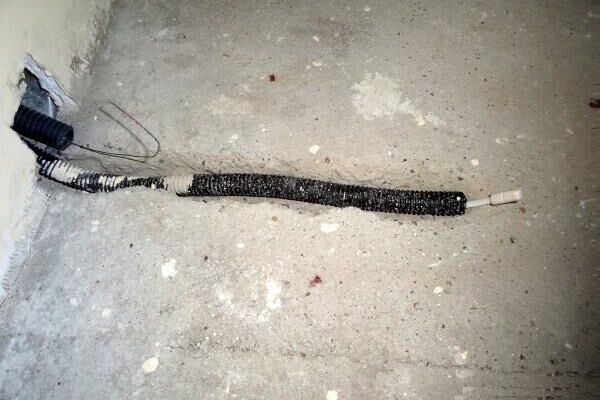
- Two-core – the function of a heating “spiral” in them can be performed by either one cable or both at once. They are equipped with an end coupling that ensures the circuit is closed.
If we compare single- and two-core cables, the former lose in that the electromagnetic interference from them arises much more than from their two-wire counterparts.

But due to the labor-intensive and time-consuming installation, which requires the technician to have appropriate qualifications, and the long waiting period before putting the system into operation, such cable options are gradually losing their position in the market, giving way to more modern thermomats.
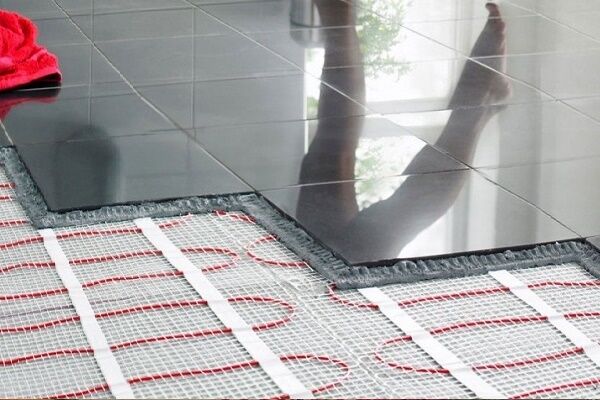
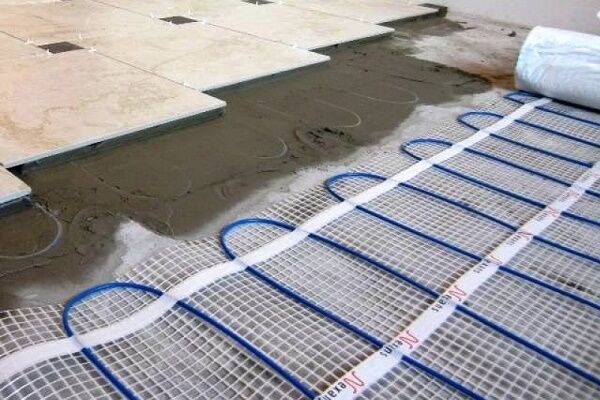
A key feature of ready-made heating mats is that single- and double-core conductors are already initially attached to a fiberglass mesh frame.

Unlike cable analogues, heating mats do not emit harmful electromagnetic fields, and their elements are resistant to rust.
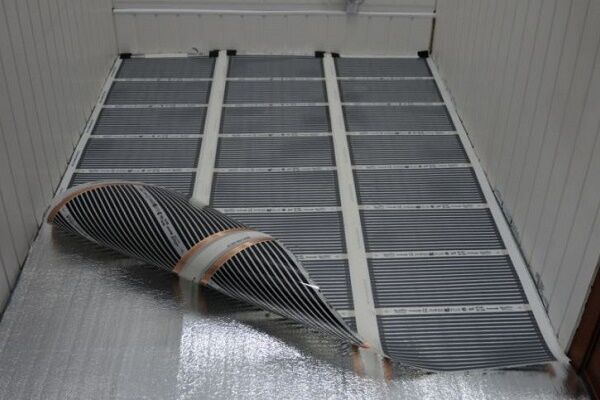
Infrared film floor
Film flooring is considered one of the most efficient modern heating systems. Unlike the analogues of the system described above, it does not create electromagnetic fields, but emits waves similar in spectral parameters to solar radiation.
Thanks to this, the room is completely heated uniformly, and the ionized air has a positive effect on the health of household members.

There are two types of film systems:
- With carbon type plates on mylar filmemitting far-wave infrared radiation. When connecting carbon strips, a parallel circuit is used. They can be safely laid both under porcelain stoneware and tiles.
- Carbon double-layer films with bimetallic stripsmade from an alloy of copper or aluminum. The heating strips in such films are located between layers of elastic, but dense polyurethane. For this reason, they are not compatible with ceramic coatings.
Infrared PLEN systems It is allowed to be placed both on horizontal surfaces and on vertical bases. They can be installed without screeds. Therefore, the thickness together with the finishing cladding does not exceed two centimeters.

The choice of temperature sensors presented on the domestic market is wide and varied: with push-button and mechanical controls, with liquid crystal and LED indication, in various colors and original design solutions.
Any of the presented models is designed for installation in a socket of standard dimensions.
Methods for installing film flooring
When installing a film heated floor under tiles, the installation of the floor system is carried out using one of two technologies: “dry”, which involves the use of plasterboard sheets, “wet” - by pouring concrete.
Dry installation
Since tile adhesive adheres too poorly to a smooth film, when laying such a flooring system, an intermediate layer is constructed between it and the tile.
For this purpose lay:
- plasterboard sheets, which are gypsum panels covered on both sides with thick cardboard;
- glass-magnesite sheets made of composite materials supplemented with wood shavings.
Both materials have low resistance to infrared radiation, so the loss of infrared properties is minimal. As a result, such a multi-layer system evenly distributes the generated heat throughout the floor, thereby eliminating the possibility of overheating.

Laying infrared heated floors under the tiles is carried out in six stages:
- A heat-reflecting layer is laid on the base that has been repaired from cracks and crevices and then leveled.
- The second layer is to lay strips of carbon film so that the edges of the layers do not overlap each other. It is advisable to cover the laid strips with a film of dense polyethylene.
- By installing terminal clamps on the edges of the copper plates, connect them to the electrical wires. The assembled system is connected through a room thermostat, after which the uniform heating of all plates is checked.
- Cut sheets of plasterboard into blanks of the appropriate size in order to completely cover the heating strips with them.
- The plasterboard sheets screwed to the base are covered with a layer of primer.
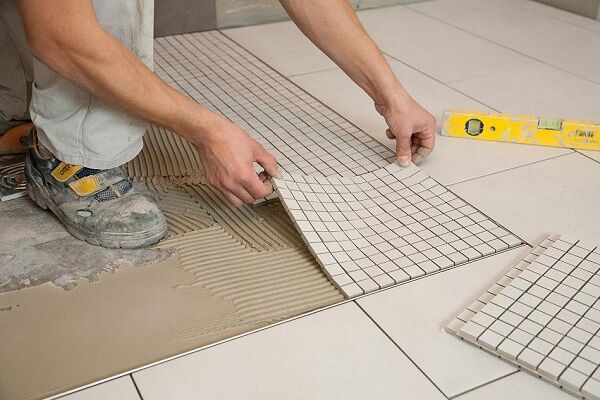
- Using adhesive intended for underfloor heating systems, the tiles are glued.
The main thing when laying carbon film is to ensure the most intimate contact with the thermal insulation material. This is necessary in order to prevent the occurrence of air-filled voids.
When laying the carbon film, it should be placed with the copper elements down so that the connection contacts are directed in the direction where the thermostat is supposed to be hung. The places where the film is cut on the reverse side, as well as the connection points for electrical wires, must be covered with a layer of bitumen insulation.

Plasterboard sheets are fixed to the primary base by screwing, trying not to damage the integrity of the plates.
Pouring a “wet” screed
Implementation of this installation method will require a lot of time and effort. To save bills for the consumed kilowatts that go into heating the floor slab, an underlay in the form of insulation is laid under the floor system.
The following is used as a substrate:
- isolon – polyethylene foam having a loose molecular structure;
- folgisol – created on the basis of foamed polyethylene and covered with a metallized polypropylene film;
- technical jam, having a honeycomb structure.
The insulating material is cut into strips, the size of which corresponds to the width of the thermal film. The blanks are laid out under each mat so that all the cutouts in the film fall on the substrate.

A heat-reflecting layer is placed on top of the insulation. All joints are treated with special glue.
Since grounding is not provided when installing film heated floors, it is not allowed to use aluminum foil, which is a conductive material, as a heat reflector.
For the same reason, reinforcing mesh with cells of 20-40 mm, intended for concrete screed, should be made not of metal, but of polymer.
The role of a grounding conductor can be performed by electrically conductive tape, which is glued around the perimeter of the room.To increase the security of the system, it should be “powered” from a separate machine, and at the input install an RCD.

The laid floor system is covered with polyethylene film and the concrete screed is laid. To do this, a mesh plastic mesh is placed on top of the film, the section size of which is 5*5 cm or 10*10 cm.
It will act as a reinforcing frame. The mesh is attached to the previously laid layers, being careful not to damage the thermal film.
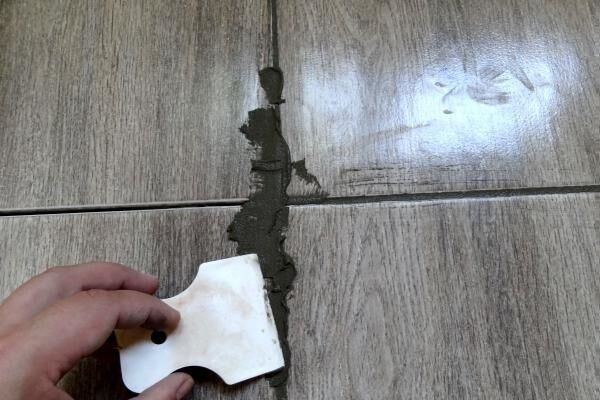
A concrete-cement mortar is applied on top of the laid and fixed mesh, forming a layer 5 mm thick so that it completely covers the technological holes. Leave the screed for a week and a half until completely dry.
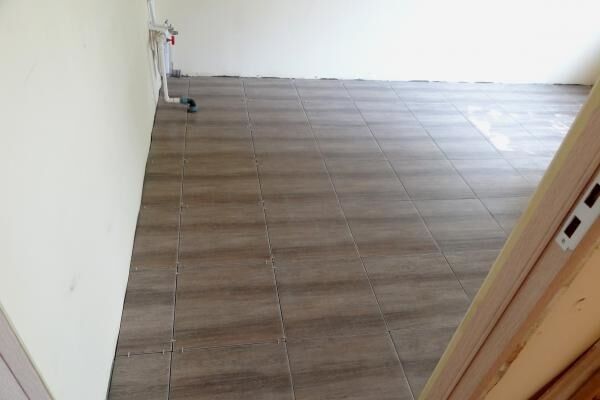
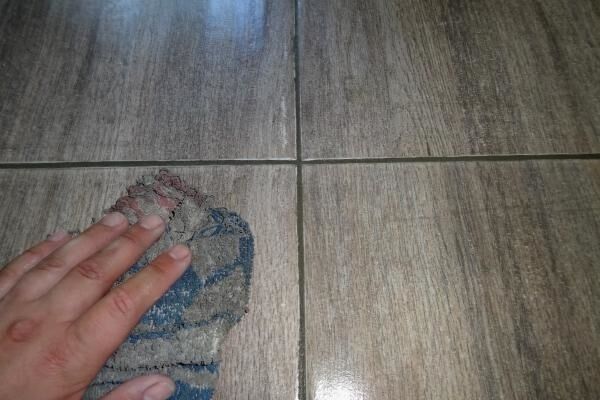
When the screed acquires the necessary strength, proceed to the stage of gluing tiles or porcelain tiles. The cladding technology is conventional. The only thing is to “plant” the coating on glue, which is not afraid of temperature changes.
Technology for installing cable floors under tiles
Installation of cable heated floors under tiles requires certain qualifications. In addition, such a system can only be turned on a month after installation.
Drawing up a layout plan
Before proceeding with the installation of the system, it would be correct to first draw up a scale plan of its layout on paper. When developing a plan, areas where furniture is placed and where heavy household appliances are supposed to be installed are excluded from the total working area.
It should be understood that further rearrangement may negatively affect the performance of the floor system.

Taking into account all the nuances, the finished layout plan will have the outline of an irregularly shaped figure that fits into a rectangular and square covering area.
Based on the total area of the working surface, calculate the length of the cable, taking into account the fact that the cable should cover 70-75% of the total square footage. Its effectiveness will depend on how well the flooring system is designed.
At the design stage, it is necessary to think about a convenient place for thermostat placement. In some cases, when installing a floor system, it is necessary to lay a separate electrical wiring line of the required power.
Preparatory and energy-saving work
The key condition for proper installation of both the heating system and the finishing tiles is a carefully leveled surface. The master’s task is to bring the base to zero, since the worse the base is prepared, the worse the final result will be.

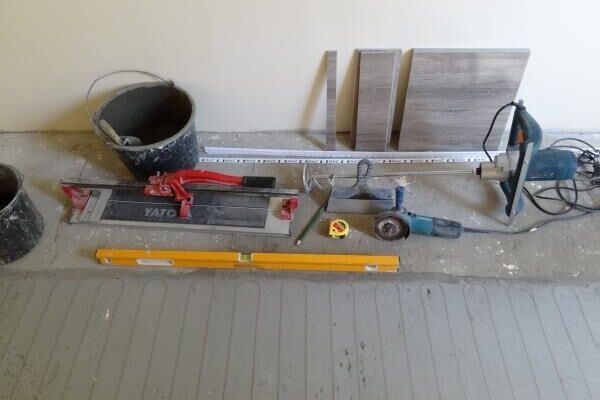
A set of tools that will be needed to complete the work:
- building level;
- tape measure and ruler for marking and control;
- insulation stripping tool and cutting wires;
- soldering iron with solder for tinning wires before switching;
- construction hair dryer for heating heat-shrinkable tubes;
- hammer drill and grinder with a stone disc;
- multimeter for control measurements of circuit conductivity and resistance;
- megohmmeter to check insulation resistance;
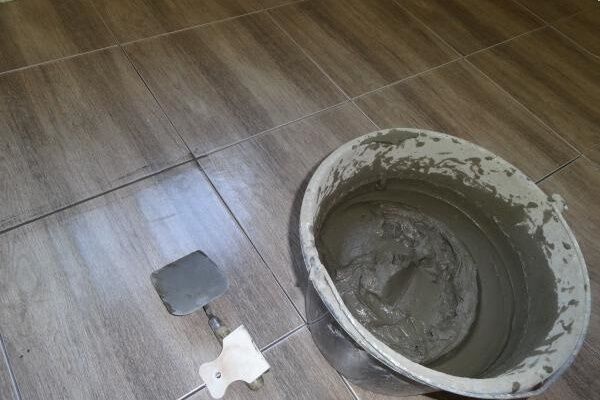
- construction mixer and container for mixing cement mixture;
- roller and brushes for applying liquid primer;
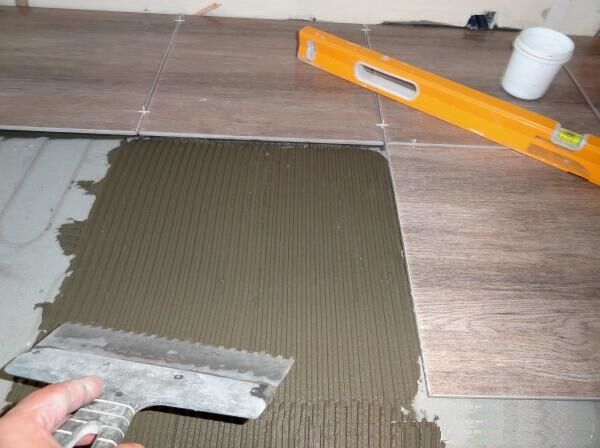
- notched and regular trowel for spreading the paste-like cement mixture.
To prevent a situation where the installed system will heat the neighbors’ ceiling, it is necessary to carry out energy-saving work.

When planning to install a heated floor on a loggia or veranda, you should lay a layer of insulation in front of the waterproofing layer. For this purpose it is better to use sheets extruded polystyrene foam 10 cm thick or mineral wool.
A waterproofing layer is laid on the prepared base, the basis for which is:
- foil penofol, which is a rolled material made of foam components, equipped with internal reinforcement;
- extruded polystyrene foamhaving a foamed polymer structure;
- foamed polyethylene, equipped with foil covering.
The material should be laid out overlapping on the wall. To compensate for thermal expansion between the floor and the wall, a damper tape is laid around the perimeter of the base. Partial thermal insulation of walls at a level of 20 cm from the floor will also help reduce heat loss.
Underfloor heating device option
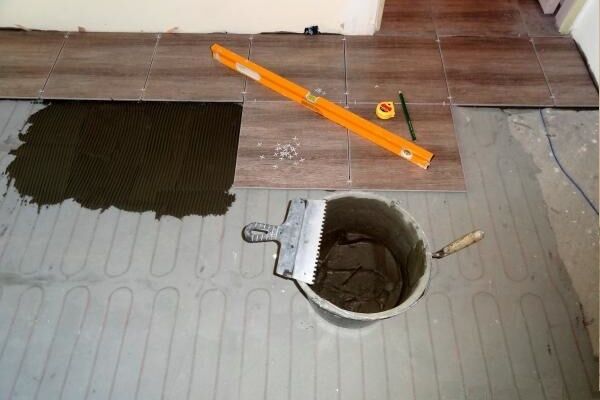
Let's look at the step-by-step process of installing an electric type of heated floor from mats prepared for laying on a cement base.
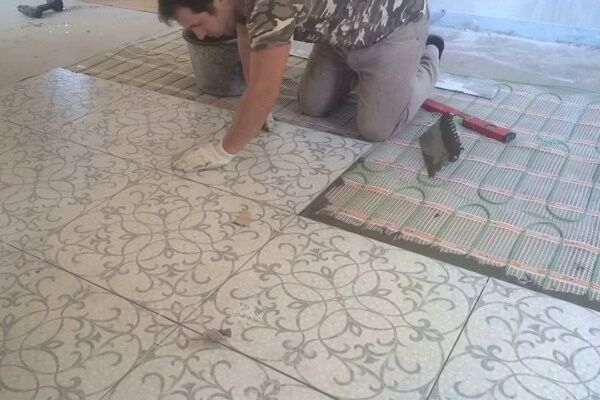
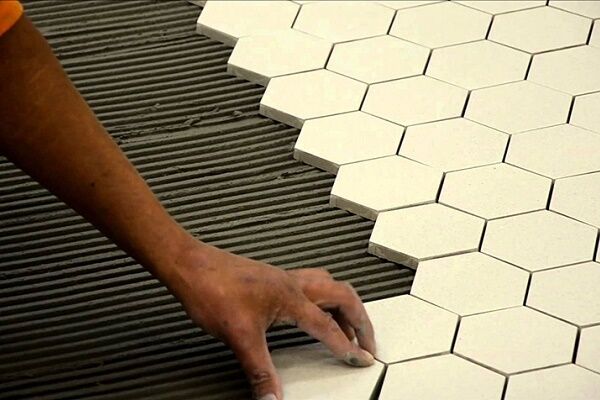
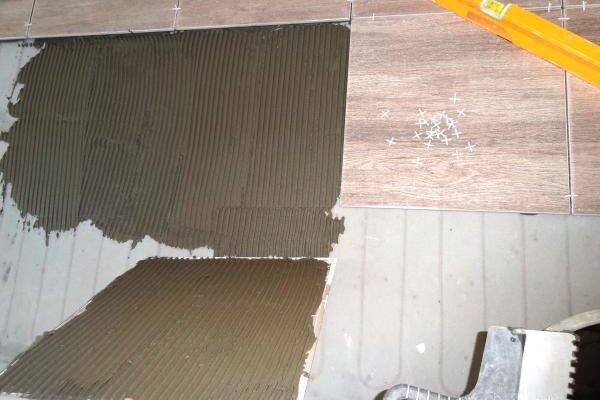
Before directly laying the floor tiles, it is worth considering the layout of the covering elements, especially if it is supposed to have any kind of ornament.
Even if there is no design, you need to decide how best to lay ceramic elements with minimal trimming.
Laying the cable system
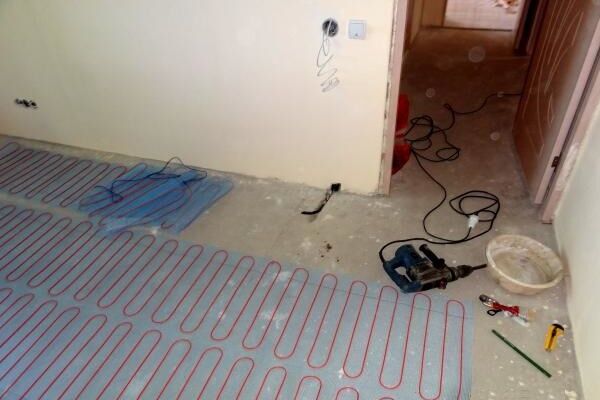
First of all, install the thermostat, making a socket socket for its installation in the wall using a special crown. The height of the nest is at least 300 mm from the floor level. Place placement of the socket box subsequently it should not be covered by large household appliances or heavy stationary furniture.
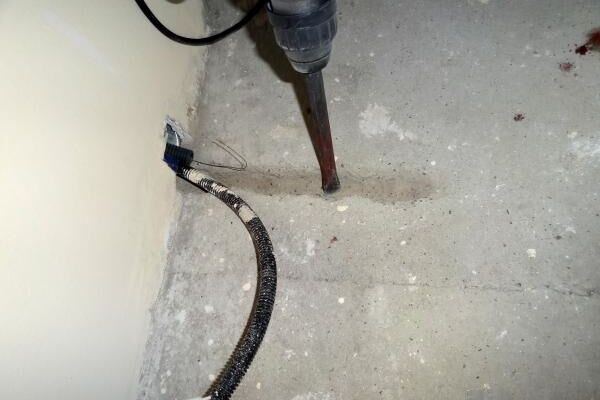
The temperature sensor is placed in a corrugated pipe with a diameter of 9-16 cm. To ensure that the pipe runs flush with the floor, a groove is made for it using a hammer drill or grinder equipped with a disk for working on stone. Between the socket box in the wall and the corrugated pipe in the floor, a 20*20 mm groove is laid for placing electrical installation wires.

Before installation, the heating cable itself should be checked with a tester for electrical resistance.
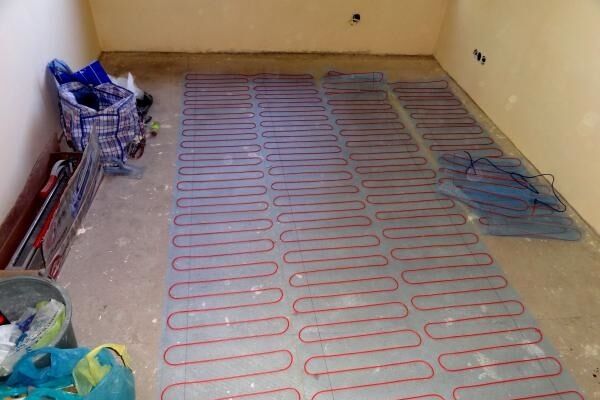
Laying heated cable floors under the tiles is carried out in several stages:
- A primer is applied to the cleaned and leveled base, which will ensure good adhesion to the concrete.
- Foil roll insulation is laid over the entire floor area to be heated, placing the reflective layer outward. The strips are laid close to each other, and the seams between them are taped with masking tape.
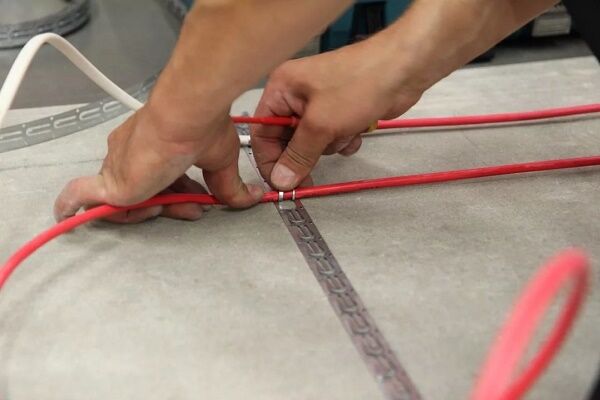
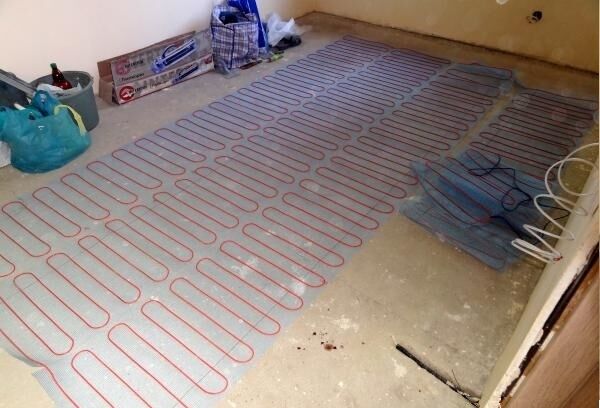
- Guided by a pre-drawn diagram, roll out the mounting tapes over the surface and fix them using self-tapping screws or dowels.
- The cable is fixed to the mounting strips with plastic clamps or “antennae” so that its loops bend without tension, and it does not intersect with other heating elements. Laying is completed in the area of the end coupling.
- The temperature sensor connected to the signal wire is buried in a corrugated tube, the outlet of which is closed with a cap. One end of the corrugated tube with the sensor is placed strictly between the turns of the heating elements, and the second is placed in the groove.
To make installation easier, use fiberglass reinforcing mesh. It will act as a frame when laying the cable and will serve as additional reinforcement of the screed.

If it is necessary to rotate the strip, the mesh base can be cut into fragments, while avoiding overlapping and crossing the cable. The cable itself cannot be cut.
Connecting the system and filling the screed
The wires with the contacts of the laid system are led out into a box, inside which the bare “tails” are tinned and connected.
Using a multimeter, the circuit conductivity and resistance are measured, comparing it with previous readings. If possible, additionally check the insulation resistance. Then turn on the power supply for a short time and check the functionality of the system.

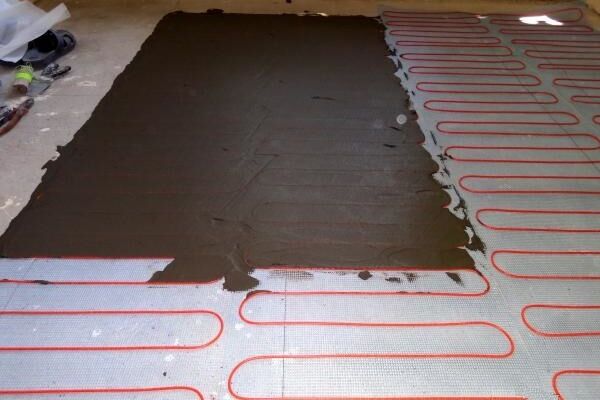
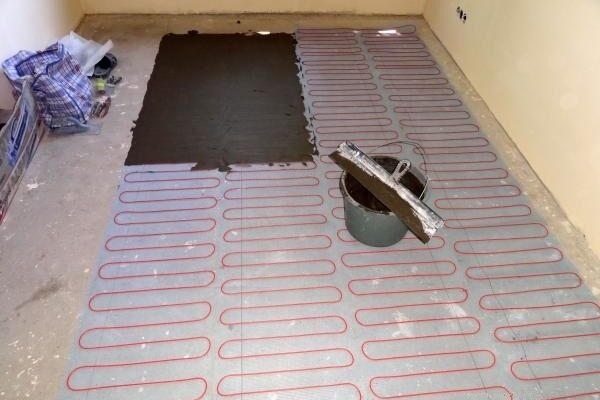
Having installed the beacon system at a height of 3-5 cm, distribute the concrete solution evenly over the surface, trying to prevent the formation of air cavities.
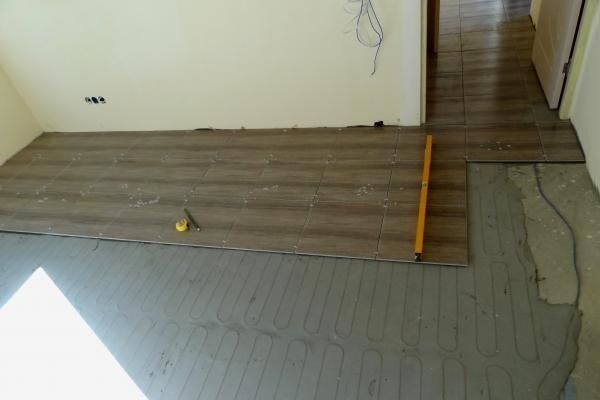
A primer is applied to the dried screed and the floor covering is laid out. While the screed is curing, it is important to completely eliminate drafts and ensure uniform hardening of the composition without drying out or freezing.
It will take from 7-10 to 28 days for the screed to harden and gain strength, depending on the composition of the solution and the recommendations of the manufacturer of the finished mixture. Starting from the third day after initial setting, it is recommended to regularly moisten it with a spray bottle and cover it with plastic wrap.
After the concrete has hardened, all that remains is to lay the tiles and wait until the glue dries completely. The system can be started no earlier than a month from the moment the screed is poured. And it should be started gradually, starting at 15°C, and increasing it by 4-6°C every day.
Conclusions and useful video on the topic
How to install an infrared rod system:
The procedure for connecting heating mats:
Sequence of laying the film system:
It is better to attach a diagram indicating the location of the cable to the product passport, supplementing it with such data as the pitch of the turn, the distance from the walls, the location of the connecting and end couplings. These values may be required if repair work is necessary.
Do you have personal experience with installing electric heated floors under tiles? Do you want to share your accumulated knowledge or ask questions on the topic? Please leave comments and participate in discussions - the feedback form is located below.


About 10 years ago we were renovating a new building and decided to install heated floors in the bathroom. We bought a ready-made system, so-called heating mats, at a hardware store.They were installed by the master who laid the tiles. Moreover, we did not do it for the entire floor area, but with the deduction of space under the bathtub and a washbasin with a cabinet. Ceramic tiles on top.
I don’t know why it stopped working after two years. The repairman came, checked, called the part that was accessible from above, and said that it was burnt out and could not be repaired. This is how our warm floor is buried in the screed under the tiles.