Brick stoves for a wood-burning cottage: the best arrangements and step-by-step construction guide
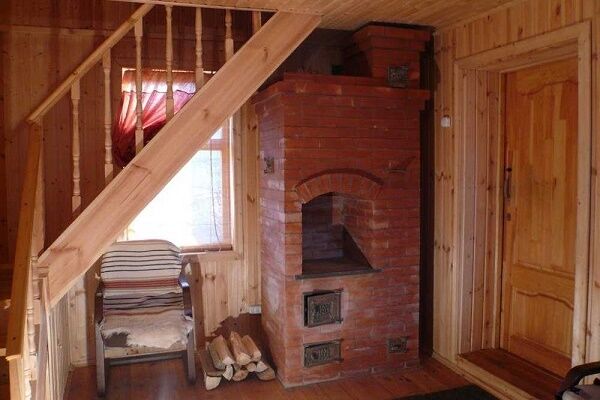
Most domestic holiday villages do not yet have the opportunity to connect to centralized communications.In terms of infrastructure, it’s good if there are asphalt roads and power lines. In such conditions, building a brick stove for a wood-burning cottage will help solve an important problem: it will provide thermal energy for heating rooms and for cooking.
We have selected for you diagrams and orders of the simplest stove structures, the laying of which can be handled by a novice master. With our help, home craftsmen will easily master the basics of the difficult, but extremely interesting activity of a stove maker. An impeccably constructed structure will delight both the owner and household members.
In addition to a detailed description of the technology for laying brick stoves, we provide valuable recommendations on the selection of materials for the construction of units. The article meticulously describes significant subtleties and the smallest nuances. To help independent stove makers, diagrams of stove structures, procedural instructions, photos and video tutorials are included.
The content of the article:
Materials for building a brick stove
Proper selection of material for a structure exposed to high temperatures is an important part of the job of a trained stove maker. After all, the unit will be operated in far from difficult conditions, and it should not malfunction, crack or collapse.
There are a lot furnace structures. Despite the differences in their design, the same types of materials are used for laying brick kilns.The differences in their selection depend only on the operation of the structural component for which they are intended.
In order to determine the purpose and location of these very components, we will briefly describe them.
As an independent construction, a brick oven includes:
- Foundation. A support structure buried in the ground or built in a dry underground, made of rubble stone or brick. For small country stoves, the foundation is often made monolithic from reinforced concrete.
- Array. This part of the brick stove includes the body of the unit along with the firebox, stove appliances and smoke circuits - brick channels lined in the body of the stove to increase heat transfer. In addition, a lining is made inside the firebox - lining made of refractory bricks.
- Chimney. The brick oven is equipped with a channel made of the same material, because only it can transport flue gas with temperatures up to 500-700º without destruction. Instead of bricks, you can use ceramic blocks.
Steel and asbestos-cement pipes are not suitable for arranging chimneys for brick kilns. They “burn out” in a couple of years, so they require regular replacement.
The listed parts of the furnace perform different functions and experience varying loads and degrees of temperature exposure.Therefore, for their construction, different brands of bricks and different binding compositions are used.
To lay a brick stove you will need the following materials:
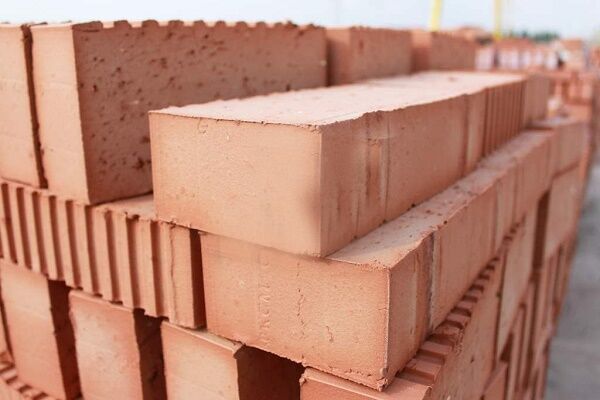
- Red solid brick. It is needed for the construction of a furnace array with smoke circulation, cuttings and the outer part of the firebox. You will need fired first-class brick, the technical qualities of which are regulated by GOST 530-2012.
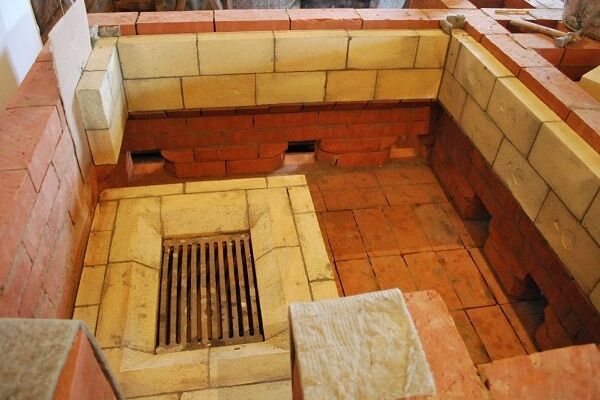
- Fireproof refractory brick. This brick is used to line the firebox of stoves and lay the “hearth” - the base of Russian stoves. The technical qualities of refractory material are regulated by GOST 8691-73.
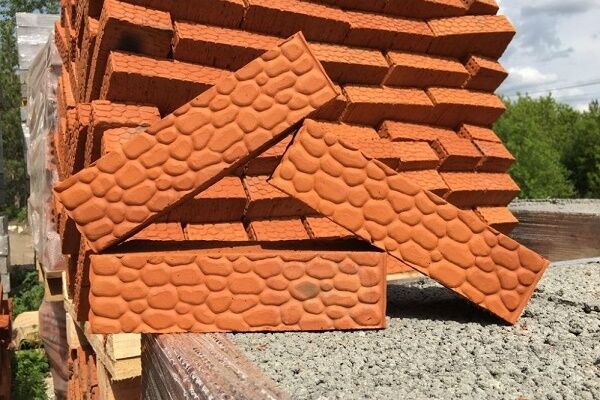
- Sheet roofing steel, asbestos plywood, tiles (clinker facing tiles, tiles). These materials are needed for the external cladding of the stove portal.
- Thermal insulating non-flammable materials. These are asbestos-cement boards, synthetic-based mineral wool mats, asbestos cardboard, construction felt impregnated with clay diluted in water. The listed materials are required for fire retardant insulation and cladding.
To perform insulation and cladding, it is unacceptable to use thermal insulation materials that contain bitumen or bitumen-containing ingredients.
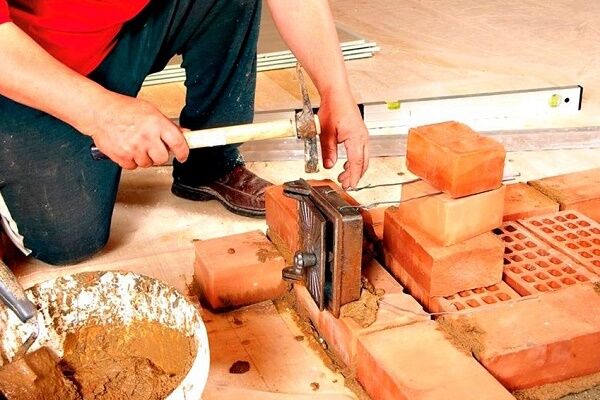
Bricks for laying the stove should be carefully selected, each unit should be scrupulously checked for cracks, chips, shells, and foreign inclusions. All elements must be evenly painted and fired.
Used bricks, cleared of mortar after dismantling destroyed buildings, may be used in the masonry of parts of the unit remote from the firebox. For example, it is quite suitable for constructing the lower rows of a furnace foundation.
It is not allowed to use bricks contaminated with furnace condensate obtained during dismantling of old stoves in masonry.
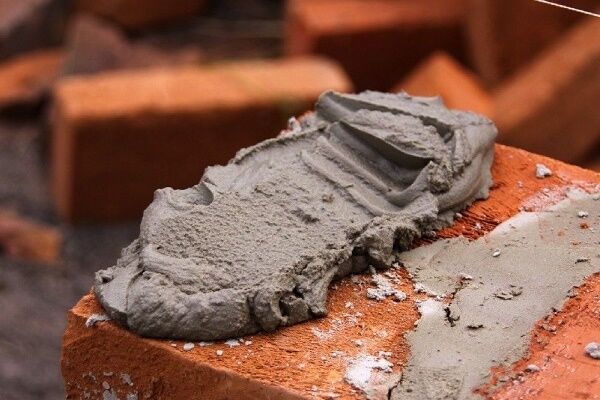
The composition of binding materials used in the masonry of a heating or cooking-heating brick structure is also ambiguous.
The following solutions will be required:
- Clay-sand mortar. It is needed for the construction of the main working part of the structure - the furnace array.
- A mixture of refractory clay and sand. Required when laying refractory bricks, for example, when constructing a cooking section, a compartment for a built-in boiler or a recess for an oven.
- Fireclay masonry mixture. Composition of refractory clay with sifted mountain sand. It is used when laying refractory bricks, i.e. when lining the firebox or when constructing the base of the firebox of a Russian stove.
- Lime-cement or lime-sand mortar. It will be needed to install a part of the chimney located within the attic.
- Cement or lime-cement mortar. Necessary for the construction of a part of the chimney that rises above the roof.
The composition of the binding solution used in the construction of foundations for furnaces depends on the humidity of the surrounding soil. If the base is buried in low-moisture rocks, a lime-sand mortar will be required. To build a foundation in wet soils, you need cement mortar.
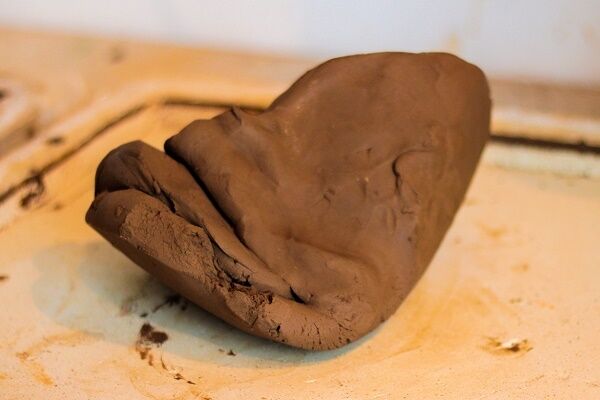
The clay-sand mixture is prepared independently, although there are now a lot of ready-made masonry compositions on sale, including a mixture of kaolin or red clay with sand. When preparing yourself, you should take into account the fat content of the clay, i.e. the presence or absence of tangible grains of sand.
Oily clay is dominated by finely dispersed particles, while lean clay contains sand, which reduces the plasticity of the rock. Sand may not be added to lean clay at all. The ratio is usually selected experimentally, mixing rocks and achieving optimal plasticity of the solution.
When using fatty clay, the proportions of it and sand in the mixture can reach 1:4, but no more. It may well be less. The proportion of sand usually varies; the proportions are selected on site so that the solution does not crack or change in volume when it dries.
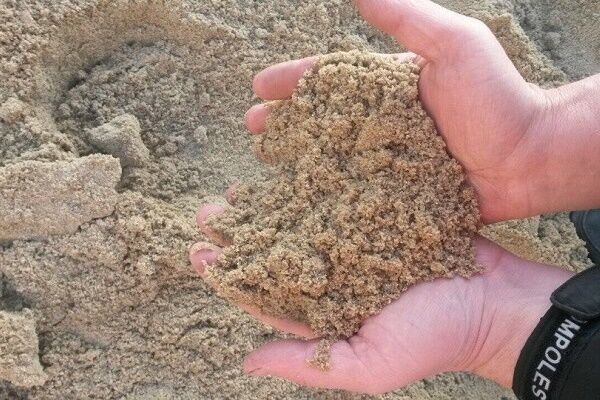
A solution of clay and sand, intended for self-laying a stove, is prepared in advance. No more than 24 hours in advance, but no less than three hours in advance. Natural components must be prepared for mixing. The sand must be sifted through a sieve with mesh up to 1.5 mm, the clay must be rubbed through a mesh with mesh up to 4 mm. The prepared mass should not contain organic inclusions.
When using factory-produced building mixtures in production, strictly follow the instructions supplied by the manufacturer with their product.

Mortars for laying a brick stove are prepared in the quantities required for the job. There is no point in sealing more, because after drying they cannot be “rejuvenated”, i.e. dilute with water to the original consistency.
The percentage of homemade clay-sand mortar used in the construction of the furnace mass must be remembered. After construction, the stove is finished with the same composition, if it is decided not to leave the structure without finishing.
Procedures to help independent stove makers
There are a lot of nuances in choosing the design of a country stove that cannot be ignored. The vast majority of wood-burning units in dachas are not constantly heated, which does not have the best effect on their functionality and performance.
Due to the limited free space at the dacha, they try to build one stove. They mainly prefer universal designs that have both a heat-conducting surface and cast iron stove with burners for cooking food. Although there are adherents of purely heating units.
Let's look at three options for the construction of brick kilns for dachas, the construction of which is quite possible to handle with your own hands. Let's consider universal and heating designs of an extremely simple device, which can be quickly and easily cleaned even with irregular fires.
You can read about the most popular types of brick kilns in this material.
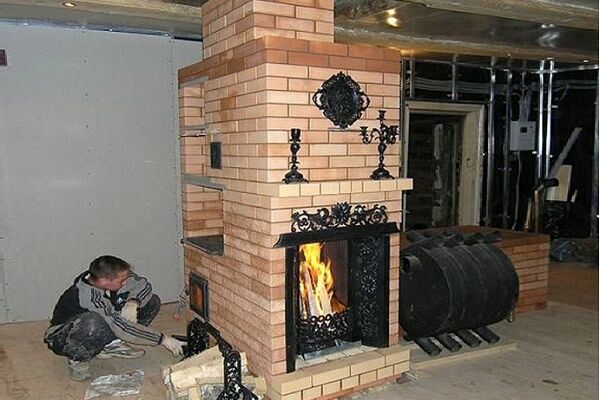
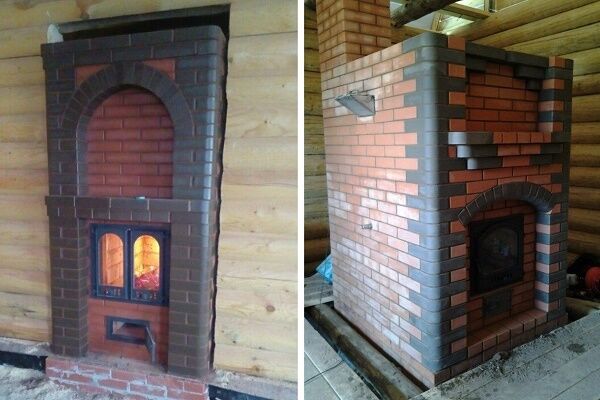
Option #1 - stove with a single burner panel
This is an extremely simple and compact design, seemingly elongated in the vertical direction. In the example, it is equipped with a door with heat-resistant glass, which allows you to monitor the process. If it is not possible to purchase just such a door, the cast iron variety is quite suitable.

The width of the small-sized brick structure is 510 mm, which allows it to be placed in traditionally small country houses without any problems. The depth of the stove is 640 mm, while the depth of the firebox does not exceed 500 mm. The height of the structure is 2150 mm, the height of the chimney is determined by the position of the pipe relative to the ridge.
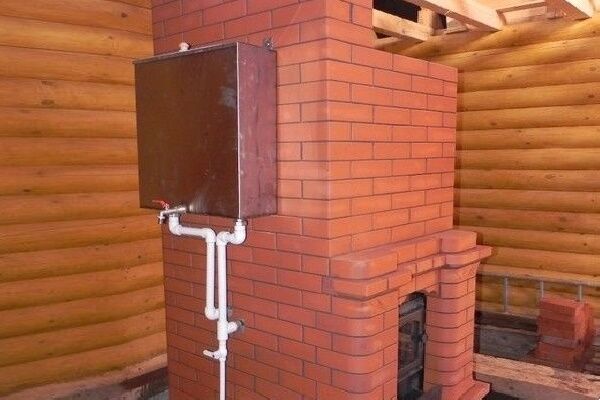
There is an oven that can be replaced with a drying chamber or a tank for preparing hot water.The presence of functional compartments not only allows you to prepare delicious hot dishes at the dacha, but also increases the heat transfer of a brick structure.
During operation of the stove, the air and flue gases heated by the stove rush upward, pass along the rear wall of the cooking compartment, after which they flow into the smoke circulation and further into the chimney. Thermal energy in this building is used to the maximum.

The described brick structure includes 31 rows of flat laid bricks. In order for the structure to function flawlessly, the following procedures must be strictly followed.
During masonry, you need to constantly check the horizontalness of the structure being built and check the size of the diagonals of the laid sides. There are strict requirements for the thickness of seams that must be strictly taken into account. The maximum thickness of seams when laying the body and smoke exhausts cannot exceed 5 mm, when making lining - 3 mm.

The presented order does not indicate the foundation for the stove, the specifics of the construction of which are presented in another article on our website. It is poured or built of brick according to standard rules. We will assume that the foundation has already been erected, and we will proceed to the actual laying of the stove.
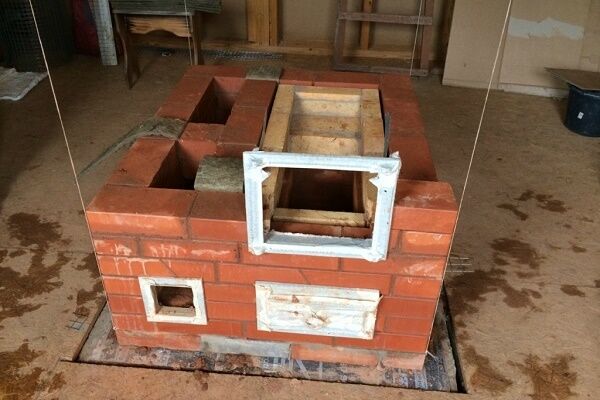
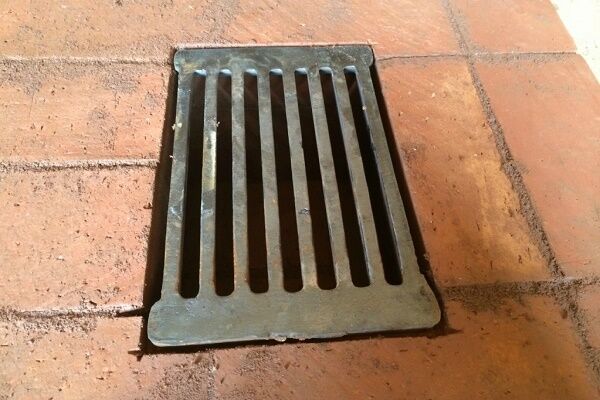
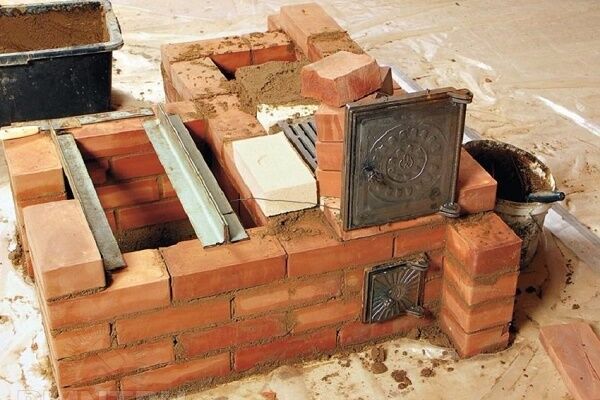
No comments are needed for laying the first three rows; everything is extremely simple. In the 3rd row we put a door for the blower, in the 5th row we put a grate.Before installing the 6th row, we place the firebox door: we temporarily secure the frame with the door with wire braces and immediately support it with two side bricks.

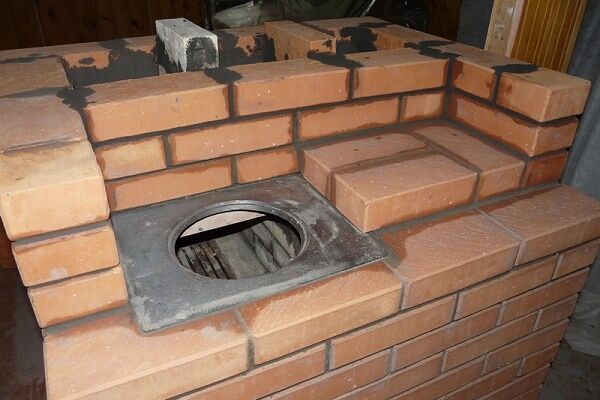
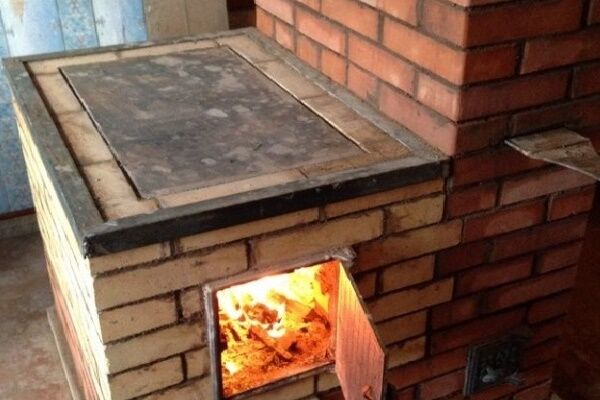
Next, follow the ordering instructions up to the 11th row. After laying it, we lay a metal corner or a steel strip, stepping back from the rear edge of the already constructed part of the structure exactly the width of one brick. This is necessary to install the hob.
After installing the hob, we continue laying, strictly following the instructions. Starting from the 12th and continuing to the 15th row, we simultaneously build the walls of the rear smoke channel and the cooking compartment.

Upon completion of the laying of the 15th row, we place metal corners or install a slate sheet. They will serve as the basis for the upcoming continuous masonry.
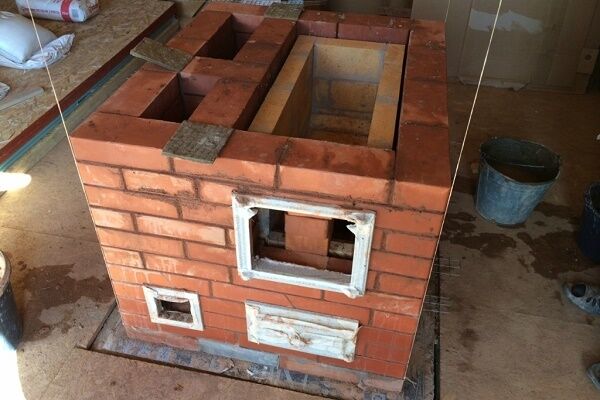
In the 17th row we install and secure the cleaning chamber door. We lay it out up to the 22nd row. The result should be a hollow section connected to the smoke channel.

In the 24th row, we lay out asbestos scraps along the inner edges of our structure. Next, we wrap the oven body with asbestos rope, and then place it on the stove, resting it on the scraps. The asbestos rope will serve as thermal insulation and at the same time protect the device from burnout.
From the 24th to the 27th row we line the oven with bricks, observing the thickness of the seams regulated by the rules.
In the 28th row we install a door through which we will clean the chimney. We fix it as it should be with two bricks on the sides and continue construction.
In the 29th and 31st rows we arrange channels for chimney valves. We simply lay them down and carry out further masonry without connecting the devices to the bricks with mortar. Then from the 32nd row we build a chimney.
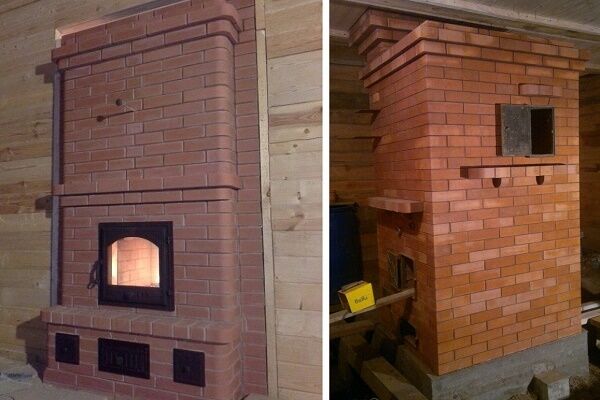
Option #2 - stove for heating adjacent rooms
We can unconditionally classify this design as a heating unit. It is not equipped with a hob with burners and an oven. But it perfectly warms several adjacent rooms, in which it is part of the interior partition.

The design, just like the previous type, is compact due to its elongation in height. It is only 510 mm wide and 890 mm deep.
The height of the heating stove without a chimney is 2380 mm, which is equal to 35 rows of laid bricks.

We will divide the manual for laying a heating type of a country brick stove into three conditional parts. We will assume that the foundation for it has already been built in accordance with the general rules.

The first third shows the ordering patterns from the 1st to the 12th row. We build the starting rows with special care, because...We will focus on them in the future. In each row we check the equality of the diagonals, using a building level we control the verticality of the rows.
To ensure that the walls are strictly horizontal, we will periodically check them during laying with a plumb line. In case of deviation, errors must be corrected immediately, before the solution has time to set and begins to harden.
The 1st row is laid over roofing felt, roofing felt or similar waterproofing material laid in two rows. For convenience, we fix the waterproofing with a binder solution and mark the outline of the stove under construction on its surface.
In the 2nd row we install a frame with a blower door and begin building a chimney. In the 5th row we place a grate, which is the overlap of the blower. In the 6th row we place a frame with a fire door and secure it with two bricks on the sides at once.
From the 5th to the 15th row we carry out the masonry with fireclay refractory bricks, thanks to which there is no need to carry out lining, which would essentially significantly reduce the volume of the already small firebox.

After laying the 16th row in the formed recess in the 15th row, we strengthen its bottom with cement-sand mortar.
This is necessary to strengthen the bottom of the chamber intended for cleaning smoke channels. Then in the 16th row we install a cleaning door.

Afterwards we cover the cleaning door and form this chamber, at the same time we continue to build vertical channels for the smoke exhaust up to the 24th row.
Next, we proceed to the third stage of masonry. In the 25th row we begin the construction of the second cleaning chamber. We again strengthen the bottom of the previous row with a clay-cement composition, install another door and continue building the chimney.
In the 28th and 32nd rows we install valves, which are used as draft regulators. We add the furnace mass up to the 35th row, so that after that we can begin building the chimney.
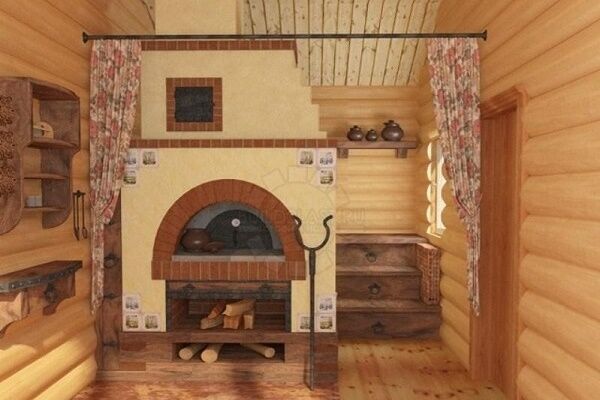
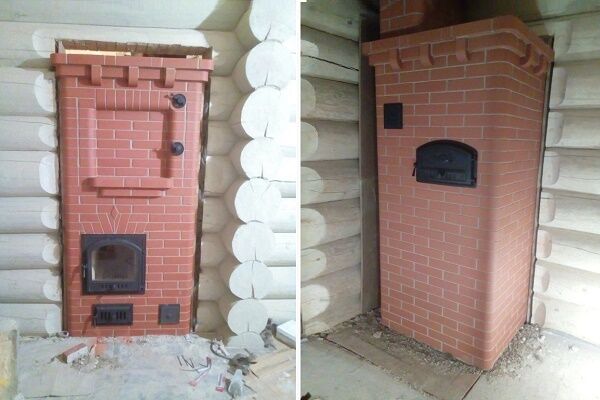
Option #3 - a stove with a shield and a low trestle bed
A very practical design with a low brick couch that serves as a heated sleeping place in Russian huts. The construction is more complicated than previous options, but more practical, because includes a heating unit, some furniture, and a hob.

In order for the shield of the heating part of the stove to be 1020 mm wide, protrusions are formed on both sides. If you plan to increase heat transfer, the number of smoke rotations can be increased to 5. For normal operation of this design, it is necessary to rotate the chimneys above the stove.
This stove has two solutions, the differences of which are determined in rows 5 and 6, as well as in 5a and 6a. The second solution involves installing a steel angle on the corner.

The dimensions of the bed are selected individually.It may not be a solid brick structure with chambers for burning and cleaning, but some kind of trestle bed on pillars instead of legs.
Between the posts you need to leave holes 120 mm wide. However, a structure with chambers retains heat better.

It is recommended to build this stove on a monolithic foundation, on which asbestos sheets are placed before constructing the stove. Fireclay refractory bricks are used only in the construction of a firebox as a lining. Typically, the firebox is built one brick lower than the installation level of its door.
The lining is carried out with bricks installed on the edge. We will not describe in detail the procedures given for the construction of this stove, because... the reader has already received an idea of the symbols and specifics of stove construction.

It is important to follow the given sequence diagrams, as well as strictly adhere to the proportions and compositions of binding solutions used in the construction of brick stoves.
Conclusions and useful video on the topic
Video #1. A video to help independent stove makers, the material presents a visual arrangement of a heating stove:
Video #2. A detailed guide to the construction of a heating and cooking unit according to ready-made procedures, but with some changes from the contractor:
When choosing a design for your own construction of a stove for a summer residence, you need to take into account your own capabilities and skills.It is possible that someone will consider the options we have proposed to be too complex or simple. In any case, the information presented will help you get an idea of the stove structures in order to use it yourself or monitor the actions of hired stove workers.
If you had to build a brick stove for your dacha yourself, please share photos of your own designs. Perhaps you know some subtleties that we did not take into account in our article? Tell our readers about them - leave comments in the block below.


The brick oven is, of course, a classic. But in my opinion, it is an absolutely useless waste of money and time. Not only does it require careful design, but it's not very useful. At the dacha, I still solved the heating problem differently - I installed heaters, they are much cheaper and the heat supply can be precisely controlled, there is no need to clean the chimney and constantly buy firewood.
Is a brick stove of little use? What are you talking about? A well-made brick oven takes a long time to heat up, but once it’s heated, it keeps the heat very well—up to 24 hours. In terms of comfort it is definitely superior to, for example, a cast iron stove. And what kind of heaters are many times cheaper? Electric? You pay for the stove once, and then firewood is much cheaper than electricity. The only problem is to find a good stove maker, there are not many of them.
Hello. Let me disagree with you. Let's do the math. We will count taking into account permanent residence, since we don’t know how much time you spend there.
A Kamaz of ready-made firewood for a stove costs 10 thousand rubles.This is enough for heating for 5-6 months, provided that the structure is of good quality, without any special cracks or holes. Not counting how much wood people give away for free (by the way, they also rake coal out of barns, and many people give it away) and the fact that starting this year it is allowed to collect dead wood and dead wood in the forest.
We take a heater, but one is not enough for the house, but let there be one (it would be more advisable to install water heating with an electric boiler). Consumption on average 2 kW/h. There are 24 hours in a day. 24x2 = 48 kW. Electricity prices range from 2 to 8 rubles in different regions of the country. Let it be 3 rubles per kW. 48x3= 144 rubles per day or 4320 rubles per month. We counted firewood for six months, even for 5 months, okay. 4320x5=21600. Without the ability to pick it up somewhere for free.
Let's also take into account that the stove burned out, it was closed, and it continues to heat. I turned off the heater and it was freezing cold.
Another plus is that there are heating and cooking stoves. You can simultaneously heat and heat water or cook food. With a heater, the installation of an additional device is required, again, this costs for bottled gas or electricity.