Do-it-yourself garage oven: a review of the best homemade options
A private garage is a specific room and is usually very cold in winter.Such a microclimate is completely useless for either a person or a car. At the same time, the use of standard electric heaters often turns out to be too expensive and ineffective.
All that remains is to make a stove for the garage with your own hands, choosing one of the suitable options. We offer for consideration four methods of arranging stove heating, each of which has its own characteristics in creation and operation.
Visual diagrams and video instructions will help you decide on the design of the furnace, assemble and connect the unit yourself.
The content of the article:
Features of garage heating
A major garage with insulation is not available to every car owner. Most often, the vehicle owner has a metal structure at his disposal, devoid of any insulation. Any thermal energy leaves such a structure almost instantly.
When solving the problem of heating a garage space, you should not estimate its heat requirement based on similar experience with a residential building. And it’s not just the lack of thermal insulation.
There is the so-called square-cube law, which states that when the dimensions of a geometric body decrease, the ratio of the surface area of this body to its volume increases.
This affects the size of the heat loss of the object, so to heat one cubic meter of a small room, for example, a garage, more heat is needed than to heat a large house.
If for a two-story building a heating device with a power of 10 kW may be sufficient, then for a much smaller garage you will need a unit with a productivity of about 2-2.5 kW of thermal energy.
To maintain a very modest operating temperature of 16°C, a 1.8 kW stove is sufficient. If you only need to maintain the optimal temperature for storing a car in a parking lot - 8°C - a 1.2 kW unit is suitable.
It turns out that fuel consumption for heating a unit volume of garage space can be twice as high as that for a residential building.
To thoroughly warm up the entire garage, its walls and floor, you will need even more thermal energy, i.e. an even more powerful heater. But even with insulation, heat will leave the room too quickly. Therefore, it is recommended to heat not the entire garage, but only the so-called workspace.

The idea is to concentrate heated air in and around the center of the room so that there is a layer of cold air between the walls and ceiling.As a result, equipment and people will constantly be in a cloud of air at a comfortable temperature, and thermal energy consumption will be noticeably reduced.
Experts call this phenomenon a warm cap; it occurs due to naturally limited convection. An intense flow of heated air rises, but does not reach the ceiling a little, since its kinetic energy is dampened by denser cold layers.
Next, the hot flow is distributed to the sides, lightly touching the walls or at a short distance from them. Almost the entire garage becomes warm; even the inspection pit warms up under the influence of convection processes.
To achieve a similar effect, garage stoves of relatively low power are suitable, creating an intense, but not particularly dense flow of warm air.
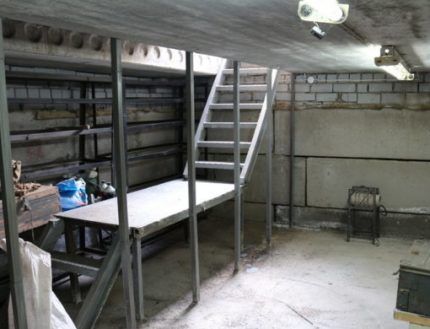
An alternative option for heating a garage is to use various infrared heaters. For a garage with metal walls, such equipment is not particularly suitable. Infrared radiation is poorly reflected from metal surfaces, it penetrates through them, as a result, all the heat will simply go outside.
For a brick garage with half-brick walls, experts also do not recommend an infrared heater. This material does not transmit infrared waves, but does not reflect them either. Brick absorbs this type of thermal energy and releases it over time. Unfortunately, the process of storing energy and returning it takes too much time.
Practical recommendations for choosing a garage heater are given in this article.
Using insulation: pros and cons
Economy-class garages are almost never insulated on the outside for a very simple reason - it is too expensive for a room that is not constantly used. Yes, this is not always possible, for example, in garage cooperatives, buildings are placed very close to each other, the gap does not allow installation of insulation.
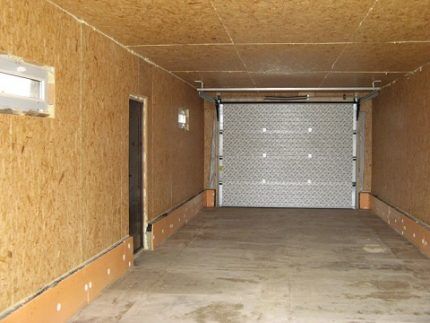
But the internal thermal insulation of a garage can also be problematic. When installing insulation material directly on metal walls, a so-called dew point occurs at the point of their contact, i.e. place where condensation accumulates. Almost always, when in contact with moisture, insulation becomes unusable quite quickly.
And for the structure itself, such a situation can be disastrous. Insulation can be installed in a metal garage, but it is better to install a suitable material at some distance from the wall, about 20-50 mm.
You should retreat 50-70 mm from the floor. It is best to use washers as a profile to avoid creating closed contours under the coating.
With this installation option, condensation will also appear, but thanks to air circulation under the insulation layer, the moisture will gradually evaporate without causing any noticeable harm to the structure.
However, for a garage that is constantly heated, this option is not suitable, since the indoor humidity will be excessively high most of the time. This will put both the health of people and the condition of the vehicle at risk.
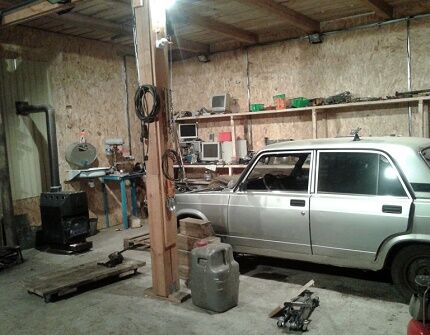
As a material for such “ventilated” insulation, it is recommended to use slabs, for example, fiberboard, chipboard, that is, wood materials that self-extinguish upon fire. Recommended thickness is about 5 mm.
Flat ondulin or its analogues are perfect. These materials have the ability to reflect infrared radiation, which provides effective heating.
But plastic, even with attenuation properties, is strictly not recommended to be placed in the garage. When ignited, such materials emit toxic fumes, which can cause poisoning to people who escaped the fire. It is also prohibited to use slabs containing asbestos as insulation.
When insulating a cold brick garage, it is recommended to first plaster the walls with vermiculite to protect them from moisture. The walls of a metal garage should be painted in two layers, having previously primed the base.
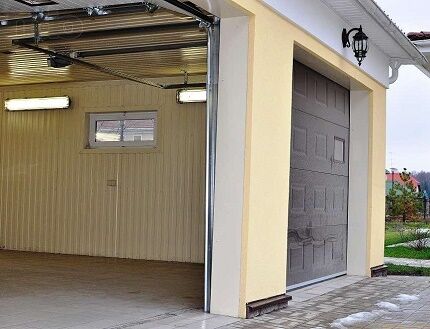
Overview of possible options
For the garage, the following options for homemade stoves are most often used:
- brick wood stove;
- potbelly stove;
- long burning stove;
- furnace in progress.
Each of these DIY garage oven options has certain advantages and disadvantages. Some units can be combined to expand your garage heating options and make this process more convenient and profitable.
In the construction of a small stove for the garage, you can use virtually waste tools and materials, these are:
#1: Brick - may cause problems
A brick oven is sometimes made in the garage, although this is not the easiest option. A device with a base of two by two and a half bricks can cope with heating a small space.
However, such a stove does not heat up too quickly, and then gives off heat for a long time. Therefore, it is not very suitable if the owner only enters the garage for a short period of time.
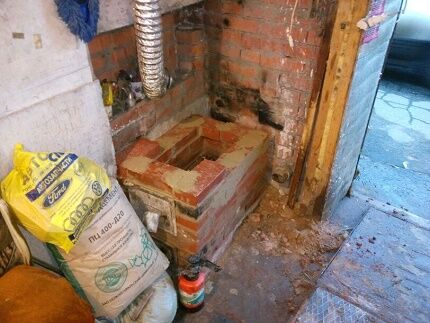
It is almost impossible to create the warm cap mentioned above using a wood-burning stove, since it is not capable of producing a sufficiently intense flow of warm air. It is recommended to heat such a stove in advance, about an hour before starting work.
To build this type of wood stove, you will need fireproof and fireclay bricks. Fireclay and fireclay powder should be added to the masonry mortar. The fuel chamber is made at the level of the second to fourth rows, of which there are usually no more than nine in the masonry. Of course, you will need to install a chimney.
It is also made of refractory brick, and a steel liner is placed inside. The chimney exits through the roof; the masonry must be neat and even.
When choosing a brick oven for your garage, you should remember that constant changes in moisture after some time will lead to a deterioration in the viscosity of the masonry mortar - the device will not last too long.
#2: Potbelly stove - simple and reliable
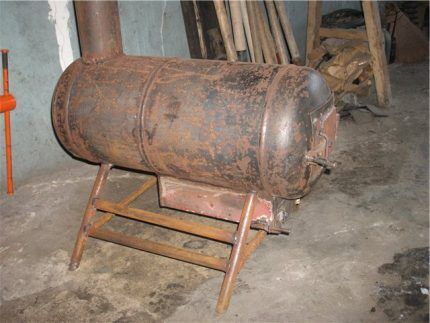
The simplest version of a homemade stove for the garage is making a regular potbelly stove. It is not difficult to make from scrap materials. Sheet metal, an old gas cylinder, a piece of pipe or an unnecessary barrel will do.
The main thing is that the metal thickness is at least 5 mm.If a cylindrical object is used, its cross-section must be at least 300 mm.
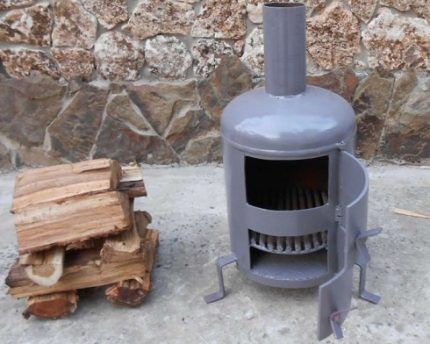
For the chimney, it is recommended to use a metal pipe with a wall thickness of 2-3 mm and a cross-section of at least 120 mm. A combustion chamber is cut out of metal or a blank (cylinder, pipe, barrel, etc.). At the bottom there is a grate for fuel, and under the grate there is a box for collecting ash. Metal 3 mm thick is also suitable for this element.
The chamber is closed at the top and vertically remove the chimney. All that remains is to attach the legs from a metal corner. To increase heating efficiency, some craftsmen weld small metal “wings” to the sides of the potbelly stove.
This will increase the area of contact between the air and the hot metal and speed up the heating of the room.
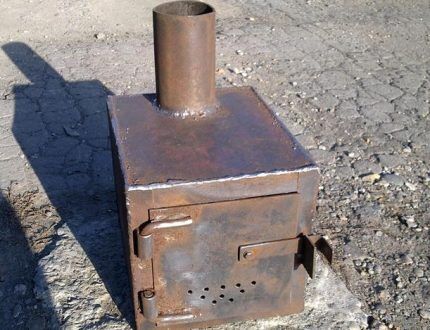
For a potbelly stove, you should prepare a flat and durable base, covered with fire-resistant materials. Surrounding walls should also be protected from possible fire. In addition, there should not be any foreign objects in the immediate vicinity of the stove.
The surface of such a stove can heat up to very high temperatures. You should be aware of the danger of getting a serious burn if you accidentally touch it.
During production potbelly stoves from a gas cylinder need to be careful. There have been cases of explosion of gas residues when sawing such a container. Experts recommend pre-filling the container with water to displace flammable residues.
The following photo selection will clearly show you the process of making a potbelly stove from an empty gas cylinder:
Work on the construction of the main part of the future garage stove has been completed, all that remains is to weld the chimney to it and bring the pipe outside:
Before constructing a stove from an empty cylinder, the container itself must be “burned.” It is better to do this in some deserted place, on a fire, removing old grass around it and all flammable objects within a radius of 2-3 meters. It is better to mow even new vegetation almost to zero using a trimmer.
Before firing, the valve must be separated from the cylinder, i.e. cut it off. The container itself should be placed strictly horizontally directly on the firewood and the side walls should be lined with firewood. Then you need to pour a little lighter fluid inside and set the entire “laying” on fire, always from the bottom.
When the flame of the fire catches and begins to flare up, you need to move as far away from the fire as possible. But not in such a way that it is not possible to extinguish it if necessary.Carry out all actions with a fire extinguisher next to you, stock up on at least a car version or water in buckets.
This video demonstrates the experience of making a classic potbelly stove:
#3: Exhaust furnace - efficient, inexpensive
The design of such a unit is a little more complicated than a potbelly stove, but its efficiency breaks many records. Every car enthusiast can find used oil, and if there is not enough of it, then such fuel can be purchased at almost any car service center at a more than reasonable price.
Unlike a potbelly stove, such a stove is made of two sections connected by a perforated metal pipe.
In the lower section, waste oil burns, which produces some heat and turns into a flammable gas. This gas enters the second combustion chamber through the pipe, simultaneously mixing with a small amount of air. The resulting gas mixture, when burned, produces an impressive amount of heat.
The first chamber, in which the waste oil is burned, can be made of sheet metal or a suitable metal container of a square, round or rectangular configuration.
In order for the combustion process to proceed correctly, a damper is installed in this container to regulate the amount of air entering the chamber.
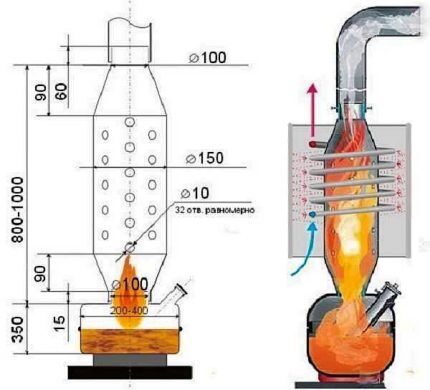
At the bottom you need to attach legs from a corner or thick wire, the main thing is that they are strong enough to support the metal structure.A round hole is made at the top and a perforated pipe is inserted into it.
Typically this pipe serves as support for the upper chamber and is also exposed to high temperatures from burning oil.
Therefore, you will need a structure with walls thick enough to withstand both the additional weight and temperature. Otherwise, it will burn out very soon. The upper chamber is usually made in the form of a short and wide cylinder made of thick metal.
A chimney must be placed on top - a side position of the pipe to remove smoke gases is not allowed in this case.
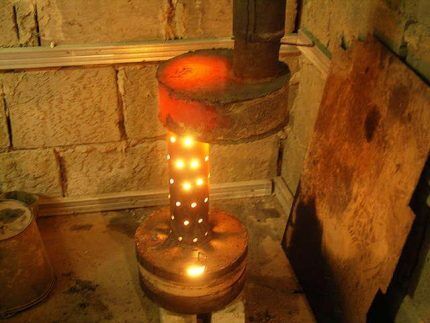
The requirements for installing a furnace during mining are approximately the same as for a potbelly stove: a level and solid base, protection of the surrounding area from overheating and fire. Almost any waste oil can be burned in such a furnace: diesel fuel, transmission compounds, fuel oil, diesel fuel, kerosene, etc.
You should refrain from experimenting with compositions that are characterized by easy and rapid ignition, i.e. from burning gasoline or various solvents in such a stove.
A small amount of gasoline can be used to ignite the waste. And gasoline spilled directly near a hot stove can lead to a serious fire.
It is impossible to officially obtain permission to install such a stove; this is prohibited by fire safety standards. Owners of a private garage have the right to install such a unit, but they bear full responsibility for a possible fire.
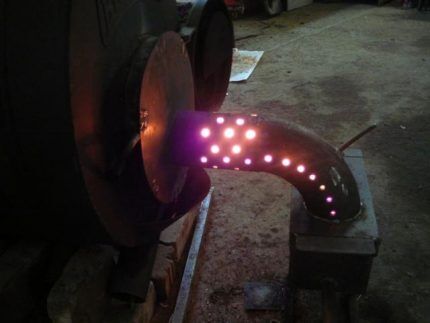
An interesting solution could be hybrid of potbelly stove and stove on probation. To do this, the chamber in which the waste is burned is equipped with a curved perforated tube, and the potbelly stove is made two-chamber so that not only wood, but also waste oil can be burned in it. The unit can be used for two types of fuel depending on the situation.
A modified version of the stove during testing can not only increase the temperature in the garage, but also warm the water for washing hands:
Additional options for homemade garage stoves are described in these articles:
- Do-it-yourself miracle stove for a diesel garage: step-by-step construction instructions
- Do-it-yourself oven for the garage: a step-by-step design guide
A detailed overview of the manufacture and operation of the furnace during mining is presented in the video:
#4: Long burning stove - high efficiency
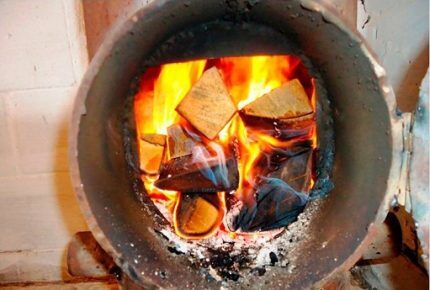
The operating principle of this stove allows you to obtain the maximum amount of heat when burning ordinary wood. Large quantities of fuel are loaded into the combustion chamber, and a moderate amount of oxygen is also supplied there. In such conditions, the wood does not burn immediately, but slowly smolders, releasing flammable gas.
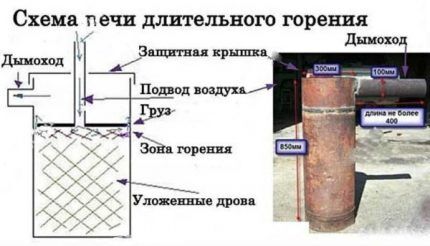
This gas burns in the upper section of the combustion chamber at a very high temperature, which ensures the high efficiency of this type of device.
The process of creating an interesting version of a long-burning stove is shown here:
You need to load fuel into a long-term combustion furnace no more than twice a day, so such devices are more suitable for constant heating of a garage or for use over a long period of time.
The easiest way to make a long-burning stove is from a metal barrel with thick walls. A container measuring about 200 liters is considered optimal for such purposes. On top you need to make a lid with a chimney and a hole to supply fresh air necessary for combustion.
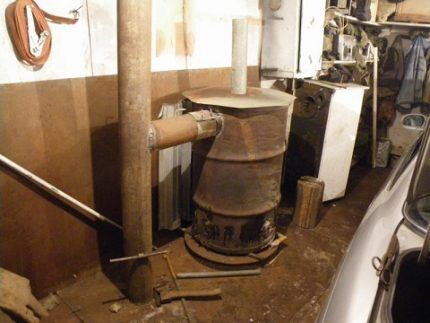
The cross-section of the chimney should be about 150 mm, and the air pipes should be 100 mm. An important element of this type of stove is the weight that presses down the smoldering wood. To make it, you will need a metal circle slightly narrower than the diameter of the barrel, as well as two pieces of channel that will act as a weighting agent.
A hole is also made in this element for air supply, to which a pipe with a cross-section of 100 mm is then welded. It should be slightly longer than the height of the stove body.
A loading hole for firewood with a door is made on the side, and a grate and a container for ash are placed at the bottom, and strong legs are welded.
Firewood burns almost completely in a long-burning stove, leaving a small amount of waste, so a large ash pit is not needed here. To start such a stove, you need to load firewood on top, press it with a weight, then cover the structure with a lid, threading an air pipe into the corresponding hole.
As smoldering progresses, the amount of firewood will decrease and the load will drop. To install such a stove, you also need a solid foundation and a safe environment.
Can make a buleryan stove - a worthy example of long-term combustion furnaces.
Heating from a stove is far from the only option for heating a garage. Alternative methods of providing heat to a car box are written in this article.
Conclusions and useful video on the topic
Video presentation of a stove-based autonomous heating system in a garage:
The options for homemade stoves are quite varied, and the designs of such devices are not particularly complex. You will need skills in working with metal, a welding machine and quite affordable materials. A properly manufactured stove operates efficiently and lasts a long time.
Looking for an effective way to heat your garage? Or do you have experience making and using a stove? Please leave comments on the article and ask questions on the topic.


Personally, I would not risk using a furnace for mining precisely because of its fire hazard. It seems to me that the best option would be to install a cast iron stove. It warms up quite quickly, while also releasing heat for a long time. In principle, it provides smoother and more uniform heating than a simple steel potbelly stove. Although the price for this option is slightly higher.
I'm planning to have a similar device in my garage. I thought about buying it before, but it became interesting to try to make something like this with my own hands. Of course, I have little experience in this. My garage is only 18 square meters, please tell me the best option for such an area. So that the heating is good. What is the best stove to build to heat the garage if I am in it for a couple or a little more hours a day?
For heating a garage of 18 square meters. There are several oven options to consider:
1. Make from 3 mm sheet metal and 57x3.5 mm tubes;
2. Make a stove from a gas cylinder.
The second option is a little simpler; in fact, you will have to upgrade the gas cylinder into a long-burning stove. For the first option, you will have to make everything from scratch.
Let me know which of these options interests you more, I will then describe what and how in more detail (materials, tools). In any case, you will need a welding inverter and a plasma cutter.
If you still buy a stove, then it is better to choose Buleryan. And if you experiment yourself, then build it like a potbelly stove. As for me, there is simply no safer option. Moreover, it has been tested by time, by fellow revolutionaries. It's not difficult to do. The main thing is that there is welding.And it can be easily started for testing. But, alas, you can’t do this with a buller.