Do-it-yourself miracle stove for a diesel garage: step-by-step construction instructions
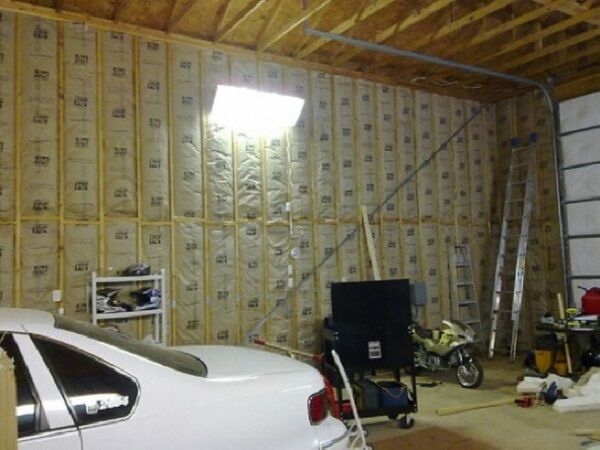
The need for heating in a garage rarely causes controversy: motorists understand perfectly well how important it is to take care of the condition of the car, and they themselves do not want to freeze during inspections and repairs of equipment.
The main issue that needs to be resolved is the selection of the appropriate type of heating. A good option is a miracle diesel stove - the unit is easy to assemble and economical to operate. And these are important criteria for organizing garage heating.
Before you decide to assemble a stove, you need to understand its structure and operating principle, don’t you agree? In the article, we outlined the identified points in detail, and also provided several options for assembling a home-made unit. Step-by-step instructions will help you build a stove and organize efficient heating of your garage.
The content of the article:
How should the heating be in the garage?
For many motorists, the garage is almost a second home. Here they delve into their hobby, take a break from the hustle and bustle and take care of the car. Therefore, first of all, you should think about the comfort of the person who spends hours indoors.
Heating is also necessary for the car, because... low temperatures negatively affect its technical condition and significantly reduce its service life.

To keep your garage dry, you should ensure good waterproofing and ensure normal operation. ventilation system. However, moisture still gets into the room on the wheels of the car. It evaporates and drops of water settle on surfaces.
If there is no heating, moisture accumulates, causing fungus, mold, and rust to appear. To prevent this from happening, heating is necessary.

Features of garage operation determine the requirements for heating systems:
- Efficiency. The oven must heat the air quickly and maintain the desired temperature for several hours.
- Easy to use. When coming to the garage, its owner should spend a minimum of time and effort heating the room.
- Ease of maintenance. The stove must be inspected, cleaned, and repaired in a timely manner, so its design must be simple and understandable, and its parts must be easily replaceable.
- Availability of energy source. At choosing a heating system Availability of fuel is of fundamental importance. A stove using diesel fuel, diesel fuel or waste oil is well suited for a garage.
- Safety. There is always some amount of flammable substances in the garage. Since these premises often serve as workshops and sheds, flammable materials will often be found here. Therefore, heating must comply with all fire safety standards.
- Cheapness. The costs of servicing a car and arranging a garage are already high, so saving on heating without compromising its quality is a pressing issue.
When choosing a suitable heating device, you should set priorities, because... the ideal is unattainable. The easiest to use are electric heaters. This energy source is available in almost any location.
However, the price of heating with electricity is too high, so it is worth considering other options.
The Miracle Oven is a great option. Such heating is cheap, and fuel (diesel fuel, kerosene or diesel fuel) is available and affordable.
There is a huge advantage in assembling a diesel stove with your own hands: you choose the design yourself and make a model that is ideal for specific operating conditions. You do not have to adapt the heating device or adapt to the peculiarities of its operation.
How the miracle stove works and works
A factory-made or home-made stove for a garage for mining or diesel fuel is multifunctional. It is suitable as a main, additional or alternative source of heat if a heating system is already installed in the room.
If necessary, the device can also be used as a hob: food is quickly heated on the stove and the kettle boils.

Miracle stoves operate not only on diesel fuel, but also on other types of liquid fuel, with the best option being kerosene. However, in most cases, motorists use diesel fuel, because... it's inexpensive. The stove power is 1.8-5 W - the figure depends on the design and build quality of the model.

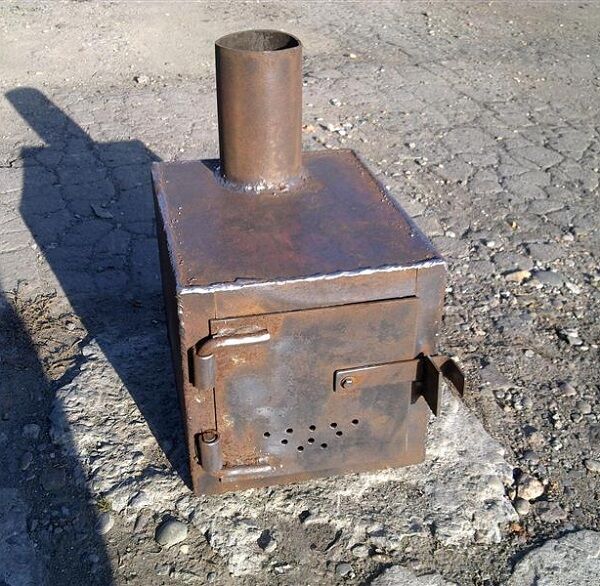
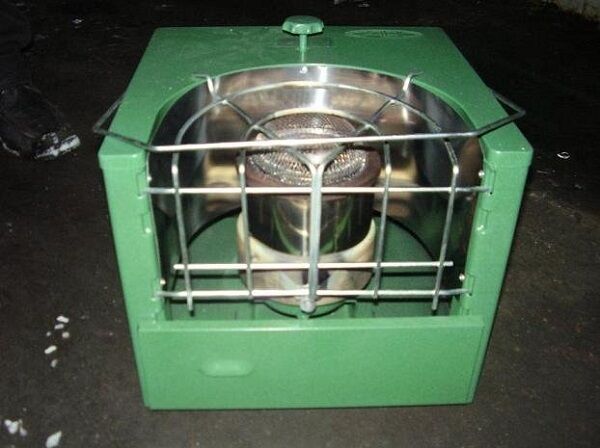
The miracle stove consists of a fuel tank (usually removable) with a valve, a replaceable block with a wick, an adjustment screw, a reflector and a burner. All these components are placed in a common housing, which can be made from a barrel, sheets of heat-resistant steel or a used gas cylinder.

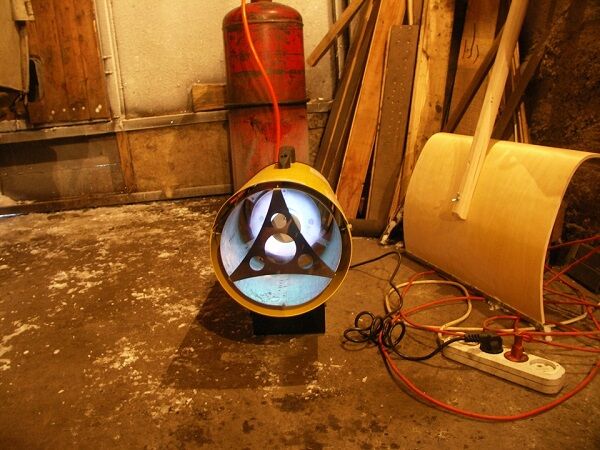
The burner is placed in the center of the structure. It receives fuel from a tank located at the rear wall of the housing. To achieve the desired temperature, use the adjusting screw. An important detail is the reflector. It provides quick and high-quality heating of the room.

When choosing a design, it is better to choose a compact model weighing 10-20 kg. Such a stove will be easy to rearrange, carry and transport without outside help.
Assembling a homemade structure
If you wish, you can find a suitable model in a store or buy it online, but if you have a few hours of time, a desire to save money and get a useful item from old unnecessary parts, then you should make a stove yourself. Let's look at popular designs.
Option 1: stove from an old gas cylinder
If you have a 50-liter used gas cylinder, then half of the structure is already ready. The main thing is that the thickness of its walls does not exceed 1.5 mm. Now we need to find chimney pipe. A piece with a diameter of 10 cm or more is suitable.Its length must be at least 4 m. The desired metal wall thickness is 2 mm.
The fuel tank can be made from a tank. The optimal volume is no more than 15 liters and no less than 8. The remaining parts can be purchased in the store. You will need 20 cm steel corners (future legs) and a copper burner. Tools include a grinder, a drill, a welding machine, as well as a tape measure and a level.

The gas cylinder is freed from condensate and rinsed from the odorant. Now you need to cut off the top part with the valve. To make it more convenient, you can fill the container with water and bury it in the ground. After the cut, water will appear. You should wait until it drains completely and then finish the job.
The lower part of the cylinder is used as a chamber (stable legs made of steel corners are welded to it), and the upper part will serve as the lid of the structure. To regulate the fuel supply, a special valve is installed.

After assembling and installing the stove, you will need to install a chimney. It must be strictly vertical. This point must be taken into account when choosing a place to install the stove: it should be placed only where the chimney pipe can be mounted without bends or slopes.

If most models of homemade stoves can use almost any liquid fuel, then this design should be handled with care. It can only operate on diesel fuel or purified waste oil without water or alcohol. Gasoline and kerosene cannot be used.
Option 2: Sheet steel body
Instead of a gas cylinder, you can use heat-resistant steel with a thickness of 4 and 6 mm to make the furnace body. The only caveat: you will have to buy or rent a sheet bending machine. Other materials and tools are available. Some can be found at home, and the missing parts can be purchased.
You will need:
- steel corners for making legs;
- burner pipe;
- 4-meter chimney pipe with a diameter of 100 mm;
- measuring instruments;
- Bulgarian;
- welding machine;
- hammer;
- level.
The finished stove will be compact (70*50*35 cm) and relatively light (about 27 kg). The design will be stable, efficient, and easy to operate. If desired, it can be connected to water heating.

The bottom of the firebox and the tank lid are made from a sheet of thicker steel (6 mm), and a steel sheet 4 mm thick will be used to make the tank itself. The parts are cut out according to the diagram, welded, and the seams are processed with a file.
To make a diesel fuel tank pipe, you need to cut a strip of metal 4 mm thick and 115 mm wide, bend it into a ring and weld it to the tank. The pipe will have a diameter of approximately 34-34.5 cm. You will need to make a lid for it.It is cut out of a sheet 6 mm thick and welded to the pipe. After this, the legs are made.
The fuel filling tank is made of 6 mm steel. A round piece with a diameter of 35.2 cm and a strip are cut out of it. The width of such a strip should be 6 mm. A hole for the chimney is prepared in the center of the circle (the diameter depends on the selected pipe, the optimal one is 10 mm).
Another hole is needed to fill the oil. It should be smaller (diameter 5-6 cm) and located at a distance of 4 cm from the chimney opening.

For the lower part of the container, a circle of 35.2 cm is cut out of thicker steel. A round hole is prepared in it for a pipe with a diameter of 10 cm. The location is calculated so that there is 11 cm between the center of the part itself and the center of the hole.
A rectangular partition 7*33 cm is cut out of thick steel and welded onto a circle, moving it closer to the pipe. The exhaust pipe itself is made from a 13-centimeter section of chimney pipe.
To make the burner, 48 9mm holes are drilled in the pipe, spaced 6cm apart. You should get 6 rows, each with 8 holes.
The burner is installed tightly and evenly (but not welded) into the fuel tank lid, correcting the structure with a file. A 16-centimeter pipe is inserted into the tank for filling fuel, and the upper and lower parts of the stove are connected without welding.
A ring with a diameter of 35.4 cm is used for sealing. The structure is completely assembled and a sliding plate is installed.
Option 3: drip-type design
You will need a regular rubber heating pad with a hose (volume 2 l). A copper pipe 1-1.5 m long is connected to the rubber hose - it will need to be bent in the shape of the letter “L”.
After this, the rubber hose should be bent in half and secured with a clamp and screw. The heating pad itself is hung on the wall and fuel is poured into it, and the intensity of its supply is adjusted with a screw.

Wicks are made from rags: they are formed using flexible metal wire, wrapped in rags and soaked in diesel fuel. The ideal option is to find an old mattress and chop it into fuel briquettes 20*10*4 cm.
Soaked in diesel fuel, they will burn perfectly. If the stove is large, then you will need to place a brick under the wicks.

The stove itself can be anything. You can make it from part of an old barrel. The main thing is to attach the door and pipe to it. Don't worry too much about the door's seal. If air flows through the cracks, you won’t have to make a vent.

For fuel, a hole is made into which a copper tube coming from the heating pad is inserted. If this hole is drilled in the side of the barrel, the stove will not only heat the garage, but also serve as a cooking surface.
Rules for safe operation of the oven
In order not to cause a fire, you need to choose a location for installing the stove.
The following rules should be followed:
- The structure is placed where there are no drafts and away from light flammable objects that could be accidentally thrown into the oven by a gust of wind.
- There should be free space around the stove - 0.5 m on all sides.
- Ideally, the structure should be placed on a sheet of asbestos, metal or other non-combustible material.
- Fuel, wicks, etc. should be stored as far as possible from sources of fire.
A fire extinguisher is a must in a garage, and skimping on one is life-threatening. It is worth buying a reliable, non-volatile automatic model.
The volume of a fire extinguisher for a garage is selected with a reserve so that there is one and a half times more gas than is needed to extinguish a fire in a room of such cubic capacity.
On our website there is a selection of articles describing technologies for assembling various stoves for the garage; we recommend that you read:
- Do-it-yourself oven for the garage: a step-by-step design guide
- How to make a Buleryan oven with your own hands: step-by-step instructions for making
- Do-it-yourself potbelly stove from a gas cylinder: diagrams, drawings + step-by-step guide
Conclusions and useful video on the topic
We offer useful videos that will help you better understand the nuances of making a liquid fuel stove.
The operating principle of the miracle diesel stove:
Correct ignition and improvement options for an industrial diesel stove:
Video instructions for making a drip-type oven with your own hands:
Video review of the operation of a handicraft stove:
The scope of application of the miracle diesel stove is not limited only to the garage.It is perfect for heating a greenhouse, country house and any other room where people do not live permanently, but stay for several hours at a time.
Liquid fuel consumption is approximately 300 g/hour, and it is difficult to imagine a more economical model. This is a good solution for those who try to manage money rationally.
Do you have experience making a diesel stove? Or do you use such a unit to heat your garage? Please share information with our readers. Leave comments, attach photos of your homemade products and ask questions in the form below.


A great way to heat your garage. I did this myself, and now I can work on the car normally even in the harshest weather. There is also no dampness coming from the garage into the house; I just have a garage attached to the house. Quite interesting information. It’s also nice that this stove is made for pennies and with your own hands. Of course, I am not a master, but building this mechanism was not a difficult task for me.
I also recently thought about assembling a stove for the garage. And in this case, it’s not even a matter of saving, but the process itself. I'm just very interested in trying to make a stove with my own hands. I want to make the assembly from steel sheets, since I have enough of this stuff. By the way, can anyone tell me what fuel is best to use for the firebox in a small room?
I agree, I have a similar motivation - to try to assemble the stove myself. As for fuel, it is most effective to heat with kerosene, while diesel fuel is more reasonable in terms of price/quality.
In a small room, it will be important to use a working stove for heating. To create such a small stove you will need:
- two pipes;
— 13 sheets of metal of the required size;
- some metal for the stove legs;
- support.
The process of creating such a small stove for testing is not complicated, the main thing here is to cut the sheet of metal evenly into plates of the required size (you will need a plasma cutter) and weld them evenly (you will need a welding inverter). For clarity, I am attaching a photo of the process of creating a furnace during testing; it took a day to do everything.