Filling a refrigerator with freon at home: work algorithm
Refrigerant leaks are a common problem in refrigeration equipment.Elimination of this malfunction is usually entrusted to specialists who specialize in restoring the functionality of refrigeration equipment.
But refilling a refrigerator with freon is quite accessible to home craftsmen who are ready to carefully study this process and apply knowledge in practice.
The content of the article:
The role of freon in the operation of a refrigerator
If compressor While some consider it to be the heart of the refrigerator, the refrigerant can be considered its blood. Without a sufficient amount of this substance, no refrigeration equipment will be able to operate. The colorless and odorless gas is necessary to transport thermal energy.
Freon easily passes from liquid to gaseous state at relatively low temperatures. The circuit through which it circulates consists of two parts: internal and external.
The liquid refrigerant enters the internal circuit of the refrigerator and absorbs particles of thermal energy dissipated in the air, turning into gas. It then moves to the external circuit, passes through the compressor and evaporator, transfers heat to the surrounding air and returns to liquid form.
The cycle repeats again and again, as a result, the air in the refrigerator chamber becomes colder, and the grille on the back wall constantly releases heat.
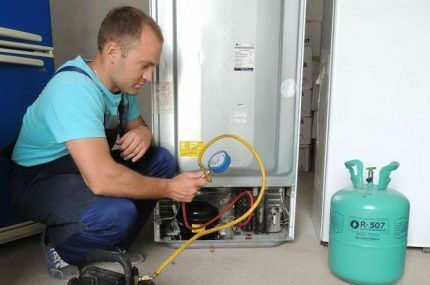
These properties of freon are also used in other devices, such as air conditioners, heat pumps, etc. Gas circulates through a hermetically sealed circuit. It does not pose a great danger to human health even if the substance completely leaks from an ordinary household refrigerator.
In total, 16 types of these saturated fluorinated hydrocarbons are used in industry. A specific brand of freon is suitable for refilling a specific refrigerator model; it is usually indicated directly on the compressor housing.
Causes of refrigerant leakage
In short, the cause of a freon leak is a leak in the refrigeration circuit. But the reasons for this situation can be very different. Accidental mechanical impact on the refrigeration circuit elements or the compressor can cause such a malfunction.
A compressor breakdown almost inevitably necessitates refilling with freon. Even if the refrigerant remains in the circuit, it will still have to be refilled when replacing a faulty element. Poor quality of the capillaries through which freon moves, or their wear, also often causes depressurization of the system.
If the connections between the individual elements of the refrigeration circuit are installed incorrectly, over time they may become loose and the refrigerant will leak out through the cracks that appear.
If the capillary tubes are contaminated due to freezing of moisture trapped inside the circuit, it is not difficult to clean them. But sometimes such blockage occurs as a result of the accumulation of contaminants from particles of burnt engine oil.The filter drier does not catch these substances; they gradually accumulate inside the narrow tubes and form an obstacle to the free circulation of the refrigerant.
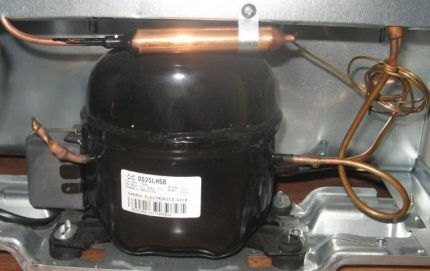
Although a freon leak is not observed in such a situation, in order to normalize the operation of the system, you will have to open the refrigeration circuit.
After cleaning the capillaries, you will have to restore its tightness, and then introduce a new refrigerant into the system to replace the lost one.
Before starting refueling work, the cause of the leak should be identified and eliminated. To do this, you need to inspect the circuit to understand where exactly this is happening.
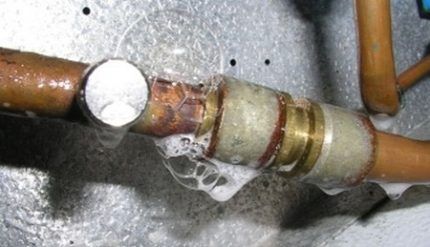
If the inspection does not give results, you can use a soap solution. In this case, air is supplied to the system under low pressure.
A soap solution is applied to the surface of the tubes, joints, etc. It will bubble where there are leaks. It is impractical and unsafe to process the entire contour in this way.
It will be easier to first check the weakest and most suspicious areas: joints, as well as areas where there are traces of contamination with technical oils.
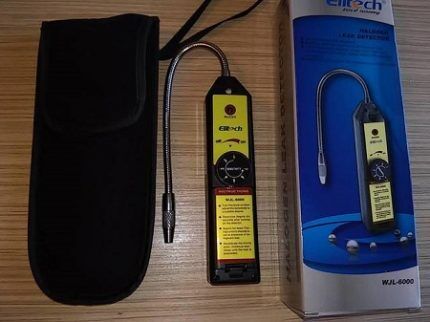
If the soap solution does not produce results, you should use a leak detector or invite an experienced technician to determine the location of the refrigerant leak.This is not a universal tool; a specific device is usually configured to respond only to a certain brand of refrigerant.
It can be used to identify leaks not only before eliminating them, but also after completing the filling of the circuit, in order to ensure that the quality of the operations performed is sufficiently high.
If you don't do this, you may miss some defect. Poor quality repairs will appear in about two weeks, and all work will have to be done again.
In addition to eliminating leaks, it doesn’t hurt to also check the functioning of other elements of the system. An insufficient amount of freon often leads to increased wear of individual parts. If the reasons that cause leakage are not eliminated, very soon you will have to start repairs again, pump in refrigerant, etc.
The procedure for performing work to replace freon
Before you begin replacing the refrigerant, you need to make sure that you have all the necessary tools and materials at hand to carry out the work.
Step #1 - diagnose the problem yourself
Refrigerants do not burn, but their absence or insufficient quantities in the system can cause premature wear and damage to other parts.
In addition, a violation of the specified heat exchange will lead to the fact that the refrigerator will become too warm, the food will spoil, and bad smell and so on. Therefore, it is important to learn how to quickly identify signs of a leak and eliminate them.
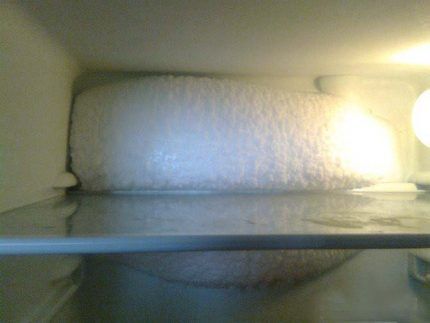
Here are the points to pay close attention to:
- the temperature inside the chamber is too high;
- interruptions in engine operation have been noticeably reduced;
- the compressor runs continuously;
- Condensation appears inside the device;
- the refrigerator emits an unpleasant odor that is not related to the presence of spoiled food;
- the evaporator becomes covered with snow or ice, etc.
Sometimes a leak can be detected immediately. If you do not carefully remove ice from the evaporator, the circuit tube may be accidentally pierced.
As a result, gas will come out of the narrow hole with a characteristic hissing sound. If you pay attention to this point, you can quickly fix the problem.
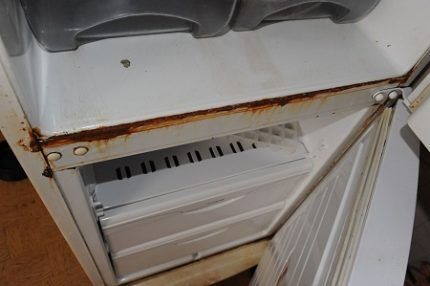
Step #2 - preparatory work before replacement
Before starting repair work, of course, the refrigerator should be disconnected from the power supply. All heating devices and open flame sources should be turned off or moved away from the place where freon is being charged.
Electrical equipment that will be used during repairs must be grounded in accordance with the operating instructions.
When carrying out soldering, you should also take care of fire safety. Although freon is not dangerous for people, it is still better to ventilate the room during the work, as well as after completion of the work.

Before starting repairs, it doesn’t hurt to find and re-read the operating instructions for the refrigerator to take into account the features of a particular model.When filling the refrigerator with freon, you should be guided by the information indicated on the tag, as well as the marks on the filling cylinder.
Step #3 - remove remaining refrigerant
Before pumping gas into the system, you need to remove any refrigerant remaining inside the system. To do this, you need to find a filter drier; it is clamped using a needle grip.
After this, a hole is made in the filter on a section of copper. An element damaged in this way will have to be replaced with a new one in the future.
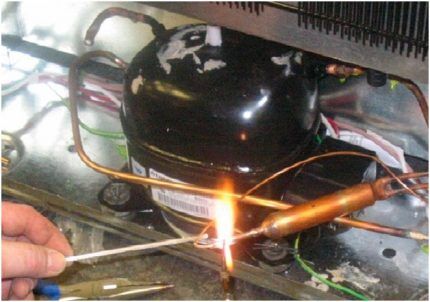
It is better to prepare the place for soldering the valve in advance. It needs to be removed from the fitting and the excess length cut off. Then it is recommended to immediately solder the valve to the compressor.
After the remaining refrigerant has left the system, you will need to purge all pipes with nitrogen. This will allow any moisture that may have entered there to be removed from the circuit.
To pump gas into the working circuit of the refrigerator, a Schrader valve is installed, which prevents the outflow of freon in the opposite direction.
Cylinders in which the gas pressure exceeds 6 atmospheres should not be used for such work, as this can damage the system. Internal pressure information is usually indicated on the container.
If a cylinder with suitable characteristics is not available, you need to supply gas to the system using a reduction reducer.
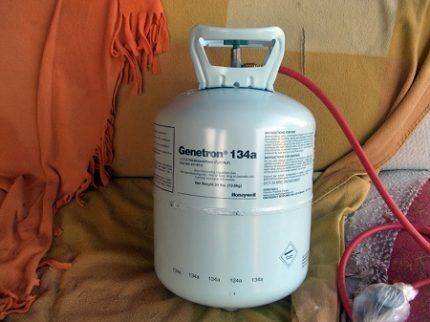
The system needs to be purged for approximately 10-15 minutes.After this, the valve on the needle gripper is closed and the filter is cut off next to the capillary tube.
Then you need to purge the circuit again. At the end of the purge, you need to install a new drying filter in place of the used one.
This should be done within 15 minutes after the end of the last purge, since the refrigeration circuit cannot be left open for longer.
Professional craftsmen use a whole set of special tools to perform this type of work: leak detector, tester, vacuum pump, wrenches, thermometer, pliers, pinch pliers, etc.
To perform soldering, you should stock up on protective screens; you will also definitely need a Schrader valve and a new filter drier.
To perform a one-time refill of the refrigerator, it does not make sense to buy a separate set of equipment. It will be cheaper and easier to rent everything you need.
Step #4 - pump in freon
To perform this operation, you will need instruments that will allow you to control the pressure in the system. Appliance repair technicians use a filling station consisting of two pressure gauges with shut-off valves and three hoses.
Pressure gauges vary in color: red and blue. The first one measures the discharge pressure, while the blue one measures the suction pressure.
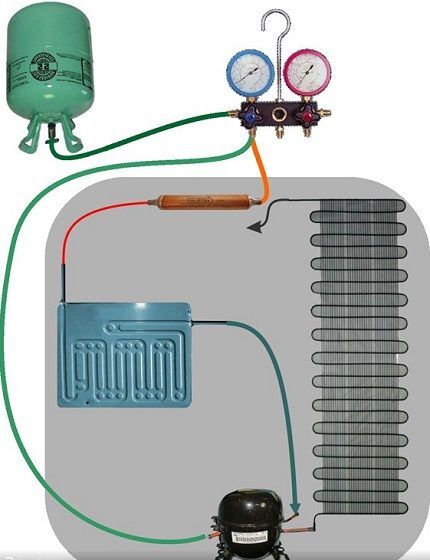
When working with a regular household refrigerator, only the readings of the blue pressure gauge are usually taken into account.
The hoses to which the pressure gauges are attached are also color coded differently: red and blue, which are connected to pressure gauges of the same color, and yellow, located in the center.
Before starting work, you need to make sure that the valves on the hoses with pressure gauges are completely closed. After this, the yellow hose is connected to the gas cylinder.
The blue hose is connected to the pipe through which refrigerant will be supplied to the circuit. A special fitting is used for this.
The red hose is mounted at the other end of the system. It requires a Schrader valve to be attached.
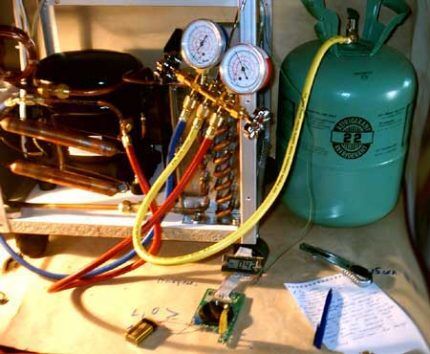
When all the necessary elements are connected, you need to open the shut-off valves on the blue and red hoses. After this, open the valve on the refrigerant cylinder and begin filling the system, observing the readings of the pressure gauges.
When the pressure reaches approximately 0.5 atmospheres, the pressure gauge valves should be closed.
Now apply power to the compressor for about 30 seconds. Instead of a cylinder, a vacuum pump is connected to the yellow hose. It is turned on for about 10 minutes.
Evacuation allows you to remove air trapped in the system and improve the quality of filling. Now you need to reconnect the yellow hose to the freon cylinder.
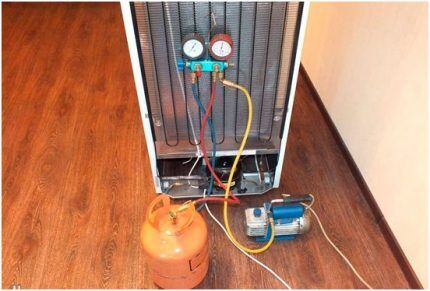
At the same time, make a small gap between the manifold and the hose so that the incoming refrigerant displaces the air from the hose, and apply a small amount of gas to the hose.
Then the yellow hose, from which the air has been bled, is securely fixed to the manifold. You need to open the blue valve again and continue filling the circuit with freon.
At this stage, turn on the compressor again and observe the pressure gauges to ensure that the system is operating normally. If the pressure remains stable, the pipes are bent and carefully sealed.
Do not pinch the service pipe or seal it until the system is tested. At this stage, the needle of the blue pressure gauge should constantly be in the region of zero.
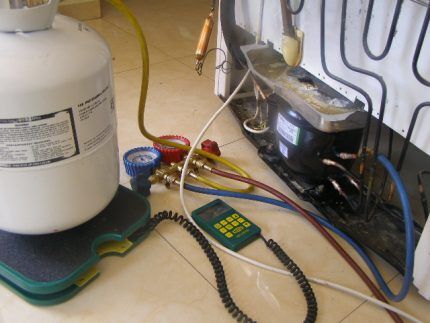
Some craftsmen fill the circuit with freon using only one pressure gauge. In this case, the amount of refrigerant that has been transferred into the circuit is determined by weighing the freon cylinder on a household scale.
Otherwise, the downloading process is practically no different from the method described above.
Conclusions and useful video on the topic
This shows the process of fixing the leak and pumping freon into the refrigerator using a scale:
The general procedure for performing this type of work can be seen in the video:
Filling a refrigerator with freon is relatively easy if you have the necessary equipment and the appropriate skills. However, it is necessary to take into account a number of nuances: comply with safety requirements, identify and eliminate all faults that caused a refrigerant leak, perform final soldering efficiently, etc.
It is better for inexperienced craftsmen to first observe the work of specialists in order to learn how to perform this operation on their own.
If you have experience in refilling refrigerators with freon yourself, please share it with our readers. Tell us how you managed to diagnose the problem and what you did to solve it. Write your comments, share your experience, ask questions - the contact block is located under the article.


Our refrigerator is old, manufactured in 2004. Every year we have to fill it with freon, especially if it sits defrosted for a day, then it is very difficult to start it. It seems that everything is described simply, and my hands grow from where they need to, but I myself would not dare to fill the refrigerator with freon. And yet, not everyone has a gas station and gas cylinders. It’s easier to call a person who has done this not for the first time.
If your hands grow from the right place, as you write, then there can be no problems with filling the refrigerator with freon. If such a refill is needed at all, it means there is a micro-leak in the refrigerator and the refrigerant will have to be refilled almost every six months. Will you call a specialist every time and pay?
Apparently, the technicians “correctly” explained to Sergei that the refrigerator was old, so now it would have to be refilled with freon every year. When in reality the problem is that there is a leak somewhere! There are Soviet refrigerators that have freon in it from the factory for 30-50 years and don’t need to be refilled.
By the way, the author of the text is lucky that now there are no harmful impurities in the gas for refrigerators, as there was before. Otherwise, gas leaks every year would greatly affect the health of the whole family!
Here are the main reasons why there may be freon leaks in the refrigerator:
— Locking joints, there may be natural deformations or manufacturing defects;
— The “crying” type evaporator, an element made of aluminum, may suffer from corrosion;
— “Warm” steel circuit, the material is susceptible to corrosion, and the likelihood of leakage increases over the years.
My parents' old refrigerator didn't really freeze. They called a technician who diagnosed a micro-leak. He soldered the shredder valve, refilled it and advised in the future to simply refill the refrigerator with freon from time to time. This is not very difficult to do - about once every six months, with the refrigerator turned on, you connect the hose to the cylinder and valve, and release the gas for 10 seconds. Then we wait half an hour and see if the refrigerator grill heats up. If after half an hour or an hour it has not warmed up, then repeat the procedure.
This is all good, of course, when the freon leak occurs in a visible place. But when this happened in the foamed area of the refrigerator, that’s when hemorrhoids begin. As far as I know, not every master undertakes refilling with freon, let alone an ordinary person. IMHO it is better to call a knowledgeable person at the gas station. In the end, it is not that expensive - in the regions from 3 to 7 thousand, as far as I know. In Moscow it’s worse, but it’s also not critical.
Freon gas. I called a repairman, he didn’t know what kind of refrigerator or what kind of freon was needed. He changed the filter and simply topped it up, but I don’t remember exactly the freon, something like 404. And the refrigerator was made in the USSR, 10 years have already passed, everything works.
If there is a leak, then it must be determined by pressure testing the evaporator (pump 15 kg of air into the evaporator and monitor it for 5-6 hours).So we find the leak and fix it by soldering.
Some people charge old refrigerators by weight, I think this is wrong, because the cooling capacity of the old compressor is much less than the new one. Therefore, you need to fill a little more.
If there is a suspicion of a leak, under no circumstances should you try to refill or evacuate the system at all. Otherwise, there are cases where dissolved foam gets sucked into the tubes, everything gets clogged, the valves and compressor die, and then it takes a long time and is a pain to wash. They pressurize first, then eliminate the cause of depressurization.