How to make a chimney in a private house with your own hands: design options and their implementation
A chimney is an essential part of the heating system of a private home.It ensures the proper functioning of the stove or boiler and organizes the removal of harmful combustion products outside the home.
We will try to figure out how to install a chimney with our own hands so that heating communications are safe for both people and the home.
The content of the article:
Requirements for the chimney device
The installation of heating devices is subject to the requirements set out in the regulatory documentation.
Installation of devices is regulated by the provisions SNiP 2.04.05–91 And DBN V.2.5-20-2001. Also, before drawing up a project, it is advisable to study materials about heating systems (SNiP 41-01-2003), about heat generation devices (NPB 252–98), on technical conditions for the operation of thermal devices (GOST 9817–95), on the rules and regulations for the operation of smoke ducts (VDPO).

Some of the requirements are addressed specifically to the installation of chimneys. The design of the structure can be anything, but the material must be non-flammable.
The materials used for the construction of chimneys can be:
- steel;
- ceramics;
- brick.
Without exception, all structures are prefabricated, and the installation itself is fragmentary, since the chimney passes through several rooms (for example, a room and an attic).
In order for a structure to meet fire safety requirements, its parameters must be correctly calculated, and all component parts must be sized accordingly. When installing factory equipment, you must follow all the recommendations set out in the instructions, including the assembly procedure and methods for installing parts.
The documentation contains certain provisions that also need to be taken into account, for example:
- the length of the chimney can be any, but not less than 5 m (the height of the ventilation ducts is not less);
- the cross-section of the pipe must correspond to or exceed the inlet hole in the generator;
- each heat generator requires a separate chimney;
- the speed of flowing air inside the pipe is from 15 m/s to 20 m/s;
- pipe thickness determined by the material of manufacture (the norm for steel is at least 0.5 mm);
- for regular inspection and cleaning activities, chimneys are equipped with pockets (niches) 0.25 m deep;
- the maximum number of chimney turns is 3;
- the radius of curvature must exceed the diameter of the channel;
- the height of the pipe above the roof is regulated by the roof structure: on a flat one – 0.5 m; 0.5 higher than the roof if it is located at a distance of 1.5 m (or less) from the ridge; equal to or greater than the ridge axis if located at a distance of 1.5-3 m.
The order of construction of the structure has been established - always from the bottom up, that is, from the heat generator (boiler, furnace) through the floors to the roof. In prefabricated structures, each subsequent pipe part is inserted into the previous one.
The operating temperature of sealants used to fix parts must be at least 1000º. The connections are equipped with clamps on the outside; fastening material should not get inside the chimney.

The regulatory documentation defines the places where chimneys are allowed to be installed.The wall material must be non-flammable, but if this condition is not met (for example, in a building with wooden walls), then during installation, for protection purposes, cap or crown pipes should be used.
Instructions for laying a brick chimney
The most ancient chimneys known to mankind were made of stone, and then of brick, along with the first stoves. Natural material is still used to this day for the construction of heating systems in private homes. Let's look at the main stages of constructing a brick chimney.
Design features of a brick pipe
There are two options for connecting a brick pipe. The first, lighter one, is installed directly on the stove, the second is built nearby and connected with an adapter. The fact is that the weight of a brick chimney with a height of 5 m or more is quite large, and not every heat generator can withstand it.
To build one pipe, from 500 to 800 bricks are required (depending on the height of the ceilings and roof), each of them weighs 3.8 kg.
In any case, a chimney is not just a hollow structure, but a complex structure consisting of several functional parts.

When the chimney passes through the ceiling, a fluff is created, which is a thickening. The next thickening of a similar configuration is constructed during the transition pipes through the roof. It's called "otter».
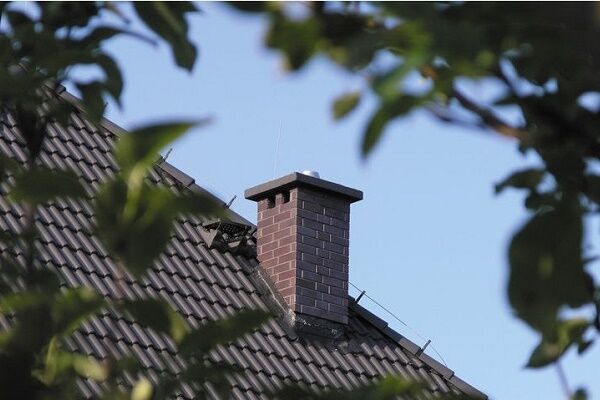
The part of the pipe from the fluff to the otter is the outer chimney. Rising above the roof neck, ending with a head (an alternative to a deflector).
The main safety condition is the distance from the internal channel through which hot smoke and gases pass to the surface of the walls and ceiling elements. It is equal to 0.25 m - this is exactly the length of one building element, a red solid brick.
The second condition concerns the location of the chimney. It must be erected strictly vertically, the maximum possible error is 3 degrees. And the third condition is the ideal tightness of the masonry, in which there should be no through holes or cracks.
The dimensions of the chimney depend on the power of the heating device. Usually they choose one of the traditional masonry: with the smallest section - “four” (12.5 cm x 12.5 cm), rectangular - “five” (25.0 cm x 12.5 cm) or a large one - “six” (25 cm x 25 cm).
The latter option is preferable for Russian stoves, rectangular - for fireplaces. For low-power cookers, the first solution is suitable.
Selection of material and preparation of solution
The stove chimney is equipped with brick oven. If another unit is installed, the pipe is built on after its installation. For construction you will need brick and mortar, as well as tools: a trowel, a plumb line and a special hammer for tapping.
The bricks are pre-soaked. To install the fluff and otter, you will need pieces of bricks measuring ½, 1/4, 1/8, ¾.

Regular cement mortar is not suitable for masonry; a mixture of clay and sand is required.This is justified by the characteristics of clay, which has a coefficient of linear expansion close to the parameters of brick. Depending on the type of clay (lean or oily), its ratio to sand may vary: 1:3 or 1:4.
The clay is pre-prepared - soaked in water and kept for about 3 days. Before use, the material must have a consistency reminiscent of liquid sour cream and be free of foreign inclusions. Special requirements apply to sand. The best option is rough, with grains of 0.9-1.0 mm.
Clay and sand are mixed in small portions as the masonry progresses. Sometimes you need to add water. The quality of the solution can be easily determined by how it contacts the trowel: the mass should leave marks on the surface, but not flow off it or stick in large pieces. If you have problems preparing the mixture yourself, you can buy a ready-made one.
The order of laying the main parts
If the boiler is installed or the stove is finished, you can begin to build a brick chimney. The procedure is traditional: applying the mortar, then installing the brick, adjusting it relative to adjacent parts with your hands and a small hammer.
The vertical position is checked after laying each row using a plumb line. The wall width is 12.5 cm. The straight pipe element is finished 4 rows before the fluff - expansion in the ceiling.

It is necessary to eliminate the pressure of the ceiling structure on the masonry, so a gap of 2-3 cm wide is left between the ceiling and the fluff.It is used for installation of insulating material, for example, mineral wool slabs.
A straight section of pipe runs through the attic again, then an otter is made. Its bottom row must be laid out when the outer edge of the chimney has passed through the roof. At this stage, cement is often used to prepare the solution, which is stronger and more wear-resistant than clay.
The otter consists of 6 rows, the indentation of each next one is 1/8 of the whole brick. The holes around the pipe are insulated and covered with steel roofing sheets.
The next stage is again straight - the neck, which is crowned by the head.

Required for chimney deflectorso that clouds of smoke do not return back into the chimney. Along the perimeter of the head, fastenings for a cap are installed - protection from precipitation. Caps are often used as a decorative element, so they are given an interesting and beautiful shape.
Construction of a ceramic chimney
Prefabricated ceramic chimneys have become popular due to their strength, safe composition, environmental friendliness, and ease of installation. They borrowed the best technical characteristics from steel and brick models. The only negative is the high cost of the kits. Let's look at how a ceramic chimney is installed in a private house.
Prefabricated design
Unlike brick chimneys, ceramic ones are assembled from ready-made elements, gluing them together with a special solution. It is not possible to make ceramic parts yourself; ready-made kits are purchased for construction.
Manufacturers present standard kits from which you can assemble chimney for fireplace, oven or boiler.

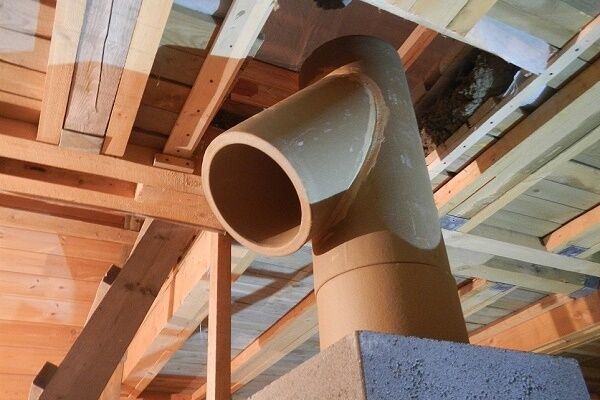
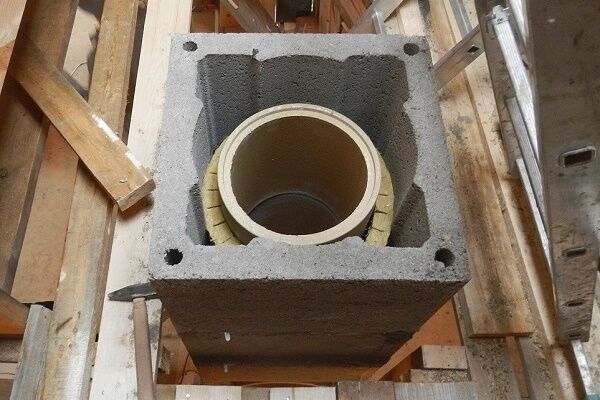
In addition to ceramic pipes, the kit includes the following parts:
- base element with condensate drain;
- connection part with a pipe (angle 90º or 45º);
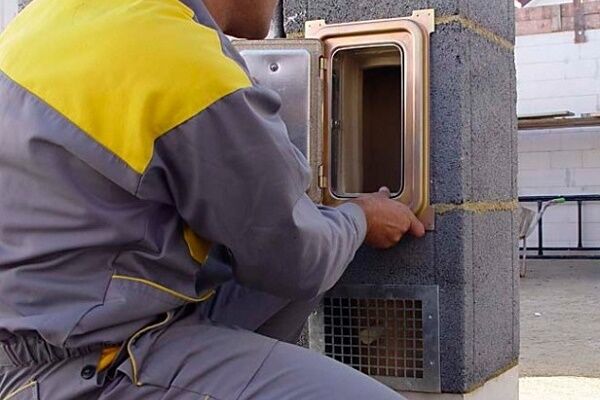
- inspection chamber with door;
- lightweight blocks for external framing;
- set for external decoration (on the roof);
- non-flammable insulating material for installation;
- paste glue.
Additionally, fasteners (brackets) and non-flammable material for cladding are required: plaster, natural stone, ceramic or clinker tiles.
Assembly and installation rules
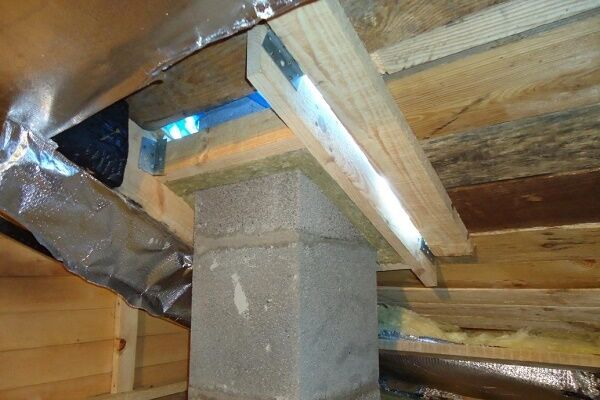
According to the standards for the installation and operation of a ceramic chimney, it should be located no further than 2 m from the heat generator (the closer, the better), as far as possible from walls and ceilings made of flammable materials, and should not cross load-bearing elements.
During installation, you should adhere to these rules:
- a prerequisite is the construction of a foundation coated with a fire retardant;
- installation begins from the bottom part - the base, then sequentially continues towards the roof;
- the parts are glued together with a special glue, which is included in the kit;
- the diameter of the pipe must be larger than the outlet pipe of the heat generator;
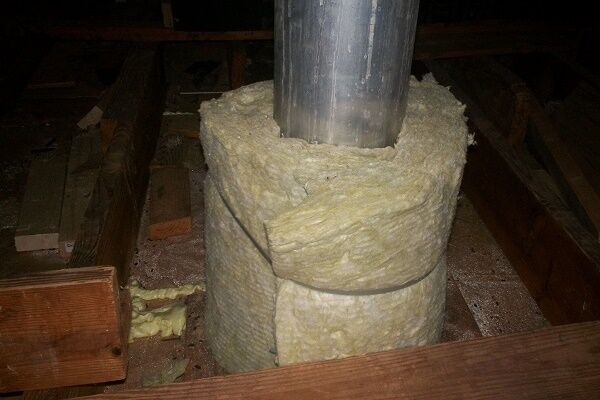
- Mineral wool and plaster are used for thermal insulation;
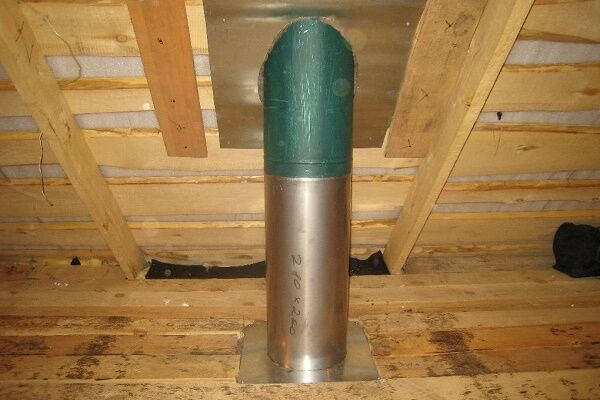
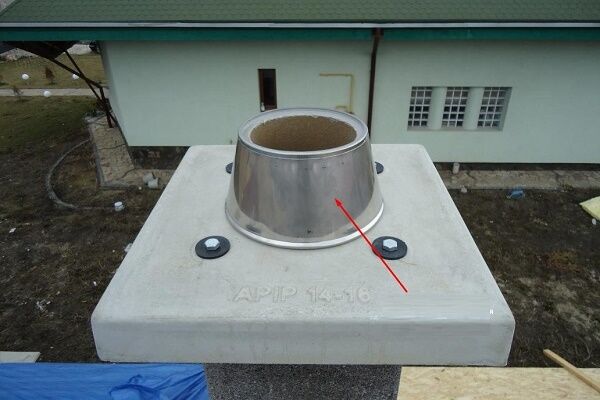
- the junction of the pipe and the roof is protected with a metal apron;
- If the roof is covered with flammable material, it is necessary to equip a spark arrestor.
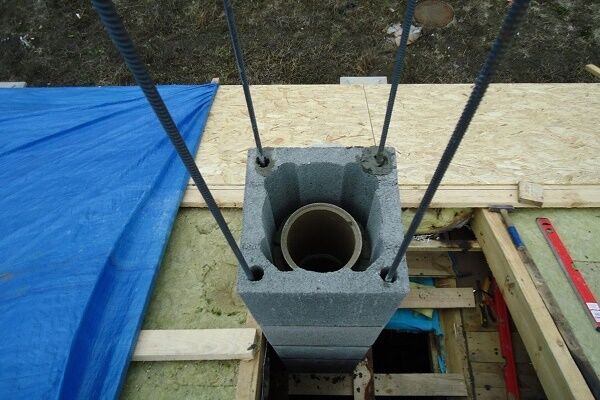
If the chimney duct is installed without fasteners for more than 3.9 m, it must be reinforced with steel rods. Especially for this purpose, holes are provided in the pipe parts in the corners.

The upper part of the head is equipped with an umbrella to protect from rain, debris and strong wind.
The nuances of installing and connecting pipes
The elements from which the chimney is assembled are made from ceramics with the addition of fireclay - this composition tolerates high temperatures, and parts made from it have a long service life. They cannot be used as independent units; external protection is required.
The lower part of the chimney - the base - is equipped with a hole for draining condensate, which is formed during the removal of combustion products. The accumulated liquid moves into the sewer, which is connected in advance.
It should be remembered that moisture from the chimney is detrimental to septic tank bacteria, so it is better to prepare a separate container to collect the liquid.

The elements are installed one on top of the other according to the instructions, without changing the order established by the manufacturer. The correspondence between the dimensions of the chimney and the parameters of the house must be checked in advance.
How to prepare and apply glue?
To ensure that the chimney parts are hermetically connected, special acid-resistant glue is used.This is a thick mixture that is prepared by hand from dry powder and water in a 7:1 ratio, preferably at room temperature.
At first the solution looks unusually dry, but after about 7-8 minutes it takes on the desired pasty appearance.

One of the nuances of applying glue is pre-wetting the ceramic surface. It is impossible to save the adhesive mass - only hermetically filled seams guarantee the full functioning of the chimney.
Remains of glue must be removed: from the inside - to prevent soot from accumulating, from the outside - for aesthetic purposes.
If subsequently there is a desire to disguise the pipe with a decorative partition, the technical inspection hole must be accessible.
Construction of a metal sandwich chimney
Steel chimneys are popular both in industrial construction and for landscaping in the private sector. Their installation is reminiscent of assembling a ceramic structure, and accordingly, it is easier than building a brick pipe. Let's take a closer look at how to properly make a metal chimney, avoiding mistakes.
Materials for installing a metal structure
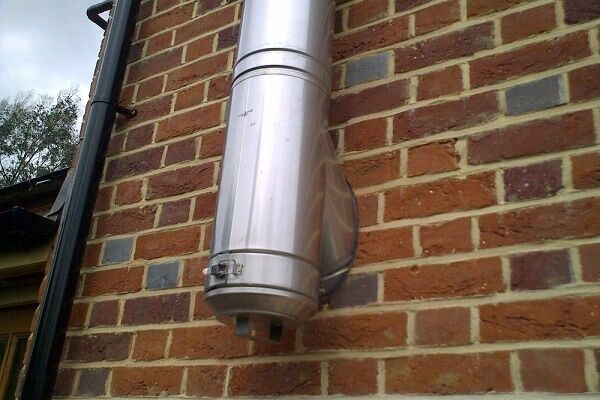
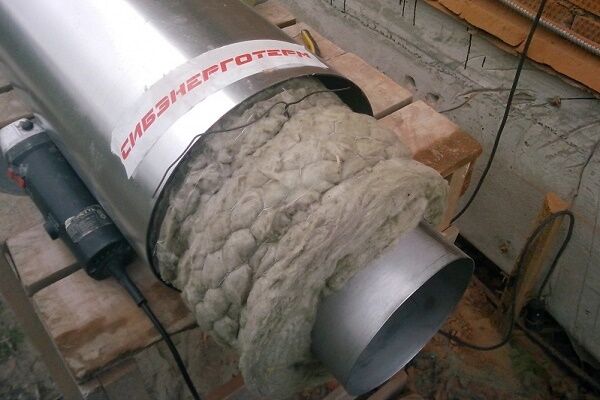
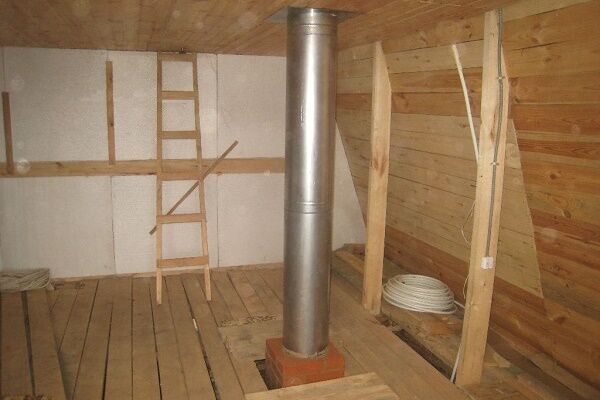
A sandwich chimney is a sealed system of pipes and adapters leading from a heat generator to the roof space. It can pass inside the building (internal) and outside, along the wall (external).

Non-flammable thermal insulation material has different thicknesses - on average from 2.5 cm to 10 cm. Manufacturers most often use one of the best materials - dense basalt wool (from 200 kg/m³).
To assemble a chimney, you will need to connect several parts of various shapes, using the method of connecting tapered ends and sockets. Simply put, one element is inserted into another. From the outside, the joints are reinforced with overhead clamps, which are tightened tightly after installation.

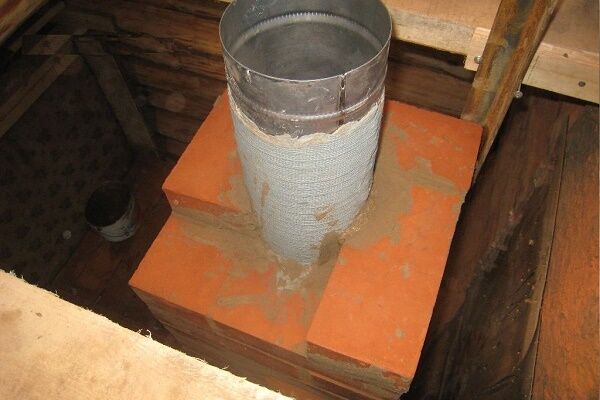
When installing a steel chimney inside a building, the holes in the ceilings and roof are much smaller in diameter than for brick or ceramic analogues.
Sandwich chimney installation diagrams
Let's consider two installation schemes for a sandwich chimney: with an internal arrangement, which requires the organization of holes in the roof and ceilings, and with external installation, which is carried out from the outside and installed parallel to the wall of the house.

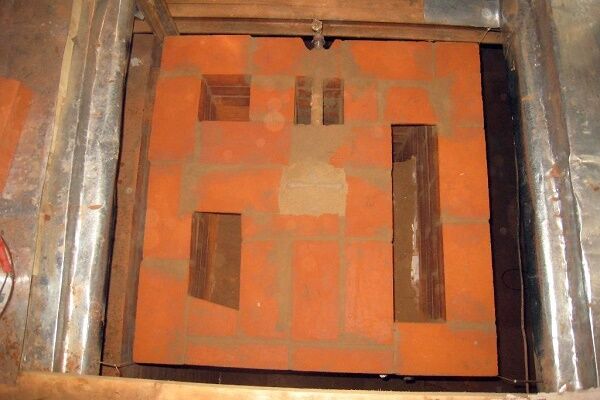
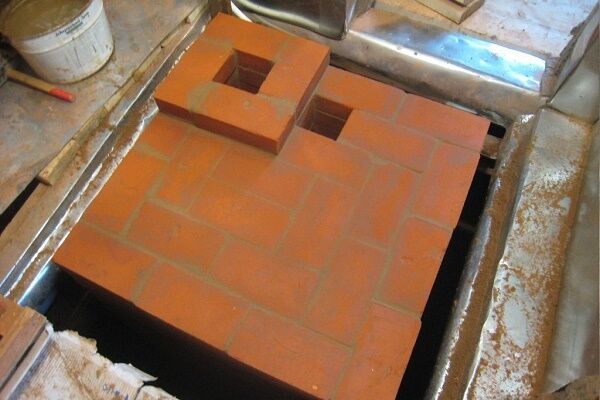
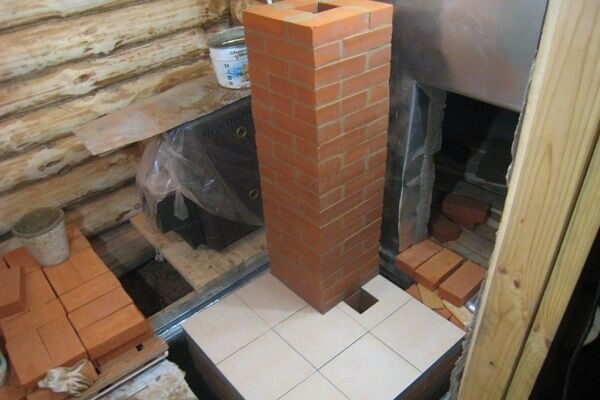
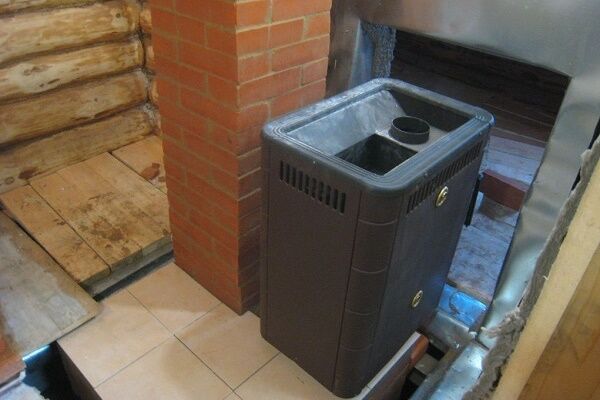
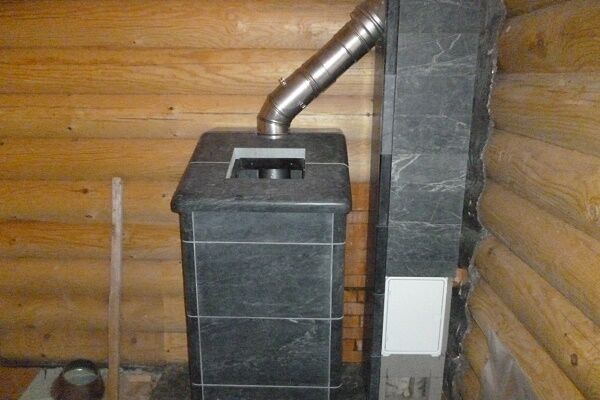
The internal installation scheme is often used in bathhouses, since a steel pipe can simultaneously heat both stones and a tank of water. If the bathhouse is not installed separately, but is an extension to the house, this is the most appropriate and effective option.
The disadvantages of the internal system are the need to make holes in the ceilings and roof, as well as a reduction in usable space.
To install an external system, it is enough to make one hole in the wall and ensure the pipes are positioned vertically using brackets. Taking the pipes outside reduces the risk of poisoning from combustion waste. The downside is the provision of additional protection from the influence of the external environment.
Installation procedure:
- connecting an adapter to the boiler (or other heat source);
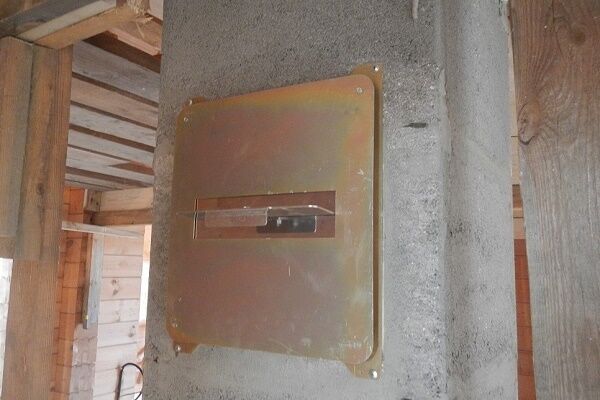
- punching a hole in the wall (average size - 40 cm x 40 cm), upholstery with fire-resistant material;
- installation of a passage block with thermal insulation in the wall;
- installation of a horizontal section of pipe from the boiler (furnace) to the hole in the wall;
- arrangement of the support unit from the outside (platforms on brackets);
- installation of a vertical pipe;
- fastening in the upper part of the cone and head.
When assembling, it is necessary to rely on the technical documentation prepared during the project preparation process.
Tips for installing an inner pipe
When choosing an internal model, you need to remember some technological nuances. For example, it is important to install a valve in the transition area from the boiler so that heat can be retained.
The joining of two adjacent elements in the transition area is prohibited. The location of the attic rafters and beams should be taken into account: the further they are from the chimney, the better. Read more about self-assembly of a sandwich chimney in this material.

Conclusions and useful video on the topic
To imagine how the process of installing chimneys of various types occurs, we offer useful and informative videos filmed by skilled craftsmen.
DIY brick chimney:
Installation steps for a TONA brand ceramic chimney:
Tips for installing a sandwich chimney:
Construction of a chimney for a gas boiler, stove or fireplace is a responsible task that requires special permission, design and professional skills. If you are not confident in your abilities, entrust the installation of the pipe to specialists who will carry out the work taking into account all norms and requirements.
If you have already built a chimney yourself or are an expert in this matter, please share your experience and knowledge with our readers. Tell us about the nuances of building a chimney in the block below.


Last year we decided that we would come to the dacha in winter. There is no heating there. So I had to learn the profession of a stove maker - I laid out the stove myself and built a chimney. The stove turned out to be quite good, but when arranging the chimney, I didn’t take into account that a deflector was needed - there was a lot of smoke. It’s good that I tried the stove in the fall and managed to finish it before winter. Now I can do the same for my neighbors.
Making a chimney yourself is not such a simple task as it seemed before. At a minimum, there should be a couple of people who are willing to help. When I made the chimney, I invited all my friends. I decided to make it out of a sandwich, the most important thing is that in winter it practically won’t freeze. And it will need to be covered with bricks. I will no longer take on this type of work on my own; I will invite specialists.