How to install a deflector on a chimney with your own hands: step-by-step instructions
To enhance traction, various devices and technical innovations are used. The complexity of the selected option directly affects the price.Agree, you always want to get good quality equipment at minimal cost.
The most profitable solution is to make a chimney deflector with your own hands. The design is extremely simple, and the effectiveness of its use is difficult to overestimate.
We will tell you how the device works and explain the principle of its operation. We will also provide step-by-step instructions for assembling and installing a simple deflector. We supplemented the information provided with visual photographs and videos demonstrating the nuances of the construction and installation of the ventilation hood.
The content of the article:
What is a deflector?
The device used to enhance traction is used everywhere. The end of the chimney is usually decorated with a cap of a certain shape. Moreover, not a simple cap to protect against birds, butterflies, leaves and other representatives of flora and fauna.
This is a product that has a specific structure and acts as a traction amplifier, which has a positive effect on fuel consumption.
The need to use a deflector
Deflectors offered on the building materials market have different shapes and sizes. The material from which they are made is also different. It can be plastic, galvanized steel, stainless steel and other alloys. The scope of application of the device is also very wide.
Varieties of draft amplifiers for installation on chimneys for private and collective use differ in appearance, material of manufacture and cost of the product.
The deflector is used for increasing draft in ventilation ducts, chimneys.
Depending on the purpose, products are selected for installation on:
- chimneys;
- ventilation ducts;
- sewer ventilation risers;
- piston aircraft engine (into the cooling system);
- other systems.
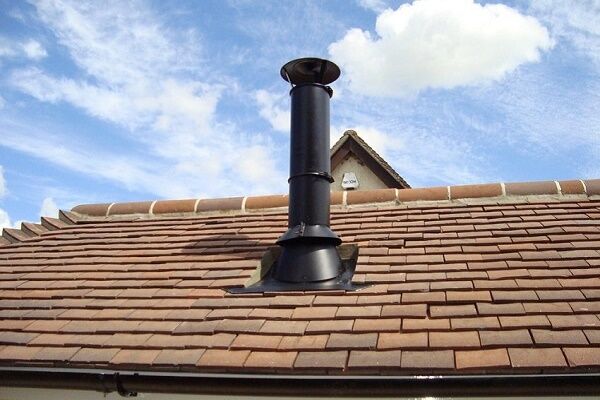
This device is used for chimneys located on the roofs of residential buildings, bathhouses, garages and other premises that are heated by a boiler.
The main thing is that for safety reasons it is not prohibited to install such additional devices on the pipe. Moreover, it makes no difference whether it is a collective chimney or an individual one.

The main functions performed by the deflector installed on the chimney:
- increased traction;
- spark protection;
- preventing foreign objects and living creatures from entering the chimney pipe;
- serves as a kind of substitute for an additional piece of pipe;
- protects the inner pipe from destruction.
It turns out that the deflector is a very useful device. The only thing you need to take into account is the individual characteristics of the heating boiler installed in the house/bath and the material with which the roof is covered.

Special requirements apply to installation deflector for gas chimneys. In some models of units, the installation of any devices on the chimney is strictly contraindicated.
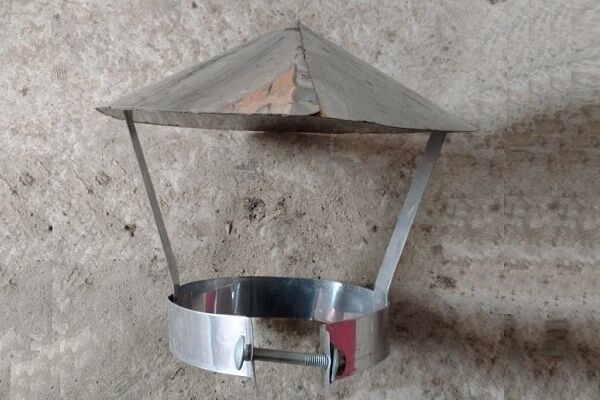
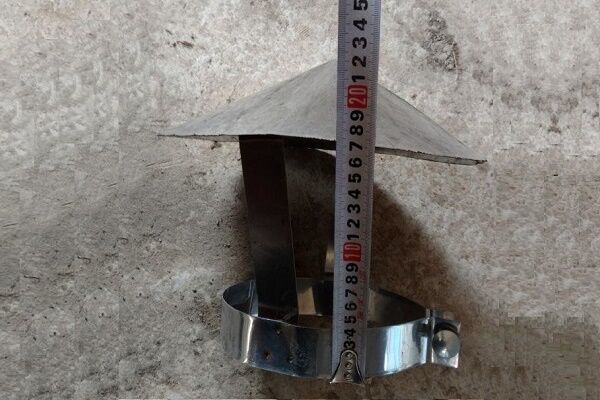
How is the reflector constructed?
Deflector in translation means “reflect”, “deflect”, which fully characterizes its capabilities. It, depending on the model, may consist of various parts.
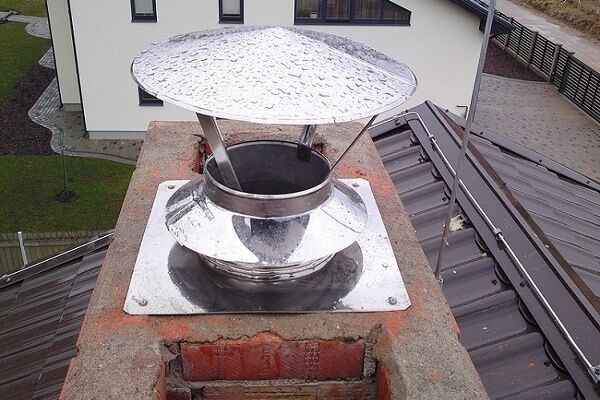
Main components of the device:
- bottom cylinder;
- top glass;
- cap.
The inlet pipe or bottom cylinder is in direct contact with the chimney pipe. It is made from metal sheet. It can also be a pipe made of asbestos-cement or ceramic pipe.

The top glass expands at the bottom. To attach it to the cylinder, special stands are used. Annular holes are made on the upper and lower cylinders to change the direction of the wind.
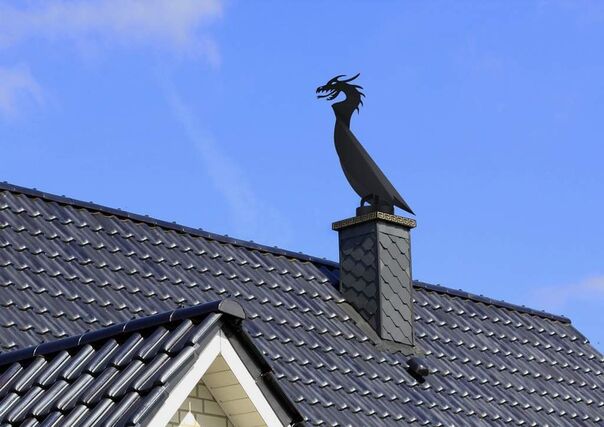
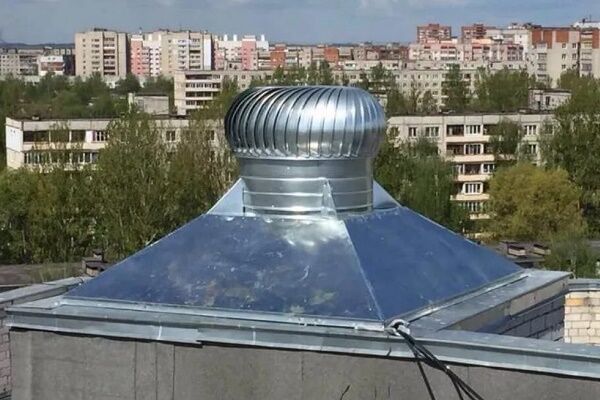
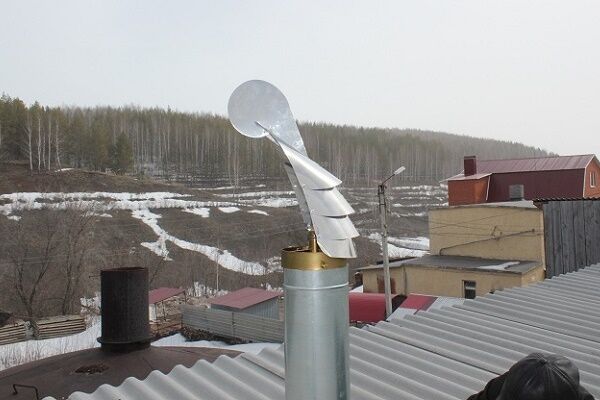
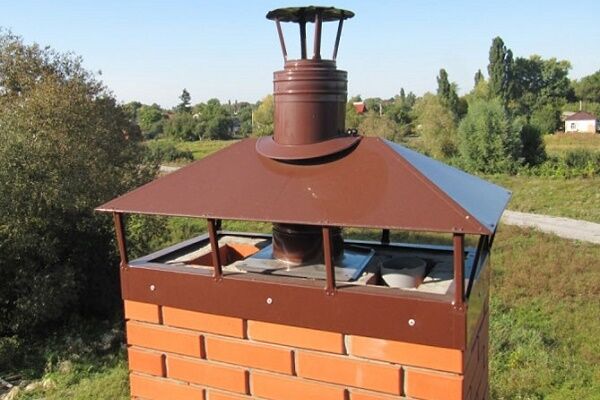
A cap, umbrella or finial are all names for the top part of a diffuser. It can have different shapes - semicircular, flat, with a lid, gable gable surface.
Operating principle of the ventilation hood
The deflector is able to bow away from the slightest influence of wind on it. Moreover, it not only bows to the side, but is also installed in such a way as to provide the most favorable conditions for removing combustion products through the chimney pipe. The main thing is that the wind does not interfere with this process.
The principle of operation of the deflector is that it is installed on a pipe that removes smoke and interferes with the free movement of air masses. The wind has to go around this obstacle.
Moreover, as it goes around the roof of the device, it accelerates and a vacuum/low pressure zone is created in this place. This allows the draft in the chimney to increase by at least 11-20%.

Depending on the type of wind blowing over the roof, air currents can behave differently.
Possible options:
- the wind blows the pipe from top to bottom - in this case, gases will be drawn in through the lower holes;
- the wind blows the deflector from bottom to top — air masses pass through the upper annular holes;
- air masses move horizontally — the upper and lower rows of holes are involved at once.
The second option for wind movement is the most unfavorable. In this case, the deflector umbrella on the chimney reflects the wind in the direction opposite to the movement of combustion products.

To turn this situation to your advantage, use another cone, which has the same size as the main one. They are connected to each other by bases. It turns out that the deflector umbrella consists of 2 cones, the tips of which are directed in opposite directions.
Do it yourself or buy a device?
The question of whether it is advisable to purchase a deflector worries thrifty homeowners. This is not surprising, because the simplest device costs about 17-18 dollars. The average purchase price is $45-60.

In this case, making the device will not be difficult.And the aesthetic component does not always come first. Sometimes a deflector is needed for the chimney of a boiler heating a garage or other utility room.
The cost of the simplest deflector options starts at $17. To buy a Khanzhenkov, TsAGI or Volpert-Grigorovich model made of galvanized steel you will need up to $50. Moreover, these can be factory products or handmade ones.
The efficiency of the device does not depend on the manufacturing method. The main thing here is to choose the correct diameter of the product and the right model that can meet the needs of a particular chimney.
When purchasing, you should pay attention to the characteristics of the deflector:
- material type;
- metal thickness;
- diameter of the pipe for mounting on the chimney pipe.
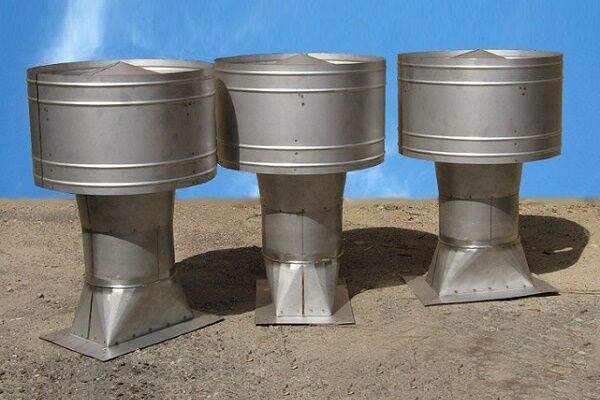
Manufacturers also offer stainless steel options. They differ in cost - the price of rotary stainless steel models can reach $140 or more.
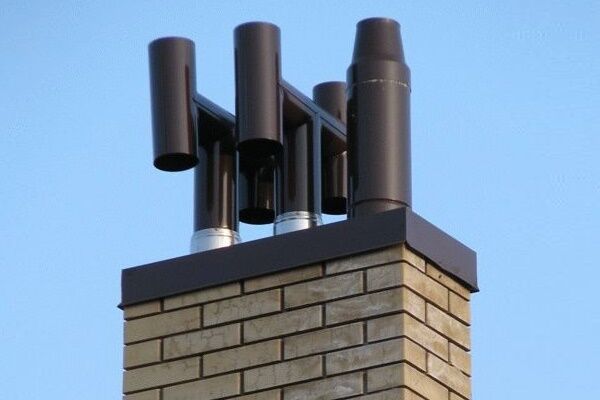
The most common deflectors used for chimneys in private houses, cottages and baths: TsAGI, round “Volper”, H-shaped, star-shaped “Shenard”, Grigorovich and open Astato.

Whether to buy or build a traction amplifier is a matter of individual decision. For those who like to do something around the house, this task will be a pleasant and interesting activity.
If you don’t have any tools or skills for doing housework, then it will be easier and more convenient to purchase a finished product, choosing the most suitable model that will not stand out from the overall picture of the roof.
When purchasing or making your own device, it is important to consider the material of the roof covering. If it is a flammable material, then it is imperative to provide a spark arrestor. This is an important point that ensures the safety of all family members living in the house.
Manufacturing and installation of a deflector
The deflector has been tested in action by more than one generation of home/cottage owners. Its effectiveness has been proven repeatedly, so it is not surprising that the device is in demand. And demand, in turn, creates supply.
The price of such offers can sometimes be steep - not every thrifty owner is willing to pay $140 for a simple device.
Ventilation element assembly procedure
It will cost much less to assemble a deflector from scrap materials. Especially if you want to build something useful with your own hands. The entire production process of the device will take 2-3 hours - the time depends on the dexterity and skills of the assembler.
The process of making a reflector that enhances traction with your own hands consists of the following stages:
- create a drawing;
- make blanks;
- assemble the device;
- install and secure it to the chimney.
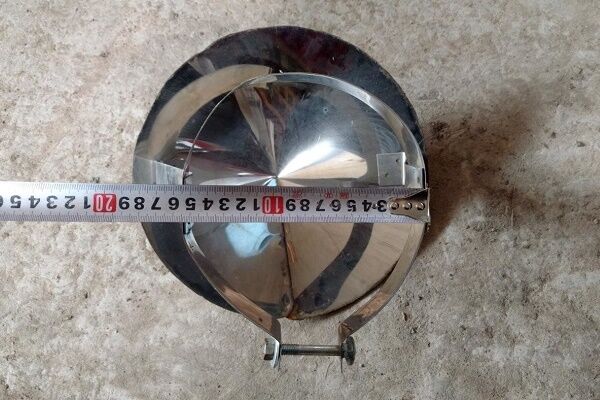
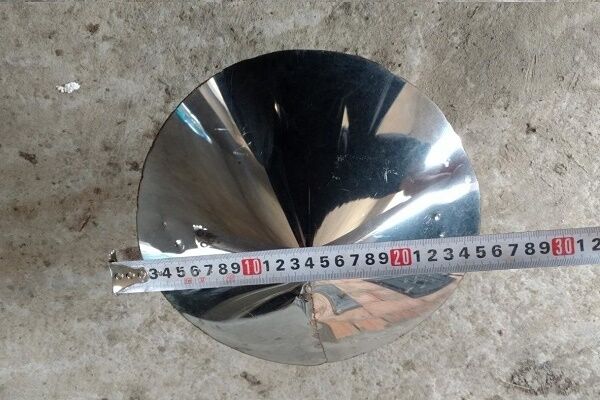
The first stage of creating a drawing is best done on paper. To do this, it is important to correctly calculate the diameter of the inlet pipe and the diameter of the cap. And also, the height of the deflector itself.

To avoid mistakes, you can use generally accepted formulas for your calculations.
The main role in the calculations is played by the internal diameter of the chimney pipe:
- height=1.6-1.7*diameter;
- diffuser width=1.2-1.3*diameter;
- hood width=1.7-1.9*diameter.
Once you have the formula, all that remains is to correctly measure the internal diameter of the chimney pipe and substitute the resulting value. Knowing the dimensions, you can begin to draw the contours of the blanks on paper.
It is best to create a prototype of the finished paper product after creating a drawing. This will make possible errors and shortcomings more clear. If there are none, then you can proceed to the second stage - creating real metal blanks.

The material can be used as a sheet of galvanized or stainless steel with a thickness of 0.5-1 mm. Sometimes you can come across the opinion that it is best to use copper for the deflector.
This statement has the right to life if you accidentally have an unnecessary sheet of copper in your garage or workshop.Otherwise, such an expensive purchase will not justify itself. And the service life of stainless steel cannot be called short enough to neglect this material.
When the blanks are cut with metal scissors from the prepared sheet, you can begin the assembly stage of the product. To do this, you can use a riveter and a drill or welding. When working with welding, you need to be extremely careful so as not to accidentally burn through a section of the future deflector.
If you plan to use rivets, then it is convenient to make allowances for connecting the parts together on a rolling machine. If this is not the case, then a hammer will do just fine. Having made allowances, you have to connect the parts evenly together, make holes with a drill and install rivets.

The cap must be secured to the base with legs, which are also drawn and cut from a stainless steel/galvanized sheet.

When the 3rd stage is finished and the homemade product is ready, you can proceed to the last and most important moment - installation on the chimney.
Installing a roof deflector
The last stage of manufacturing a deflector for a chimney pipe is to install it in its permanent location - on the chimney. You can install either a home-made device or a purchased design yourself. There is no difference - you still have to climb onto the roof.
To avoid problems with installation, even a purchased model that comes disassembled must be assembled at the bottom, securely fixing all the fasteners. Only after this can you take the necessary tool and head to the chimney.

When installing the deflector on the chimney pipe, you must carefully drill holes for mounting. Then all that remains is to securely fasten the screws or rivets and check whether the installed device is tilted in different directions.
If it dangles, then you can additionally install a clamp. This option is suitable if the chimney is not lined with brick.
For brickwork with a square or rectangular chimney cross-section, you will have to use special adapters. When the work is completed, you can test the deflector you installed yourself by lighting the stove/turning on the heating boiler.
Another important point is the spark arrester. Whether it is needed or not is looked at in a particular house. Can make your own spark arrestor made of stainless steel sheet or metal mesh.

Errors and problems with the device
With the deflector, as with all devices, troubles can arise. One, the biggest and completely preventable one is incorrect work. This happens if the device was selected the wrong size. It can simply fall inside the chimney pipe, closing the path for combustion products to escape.
To avoid this situation, you need to pay attention that the diameter of the deflector pipe must be equal to the diameter of the internal chimney pipe.
If the chimney is made of brick, and the installed device has a round cross-section, then you cannot do without the appropriate adapters.

The second mistake when installing a deflector is choosing a rotating model for areas with cold and snowy winters. Such a solution is fraught with icing of the device, and after a few days it will be covered with snow and not only stop rotating, but will also significantly interfere with the normal operation of the chimney.
To clean everything by removing snow and ice, you will have to climb onto the roof, and this is not the most pleasant activity on a cold and snowy day.
The third problem is the ineffectiveness of the deflector.
The problem may arise if the installation location or model is incorrectly selected:
- the body of the device is poorly blown by winds from different directions;
- in areas with gusty winds, an H-shaped deflector will be more effective;
- you should avoid installing the device in the aerodynamic shadow zone of trees and taller structures located nearby;
- the device must be located above the roof ridge and above other structures if they are present near the chimney.
If the deflector turns out to be ineffective, then you need to look for reasons for backdraft chimney.
The fourth problem is the breakdown of rotating models. The fact is that the mechanisms that ensure rotation require maintenance.More precisely, you must not forget to periodically carry out maintenance on individual parts of the deflector and lubricate the bearings on time.
If the device was made by hand, and the material used turned out to be cheap and of poor quality, then everything can rust very quickly. In this case, you will soon have to replace it with a new deflector.

Another problem is when a simple cap is installed instead of a deflector. It may become icy and covered in snow. This will have to be fixed. It is dangerous if this situation occurs at night and all combustion products remain in the house. This is fraught with death for all household members.
Therefore, you need to immediately install the deflector and not experiment with different canopies. If you don’t want to build an amplifier from scrap materials, you can always buy the model you like and install it on the chimney yourself.
It is necessary to take care of the normal operation of the boiler and the effective removal of combustion products at the heating design stage. Useful information on chimney construction is presented in this article.
Conclusions and useful video on the topic
How a deflector is designed that can extinguish sparks is described in the video clip:
Step-by-step production of a TsAGI deflector on your own without special equipment is shown in the video:
Calculation, production and testing in action of a self-made deflector are shown in the video clip:
A detailed video about making a chimney deflector with explanations and a visual presentation of each action:
Having studied in more detail the issue of assembling and installing the deflector, you can use your own resources to protect your chimney from unwanted interference in its operation by wind and various types of precipitation and debris. This simple device will also help to significantly increase traction.
Do you have personal experience building a chimney deflector? Do you want to share practical skills or ask questions on a topic? Please leave comments - the feedback form is located below.


We were doing a major roof repair at the dacha, threw away the old rusty deflector - I thought it would do just fine! But it turned out that no! When a pigeon flew into the chimney and could not get out, I realized that I had been stupid. In short, they took out the bird and installed a new deflector (I didn’t buy it - I made it myself from stainless steel). After that I noticed that my traction became better. So a deflector is a must on a chimney!
Why do we have payments in bucks and dollars for deflector pieces of iron?
I don’t see anything surprising in this, especially considering that the site has many visitors from different CIS countries. Therefore, it is more practical to indicate the price tag of sales, parts, components and other things in dollars. Personally, I always do this, plus the economic situation may change, in which case the price tag in dollars will practically not need to be adjusted.
I can share examples of my work, which was made to order. I can say that the price for such a product relative to 2017 (only 2 years have passed) has increased by 20%.And not because I started raising the price tag higher, but because the cost of materials simply increased, while in dollar terms almost nothing changed. In general, if we take into account that all delivery by transport is tied to gasoline, which is pegged to the dollar, then indicating the price of products and components on the forum in this currency is the right decision.
Making a Grigorovich diffuser is easier if you know the diameter of the pipe. Lampshade per hundred square meters, bottom 200 mm, top 150 mm, width 150 mm. we make a layout, on the sheet, retreating 60 mm from the edge, we make a line relative to the edge (60 mm is given with a margin, for clarity, by drawing the radius, you will know how much to retreat), retreating 150 mm, we make a second line, on the bottom line we mark 650 mm, the middle is 325 mm . on the second line we make similar marks, stepping back from the edge of 80 mm we put a mark and connect it to the edge of the first line. This is a lampshade blank, all that remains is to connect the dots according to the diameter of the circle. We take a pencil, tie a rope and, by changing the length of the rope, connect the points of the first line, and similarly connect the points of the second line.