DIY gas stove: rules and guidelines for assembling gas heat generators
What problems do owners of domestic buildings often face: garages, outbuildings, bathhouses, small swimming pools, summer kitchens? Indeed, in addition to carrying out a number of communications, it is necessary to deal with heating and heating. For those who have made a gas stove with their own hands, issues can be resolved simply and cheaply.
Anyone can buy special heating equipment. However, its cost is painful. Not many people are willing to spend large sums of money on the design and installation of a heating system in this kind of premises.
We will tell you how to assemble and run an effective and inexpensive heat generator in commercial buildings with your own hands. The home-made structures we offer, made according to pre-developed drawings, are easy to install and inexpensive. The information is confirmed by practice.
The content of the article:
Preparatory stages of work
If the room is not heated in winter, then one of the main problems is the occurrence of condensation on the internal surfaces of the walls and on all objects inside.
This leads to gradual rusting of metal structures and increased humidity inside the building. It becomes impossible to store things in winter in such conditions, as they will deteriorate.

Some car owners use electric heaters And homemade wood stoves for heating a garage. However, such a solution subsequently turns out to be unprofitable: the power of the electrical appliance is often insufficient, and the electric meter increases astronomical figures.
If, on top of everything else, the room is not insulated, then heat loss increases several times. Then you need to purchase an appropriate heater - very powerful and expensive.
In such cases, even a gas furnace may not be able to maintain a temperature of at least 24 degrees Celsius. Therefore, owners should first tackle the external and internal insulation of the building.
It is better to carry out two types of insulation. But everyone carries out the procedure based on technical capabilities. Sometimes there is no access to the ceiling or side walls, for example, if a garage is being insulated.
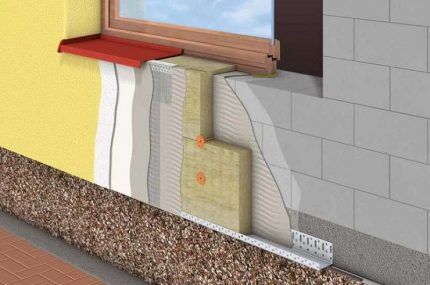
It is also necessary to take into account the future heating of the building using a homemade gas stove. It is strongly recommended to insulate walls, ceilings and floors with fire-resistant materials. Then the room will be fire-resistant, and the owner will save himself from unnecessary worries. It is recommended to plaster brick walls, and prime and paint metal walls.
After all thermal insulation measures have been carried out, the effectiveness garage heating will increase significantly, and fuel costs will be much lower.
The best place to place a homemade gas stove is the center of the room.If the heat source is not in contact with the walls, then the heat will not escape through them and a kind of thermal cap will be created in the building.
The principle of operation of a thermal cap is that first, warm air rises from the center of the room up to the ceiling. There he encounters a cold stream of air and begins to move to the sides towards the walls, where he again encounters cold streams. During such circulation, warm currents will gradually fill the entire room and warm it.

In the image, the circulation of warm air in the room would resemble the movement inside a schematic mushroom-shaped figure. A positive heating effect is achieved even with the use of low-power stoves. However, they must generate intense air flow.
Advantages and disadvantages of gas furnaces
The market offers consumers a wide variety of energy resources. At the present stage of economic development, gas is one of the most profitable and efficient fuel options.
The use of gas as a power source for heating equipment is advantageous in that its cost does not break the consumer's pocket. In addition, gas has a high efficiency factor. The operation of gas heating devices is easy to use, economical and safe.
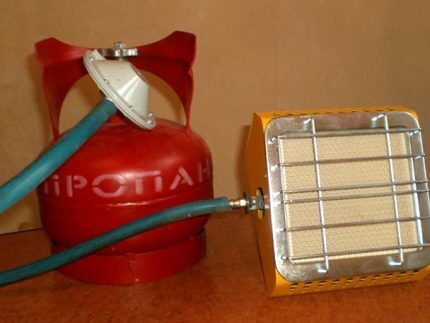
When installing a gas stove indoors, the best option for owners would be a situation where a gas pipeline is directly connected to the building. However, in modern realities this is a very rare case. Many will have to purchase gas cylinders and other containers for storing and supplying fuel to the stove.
The advantages of using gas furnaces include:
- fast, efficient and high-quality heating of the room;
- mobility and compactness of gas equipment;
- the ability to quickly move the oven to the desired location;
- independence from government communications, power outages and many other factors.
Gas equipment, like any other, has its drawbacks. However, they are relative and easily avoided.
The disadvantages include:
- the use of gas is strictly regulated by regulations;
- owners of non-residential premises will have to obtain a number of agreements and permits from the gas industry and other government bodies;
- drawing up the necessary project can cost a lot of money;
- the use of reduced and bottled gas requires compliance with safety measures.
In order for a gas stove to perform its function as efficiently as possible in a room, it is necessary to have protective screens. Such structures are equipped with reflective surfaces, thanks to which warm air does not escape, but is reflected and heats the entire area of the box.
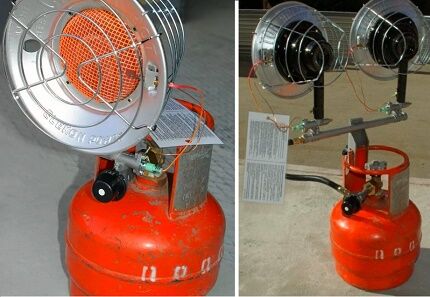
Open combustion furnaces require design and installation ventilation system and providing air humidification.When the device burns oxygen, the air becomes dry. This often leads to headaches and sore throats.
Homemade heater from a gas burner
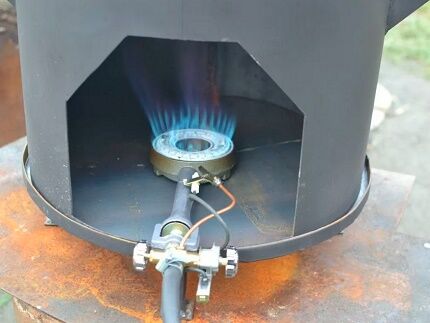
Independent production of a gas stove from metal or other materials is carried out in accordance with pre-developed schemes. Let's consider one of the possible options for independent step-by-step assembly of a gas stove.
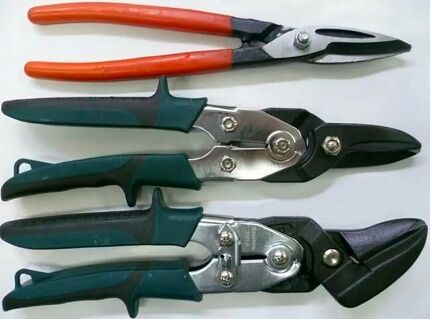
For assembly you will need the following materials and tools:
- metal scissors and metalworking tools;
- sheet of metal with a thickness of 0.5 mm to 1 mm;
- chain-link mesh, which will be used as a lattice;
- a metal sieve of suitable sizes (can be used, but without significant damage);
- a gas burner with a safety valve, which should be purchased on the construction market;
- gas cylinder of suitable volume;
- fittings, approximately 10 mm thick, with which the structure will be connected to the cylinder.
After collecting all the necessary materials, they begin to directly begin manufacturing the structure.
First, you need to place the sieve on the prepared metal sheet and trace its circumference with a pencil. Then we mark the scan in the form of a rectangle. Its length should be enough to wrap around the sieve and the bottom of the metal stove. The development must be cut carefully and without irregularities.
Next, you need to mark the places where the gas burner is attached, drill holes and fix the burner on the back of the reamer. The parts are connected to each other using rivets and a small flange made in advance.
A drilled plate is attached to the top of the sieve using rivets. You need to attach a chain-link mesh to the plate with metal plates. Next, using a riveter, legs of a suitable length are installed.
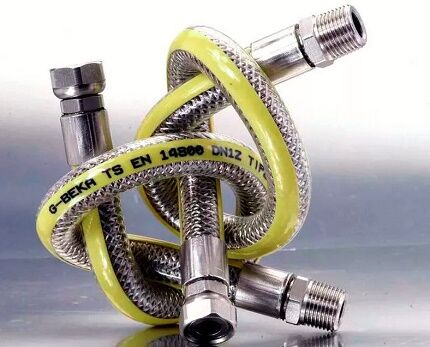
The burner valve is equipped with a hose attached at the other end to the gas cylinder. After releasing the gas, it is necessary to check the tightness of all connections. This is easy to do with a soap solution.
Such an installation can also be connected to a gas pipe that removes combustion products from the apartment. However, in this case, permission and approval from the HOA, residential complex or housing cooperative will be officially required. It will also be necessary to install a ventilation system and install the stove on a separate foundation. You will also need to purchase a gas meter.
When installing a homemade stove, all required distances between various surfaces must be observed. The distance from the stove to the floor or walls made of combustible materials must be the values defined in the standards.
When using a large stove, the owner of the room will need to install an additional chimney. If a gas appliance needs to be installed on a wall, then the wall must be load-bearing. Installation of gas appliances on non-load-bearing walls is prohibited.
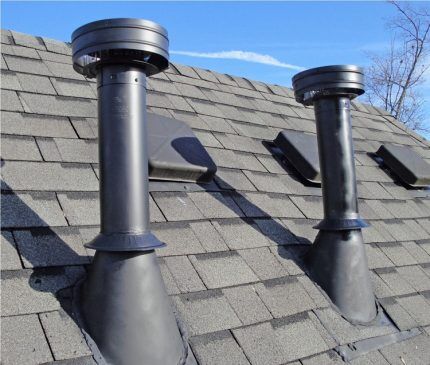
Before directly starting up the equipment, you must ensure that it is working correctly. ventilation and in the absence of gas in the air in the room.In addition, every time after turning off the equipment, you should close all taps and valves, both on the gas cylinder and on the gas stove.
The reducer installed on the cylinder will protect it from blowback and also makes it possible to regulate the pressure.
Gas stove heater
For some small rooms, a small tabletop heater may be sufficient for heating. The device is assembled using quadrangular flat tiles, which are initially equipped with a grid.
The structure is assembled by connecting the tiles to a metal casing. The casing is equipped with a combustion chamber and a fan. Assembling such an installation yourself is not difficult.
First of all, you need to measure the length and width of the future body. In this case, you need to rely on the size of the tiles. After making the casing, it must be secured with hook strips.
On one side you need to make a movable bar. This is easily done using a spring that is attached to the lift arm. This measure in the future will ensure the possibility of removing the housing if necessary.
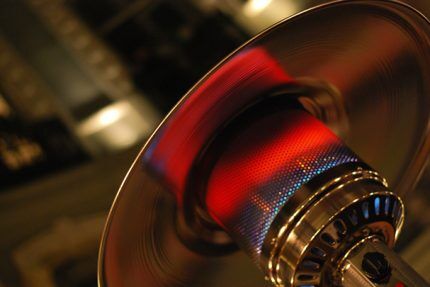
This design has a pre-provisioned ventilation system. There is no need to use any unusual materials for its construction. A handy fan will be enough. For example, from a window air conditioner. The blades can be carefully trimmed and given the desired shape and size. The fan is mounted on the back of the case.
To create draft inside the housing, it is necessary to secure a metal combustion chamber.Many holes are made on the surface of the combustion chamber at a small distance from each other.
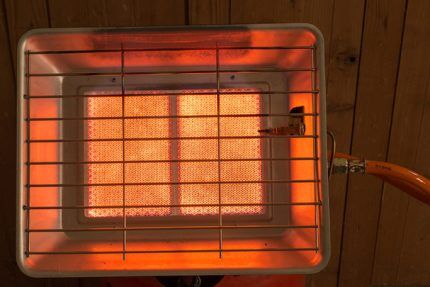
The device effectively heats rooms even in winter and has a high efficiency. If you insulate the room in advance and install reflectors, then such a heater will perform its task as efficiently as possible.
Heat gas gun
Heat gas guns are distinguished by their high power and high level of energy output. Typically the structure is equipped with a chimney.
To make such a device yourself, you will need the following materials:
- meter pipe with a diameter of 18 cm;
- meter pipe with a diameter of 8 cm;
- pipe 30 cm long and 8 cm in diameter;
- metal plates for future fastening;
- a metal sheet;
- gas burner equipped with piezo ignition;
- axial fan with round flange.
In addition to the materials listed, you will additionally need to acquire a welding machine, a tape measure and a level with two ampoules. Some craftsmen advise using old gas cylinders or fire extinguishers instead of pipes. Their bottom and top are first carefully cut off with a grinder.
If you collect all the necessary materials and tools, then assembling a gas gun will not take much time.
The first step is to drill two holes in the first pipe with a diameter of 18 cm. They should be located opposite each other, and their diameters are 1 cm and 8 cm. The second meter pipe with a diameter of 8 cm is used to make the combustion chamber.For this purpose you will need about 30 cm.
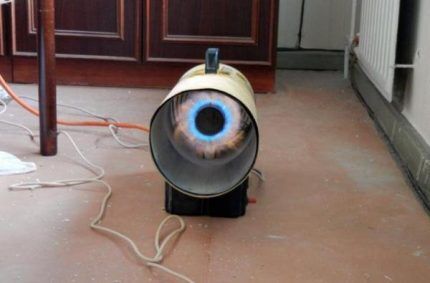
The mounting plates must be welded to the second pipe. A hole with a diameter of 1 cm is also made on this pipe. After this, the pipe must be inserted inside the first pipe.
The next step is cutting out a plug from a metal sheet, which will be used to cover the space between the heat gun frame and the combustion chamber.
Then you should use a welding machine and weld the pipe from which the combustion chamber will be made to the internal frame. After this, a pipe through which hot air will be exhausted is welded to a hole with a diameter of 8 cm. Next, a plug is welded.
The gas burner must be firmly and firmly installed in the chamber. It is necessary to check the rigidity of the fastening. After this, a hose is passed through the drilled centimeter holes in the two pipes. Then a fan heater is attached to the heat gun. A chimney must be installed on the front of the chamber.
To prevent the device from turning over and to stand stably on a flat surface, you need to weld the legs. You can also use your imagination and attach wheels or other parts to make the structure easier to transport.
Heating a room with a heat gas gun is convenient and simple. Moreover, it is economical. However, there is always a risk of structural failure. Therefore, you should be very careful and thoughtful in the process of assembling the device.
DIY gas fireplace
Another convenient option for heating rooms is a gas fireplace.Purchasing such a device will cost a hefty sum, although the most savvy can independently assemble and arrange a fireplace in their box without a particularly large investment.
This kind of fireplace can be powered either directly from a gas pipe or from a gas cylinder.
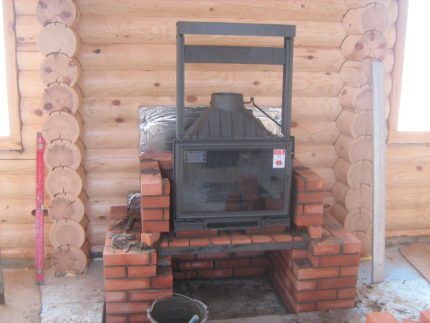
The design consists of the following main elements:
- an ordinary fireplace insert or a decorative one that decorates the room;
- fireplace body made of refractory metals - cast iron or other alloys;
- burner that supplies gas;
- gas supply system.
After determining the place where the structure will be installed, it is necessary to prepare it to begin the construction of the brickwork. There must be a solid foundation. You also need to install the chimney. After the fireplace is erected, it can be decorated with a variety of decorative elements to suit the taste of the owners.
The fireplace is laid only from refractory bricks. When erecting a structure, care should be taken to ensure passage to the gas valve. After the internal elements of the masonry are installed and communication is connected to the gas burner, you should make sure that the entire system is tight.
With the help of a valve, in the future it will be possible to regulate the strength of the gas supply and, consequently, the amount of heat generated. Gas workers advise turning the burners with their holes facing down - this will protect them from contamination and moisture.
The burner should also be reinforced with protective mesh elements. This will reduce the load on the burner from the decorative material.
The introduction of some modern devices will allow you to slightly automate the operation of the fireplace. This way you can connect a gas supply control system, depending on the level of heat generated, or an automatic gas supply shutdown system. All modifications are freely available on the market, and their acquisition depends on the desire and ability of the owners.
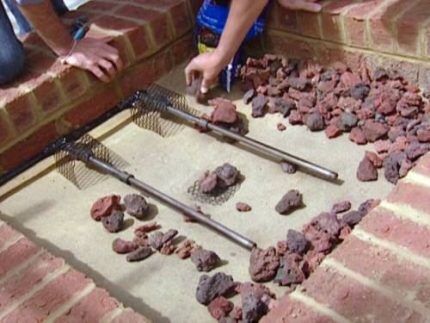
Beautiful decoration of the fireplace bowl is made using a variety of stones, glass, and ceramics. In addition to interior decoration, the outside of the fireplace can be decorated with tiles or in another way. The main thing is that it is a fireproof material.
It is easy to assemble a gas stove yourself with your own hands. To do this, you need to adhere to the design and safety instructions.
First of all, before installing a gas stove to heat a room, it is worth carrying out a number of preparatory measures. If you do not insulate the room, then even the most powerful equipment will not give a serious result. Therefore, it is important to carry out external and internal insulation procedures, as well as equip reflective surfaces.
Conclusions and useful video on the topic
Handmade Heat Gas Gun:
Gas stove made by a craftsman himself:
Homemade gas stove with a fireclay brick body:
For heating small, remote non-residential premises, a homemade heater made from a gas burner and a heater made from a gas stove are suitable. To provide sufficient heat to medium-sized rooms, you should consider installing a gas heat gun or gas fireplace.
All devices considered can operate both from gas pipes connected to the room and from gas cylinders. It is worth remembering that when connecting to a gas pipe, it is necessary to install a meter and officially register the procedure with the gas control authorities. When installing a self-made structure, this procedure will become much more complicated.
If you use gas cylinders, you can effectively heat your room in the winter. It is important to remember that following safety precautions is the key to successful work with any gas devices.


