Do-it-yourself toilet in the country: step-by-step construction instructions
Having become accustomed to city comfort, we try to make our country life comfortable.Do you agree, what kind of convenience can we talk about if there is no restroom on site? It is necessary to take care of organizing a latrine at the initial stage of arranging your land plot.
Having step-by-step construction instructions, building a toilet in the country with your own hands is not so difficult; it is more difficult to choose a place for it and the model that suits you best. But we will help you do it.
We will introduce you to the rules of arrangement and typical types of country toilets. In the article you will find step-by-step instructions with drawings that will help you build a full-fledged bathroom on the site. And to help the novice master, a video is attached to the article, clearly demonstrating the process of building a closet on the site.
The content of the article:
- Rules you shouldn't forget about
- Types of country toilets
- Pit latrines
- Toilets without pit cesspool
- Criteria for selecting a suitable design
- Instructions for building a birdhouse
- Photo guide to the construction of the “teremka”
- How to make your own peat powder closet?
- Conclusions and useful video on the topic
Rules you shouldn't forget about
A toilet is not a simple utility building.When constructing it, you need to remember some rules, the observance of which will help you not to spoil relations with your neighbors in the country and will eliminate possible problems during the subsequent use of the latrine.
Guided by the rules listed below, we will choose a suitable location for the future building.

List of requirements for the distance of the toilet from other objects located on the site:
- 12 meters – to a house, as well as a barn or garage, in which there are underground structures such as a basement or cellar;
- 25-30 meters – to the source of water intake for drinking;
- 8 meters – to a bathhouse and barn or garage without basement structures;
- 1 meter - to the fence.
Of course, all areas have individual characteristics that also need to be taken into account. If the area has complex terrain, then for the restroom you need to choose a flat area located below the source of drinking water. It is important that feces do not come into contact with groundwater.
If sewage will need to be pumped out periodically, it is necessary to provide for the possibility of access of a sewage truck to the work site. Of course, you should take into account the wind rose of your area so that piquant smells do not bother you or those around you.
All these rules are easy to remember, because they are dictated by common sense. This is exactly the approach that should be followed when choosing a structure that you will build on your own site.
Types of country toilets
The main feature used to classify outdoor toilets is the method of disposal of accumulated waste. All the rest, including the material used to make the structure, are secondary.
Do-it-yourself country toilets are divided into two large categories: having cesspool in their design and those that do not have it.

Cabins for latrines can be purchased ready-made or made independently.
They are divided into several types:
- house;
- hut;
- hut;
- birdhouse.
They differ from each other in appearance, size, etc. Typically, summer residents choose a booth that best suits their aesthetic perception.
Pit latrines
The basis of the design of ordinary village bathrooms, which we see in real life, as well as in popular films and cartoons, is a cesspool. Often this is the structure that is chosen for construction. toilet in the country.
The construction of such a toilet, as a rule, does not cause any difficulties. In fact, the sewer complex in this case is represented by a cabin and a deep hole. It is into this that waste from the inhabitants of the dacha comes. There they accumulate, evaporating or being partially absorbed into the ground.

Of course, to service a cesspool, it is still better to use a sewer truck, which is used to remove waste and dispose of it. The size of the pit, the number of users and the intensity of use of the latrine are factors that influence the frequency of calls for vacuum cleaners.
Sometimes the problem is not solved in the best way: they simply fill up the cesspool and dig a new one nearby. This can only be done if the pit was shallow and the groundwater is located no closer than 2.5 meters from the surface. As a rule, a fast-growing tree is planted over a filled container.
As for the part of the restroom that is located above the ground, a variety of materials can be used for its construction:
- traditional wood;
- metallic profile;
- slate;
- bricks, etc.
The durability of any of these structures depends on the strength of the frame, and ease of use depends on thermal insulation and quality of ventilation.
Option 1. Budget building made of wood
The obvious advantages of using wood to build a latrine are the relative cheapness of this material and the simplicity of the work performed. The plank frame is quite simple to build. You don't need any special skills to do this job.

In addition, a structure made of wood is lightweight, and therefore mobile. If the need for a new cesspool arises, the above-ground structure does not have to be disassembled and reassembled in a new location. You can simply move it carefully.
There is another obvious advantage of a wooden toilet.If you use your imagination, this structure can become a real decoration of your summer cottage. It can be stylized as a fairy-tale house or mansion.
However, along with the advantages, wood has a whole list of disadvantages:
- drying out, cracking and deformation when exposed to direct sunlight;
- fading from ultraviolet radiation;
- frame deformation, mold and fungi are the result of the influence of high humidity.
We should not forget about wear and tear - the influence of time.

Yes, an outdoor structure needs protection. For this purpose, the boards are treated with a primer, after which a special paint for exterior use or varnish is applied to their surface, which beautifully reveals the specifics of the wood.
Option #2. Metal profile construction
There are several options for creating a simple and functional structure from a metal profile, which differ in the material used to make the structure’s frame. In the first case, the frame will be wooden, and in the second, metal.
The metal frame can be welded, for example, from a corner. But, of course, to solve this problem you will need a welding machine and skills to operate it.

At the next stage of work, the base is sheathed with a metal profile using self-tapping screws or rivets. When using self-tapping screws, protective washers should be used to prevent moisture from entering the fastening area.
The washers will protect the structure from corrosion and it will last longer. A special coating applied to metal profile sheets during its production also has protective properties.
It is better to place a structure made of metal profiles in a shaded place, because in hot weather the metal gets very hot. Foam sheets, which are used for the interior lining of the restroom, will help reduce the negative consequences of overheating the internal space.
Option #3.Major bathroom made of brick
A brick building is truly a permanent structure. On the one hand, this is good: it is less exposed to negative external factors and will last a long time. But a capital structure, especially if it block of toilet and shower, cannot be moved from place to place.
Therefore, you should think in advance and carefully not only about the location of the toilet itself, but also about the method of cleaning the pit under it.
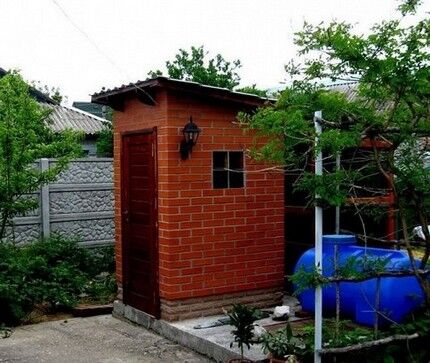
It is advantageous to build such a structure when the brick remains after the construction of the main cottage or garage. This, by the way, will give unity to the entire complex of buildings.
Please note that between the above-ground structure and country toilet and the underground parts of the structure should have a concrete floor. The total cost of such a toilet will be decent.
Toilets without pit cesspool
If your site has rocky soils close to the surface or there is a high groundwater level, then you cannot dig a hole.How to make a toilet in such a country house? The way out of this situation is to erect a structure that functions in accordance with other principles.
These restrooms include:
- bio- or chemical toilet;
- powder-closet;
- backlash-closet.
Each of these restrooms has its own design features that are worth talking about.
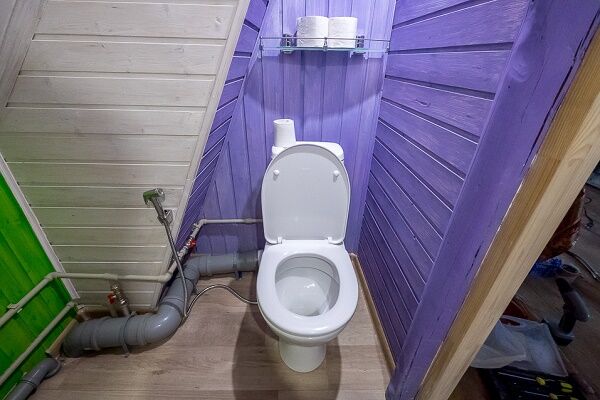
No. 1. Hygienic backlash closet
The German word "luft" means air. Backlash closets got their name because they have separate ventilation for the bathroom and cesspool. In this design, a pit dug in the ground is replaced by a sealed container.
Moreover, this waste storage device may be located outside the bathroom itself. As a rule, it is placed at the rear wall of the main heated structure with a toilet.

The storage tank and the toilet are connected to each other by a pipe. If the toilet is located above the room with the tank, then the pipe is installed vertically.
An inclined pipe is intended for the tank located behind the wall. Sewage must enter the storage tank under the influence of gravity - by gravity.

To service the backlash closet, you need to contact the vacuum cleaners, who will periodically empty the storage tank. To make their work easier, the sewage tank is given an elongated shape. Of course, this toilet option is more hygienic than those discussed earlier.
Difficulties in operating the backlash closet arise in the cold season, when the storage tank has to be heated to clean it.
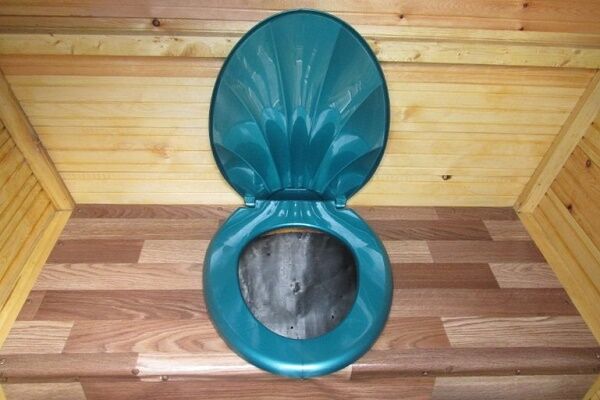
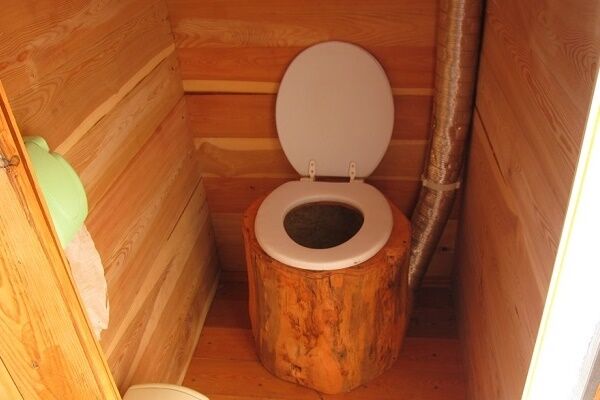
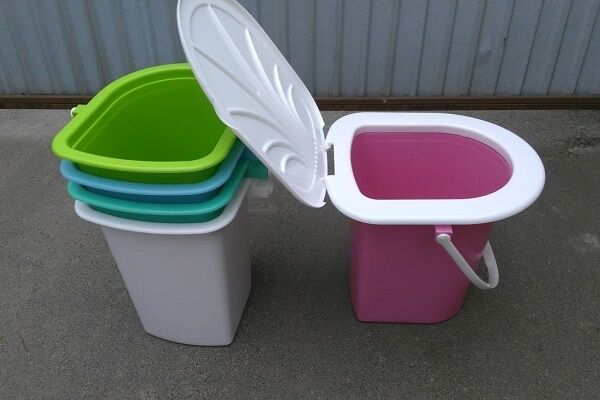
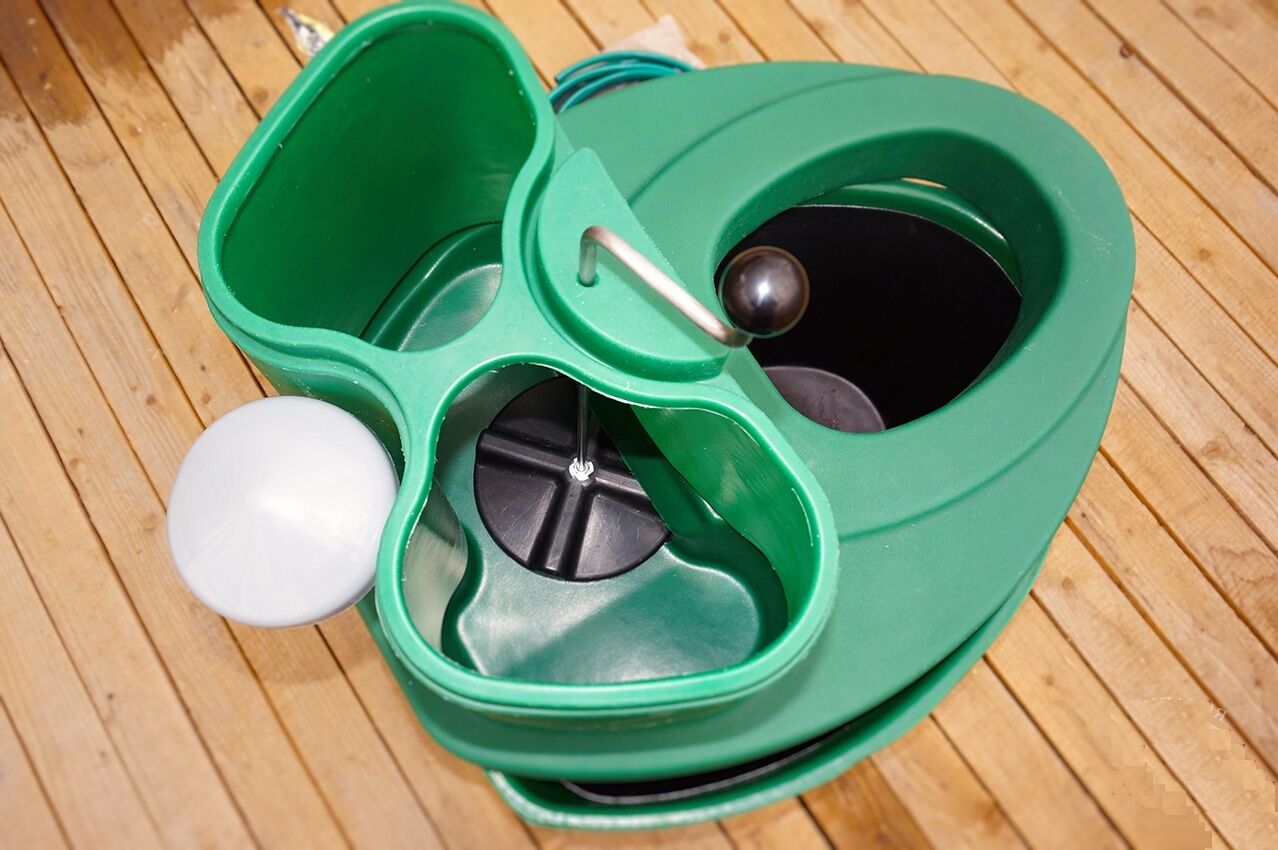
No. 2. Waste-free powder closet (peat toilet)
A distinctive feature of the powder closet is its small capacity, only 20 liters, which fits directly under the toilet seat.
This type of latrine is considered the most effective in cases where the groundwater level at the location of the dacha is close to the surface and because of this, excavation work is limited.

Setting up such a latrine is very simple, and a powder closet will cost very little. In addition, waste that is otherwise disposed of can be converted into fertilizer. Moreover, this process also does not require significant costs.
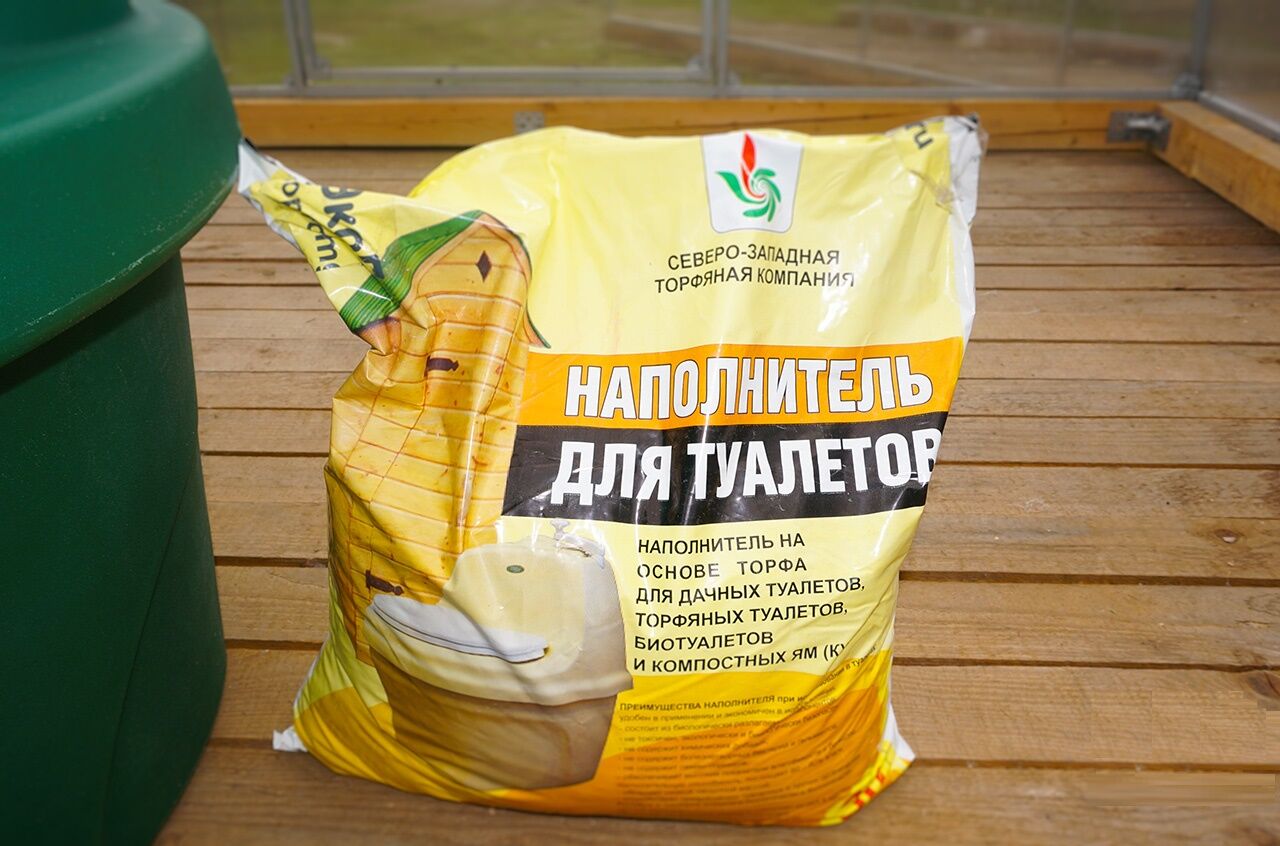
Feces entering the container are sprinkled with dry peat or a mixture of peat and sawdust. This “powder” counteracts the development of decay processes, so there will be no unpleasant odor in the bathroom.
So, the container is gradually filled with poured waste, after which its contents go into the compost pit, where the final processing of sewage into full-fledged fertilizer takes place.

If the powder closet is installed as a stationary object, then to make it more convenient to send waste to the compost pit, wheels and handles can be attached to the drive. It turns out to be a kind of car. A portable powder closet can be taken into the house during bad weather or at night.
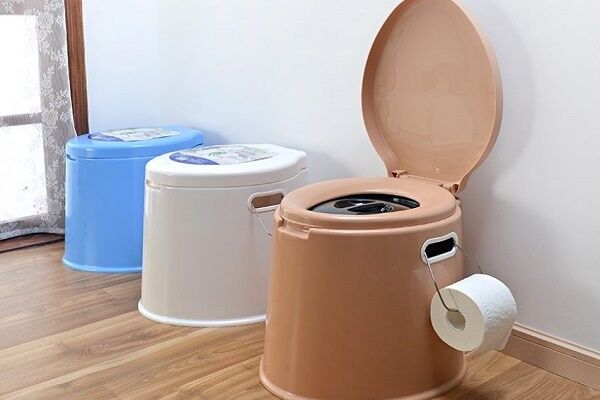
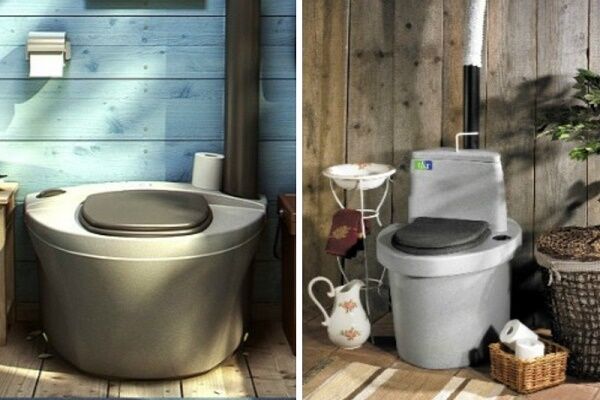
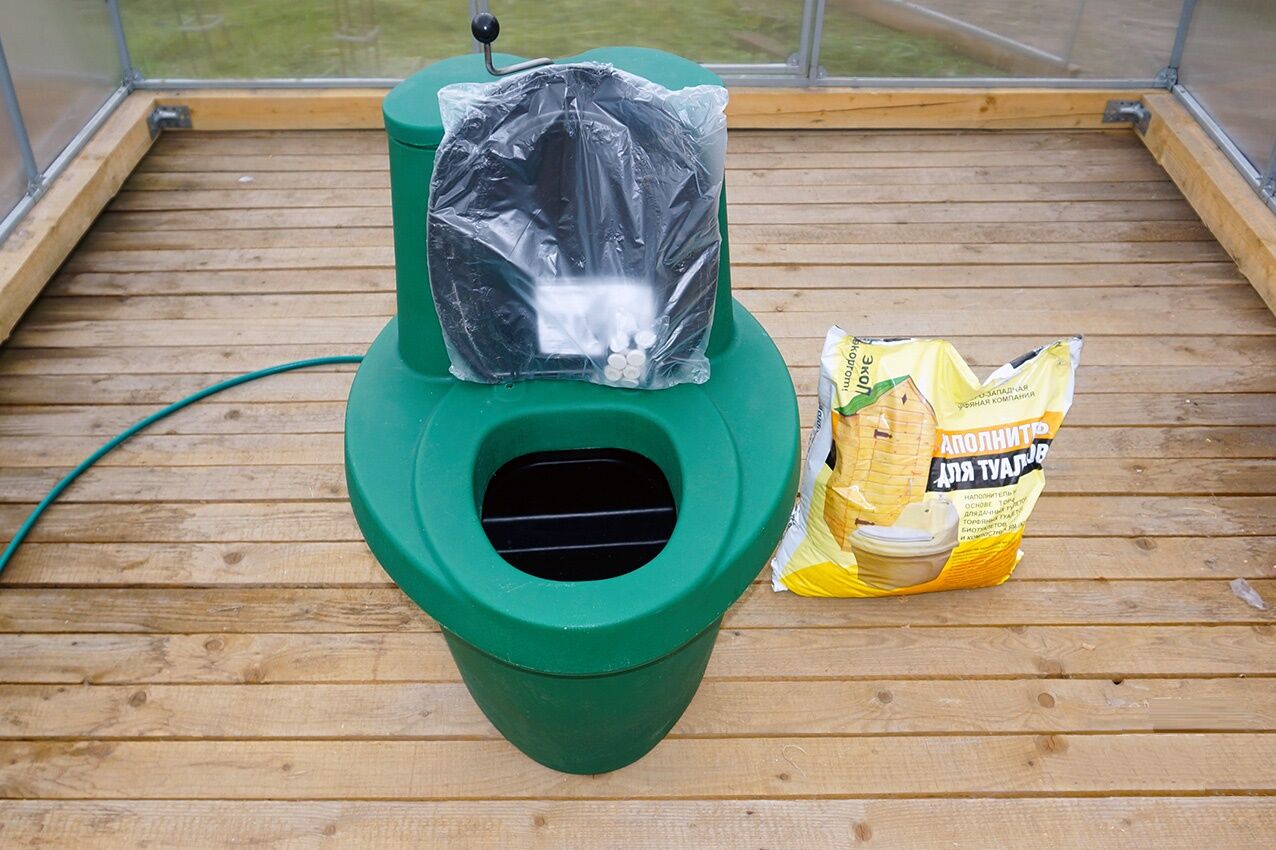
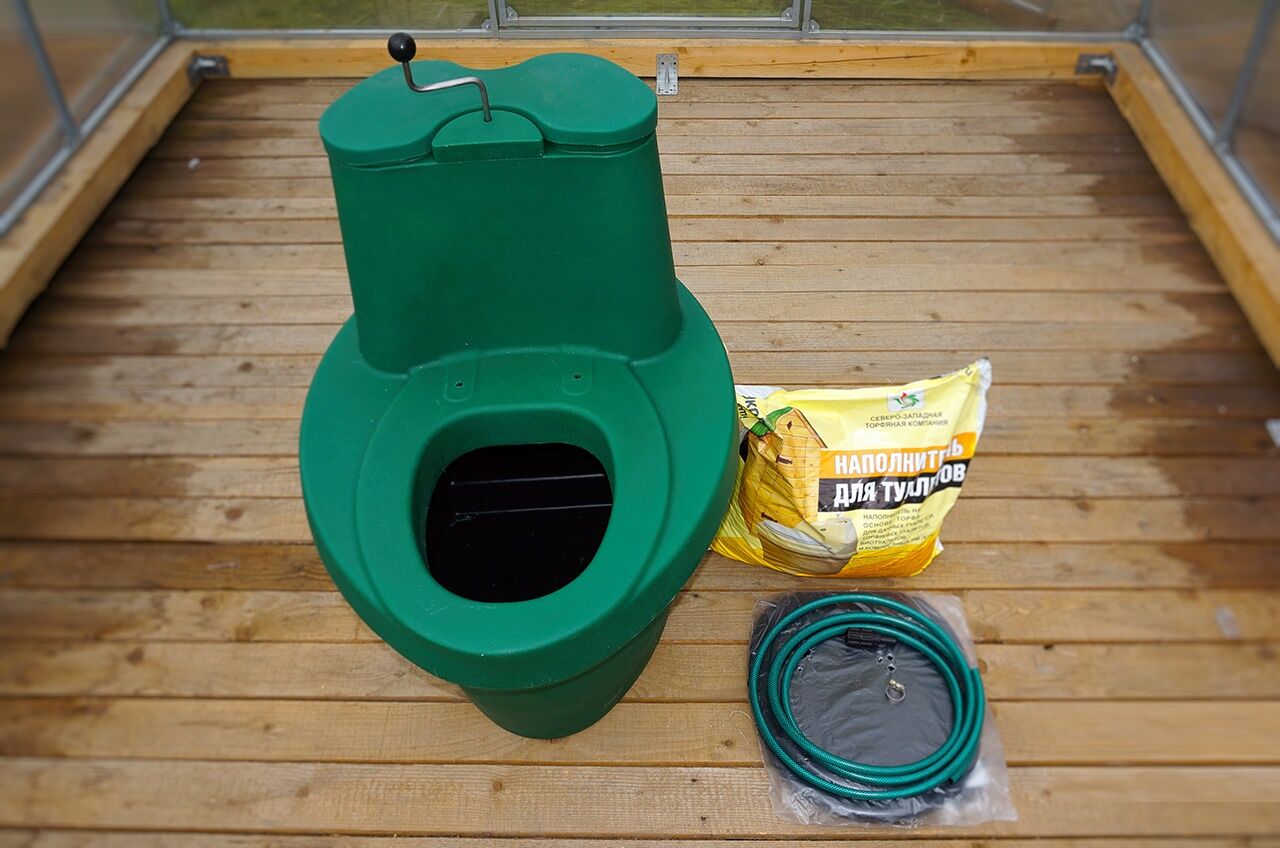
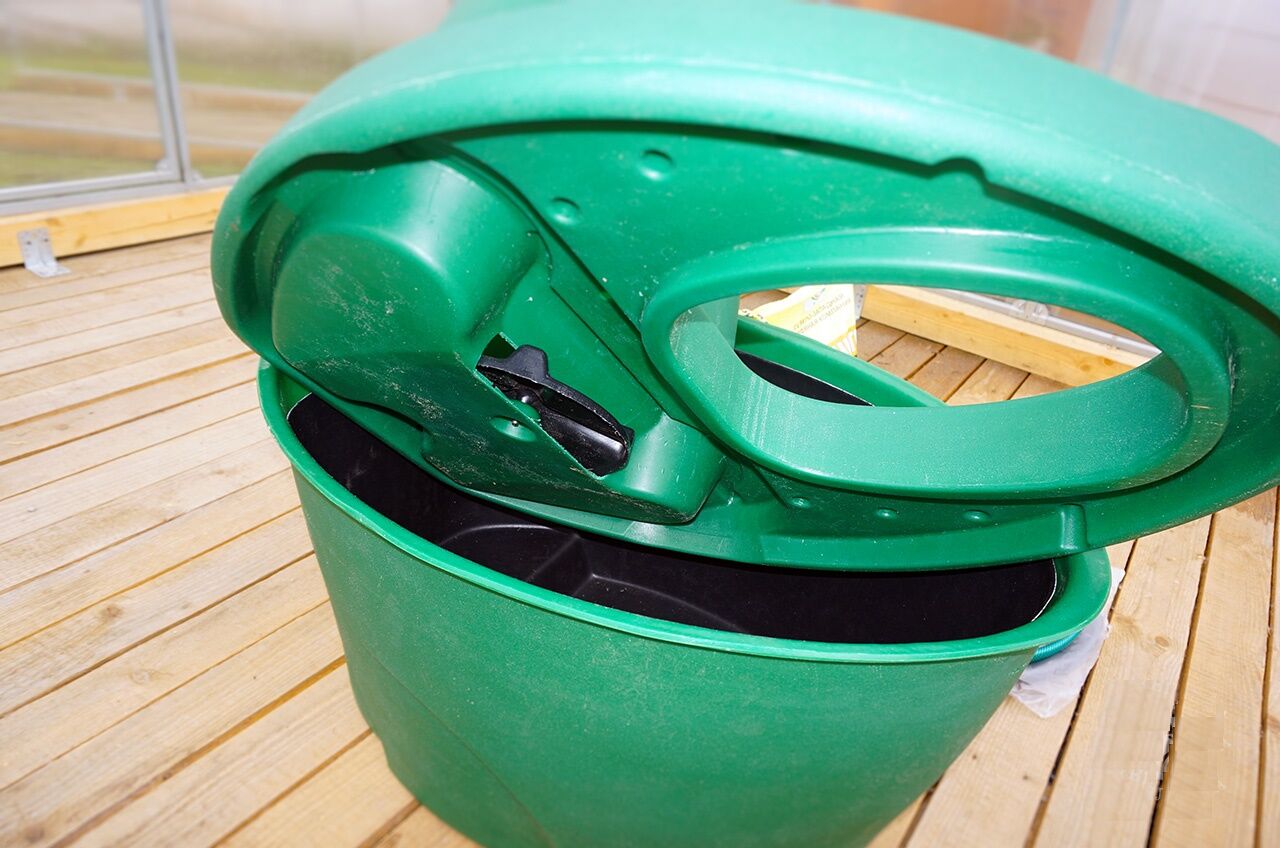
Country life lovers now have a wide selection of mobile phones at their disposal. peat toilets factory production:
No. 3. Bio-or chemical toilet
The principle of operation of the dry closet, which is becoming increasingly popular among summer residents, is similar to that of the powder closet.Peat mixture also takes part in waste processing.
Substances that are involved in the processing process can be either dry or liquid. IN country dry toilets Special bacteria are used as active elements.

There are also chemical latrines in which chemicals play the role of active substances. It must be said that they are not cheap, so “advanced” summer residents, in order to save money, try to replace them with bleach or formaldehyde.
This cannot be done, because these substances are toxic and it is dangerous to use them in such compact devices.
It is acceptable to use liquid preparations such as Bio Favorite, Microzim Septi Treat and Tamir. Powdered formulations have also proven themselves well: Sanex and Atmosbio.
Criteria for selecting a suitable design
Obviously, there are plenty to choose from.
To make the right choice and not regret it later, you should pay attention to the following factors:
- the size of the budget allocated for construction;
- expected intensity of operation;
- the height of the water horizon in the area where the toilet is installed;
- the amount that will be allocated in the future for the maintenance of the restroom.
It is also necessary to correctly assess your physical capabilities and skill level.

The choice of the type of structure and the material from which it will be built depends on objective factors related to the location of your land and subjective ones (your financial capabilities).
Instructions for building a birdhouse
The frame of the classic Birdhouse is made of wood. Various materials can be used as cladding. The cabin roof can have one or two slopes. The cabin will be built above the waste pit.

Before building a wooden toilet in the country, it is recommended to make a drawing of the future building or use a ready-made drawing and calculation. This way it will be easier to determine the need for materials, not to buy too much and, in the end, save money.
Step 1. We select the necessary materials
All materials and tools that will be needed during the work must be at hand.
Let's prepare in advance:
- 2 sq. meters of roofing material;
- 2 concrete curbs 2 meters long or 4 cement-sand blocks;
- one door block (900 x 2000mm);
- 40 pcs. linings (87 x 3000mm);
- two types of edged boards (3 pieces measuring 32 x 90 x 6000 mm and 4 pieces measuring 50 x 100 x 6000 mm);
- galvanized steel profile sheet (2000 x 1520 x 0.4 mm);
- one wooden beam (50 x 50 x 600 mm);
- latch, hinges and handles for the door;
- fasteners (nails, screws);
- plastic pipe with a diameter of 10 cm and a length of 2.5 meters;
- pipe deflector;
- paint or varnish;
- sand, crushed stone or broken brick.
If your building will be insulated from the inside, you need to purchase polystyrene foam for this purpose. In addition, provide exterior finishing elements to your own taste.
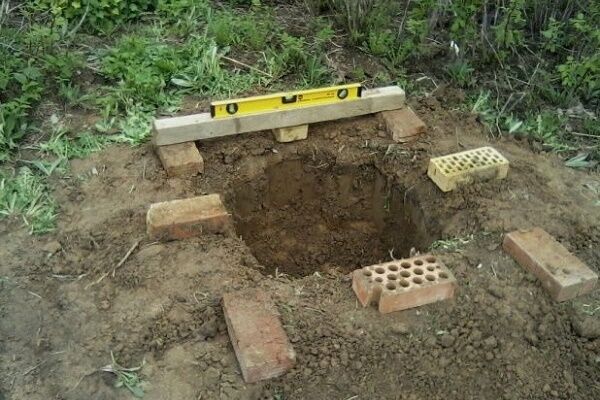
To complete the work you will need ordinary carpentry tools.Do not forget about the construction plumb and level so that you can control the horizontal and vertical position of the structure.
Step #2. Execution of construction work
The preparatory stage is completed, you can proceed directly to the construction of a comfortable toilet in the country.
First stage — organization of the underground part of the structure.
First you should dig a cesspool. Its minimum size is 1x1x2 meters. The actual size must correspond to the dimensions of the above-ground part of the building. As we describe the work being performed, it will become clear how to determine this size.
At the bottom of the pit, a “cushion” is created from a mixture of sand with broken bricks or crushed stone. If desired, concrete rings can be installed in the pit.
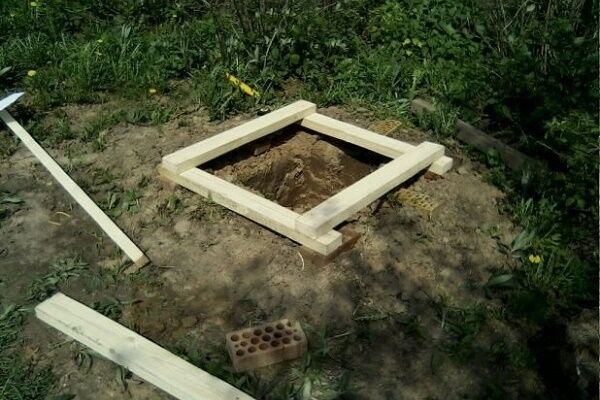
When creating a foundation, we can use concrete curbs as supporting and overlapping elements. Borders should be dug no further than 20 cm from the edge so that they rise no more than 10-15 cm above the soil surface.
If cement-sand blocks are used, they need to be dug in at all four corners. They will be used as supports for the frame of the building.
It is necessary to do waterproofing. This is why we need roofing felt. It can be replaced with any other roll material that provides reliable protection against moisture. The material is laid on curb stones or on blocks in 3-4 layers.

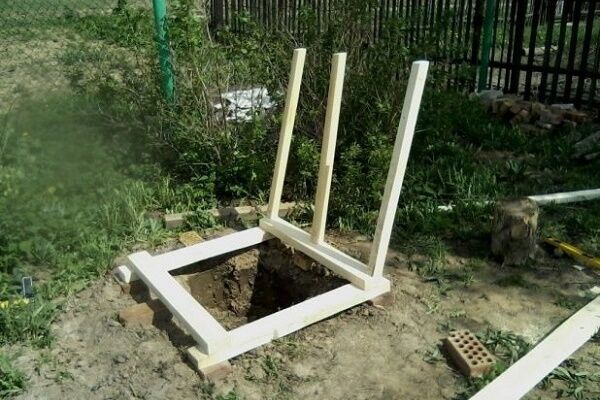
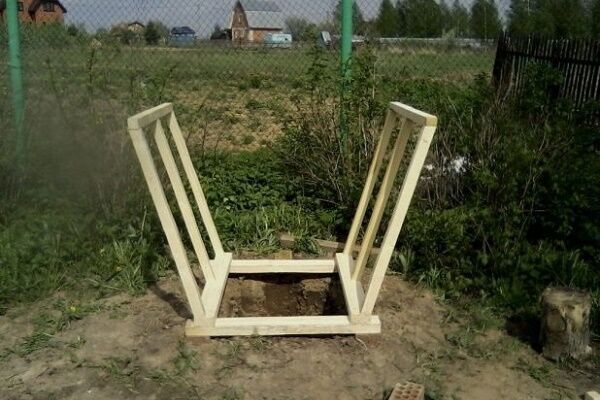
Second phase — construction of the above-ground part of the building.
Now you need to mount the wooden frame in full accordance with the drawing, and then cover it.A wooden “birdhouse” can be covered with clapboard or boards. To construct the flooring, you need thick (from 4 cm thick) and durable boards.

When choosing wood for an outdoor toilet, you need to pay attention to the following characteristics:
- strength;
- rot resistance;
- durability.
Particular care must be taken when choosing flooring boards, because they are most susceptible to moisture from the ground and evaporation from the pit. The following species have the necessary characteristics: oak, beech, larch.
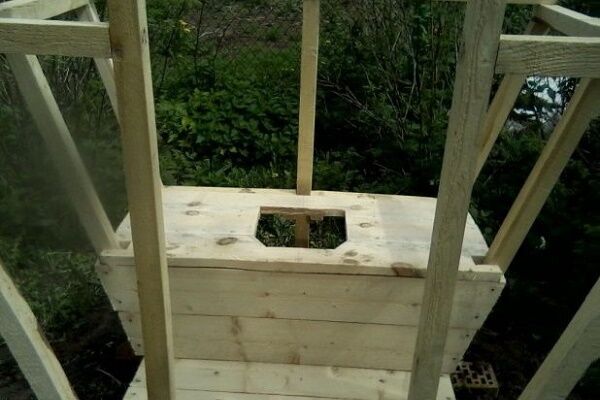
Step #3. Let's start finishing work
You need to cut a hole in the floor of the booth. It is better to make it round in shape with a diameter of at least 30 cm. Then we proceed to install the door. Usually a small hole is cut in it too. The classic shape of such a slot is a “heart”. Through it, sunlight penetrates into the cabin.
If the “heart” is not glazed, it also helps in organizing the ventilation of the room. But it is still better to provide a transparent plastic flap for the slot in case of bad weather.

A variety of materials can be used for the roof of the Birdhouse. For example, the same roofing felt, slate or galvanized steel profile sheet. So, the building is almost ready, all that remains is to paint or varnish it. Don't forget that you need coatings designed for outdoor use.
Step #4. Organization of room ventilation
Ventilation is an important part of restroom design.It is necessary to remove air from the cesspool. For this purpose, slots are made in the roof and floor of the cabin for a pipe with a diameter of 10 cm.
The pipe can be made of plastic or have an anti-corrosion coating. It is inserted into a hole in the floor and brought out through a hole in the ceiling. Both holes are carefully sealed.

The pipe should rise approximately 20 cm above the roof surface.
The deflector, which should be installed at the upper end of the pipe, must perform two tasks at once:
- protection of the air duct from precipitation getting into it;
- organization of draft, which provides air supply from bottom to top.
So, the construction of the Birdhouse is completed. The cabin of our structure is slightly raised above the ground. To make it more convenient to use the Birdhouse, you can attach steps to the booth. Be sure to make a path, because you will have to use this building not only on sunny days.
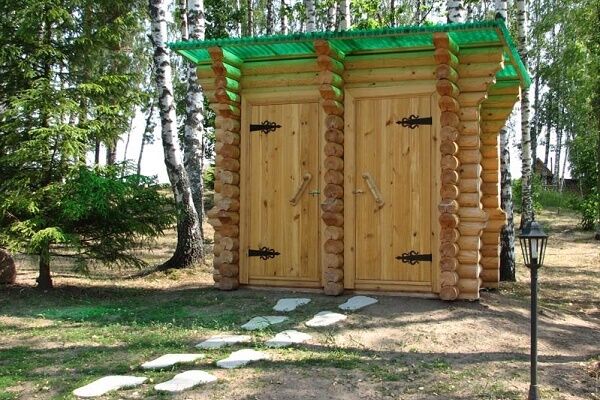
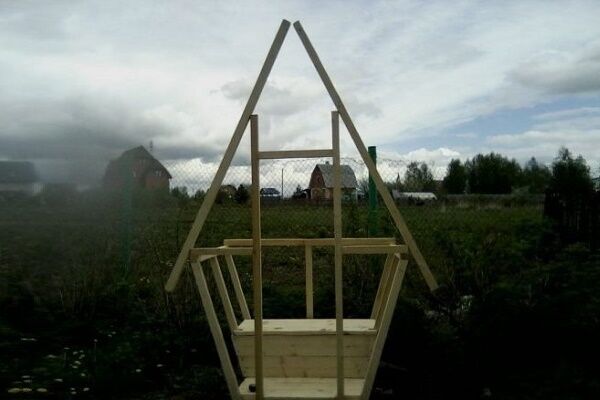
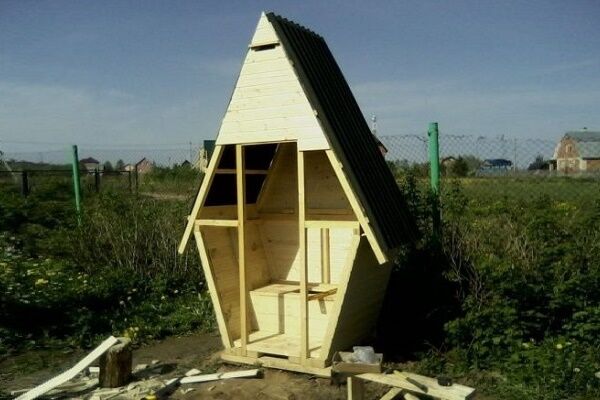
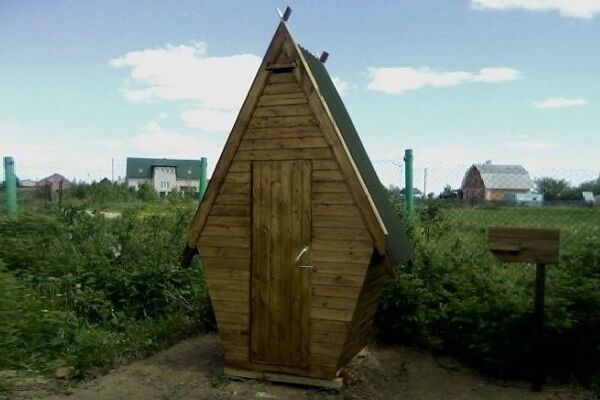
Photo guide to the construction of the “teremka”
To build a structure with an interesting shape, you will need timber, a tongue-and-groove board for covering the toilet seat and floor, sheet material such as OSB, plywood, chipboard or gypsum fiber board for covering the frame. Of course, you will need wood fasteners and corners to secure the frame parts. Naturally, you should stock up on patience, carpentry tools and skills.
Construction is carried out in several stages, which a selection of photos will familiarize you with:
About how to do cesspool made from old tires, you can find out by reading the article we recommend.
How to make your own peat powder closet?
Since we already know that high-quality fertilizers are obtained from feces treated with peat, before building a powder closet, think about where the compost site will be located.
Stage #1. Let's get ready for work
To build a powder closet we will need:
- boards;
- plywood;
- fasteners (screws and nails);
- toilet seat.
You can buy a finished seat in a store.
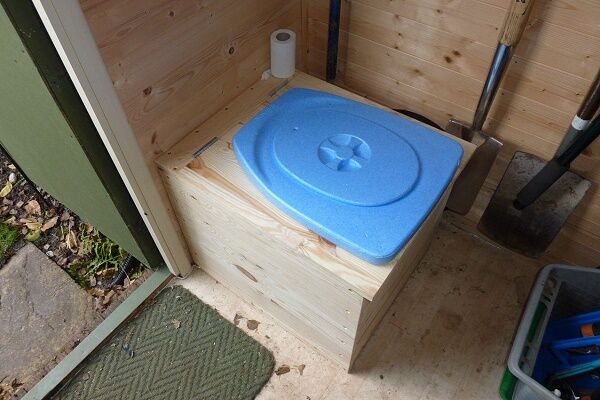
Stage #2. Basic rules for constructing a powder closet
Before you make a peat toilet in your country house, you need to assemble a box. To do this, we need four boards, which should be fastened to each other with self-tapping screws. To be able to install the feces storage unit inside the box, a cutout is made in its front part.
Next, take a sheet of plywood and cut a hole in it. We use this sheet to cover the top of the box. We install the plywood so that the technical hole is located directly above the storage tank.

You need to attach legs to the box, calculating their height so that you can easily install and remove the drive. All that remains is to secure a comfortable seat around the technical hole. As already mentioned, the powder closet seat can be purchased at the store. Depending on the material used, it will cost you from 250 to 5000 rubles.
A container for feces is placed under the hole. You immediately need to pour about five centimeters of peat into it. It is better to have several storage containers so that they can be changed as they are filled.
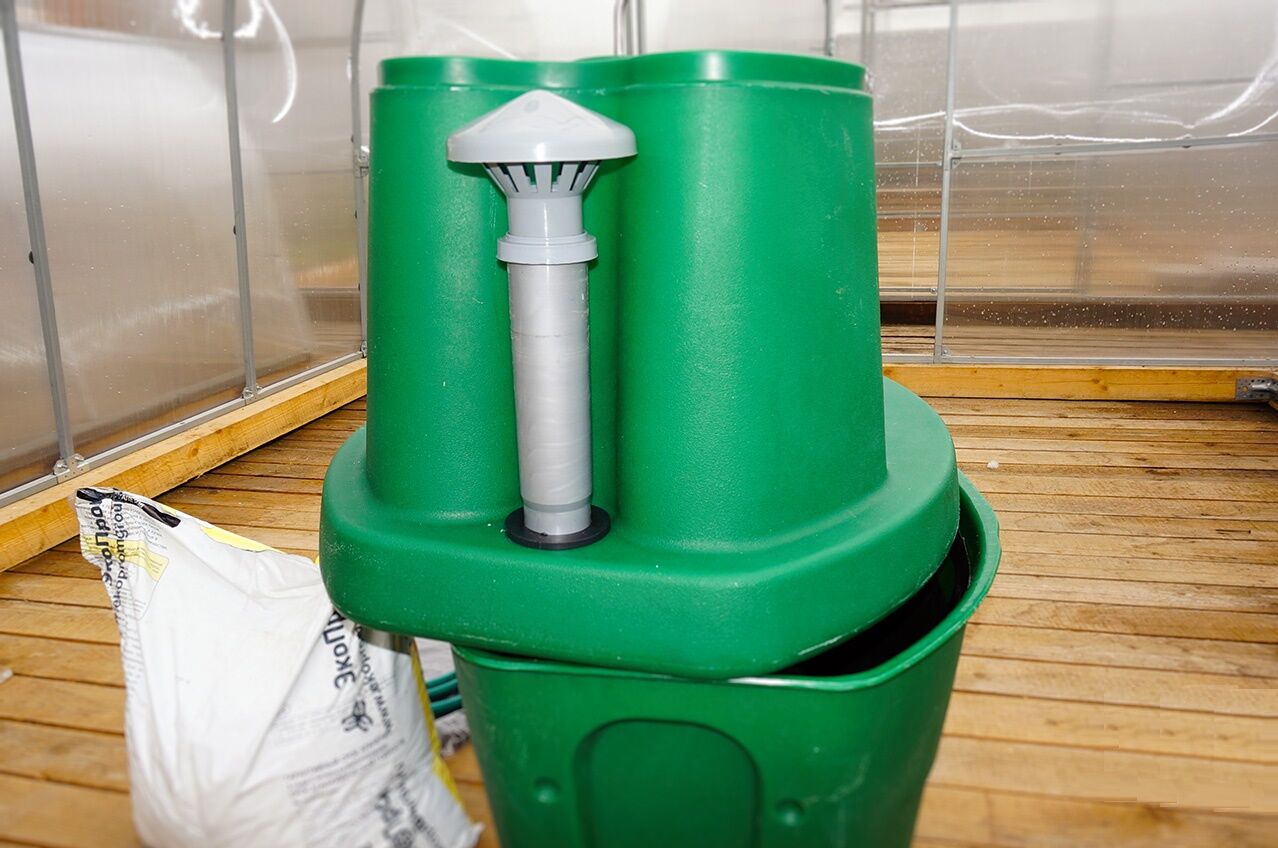
Like any other, a peat toilet needs ventilation. For this purpose, you can use a pipe already known to us with a deflector attached to it. There is no need to lower it into the container itself. A hole in the booth door would also be useful.It will increase the level of ventilation and allow the use of daylight to illuminate the cabin.
You will be introduced to the drawings of country wooden toilets made in the form of a hut. next article, the contents of which we advise you to familiarize yourself with.
Conclusions and useful video on the topic
Now, at least theoretically, you know how you can build a toilet in your country house yourself. But seeing the process with your own eyes is always useful. You can imagine it clearly by watching the video offered to you.
All that remains is to apply the knowledge you have acquired in practice. The country toilet is different from all other outbuildings. It has restrictions on location and distance from other objects.
In addition, there are different models of latrines, differing in both their underground and above-ground parts. It is very important to properly arrange the latrine. We hope that we have helped you in solving this problem.
Would you like to tell us how you built a country toilet with your own hands? Do you want to share an interesting diagram or subtleties of the process that will be useful for site visitors? Please write comments in the block below, post photos, ask questions.


First of all, you need to remember that the toilet should not disturb anyone, which means it should be located as far as possible from the well, from the neighbor’s fence and from the eating area. Before constructing a toilet, you need to take care of the cesspool. Think about how you will remove its contents. Well, then everything depends on your imagination and financial capabilities. The easiest way to make a toilet is from lumber.
Three years ago I bought a garden plot, and the first building was a toilet. It was difficult to decide on the location of its construction. The fact is that every year there is melt water on the site, from April to June. And flood waters do not drain well from the surface because the soil is clayey. When I bought the plot, I didn’t know this, since I purchased it in the winter. Then I took a closer look at the neighboring buildings and placed them parallel. The problem was never resolved. Now I’m considering another option, without a cesspool.
I'm thinking about a toilet made of metal profiles. Inexpensive and practical option. I plan to make a regular cesspool without any problems. I mapped out the place according to all the rules. I wonder if it is possible to somehow make a window above the door for ventilation and lighting. Or is it better to make it right at the top of the door itself? Still, the toilet turns out to be quite high.
Hello. If possible, make an approximate schematic sketch of your future structure, and also write down the height of your metal profile, after all, it can be different. And for ventilation, we still recommend installing exhaust holes.
Not a bad option - I'll take note of it))