Drawings of a hut-type country toilet: standard diagrams and an overview of construction nuances
Country toilets are simple designs, the main purpose of which is clear to the average person without further ado.However, in pursuit of improving the landscape picture, summer residents abandon the classics of the genre. Conventional frame birdhouses are being replaced at an enviable rate by hut-shaped structures. They look more interesting, don’t you agree?
For lovers of country life, we offer the best drawings of a hut-type country toilet. We present several modifications for your consideration, each of which is distinguished by originality, convenience and thoughtfulness of the solution. To help skilled owners, the article provides instructions for assembling and installing important household objects.
The content of the article:
Construction of a toilet in the form of a hut
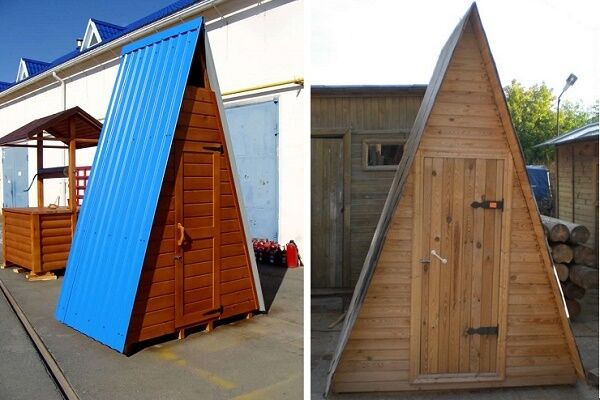
The design of the hut is, first of all, attractive due to its simple and original shape. Buildings in this design are usually used for the construction of utility cellars. Now the fashion for “huts” has come close to country toilets.
Projects of triangular prisms with a gable roof are quickly gaining popularity among homestead owners.

One of the options, represented by a standard drawing of a country toilet of a series of huts, rises 2.5-3 meters in height and occupies an area of 1.2 (2.00) x 1.0 (1.5 m) at the base.

No major financial costs are expected here. The physical load during the construction process is also low.
Materials usually required:
- wooden beam (50 x 50 mm);
- wooden beam (150 x 150 mm);
- tongue and groove floorboard (140 x 20 mm);
- board for sheathing and cladding (100 x 12 mm);
- roofing material;
- varnish, paint, fasteners.
It is not at all necessary to limit yourself only to the use of these materials. Considering the variety of products on the construction market, as well as using the simplest drawings of a country toilet for a typical hut, wide possibilities open up in terms of construction and design.
So, instead of the usual boards, sheet plywood will work just as well. Lath type sheathing can be successfully replaced by solid flooring. And instead of roofing felt, bitumen shingles will lie beautifully on the sheathing. In general, there is room for extraordinary ideas.

Constructions of this type are becoming traditional. Their drawings are distributed everywhere and put into practice.
How to build a country toilet-hut?
The work is carried out using tools often used in dacha farms.
To implement an idea from a drawing into a real country toilet hut, the builder, in particular, needs:
- hacksaw or electric jigsaw;
- plane, chisel, hammer, hatchet;
- construction meter, simple pencil.
Even before the start of construction, it is recommended to decide on the location of the “outhouse” on the personal territory. Usually they choose that part of the summer cottage where there are no nearby plants, sources of water, or buildings for eating.
It is reasonable to build a country toilet-hut on a high-altitude site, no closer than 10-12 meters from residential buildings. Convenient approaches to the structure should be provided in case of sewerage maintenance.
Construction is possible on the basis of a dry closet or as a project with a cesspool (septic tank). Let's consider both options.
House for installing a dry toilet
For a country house, the best choice is a dry toilet.This construction option will not only provide the life of summer residents with an extremely necessary building, but will also provide those who like to grow vegetables and fruits with good quality fertilizers. Installation of a dry toilet does not require significant physical strength.

The dry closet has increased functionality - it opens the way to the production of fertilizers.
Frame assembly instructions
If possible, it is recommended to use planed lumber for the construction of the hut structure itself and the details of the country dry closet.
As a last resort, if the boards and bars have a rough surface, you need to process them with a plane. In practice, it has been observed that planed lumber is much less likely to be attacked by various types of insects.
Sequence of builder steps:
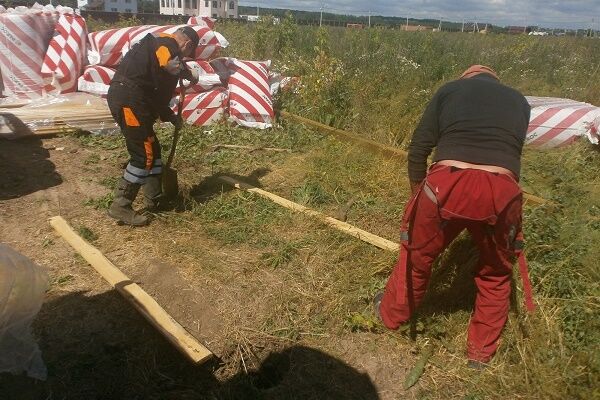
- Along the perimeter of the base (1.2 x 1.0 m) make a small (100-150 mm) recess into the ground.
- Cover the bottom of the recess with crushed stone (backfill height 50-70 mm), compact it well.
- Cover the compacted surface with roofing felt (waterproofing).
- Pour a layer of sand (20-30 mm), distribute evenly on the surface.
- Place a second layer of roofing material with some margin along the perimeter boundaries.
- At the perimeter boundaries, lay a beam (150 x 150 mm) on top of the roofing material.
After completing these works, the foundation is ready for the construction of a hut for a country toilet according to the drawing. Next, you need to assemble the floor of the toilet from tongue-and-groove boards and fasten it along the edges with bars located around the perimeter.This can be done, for example, using metal corners cut to size.

The main task is to build a reliable, durable structure, especially when a permanent structure is being built.
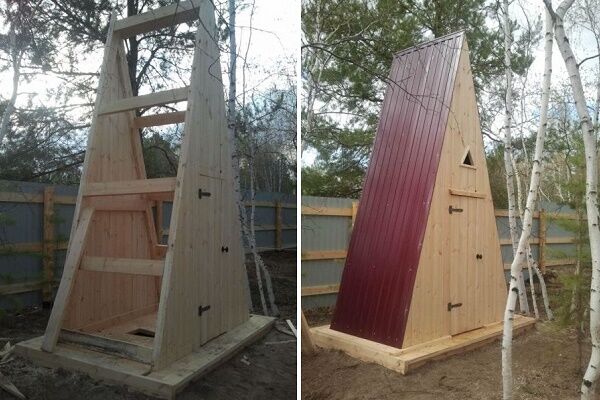
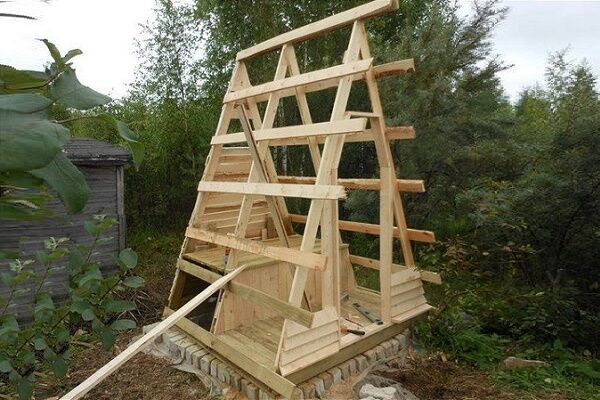
The next step is to begin assembling the frame of the hut for the country toilet, as indicated in the drawing. Take two bars 50 x 50 mm, install them vertically and perpendicular to the base. The lower ends of the small bars are attached to the base bars, and their upper ends are combined with cuts one to the other and are also fastened.
Thus, several rafter elements are formed every 200 mm. The ridge part is additionally strengthened by inserting a beam passed from below. They also install reinforcing jumpers between the rafters in different places, both on the short side and on the long side. The frame of the future dacha “outhouse” is ready.
Hull plating and finishing
Having completed the assembly of the hut frame, they begin to assemble the base of the dry closet. At a level of 350-400 mm from the floor, a jumper is attached between the two rear rafters of the hut. Having made an indentation of 400-450 mm from it to the front part, a second lintel is attached at the same level.
Below the second lintel, at floor level, a third lintel is placed. These will be the base beams of the dry closet, on which the sheathing will lie. Next, the upper lintels are reinforced with stop posts and all the voids are sheathed with boards, cutting them to size. They make sections for the toilet container and for peat storage.
They are equipped with lids (for the toilet section + seat with a hole). Roofing material is laid on the pitched roof of the hut.They make a door in the plane of the facade wall. At this point the assembly can be considered complete.

This is roughly what the simplest design of a toilet for a summer house, made like a hut, looks like. It is small-sized and somewhat inconvenient due to the limited space inside. But at the same time, it occupies a small part of the territory of the dacha plot, where every square meter is usually registered.
For better stability and reliability of the structure, metal pipes are driven into the ground at the corners of the timber base (150 x 150), close to it, and the supporting part of the building is attached to them. Gutters are installed under the roof slopes to collect and drain water. It is also advisable to lay a blind area around the outer perimeter.
Simple design with cesspool
A hut for a country toilet with a cesspool is built using the same principle, but this design has its own nuances. The first nuance seems construction of a cesspool. The second caveat is that the drive must be made airtight (SanPiN standards). The drawing in this case is also different, since in addition to the hut design, it also contains a pit design.

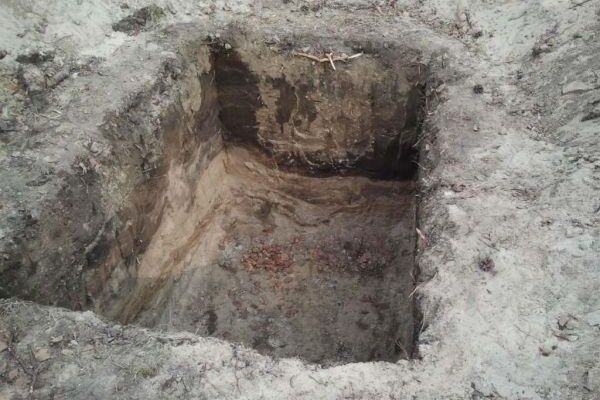
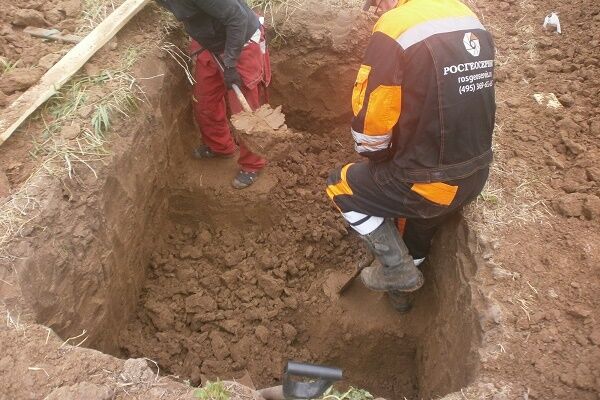
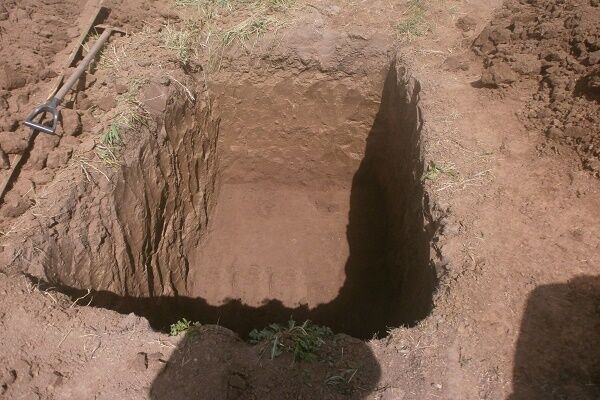
First of all, dig a hole for the container. For a dacha farm, a volume of 2-3 m is quite sufficient.3 (maximum 5 m3). The size of the width of the pit, as a rule, is equal to the size of the width of the hut structure.The bottom is made with a slight slope back from the toilet.
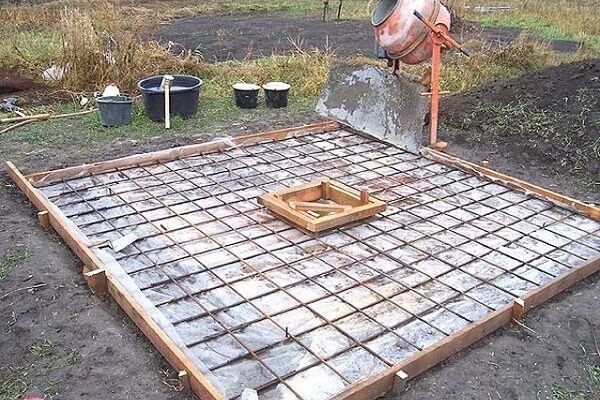
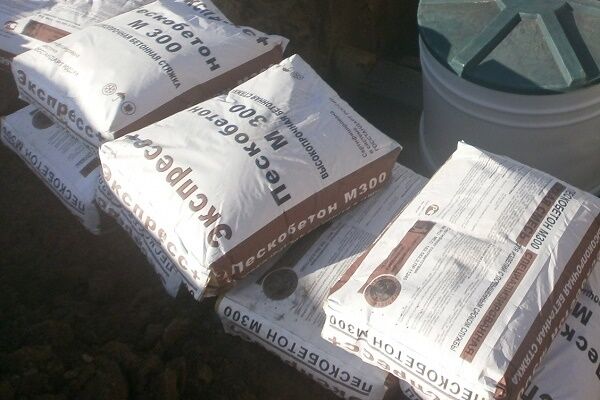
The walls and bottom of the pit are waterproofed, lined with bricks and plastered, or concrete formwork is poured around the entire perimeter. This ensures the tightness of the storage tank, which is important in most cases of construction of such facilities.
Along with sealed circuits, it is also practiced cesspool installation with drainage functions into the open ground area. It is permissible to build cesspools according to such drawings, but only in places with low groundwater levels.

However, the best option is still a sealed system, so we are further considering the construction of a directly isolated option.
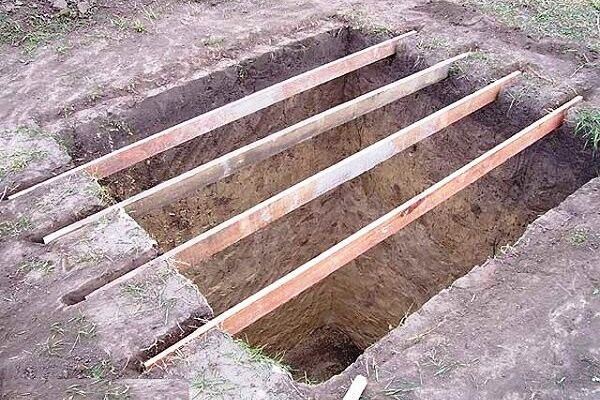
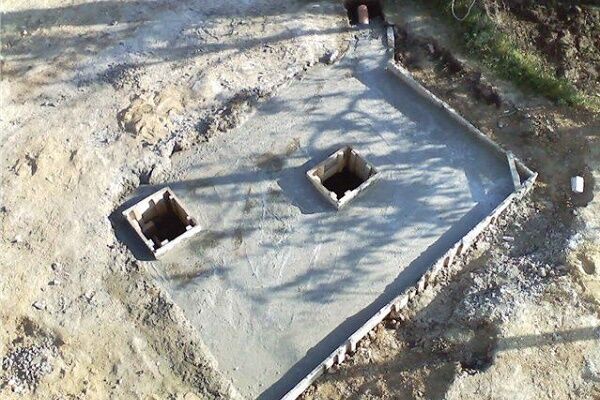
The back part (approximately 2/3) of the upper storage area is covered with a slab (metal, wood or concrete). The stove is equipped with a hatch through which feces are pumped out. The hatch, according to the standard drawing, is located at the rear wall of the building.
The remaining part of the upper area will be covered by a toilet-hut structure, which will be located above the cesspool. With this construction option, the toilet floor is laid and secured to the formwork, like the main structure.
It takes several hours to build the frame and floor. But you will have to tinker with the cesspool.
If the shield with the hatch is made of metal, it is necessary to provide protection against corrosion. To do this, metal surfaces are coated with paint and other protective coatings are used. The wooden product must be treated with an antiseptic, impregnated with varnish, and painted. Essentially, the method of protecting a building structure must be applied to the entire structure as a whole.
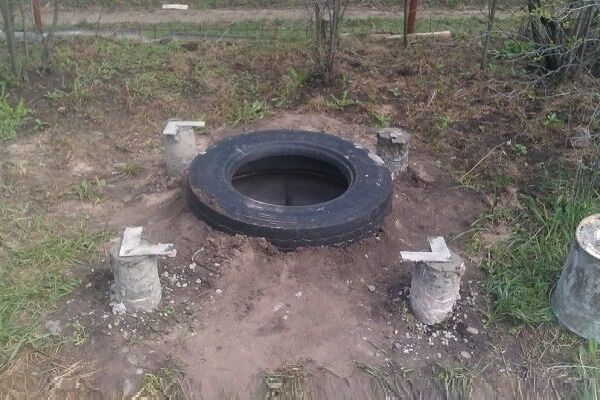
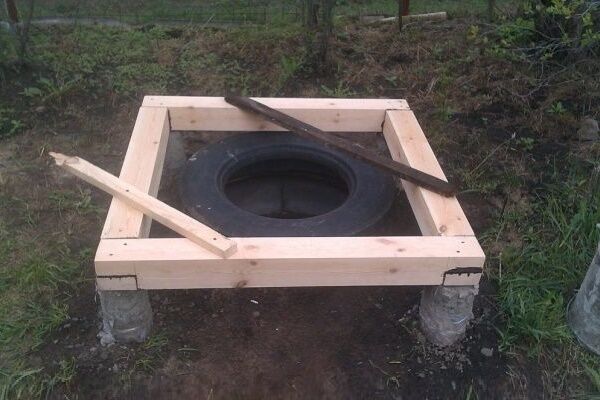
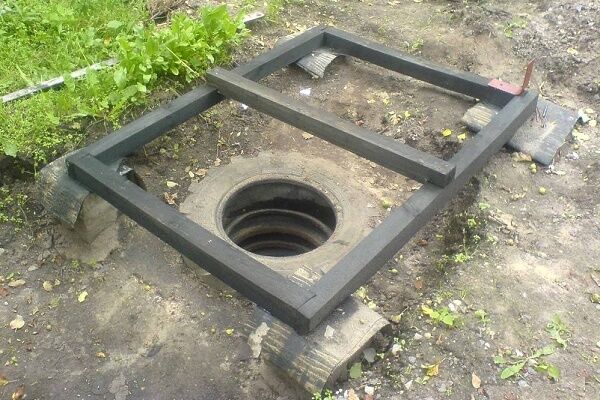
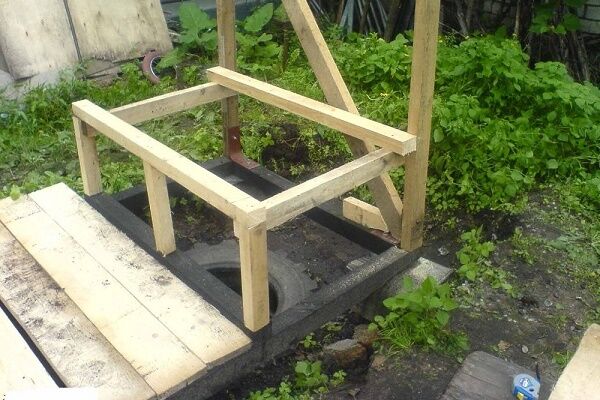
A budget option for a composting pit can be built from old tires:
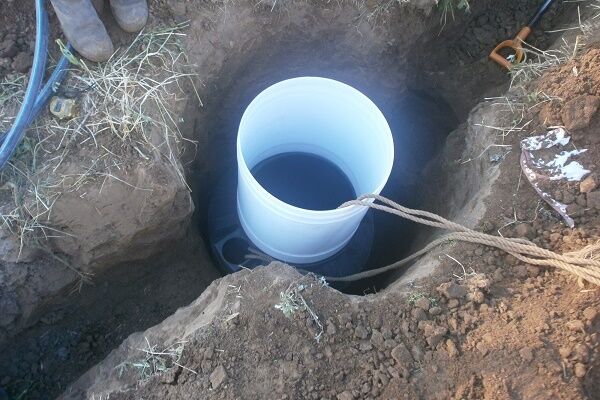
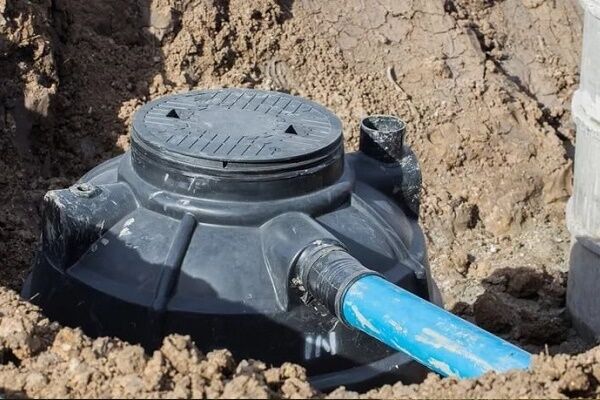
Much more expensive, more complicated, but certainly more reliable and safer from an environmental point of view, is to install a storage tank from a factory-made plastic container:
Drawings of hut-type toilets
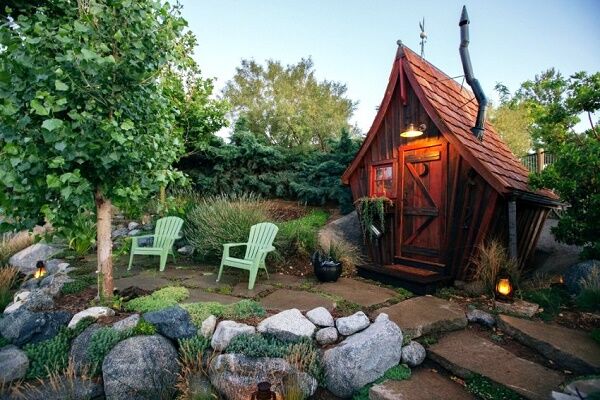
Summer residents practice the construction of toilets, which to some extent resemble the construction of a hut. These are the so-called “huts on chicken legs” or “birdhouses”.

The advantage of such a building is that with the same dimensions as the “hut”, you can get more free space inside.

The result is a beautiful building that fits well into the natural landscape of the summer cottage.

Drawings of similar country toilets have minor differences from the drawings of hut-type toilets. Therefore, the technology for installing bathrooms is almost identical to the options described above.
It will only be necessary to slightly increase the material base and supplement the set of construction tools.Often, projects of such buildings contain windows and vents, natural or forced ventilation.
An interesting and practical solution for arranging a summer cottage is a structure that includes toilet with shower. Our recommended article will introduce you to the rules for designing and implementing a project.
Conclusions and useful video on the topic
An educational video telling about the important nuances of the construction process.
The presence of a building such as a toilet on a summer cottage makes the life of hacienda owners more comfortable. If you approach the construction of a structure taking into account all the nuances of its use in the country, you can build a structure that is doubly useful.
Carefully thought out and compiled drawings will help you create a “need” of an original design. In the end, a country landscape is also a goal for a gardener’s imagination.
Tell us about how you built a toilet on your summer cottage, what option and what scheme you used in the construction. Leave posts and photos with the construction process in the block below. Ask questions, share information that will be useful to site visitors.


The main thing is to choose the right place for the toilet. It should be approximately 10 meters away from both the house and water sources. Remember that you are building a toilet for more than one year, so you need to think about the volume of the cesspool and options for its arrangement. It is necessary to provide for the possibility of vacuum cleaners getting close to it for pumping. Well, everyone builds the toilet itself, based on financial capabilities and imagination. Do not forget about the reliability of the building.
When building such a toilet, you need to remember that it is not for one year.Therefore, the main requirements for the device are: away from the house and away from the well or borehole. And you also need to think about what you need to remove sewage if the cesspool fills up. In order for the sewer truck to arrive, you need to think through the access roads. Well, then everything is simple: you dig a cesspool, build a hut-type toilet - whoever has enough finances and imagination for what.
I would like to make the toilet prettier and more original than an ordinary birdhouse. I really like the “hut/teremok”, but I’m afraid I can’t do it on my own and it requires a lot of materials. The intermediate option is just a “hut”. Who has done this, does it have any pitfalls?
Hello. Among the disadvantages of an outdoor toilet “hut” we can note the loss of usable space, although, in fact, it is insignificant, and the complexity of installation; after all, a rectangular structure is easier to build. Some say that they also need to look for materials of suitable length, but I don’t see anything difficult in extensions. And, of course, if you are not of small size, you may find it uncomfortable to be inside due to the triangular shape.
As for the hut, it is an original, warm structure with optimal usable space.
It seems to me that you should consider this option, it may help you save up or save money somehow. It’s quite possible to make it yourself, there are many standard schemes, you’ll just do everything according to the drawings.
By the way, timber is usually ordered at the market or in construction stores. I recommend that you do this somewhere at a rural mini-sawmill.In fact, the owners sell the same material on the market, but with personal contact and bypass orders, they often significantly reduce prices.
The diagrams are clear. But how about heating in such a toilet? How to insulate and all that?
As a rule, heating is not installed in hut toilets. It can be insulated using standard external insulation technologies. But don't forget about ventilation.
Hello, Zhenya. Regarding heating a country toilet, I can give you some advice. As I understand it, the question is specifically about heating during use, and not about full heating, as Maria thought.
To heat an outdoor toilet, you can use an IR heater, for example UFO ECO Mini 1500 (cost about 30-35 dollars) or THERMIA QH01 (cost about 10-15 dollars). This is the best option for heating a country toilet. Or any other models that can be mounted on the ceiling - this is ideal for a small room.
It is best to use mineral wool, polystyrene foam or penoplex as insulation. They are easy to install and retain heat well.