Bathroom lighting: DIY LED lighting installation
Proper lighting in the bathroom decorates the interior and creates a pleasant atmosphere.Increasingly, LED devices are used when organizing bathroom lighting - they are easy to install, safe and cost-effective.
Before you begin installing the lighting, you need to learn more about the specifics of electrification of wet rooms, study electrical safety rules, draw up a wiring plan, select lamps and other elements of the system. All these points are described in detail in our article.
In addition, we described the procedure for arranging LED backlighting and outlined the main stages of installation and connection of the LED strip.
The content of the article:
Electrical and high humidity
Large amounts of water, frequent temperature changes, humidity and hot steam, condensation - all these conditions characteristic of the bathroom create an increased danger when using electricity within its confines.
To ensure the safety and proper operation of electrical appliances, during installation in such rooms, electricians use only elements protected from exposure to steam and water.
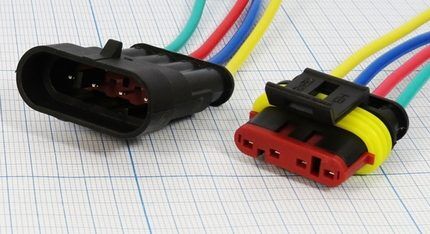
Moisture-proof terminal blocks are perfect for the bathroom, as they can withstand high humidity for a long time, and at the same time they significantly facilitate installation.
Installation of any distribution boxes and knots should be carried out strictly outside the bathroom. Inside the bathroom, connecting separate wires should be avoided as much as possible.
If for some reason it is still necessary to do the so-called twisting, then each such place should be protected as thoroughly as possible with insulating materials from moisture penetration.Most often, lighting in the bathroom is organized using low-current systems with a power consumption of 12 V.
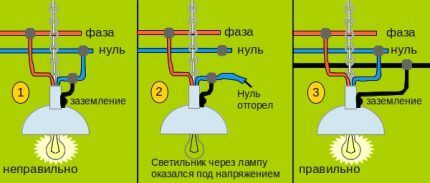
It is almost impossible to receive any dangerous electric shock from such an LED lamp, even in high humidity. But this does not mean that you can forget about security measures. All LED devices must be grounded.
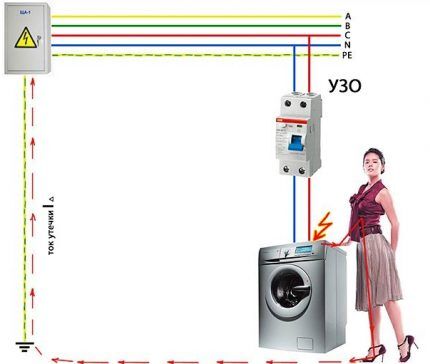
The lighting system must be connected to residual current device, which is triggered when a current leak occurs and interrupts the power supply to a specific object.
In bathrooms, it is recommended to organize a separate power supply line to each object or group of objects. Usually a line is allocated for sockets and separately for lighting fixtures.
If the bathroom is supposed to use powerful equipment (an automatic washing machine, hydromassage cabin, electric sauna, etc.), then a separate power supply line should be made for each such object. And for each such group of electricity consumption it is recommended to install a separate RCD.
Detailed instructions for installing a socket for a washing machine are presented in this article.
Electricity is supplied to low-current LED systems through a special step-down transformer. This device must also be installed outside the bathroom, i.e. away from sources of high humidity. Almost all modern LED lamps are equipped with a special grounding terminal.
This method of protection should not be neglected. Even weak currents can be transmitted and accumulated on wet surfaces. And thanks to steam and condensation, any surface in the bathroom can become wet: walls, floors, profile structures, ceilings, furniture, appliances, etc.
An accidental touch can transfer a discharge of accumulated electricity to the human body, which in some cases can not only cause discomfort, but also lead to serious electrical injury.
Design and installation features
All of the above points must be taken into account before drawing up a design diagram lighting in the bathroom. The installation of LED devices will be taken into account in such a scheme.
Usually you need to decide on the main and additional lighting, provide switches for them, determine location of sockets for connecting various household appliances.
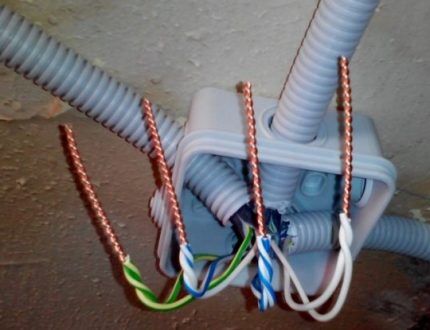
After this, a wiring plan is drawn up, the location of distribution boxes, etc. is determined.A cable with a cross-section of 2.5 square meters is laid from the general apartment electrical panel to the bathroom junction box. mm. It is suitable for lamps and also for lighting.
A more powerful cable intended for large equipment is laid separately. It is recommended to color-code the different cables to prevent them from being accidentally mixed up. After this, lay the wire to the switch.
If all lighting fixtures are turned on with one key, then it will be enough to use a regular double wire.
But LED lighting in the bathroom is usually turned on separately from the main lighting. In this case, use a triple cable. If a switch with three keys is used for lighting, i.e. for three separate groups of lamps, you will have to use two double cables. The cross-section of such a wire should be 1.5 square meters. mm.
After this, the cable is laid from the switch directly to the lighting fixtures. It is worth immediately taking into account that it is not recommended to install open wiring in bathrooms, so you will have to make grooves. In some cases, it is possible to lay the cable in a special plastic box.
Groups of auxiliary spotlights can be connected in parallel or in series. In the first case, you will need to connect a separate power line to each lamp, in the second, you will need to connect the lamps along one line one after another.
With a parallel connection, both cable consumption and the amount of work increase significantly. In the second case, everything is much simpler and cheaper.
But serial connection has a number of disadvantages. For example, if one lamp burns out, the supply of electricity to the entire circuit will be interrupted.In addition, there is no way to diversify the LED backlight control system.
With a parallel connection, a burnt-out element will not in any way spoil the operation of the remaining lamps.
If there is a desire to arrange the possibility of turning on not all lamps at the same time, but only some, for example, every second lamp, then a parallel connection will be needed. This allows you to adjust the level of illumination in the room.
If desired, methods for connecting lamps can be combined, for example, lighting a mirror can be done in a sequential way, and to decorate a bath or ceiling, use a parallel connection, etc.
For this type of lighting fixture, it is recommended to use a flexible stranded wire. Monolithic cable can make it difficult to install fixtures correctly by changing their position. Installation work with flexible wire is usually not difficult to perform, but all twists should be carefully soldered and insulated.
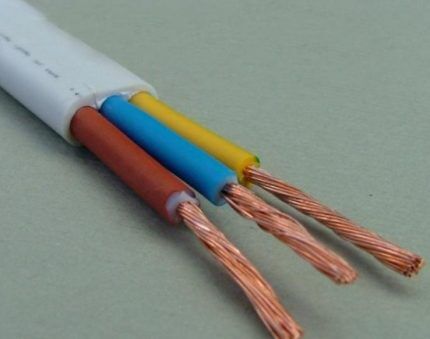
Usually for lamps in the bathroom It is recommended to use wires of the ShVVP, PVS or similar types, in which the stranded cores are securely covered with a layer of polyvinyl chloride plastic.
Such protection will prevent the spread of fire in the event of fire, prevent the formation of fungi, and is resistant to moisture.
The supply cable must be laid in a protective corrugated channel.For systems with grounding terminals, a four-core wire is used, but if such an element is missing, a three-core design will be sufficient. Holes of a suitable size are made in the suspended ceiling canvas for spotlights.
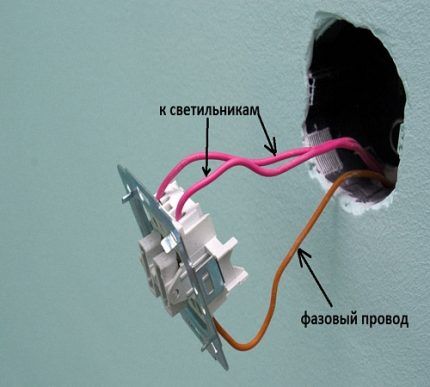
Wire outlets should come out of them, two segments for each switch key, as well as two more wires for the reverse connection. To facilitate installation, it is recommended to leave the length of the outlets approximately 15-20 cm. The ends of the outlets of the same color must be cleaned and connected into twists.
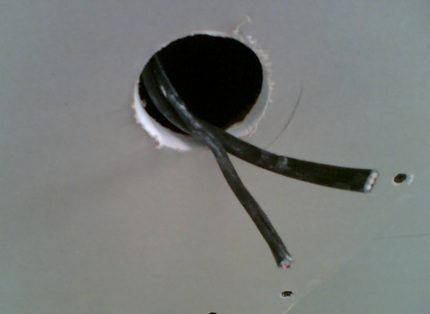
If you intend to connect to switch with two keys, then three twists will come out of each hole. One of them will be common to all lamps, and the other two will be for the switch keys.
Accordingly, the first twist is attached to each lamp, and the rest - only to those elements that will be controlled by a specific key.
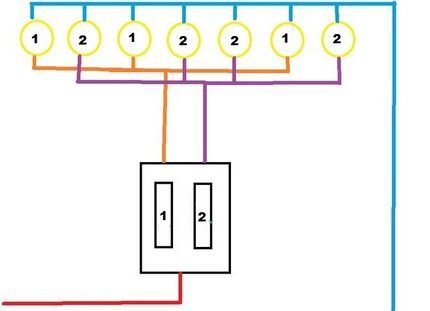
The common wire in the distribution box will be connected to the neutral wire, and the phase should be connected to the switch and divided into two lines leading to the corresponding keys for different groups of lamps.
Useful information on LED strips
This is an extremely convenient option LED lighting, relatively inexpensive and easy to install.LED strips, also called LED strips, are polymer strips on which miniature LEDs with resistors are installed. The reverse side of the plank is usually equipped with an adhesive layer.
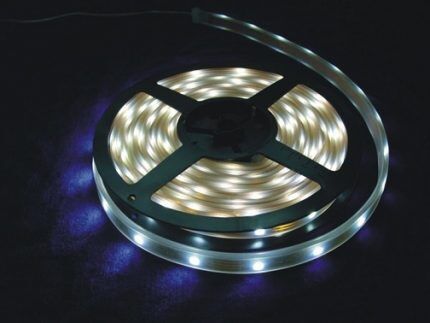
Installing such a tape is very simple: you need to glue the element in a suitable place and connect it to the power supply. The LED strip is divided into equal sections, each of which contains a certain number of LEDs connected in series.
The places for cutting this design have special markings. In bathrooms, only waterproof LED strips marked IP44 can be used. Such elements vary in power. There is a purely decorative option, and strong LEDs that provide a large amount of light.
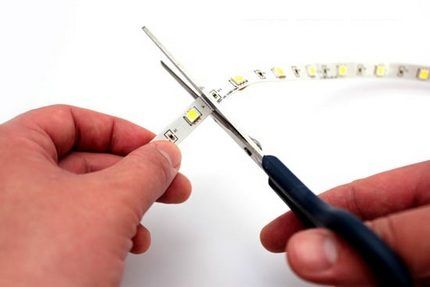
There are single and multi-color LED strips. The latter have a slightly more complex structure: in addition to the general output, there are three more - one for each color.
When choosing an LED strip, you should take into account such an indicator as the density of LEDs, i.e. their number per meter. In addition, an adhesive layer is not always needed; there are designs without it.
Soldering of single-color strips of tape is soldered according to the “plus - minus” principle. When installing a multi-color tape, connect the areas indicated by the indices V+, G, R, B.To choose the right power supply and controller, you need to calculate the length of the tape and multiply this figure by the power of one meter.
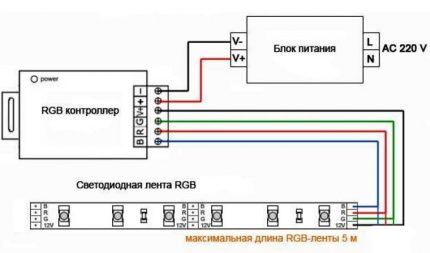
If the length of the structure exceeds 15 m, you will need to use another power supply, if the length is more than 30 m - two power supplies, etc. The connection of the network electrical wire is usually made to the contacts, which are designated as N and L. For multi-color tape, the controller is first installed.
If, when installing LED bath lighting with your own hands, you need to bend the tape, you should remember that the permissible bending diameter is 20 mm.
This type of backlight can be connected not only to a regular switch, but also to dimmer for LED strip. This device allows you to adjust the brightness of the LEDs. A portable remote control can be a convenient option for controlling the backlight.
When working with LED strip, you must strictly observe polarity, protect the structure from mechanical damage, and adhere to fire and electrical safety rules. If you intend to fix the tape on a metal base, you should first cover it with insulating material.
LED strip leaves wide scope for obtaining various effects when decorating the interior.
In addition to mirror illumination, it can be used:
- to decorate the ceiling around the perimeter;
- to effectively highlight small shelves;
- for decorating a mirror;
- to visually highlight the bath;
- for arranging a false window, etc.
If you install LEDs under the bathtub, you can achieve the effect of the structure floating.A false window illuminated with an LED strip can become a stylish interior decoration and visually expand a small space. An interesting addition are luminous faucet and shower attachments.
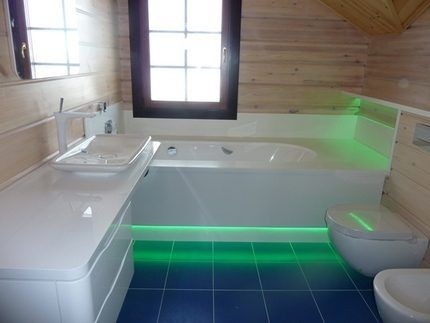
Such elements are quite simple to install; they do not need to be connected to the electrical network. Of course, the listed techniques should be used sparingly so as not to spoil the appearance of the bathroom with unnecessary details. If there are too many elements, the backlight will simply merge into one unintelligible spot of light.
Installation of mirror lighting
If you are planning to use LED auxiliary lighting in the bathroom, then you cannot ignore the mirror. Lamps located around this element will not only decorate the interior, but also make its use more convenient. For LED mirror illumination, a tape, single or multi-color, of a suitable length is usually used.
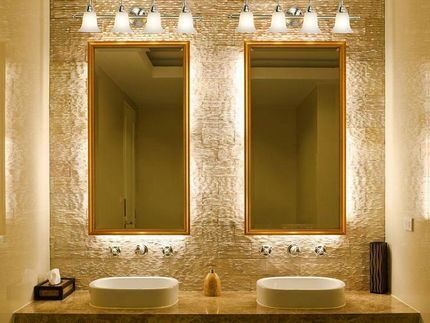
If the mirror is large and the length of the tape exceeds five meters, you will have to stock up on connectors to connect individual pieces of tape. The structure is connected through a power supply with a power that should be at least one and a half times greater than the power consumption of the used LED strip.
Of course, only waterproof LED strip should be used in the bathroom.If it needs to be cut, then this must be done using special marks made by the manufacturer, otherwise it can simply be damaged. Connect individual sections using connectors.
The tape can be glued either directly to the surface of the mirror or to the wall behind it, it all depends on what design effect you plan to achieve. But in any case, before gluing the LEDs, the surface should be degreased. After this, the tape is simply connected to the power supply.
Conclusions and useful video on the topic
The series connection of LED luminaires is described here:
This video shows how to connect LEDs in parallel:
The procedure for installing spotlights is shown in detail here:
LEDs are a convenient and cost-effective option for organizing main and auxiliary lighting in the bathroom. If you understand all the requirements and instructions, you can easily install such elements yourself.
Do you have personal experience designing and installing bathroom lighting? Do you want to share your accumulated knowledge or ask questions on the topic? Please leave comments and participate in discussions - the feedback form is located below.


I’ll tell you as a person who sells LED strips and light bulbs: scientists have proven that LED lighting is not suitable for home lighting, sooner or later the eyes get tired (even with constant rare lighting, like in the bathroom), they are rather intended for cafes, clubs and restaurants.So I highly recommend not using LED lighting in residential areas; sooner or later it will cause discomfort.
Good afternoon, Alexander. Scientists, let me remind you, “invented” these lamps. Subsequently, a competitive struggle developed between manufacturers - as Dorenko said, a mutual fight began, or, in other words, a search for shortcomings.
When ordinary people discovered discomfort from white light, scientists found a way to generate yellow light, close in spectrum to the sun. Such lamps no longer cause any complaints.
LED strips are available in two types: open and closed. The latter are placed in a transparent tube; they can even be placed in a shower stall. There are also single-color and multi-color ones, with the help of which you can imitate color music. Imagine, with the right amount of imagination, you can arrange something in the bathroom that will make you stop taking a shower. By the way, booths with audio systems have been produced for a long time!
Well, Alexander, the manufacturer is responsible for the shower stall “with music” - I mean the possibility of electrical injury. During the five-year period I worked at Energonadzor, I encountered a fatal case - a teenager took a receiver with homemade speakers into the bathroom. The contact was bad, he began to correct the wiring without getting out of the bath. This tiny voltage killed him.
It is better to use a 12-volt tape for the bathroom. And so, yes, as Alexander already wrote above, if you want and have the skill, you can arrange a real light music. And of course, when purchasing ice tape, you need to take into account the degree of protection. I would only recommend IP68 protection, i.e.A completely sealed version, they can even be heated. Well, I’m exaggerating this, of course, but at a distance of a meter under water there are no problems.