How to make an air-to-water heat pump: device diagrams and self-assembly
Due to the regular increase in the cost of heating fluids, alternative heating methods are becoming in demand.For example, a practical air-to-water heat pump that uses air energy for heating. The installation does not require expensive consumables, is easy to use, and safe.
Due to the considerable price of factory assembly of the unit, many people are interested in independently constructing this system. We will tell you what a home craftsman will need to build a homemade heat pump. Here you will find out what technical equipment you should stock up on.
The content of the article:
- Features of the air-water thermal system
- Construction of an air-to-water heat pump
- Assembling the outdoor unit
- Block with heat exchanger-evaporator
- Compressor installation rules
- Design of a storage tank (capacitor)
- Connecting the outdoor unit to the evaporator
- Connection of evaporator, compressor and tank
- Implementation of plant control systems
- Air-to-water heat pump power calculation
- Maintenance of a homemade installation
- Conclusions and useful video on the topic
Features of the air-water thermal system
The heat pump to which this article is devoted, unlike other modifications of a similar device (in particular, water-water and soil-water), has a number of advantages:
- saves electricity;
- installation will not require large-scale excavation work, drilling wells, or obtaining special permits;
- If you connect the system to solar panels, you can ensure its complete autonomy.
A significant advantage of a thermal system that extracts wind energy and transfers it to water is its 100% environmental safety.
Before you begin designing a pump, you need to find out in which cases the system is most effective and when its use is inappropriate.

Specifics of application and operation
The heat pump operates productively exclusively in the temperature range from -5 to +7 degrees. At an air temperature of +7, the system will generate more heat than necessary, and at temperatures below -5, it will not be enough for heating. This is due to the fact that the concentrated freon contained in the structure boils at a temperature of -55 degrees.
Theoretically, the system can generate heat even in 30-degree frost, but it will not be enough for heating, because the heating capacity directly depends on the difference between the boiling point of the refrigerant and the air temperature.
Therefore, this system will not be suitable for residents of the Northern regions, where cold weather sets in earlier, but in houses in the Southern regions it can effectively serve for several cold months.
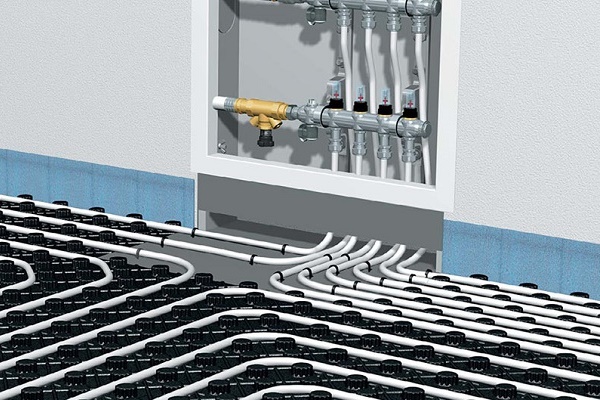
If standard batteries are installed in the room, the heat pump will work less efficiently. The air-to-water device is best combined with convectors and other radiators with a large area, as well as "warm floor" systems, “warm walls” of water type.
Also, the room itself must be well insulated from the outside, have built-in multi-chamber windows that provide better thermal insulation than conventional wooden or plastic ones.

Homemade Heat pump will be able to effectively heat houses up to 100 square meters. m and is guaranteed to produce a power of 5 kW. It should be understood that it is impossible to fill freon with sufficient quality into a structure created in domestic conditions, so you should count on its boiling point of up to -22 degrees.
The home-assembled device is ideal for supplying heat to a garage, greenhouse, utility room, small private pool etc. The system is usually used as additional heating.
Electric boiler or other traditional equipment for the heating season will be required in any case. During severe frosts (-15-30 degrees), it is recommended to turn off the heat pump to avoid wasting electricity, because during this period its efficiency is no more than 10%.

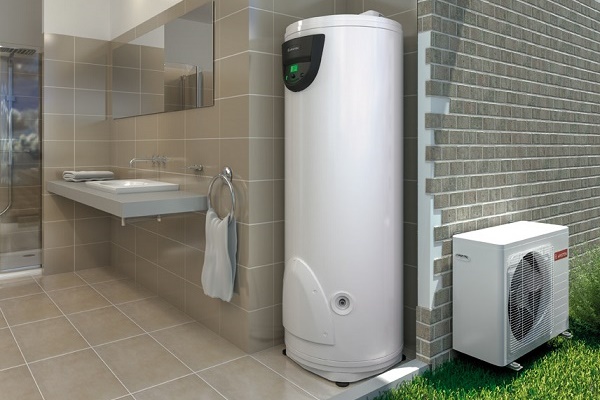
Operating principle of the system
The working substance in the structure is air. Through the outdoor unit, which is installed outdoors, oxygen enters the evaporator through pipes, where it interacts with the refrigerant.
Under the influence of temperature, freon becomes gaseous (since it boils at -55 degrees) and enters the compressor in heated form under pressure. The device compresses the gas, thereby increasing its temperature.
Hot freon enters the circuit of the storage tank (condenser), where heat is transferred to water, which can subsequently be used to organize heating and FGP. In the condenser, the freon loses only part of its heat, and is still in a gaseous state.
Passing through the throttle, the refrigerant is sprayed, as a result of which its temperature decreases. Freon becomes liquid and in this form passes into the evaporator. The cycle repeats.

For those who want to build their own Heat pump from waste materials and used equipment, for example, from an old refrigerator, the information contained in our recommended article will help.
Construction of an air-to-water heat pump
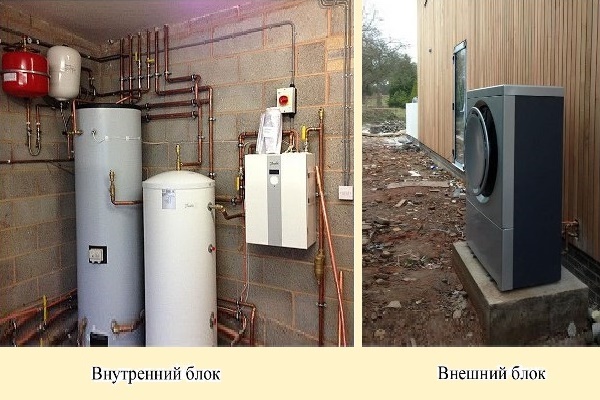
A heat pump system consists of four main elements:
- outdoor unit;
- heat exchanger-evaporator tanks;
- compressor unit;
- storage tank (capacitor).
Let's look at the design features of each block.
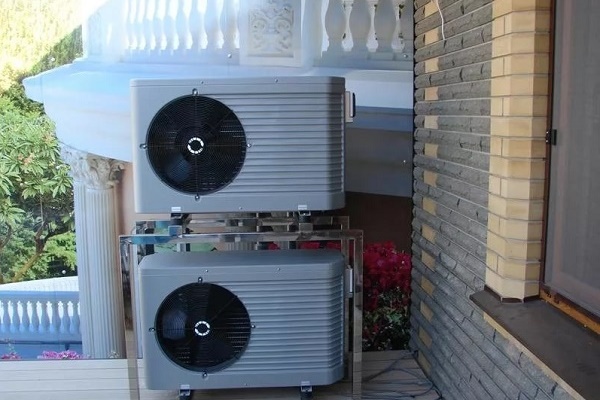
Assembling the outdoor unit
To create an external block you will need:
- Frame. Traditionally, a unit made from a split system, washing machine, or other large equipment is suitable; sometimes they build it themselves by welding metal elements. After assembly, it is important to treat the metal with anti-corrosion powder paint.
- Fan. The product can be borrowed from an old working air conditioning systems or purchase separately.
The fan model should have wide plastic blades and, preferably, with a detachable motor so that it can be connected to the sensor.

An evaporator and auxiliary elements for its operation can be installed in the outdoor unit, but it is more advisable to place these parts in a separate housing.
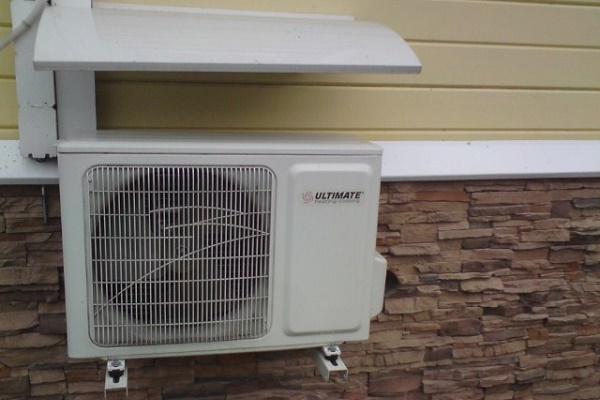
Install the outdoor unit at a distance of 2-10 m from the house. It is important to build a foundation for it and install a canopy to protect the structure from precipitation. It is also necessary to secure a grille in front of the fan to prevent dirt, debris, and leaves from getting into the fan blades and pipes.
Additionally, it is advisable to install heaters that protect the sides and panels from icing.In this case, additional heating of the case will not be necessary. The place to install the unit must be well ventilated and away from sources of open fire.
Block with heat exchanger-evaporator
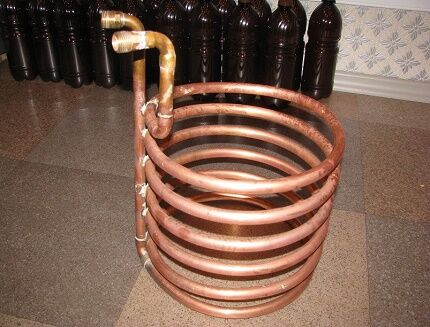
The evaporator can be purchased ready-made using the services of online suppliers, or you can create it yourself. To do this, you need an 80-liter tank and copper wire with a diameter of 10 mm and a thickness of at least 1 mm.
The length is calculated individually taking into account the required power. For a 5 kW device, you can take 10 m. Freon will be heated and circulated in the evaporator, as well as contact with air.
To create a heat exchanger, you need to construct a coil. To do this, the wire is wrapped around a thick-walled pipe with a diameter not exceeding the width of the tank. It is important to leave cuts that protrude beyond the height of the body. They will be needed to connect the coil to other elements of the system - the compressor and storage tank.
2 fittings are cut into the body for connecting pipelines, and two connectors are created for the wire exit. The connections are sealed. The finished structure is secured using L-shaped brackets.
It is recommended to additionally install a defrost relay on the evaporator, since air will circulate in the tank, the temperature of which is negative. In this case, condensation accumulating in the system can lead to icing of the evaporator. Also, to prevent the formation of moisture, you can introduce a filter-drier into the system.
Compressor installation rules
To install the compressor, you will need a separate housing with sound and vibration insulation, since almost all modifications of the device are noisy during operation. You can take a used compressor from under a refrigerator, air conditioner, or purchase a new model.
The following types of compressors are suitable for heat pumps:
- Rotary compressors are the most inexpensive, but have a number of disadvantages - they are noisy, have low efficiency and last 8-10 years.
- Spiral modifications are installed in all modern models of air conditioners and refrigerators. They are durable (15-20 years), silent, efficient, but are expensive.
- Piston models are mainly installed on industrial refrigerators. The products have good efficiency, are durable (15-20 years), but are extremely noisy and expensive.
For a heat pump, it is necessary to select a single-phase compressor. Before purchasing, it is important to find out what type of freon the device works with. It is advisable to purchase a model that runs on R22, preferably on R422. This type of refrigerant is easier to work with than any other type of freon.
The compressor is connected by tubes to the evaporator and condenser unit. Thanks to the device, freon increases its temperature.
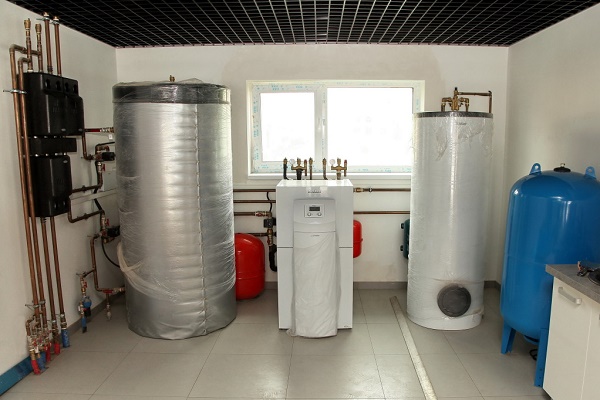
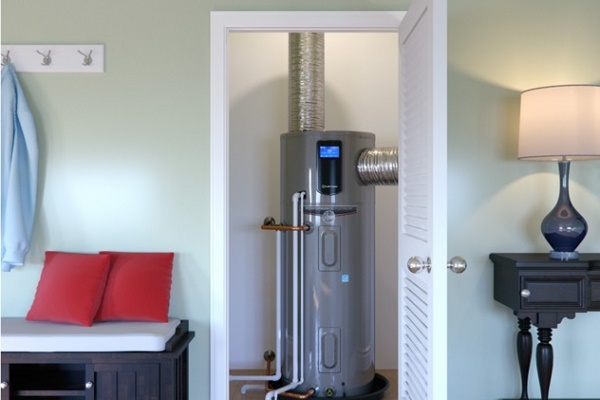
Design of a storage tank (capacitor)
To make a condenser, you will need a housing from a 100-liter boiler or any other stainless tank of the same volume. A coil made of copper tube is also required. A 5 kW pump can use 12 meters of wire. Hot freon will pass through the coil tube, causing the water to heat up.
Step #1: Creating a coil
To make a coil you will need copper wire with a diameter of at least 26 mm and a wall thickness of 1 mm. It must be wound on a pipe that has a smaller cross-section than that of the tank.
The height of the spiral must match the height of the body. It is important to leave the pipe outlets outside the tank to be able to connect the coil to the evaporator and compressor.
Step #2: Preparing the Case
To install the coil, the tank must be cut. You will need to create holes at the top and bottom for the copper wire outlets, and also cut out additional compartments for installing 2 fittings, one of which is designed for water outlet, and the other for its inlet. After these procedures, the tank must be sealed.
The heat exchanger-compressor can be purchased separately as a finished structure. Using a factory-assembled device, you can increase the power and efficiency of the installation.

Connecting the outdoor unit to the evaporator
To connect the outdoor unit and the evaporator, 2 polyethylene pipes will be required HDPE 32. Air will pass through one pipe and exit through another.
The pipes can be buried in the ground, after adding any sandy material to the ditch, or left on the surface if the outer casing is located near the house.
Connection of evaporator, compressor and tank
Freon circulates in this system. To connect coils with a compressor and throttle, you must contact refrigeration specialists.It will be difficult for a person who does not have experience in soldering work, even if he has the tools and materials, to correctly connect all the elements into one system to ensure the operation of the structure.
Moreover, a lot of additional materials will be required - tubes of different diameters, various modifications drain taps, air bleed valves, safety valves, as well as pipe clips, clamps, pipe cutters for cutting pipeline sections.
You will also need other specialized devices that are available in any refrigerator and air conditioning repair shop.
High-quality injection of freon is also carried out using special equipment. Therefore, to combine heat exchangers, a compressor and a throttle into a working system, it is more convenient and profitable to turn to professionals.
Implementation of plant control systems
To monitor freon pressure and temperature, you can use a board with a display from under any air conditioner. During the soldering process, with the help of specialists, the design can be correctly implemented into the installation.
It is also possible to connect a special device – a fan rotation sensor. It regulates the speed of rotation of the blades and also automates the speed of the freon circulation pump.
Additionally, you can set a timer electric starter, a device that protects the compressor from overheating. All these parts can be purchased at repair shops or at the aftermarket.
Air-to-water heat pump power calculation
For heating a room with an area of 100 sq.m. m will require a heat pump of greater power. You can approximately calculate the required installation power using the table:

To determine what power the compressor should have, what diameter pipes should be used and other important data when designing an air-to-water heat pump, you must use one of the following methods:
- Use online calculators posted on the websites of heat exchanger manufacturers.
- Apply software CoolPack 1,46, Copeland.
- Invite a specialist who will make the necessary measurements and calculations.
Area of the condenser coil (PZK) can be calculated using the formula:
PZK = M/0.8DT,
where M is the installation power in kW; 0.8 - coefficient of thermal conductivity when contacting water and copper; DT is the temperature difference between the incoming and outgoing air in the system.
The heat pump parameters given above are suitable for rooms up to 100 square meters. meters. Installation power - 5 kW. If you purchase special heat exchangers, it is quite possible to increase the installation power to 10-15 kW.

Maintenance of a homemade installation
For high-quality operation, the heat pump requires additional maintenance. If you use the device in winter (given that there is no additional heating installed in the housing), then the unit will have to be warmed up periodically, since an ice crust will form on its surface.
It is also necessary periodically:
- Clean the fan blades from debris - leaves, dust, dirt, snow, etc.
- Lubricate the compressor according to its instructions.
- Change the oil in the compressor and fan.
In addition, for the normal functioning of the system, it is necessary to regularly check the integrity of the copper pipeline, power cable supplying the compressor, fan and other devices.
Conclusions and useful video on the topic
The following video will introduce you to the principle of operation and design of a heat pump that processes wind energy:
A homemade air-to-water heat pump is one of the effective and inexpensive devices for additional home heating. Anyone can make and install this system.
Please write comments in the block below. Perhaps you have interesting information and photos on the topic of the article? Ask questions, share your own opinions and tips that are useful for site visitors.


