Do-it-yourself alternative energy for the home: a review of the best eco-technologies
Natural fuel reserves are not unlimited, and energy prices are constantly rising.Agree, it would be nice to use alternative energy sources instead of traditional ones, so as not to depend on gas and electricity suppliers in your region. But you don't know where to start?
We will help you understand the main sources of renewable energy - in this material we looked at the best eco-technologies. Alternative energy can replace conventional power sources: you can create a very effective installation for producing it with your own hands.
Our article discusses simple methods of assembling a heat pump, wind generator and solar panels, and selects photo illustrations of individual stages of the process. For clarity, the material is provided with videos on the production of environmentally friendly installations.
The content of the article:
Popular sources of renewable energy
“Green technologies” will significantly reduce household costs through the use of practically free sources.
Since ancient times, people have used mechanisms and devices in everyday life, the action of which was aimed at converting the forces of nature into mechanical energy. A striking example of this are water mills and windmills.
With the advent of electricity, the presence of a generator made it possible to convert mechanical energy into electrical energy.

Today, a significant amount of energy is generated precisely by wind complexes and hydroelectric power plants. In addition to wind and water, people have access to such sources as biofuels, the energy of the earth's interior, sunlight, the energy of geysers and volcanoes, and the power of tides.
The following devices are widely used in everyday life to generate renewable energy:
The high cost of both the devices themselves and installation work stops many people from receiving seemingly free energy.
Payback can reach 15-20 years, but this is not a reason to deprive yourself of economic prospects. All these devices can be made and installed independently.

Homemade solar panels
A ready-made solar panel costs a lot of money, so not everyone can afford its purchase and installation. By making the panel yourself, costs can be reduced by 3-4 times.
Before you start building a solar panel, you need to understand how it all works.
The working principle of a solar power supply system
Understanding the purpose of each element of the system will allow you to imagine its operation as a whole.
The main components of any solar power supply system:
- A solar panel. This is a complex of elements connected into a single whole that converts sunlight into a flow of electrons.
- Batteries. One battery batterieswon’t last long, so the system can have up to a dozen such devices. The number of batteries is determined by the power consumed. The number of batteries can be increased in the future by adding the required number of solar panels to the system;
- Solar charge controller. This device is necessary to ensure normal charging of the battery. Its main purpose is to prevent the battery from being recharged again.
- Inverter. A device required to convert current. The batteries provide low voltage current, and the inverter converts it into the high voltage current required for functionality - output power.For a home, an inverter with an output power of 3-5 kW will be sufficient.
The main feature of solar panels is that they cannot generate high voltage current. A separate element of the system is capable of generating a current of 0.5-0.55 V. One solar battery is capable of producing a current of 18-21 V, which is enough to charge a 12-volt battery.
If it is better to purchase the inverter, batteries and charge controller ready-made, then it is quite possible to make solar panels yourself.

Making a solar battery
To make a battery, you need to purchase solar photocells based on mono- or polycrystals. It should be taken into account that the service life of polycrystals is significantly shorter than that of single crystals.
In addition, the efficiency of polycrystals does not exceed 12%, while this figure for single crystals reaches 25%. In order to make one solar panel you need to buy at least 36 such elements.

Step #1 - Assembling the solar panel housing
Work begins with the manufacture of the body; this will require the following materials:
- Wooden blocks
- Plywood
- Plexiglas
- Fiberboard
It is necessary to cut out the bottom of the case from plywood and insert it into a frame made of 25 mm thick bars. The size of the bottom is determined by the number of solar photocells and their size.
Along the entire perimeter of the frame, holes with a diameter of 8-10 mm must be drilled in bars in increments of 0.15-0.2 m. They are required to prevent the battery cells from overheating during operation.

Step #2 - connecting solar panel elements
According to the size of the case, it is necessary to cut out the substrate for solar cells from fiberboard using a stationery knife. When installing it, it is also necessary to provide for the presence of ventilation holes, arranged every 5 cm in a square-nested manner. The finished body needs to be painted and dried twice.
Solar cells should be placed upside down on a fiberboard substrate and wired. If the finished products were not already equipped with soldered conductors, then the work is greatly simplified. However, the desoldering process must be performed in any case.
It must be remembered that the connection of elements must be consistent. Initially, the elements should be connected in rows, and only then the finished rows should be combined into a complex by connecting to current-carrying busbars.
Upon completion, the elements must be turned over, laid as expected and fixed in place with silicone.

Then you need to check the output voltage. Approximately, it should be in the range of 18-20 V. Now the battery should be run in for several days, and the charging ability of the batteries should be checked.Only after checking the performance is the joints sealed.
Step #3 - assembling the power supply system
Once you are convinced of its impeccable functionality, you can assemble the power supply system. The input and output contact wires must be brought outside for subsequent connection of the device.
A cover should be cut out of plexiglass and secured with self-tapping screws to the sides of the case through pre-drilled holes.
Instead of solar cells, a diode circuit with D223B diodes can be used to make a battery. A panel of 36 diodes connected in series is capable of delivering 12 V.
The diodes must first be soaked in acetone to remove paint. Holes should be drilled in the plastic panel, diodes should be inserted and wired. The finished panel must be placed in a transparent casing and sealed.

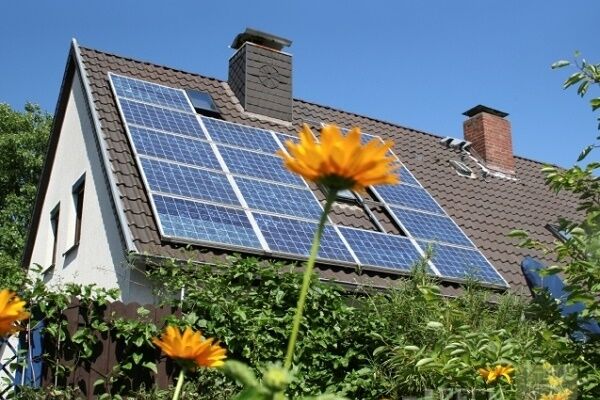
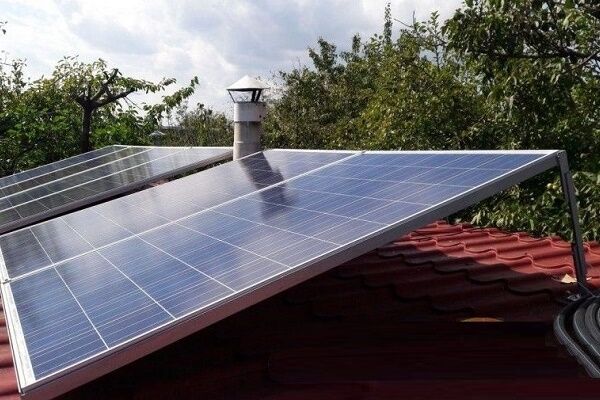
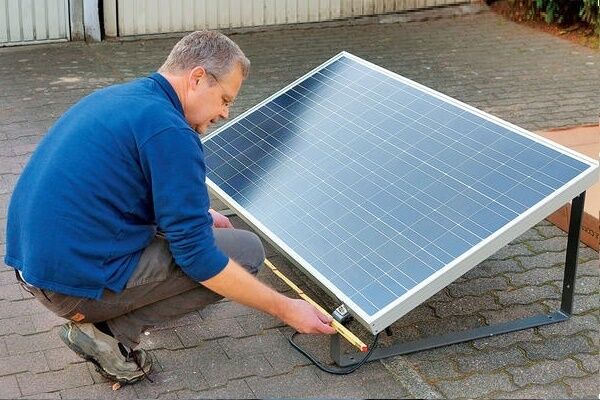
Basic rules for installing a solar panel
The efficiency of the entire system largely depends on the correct installation of the solar battery.
When installing, you need to consider the following important parameters:
- Shading. If the battery is located in the shade of trees or taller structures, it will not only not function normally, but may also fail.
- Orientation. To maximize sunlight on the photocells, the battery must be directed towards the sun. If you live in the northern hemisphere, then the panel should be oriented to the south, but if you live in the southern hemisphere, then vice versa.
- Incline. This parameter is determined by geographic location. Experts recommend installing the panel at an angle equal to the geographic latitude.
- Availability. You need to constantly monitor the cleanliness of the front side and remove the layer of dust and dirt in a timely manner. And in winter, the panel must be periodically cleaned of accumulated snow.
It is advisable that when operating the solar panel, the angle of inclination is not constant. The device will work to its maximum only if the sun's rays are directly directed at its cover.
In summer it is better to place it at a slope of 30º to the horizon. In winter, it is recommended to raise it and install it at 70º.

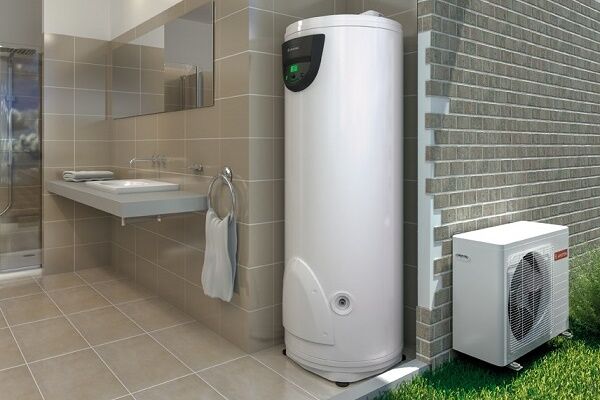
Heat pumps for heating
Heat pumps are one of the most advanced technological solutions in obtaining alternative energy for your home. They are not only the most convenient, but also environmentally friendly.
Their operation will significantly reduce the costs associated with paying for cooling and heating the premises.
Classification of heat pumps
I classify heat pumps by the number of circuits, the source of energy and the method of obtaining it.
Depending on the final needs, heat pumps can be:
- One-, two- or three-circuit;
- One- or two-capacitor;
- With the possibility of heating or with the possibility of heating and cooling.
Based on the type of energy source and method of obtaining it, the following heat pumps are distinguished:
- Soil - water. They are used in temperate climate zones with uniform heating of the earth, regardless of the time of year. For installation, a collector or probe is used, depending on the type of soil. Drilling shallow wells does not require obtaining permits.
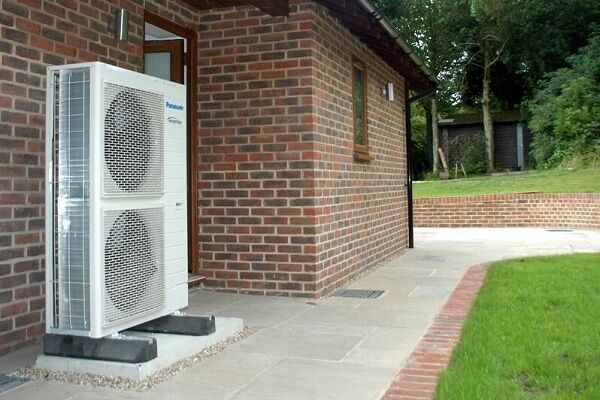
- Air - water. Heat is accumulated from the air and directed to heat water. The installation will be appropriate in climate zones with winter temperatures not lower than -15 degrees.
- Water - water. Installation is determined by the presence of bodies of water (lakes, rivers, groundwater, wells, settling tanks). The efficiency of such a heat pump is very impressive, which is due to the high temperature of the source during the cold season.
- Water is air. In this combination, the same reservoirs act as a heat source, but the heat is transferred directly to the air used to heat the premises through a compressor. In this case, water does not act as a coolant.
- Soil is air. In this system, the heat conductor is the soil. Heat from the ground is transferred to the air through the compressor. Non-freezing liquids are used as energy carriers. This system is considered the most universal.
- Air - air. The operation of this system is similar to the operation of an air conditioner, capable of heating and cooling a room.This system is the cheapest, as it does not require excavation work or laying pipelines.
When choosing the type of heat source, you need to focus on the geology of the site and the possibility of unhindered excavation work, as well as the availability of free space.
If there is a shortage of free space, you will have to abandon heat sources such as earth and water and take heat from the air.

Working principle of a heat pump
The operating principle of heat pumps is based on the use of the Carnot cycle, which, as a result of sharp compression of the coolant, provides an increase in temperature.
Most climate control devices with compressor units (refrigerator, freezer, air conditioner) operate on the same principle, but with the opposite effect.
The main operating cycle, which is implemented in the chambers of these units, has the opposite effect - as a result of a sharp expansion, a narrowing of the refrigerant occurs.
That is why one of the most accessible methods for manufacturing a heat pump is based on the use of individual functional units used in climate control equipment.
So, a household refrigerator can be used to make a heat pump. Its evaporator and condenser will play the role of heat exchangers, removing thermal energy from the environment and directing it directly to heating the coolant that circulates in the heating system.

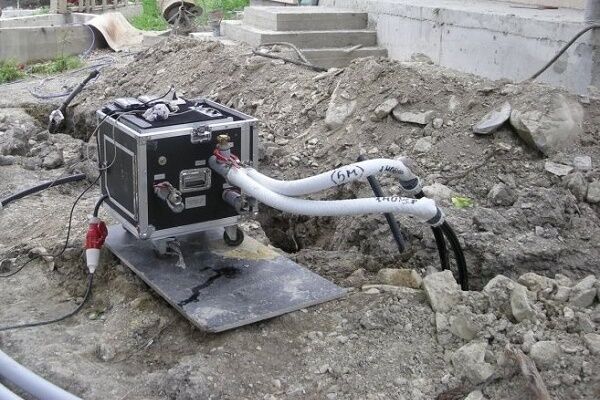
Assembling a heat pump from scrap materials
Using old household appliances, or rather, their individual components, you can assemble a heat pump yourself. Let's look at how this can be done below.
Step #1 - prepare the compressor and condenser
Work begins with the preparation of the compressor part of the pump, the functions of which will be assigned to the corresponding unit of the air conditioner or refrigerator. This unit must be secured with a soft suspension on one of the walls of the workroom where it will be convenient.
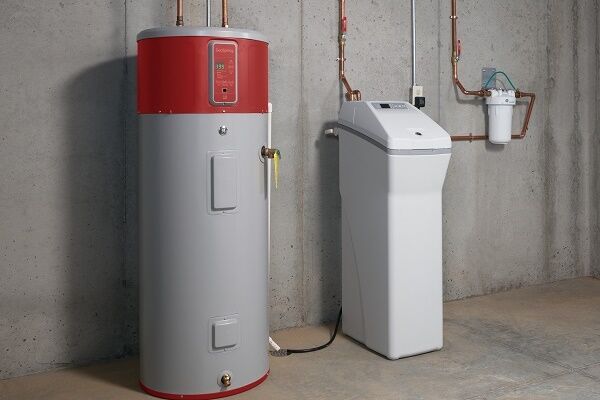
After this, you need to make a capacitor. A 100 liter stainless steel tank is ideal for this. You need to install a coil into it (you can take a ready-made copper tube from an old air conditioner or refrigerator.
The prepared tank must be cut lengthwise into two equal parts using a grinder - this is necessary for installing and securing the coil in the body of the future capacitor.
After installing the coil in one of the halves, both parts of the tank must be connected and welded together so as to form a closed tank.

Please note that when welding you need to use special electrodes, and even better, use argon welding, only it can ensure maximum quality of the seam.
Step #2 - making an evaporator
To make an evaporator, you will need a sealed plastic tank with a volume of 75-80 liters, into which you will need to place a coil made of pipe with a diameter of ¾ inches.

Threads must be cut at the ends of the tube to subsequently ensure connection with the pipeline. Once assembly is complete and the seal has been checked, the evaporator should be secured to the wall of the workroom using brackets of the appropriate size.
It is better to entrust the completion of assembly to a specialist. While some of the assembly can be done yourself, soldering the copper pipes and pumping in the refrigerant should be done by a professional. Assembly of the main part of the pump ends with the connection of heating batteries and a heat exchanger.
It should be noted that this system is low-power. Therefore, it will be better if the heat pump becomes an additional part of the existing heating system.
Step #3 - arrangement and connection of an external device
The best source of heat is water from a well or borehole. It never freezes and even in winter its temperature rarely drops below +12 degrees. It will be necessary to install two such wells.
Water will be drawn from one well and subsequently supplied to the evaporator.

Next, the waste water will be discharged into the second well. All that remains is to connect it all to the inlet of the evaporator, to the outlet and seal it.
In principle, the system is ready for operation, but for its complete autonomy it will require an automation system that controls the temperature of the moving coolant in the heating circuits and freon pressure.
At first, you can get by with an ordinary starter, but it should be noted that starting the system after turning off the compressor can be done in 8-10 minutes - this time is necessary to equalize the freon pressure in the system.
Design and use of wind generators
Wind energy was used by our ancestors. Since those distant times, in principle, nothing has changed.
The only difference is that the millstones of the mill are replaced by a generator and a drive, which converts the mechanical energy of the blades into electrical energy.
Installing a wind generator is considered economically profitable if the average annual wind speed exceeds 6 m/s.
Installation is best done on hills and plains; ideal places are considered to be the coasts of rivers and large bodies of water, away from various utilities.

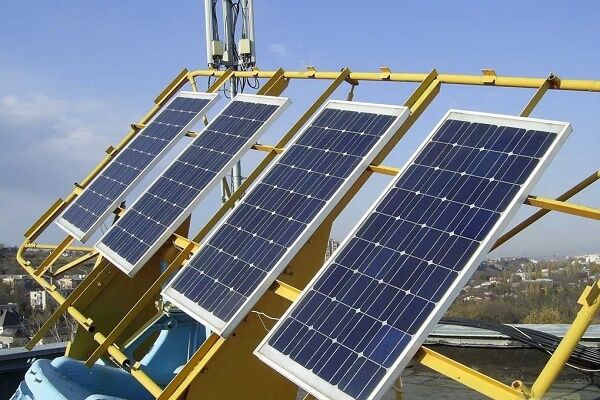
Classification of wind generators
The classification of wind generators depends on the following basic parameters:
- Depending on the placement of the axes, there may be vertical twirlers And horizontal. The horizontal design provides the ability to auto-rotate the main part to search for wind. The main equipment of a vertical wind generator is located on the ground, so it is easier to maintain, while the efficiency of vertical blades is lower.
- Depending on the number of blades, they are distinguished single, double, triple and multi-bladed wind generators. Multi-bladed wind generators are used at low air flow speeds and are rarely used due to the need to install a gearbox.
- Depending on the material used to make the blades, the blades may be sailing and rigid. Sail-type blades are easy to manufacture and install, but require frequent replacement, as they quickly fail under the influence of sharp gusts of wind.
- Depending on the pitch of the screw, there are changeable And fixed steps. When using a variable pitch, it is possible to achieve a significant increase in the range of operating speeds of the wind generator, but this will lead to an inevitable complication of the design and an increase in its mass.
The power of all types of devices that convert wind energy into an electrical analogue depends on the area of the blades.

Wind generator device
Any wind turbine contains the following basic elements:
- Bladesrotating under the influence of wind and ensuring the movement of the rotor;
- Generator, which produces alternating current;
- Blade Controller, is responsible for the formation of alternating current into direct current, which is required for charging batteries;
- Rechargeable batteries, are needed for the accumulation and equalization of electrical energy;
- Inverter, performs the reverse conversion of direct current into alternating current, from which all household appliances operate;
- Mast, is necessary to lift the blades above the ground until the height of movement of air masses is reached.
At the same time, the generator blades that provide rotation and the mast are considered the main parts of the wind generator, and everything else is additional components that ensure reliable and autonomous operation of the system as a whole

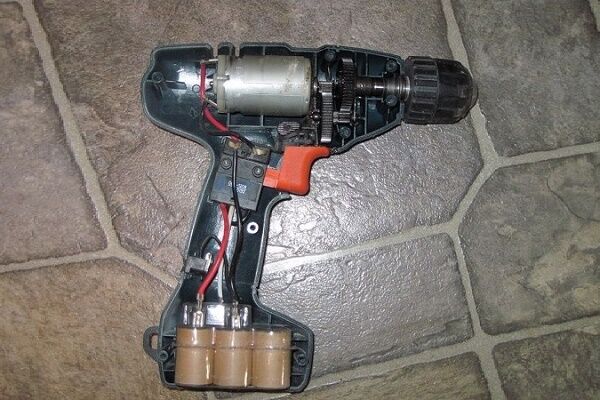
Low-speed wind generator from a self-generator
It is believed that this design is the simplest and most accessible for self-production. It can become either an independent source of energy or take over part of the power of the existing power supply system.
If you have a car generator and battery, all other parts can be made from scrap materials.
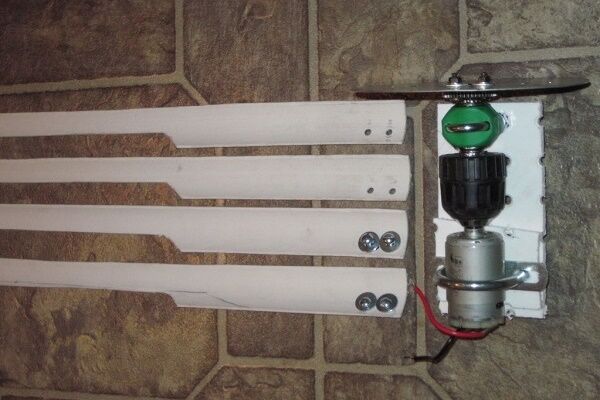
Step #1 - making a wind wheel
The blades are considered one of the most important parts of a wind generator, since their design determines the operation of the remaining components. A variety of materials can be used to make blades - fabric, plastic, metal and even wood.
We will make blades from sewer plastic pipes. The main advantages of this material are low cost, high moisture resistance, and ease of processing.
The work is performed in the following order:
- The length of the blade is calculated, and the diameter of the plastic pipe should be 1/5 of the required footage;
- Using a jigsaw, the pipe should be cut lengthwise into 4 parts;
- One part will become a template for the manufacture of all subsequent blades;
- After cutting the pipe, burrs on the edges must be treated with sandpaper;
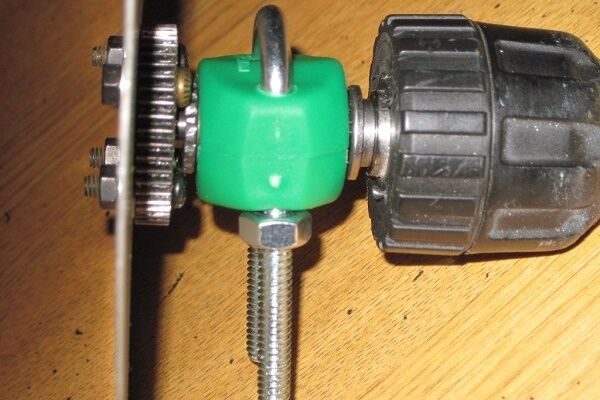
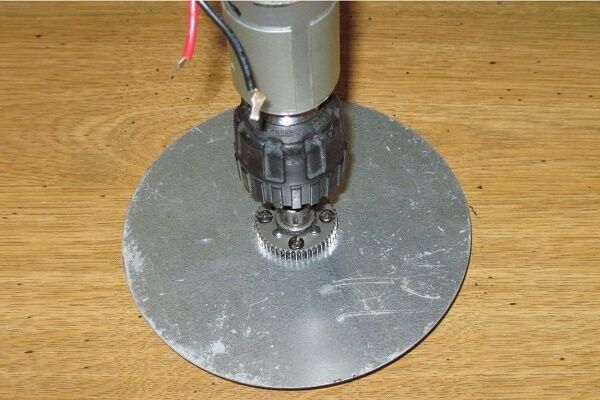
- The cut blades must be fixed on a pre-prepared aluminum disk with the provided fastening;
- Also, after the modification, you need to attach a generator to this disk.
Please note that PVC pipe is not strong enough and will not be able to withstand strong gusts of wind. For the manufacture of blades, it is best to use a PVC pipe with a thickness of at least 4 cm.
The size of the blade plays an important role in the magnitude of the load. Therefore, it would not be amiss to consider the option of reducing the size of the blades by increasing their number.

After assembly, the wind wheel should be balanced. To do this, you need to mount it horizontally on a tripod indoors. The result of correct assembly will be the immobility of the wheel.
If rotation of the blades occurs, it is necessary to sharpen them with abrasive before balancing the structure.
Step #2 - making a wind generator mast
To make a mast, you can use a steel pipe with a diameter of 150-200 mm. The minimum length of the mast should be 7 m. If there are obstacles to the movement of air masses on the site, then the wind generator wheel must be raised to a height exceeding the obstacle by at least 1 m.
The pegs for securing the guy wires and the mast itself must be concreted. As guy wires, you can use steel or galvanized cable 6-8 mm thick.

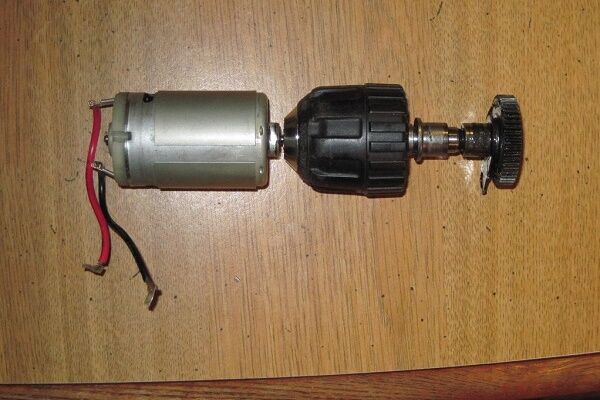
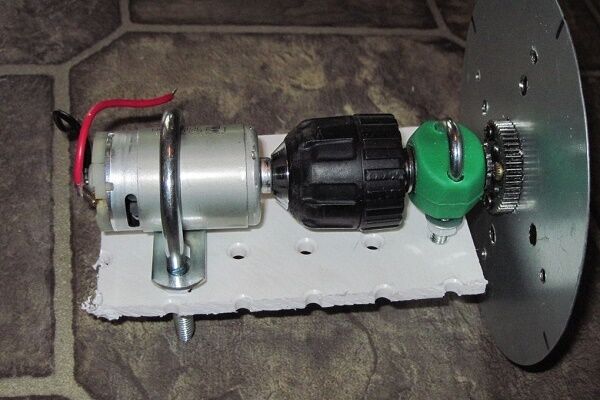
Step #3 - re-equipment of the car generator
The modification consists only of rewinding the stator wire, as well as manufacturing a rotor with neodymium magnets. First you need to drill the holes necessary to fix the magnets in the rotor poles.
The installation of magnets is carried out with alternating poles. Upon completion of the work, the intermagnetic voids must be filled with epoxy resin, and the rotor itself must be wrapped in paper.
When rewinding the coil, you need to take into account that the efficiency of the generator will depend on the number of turns. The coil must be wound in a three-phase circuit in one direction.
The finished generator needs to be tested; the result of correctly performed work will be a reading of 30 V at 300 rpm of the generator.

Step #4 - completing the assembly of the low-speed wind generator
The rotating axis of the generator is made of a pipe with two bearings mounted, and the tail part is cut out of galvanized iron 1.2 mm thick.
Before attaching the generator to the mast, it is necessary to make a frame; a profile pipe is best suited for this. When performing fastening, it is necessary to take into account that the minimum distance from the mast to the blade must be more than 0.25 m.

To operate the system, you need to install a charge controller, batteries, and an inverter after the wind generator.
The battery capacity is determined by the power of the wind generator. This indicator depends on the size of the wind wheel, the number of blades and wind speed.
Conclusions and useful video on the topic
Manufacturing of a solar panel with a plastic case, list of materials and work procedure
Operating principle and overview of geothermal pumps
Re-equipment of an autogenerator and making a low-speed wind generator with your own hands
A distinctive feature of alternative energy sources is their environmental friendliness and safety.
The rather low power of the installations and their connection to certain terrain conditions make it possible to effectively operate only combined systems of traditional and alternative sources.
Does your home use alternative energy sources for heat and electricity? Have you assembled a wind generator yourself or made solar panels? Please share your experience in the comments to our article.


It’s not as simple, of course, as described, and it’s not easy to describe, in fact. The idea of using a water wheel is definitely not appealing.To use water energy you need to live right on a noisy river. The rotating wheel will constantly creak near the house, and the water will make noise, which will become annoying over time. I am inclined only to windmills, they do not disturb the area much and do not shade the area. I would force them to cover the entire area near the house. Or I would use solar panels, they are the simplest and most undemanding to maintain. Because you can invest in them once and that’s it.
I am very interested in installing wind generators. Does it make sense to install them in the Moscow and Moscow region areas? Or, due to the many buildings, will it be economically unprofitable (the resulting energy should be enough for a small country house)? Can you advise the main manufacturers of wind generators, and also describe what to look for when choosing a wind turbine?
Hello. I was also interested in this question and, based on calculations, it was concluded that as an additional source of energy, without abandoning the main one, this option is quite worthy of consideration in any area. But here again, you need to make calculations about how feasible this is for a particular family, consider the payback, the desired power, and so on.
This requires a whole separate article with approximate calculations. According to my personal calculations, taking into account homemade products and other things, it cost about 200 thousand rubles for the turnkey installation of the necessary equipment. Which, according to our tariffs, taking into account my benefits, is financially unprofitable in the short term. Reviews praise Exmork and Aerogreen.
Of course, alternative energy is needed as air. Otherwise the planet will simply suffocate.Unfortunately, traditional methods of obtaining alternative energy have not lived up to their expectations. The experience of Europe is an example of this. They are too dependent on environmental conditions. Only BTMG based on permanent magnets can serve as a real source of alternative energy. Which has already been developed in Russia but has not yet been put into production. The reason is banal. The Russian authorities do not need such a project. The people need it. There is no power.