Connecting and adjusting the pressure switch for the pump: setup instructions
The pressure switch is a small but indispensable component of a large and small pumping station.And if all its other elements just need to be connected correctly, then it will also have to be further configured. It is this device that is responsible for automating the pumping process. It turns the equipment on and off based on pressure readings in the hydraulic tank.
Proper adjustment of the pressure switch for the pump is the key to comfort and long service life of the equipment. We describe in detail how it is performed, what actions need to be performed and what data you need to know to fine-tune it in the article. You will find out why and in what situations it is produced.
In addition to a step-by-step description of the adjustment procedure, we provide valuable recommendations provided by hydraulic engineers. To optimize perception, the text is supplemented with photo selections, diagrams, and video tutorials.
The content of the article:
Features of the device and principle of operation
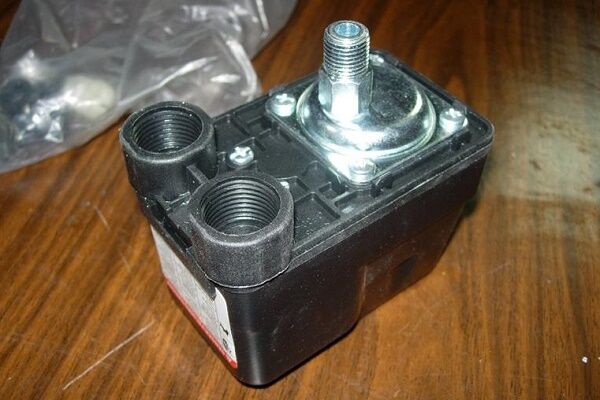
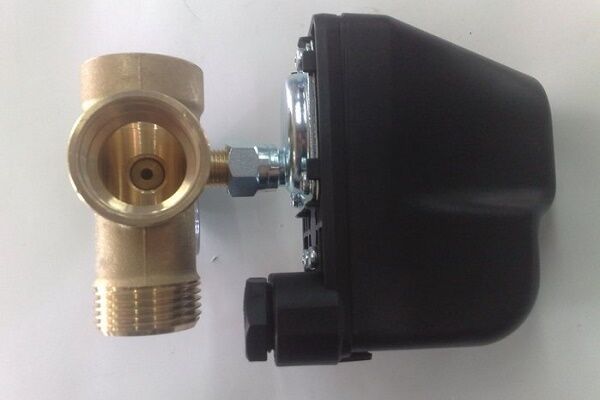
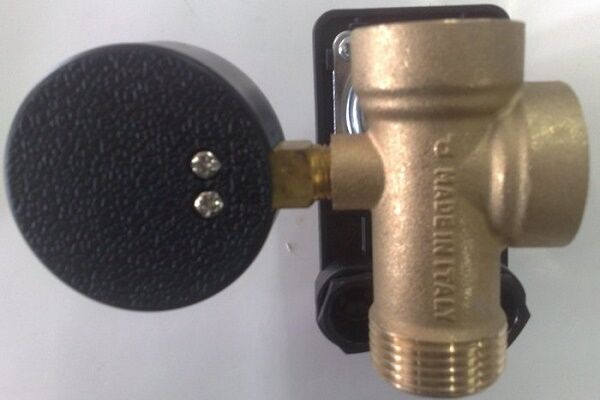
Numerous varieties pressure switch, which comes with almost all pumping stations, are designed approximately the same.
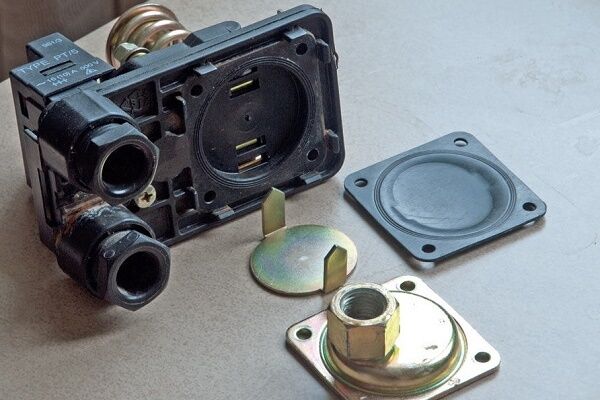
Inside the plastic case there is a metal base on which the remaining elements are fixed:
- membrane;
- piston;
- metal platform;
- electrical contact assembly.
On top, under the plastic cover, there are two springs - large and small. When the membrane experiences pressure, it pushes the piston.
This in turn raises a platform which acts on a large spring, compressing it. A large spring resists this pressure, limiting the movement of the piston.
The small distance that separates the large and small adjusting springs is enough to regulate the operation of a whole complex of devices. The platform, under pressure from the membrane, gradually rises until its edge reaches the small spring. The pressure on the platform increases at this moment, as a result its position changes.
This causes the contacts to switch, which changes the operating mode of the pump and it turns off. To switch contacts there is a special hinge with a spring.
When the platform passes the level at which this hinge is located, the electrical contacts change position, breaking the power supply circuit. At this moment the pump turns off. After which the water stops flowing and the pressure exerted on the membrane decreases as water is consumed from the accumulator.
Accordingly, the platform lowers smoothly. When its position is lower than the spring hinge of the electrical contacts, they rise, turning on the power again.

The pump pumps water into the hydraulic tank, the relay membrane presses on the platform, it rises, reaches a large spring, etc. The cycle resumes and is performed automatically.
Using a large spring, the pressure indicator at which the pump unit must be turned on is set, and the small one determines not the “ceiling” of the permissible pressure in the system, as you might think, but the difference between these two indicators. This is an important point that will be useful when studying the procedure for setting up the pressure switch own pump.
Is any setup necessary at all?
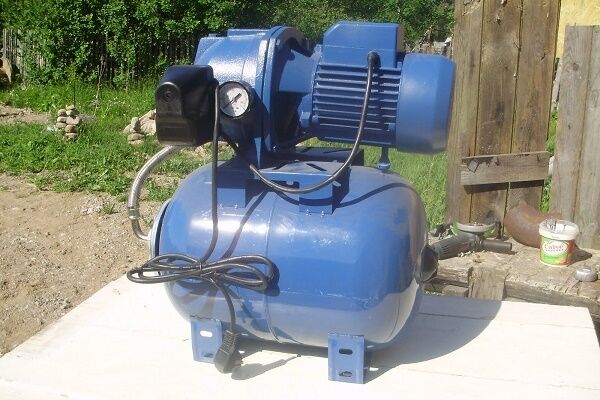
Of course, independently or with the help of a specialist, but anyone who has assembled their own pumping station from individual elements will need to set up a pressure switch.
There is an opinion that ready-made pumping stations, purchased assembled, are equipped with a pressure switch already configured and prepared for operation. In practice, this is not always the case.

Each plumbing system has individual characteristics. And the needs of the residents of the house may be different.
Constant pressure in the home system, which has only a shower, kitchen sink and bathtub, are significantly different from the needs of a spacious cottage with a jacuzzi and hydromassage. Factory settings do not always correspond to the real state of affairs.

In addition to setting the pressure switch when installing a pumping station, you should also periodically check and adjust its operation.
The same operation will have to be repeated if any part of the pumping station fails, is repaired or replaced. The procedure for adjusting the equipment is practically no different from the procedure for setting it up.
General terminology of indicators
When setting up a pressure switch, some specific names are used. They are well understood by a specialist, but can be confusing for a beginner. It is better to immediately understand their essence so as not to get confused while performing the work.
These are the terms:
- cut-in pressure;
- cut-out pressure;
- pressure drop;
- maximum cut-out pressure.
The cut-off pressure is usually designated as Poff. Sometimes this indicator is also called upper pressure. This indicator, as the name implies, indicates the pressure at which the pump starts or resumes operation and water begins to be pumped into the hydraulic tank. Typically, the manufacturer sets the default lower pressure to 1.5 bar.
By analogy, the switching pressure is also called lower pressure and is designated as Rvkl. This is the second granite indicator, the relay coming from the factory is usually set to about 3 bar or a little less.
The pressure drop or delta (ΔP) is calculated as the difference between the lower and upper pressure. In a standard pressure switch model, before adjustment, this figure is usually about 1.5 bar.
The maximum, or rather the maximum permissible value of the shutdown pressure allows you to get an idea of the maximum pressure in the system. Exceeding this indicator can cause significant damage to the water supply and equipment. Typically this figure is approximately 5 bar or slightly less.
Accumulator pressure
Understanding that how does a hydraulic accumulator work?, will help you better cope with self-configuration of control equipment.
There are two types of hydraulic tanks: with a rubber insert resembling a pear, or with a rubber membrane. This element divides the container into two non-communicating parts, one of which contains water, and the other contains air.

In any case, they work approximately the same. Water enters the tank, and a rubber insert presses on it to ensure the movement of water through the plumbing system.
Therefore, there is always a certain pressure in the hydraulic tank, which changes noticeably depending on the amount of water and air in the tank.

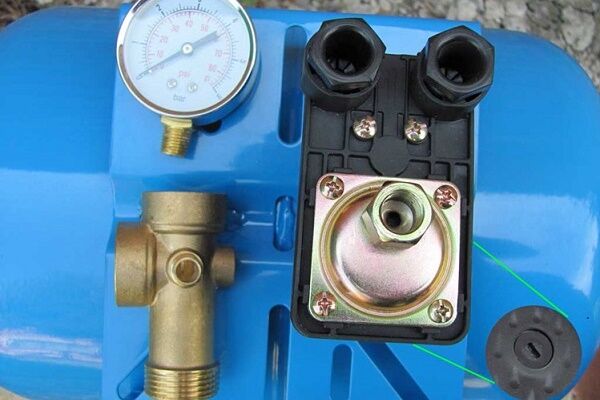
There is usually a car nipple on the tank body. Through it, you can pump air into the hydraulic tank or bleed it to adjust the operating pressure inside the tank.
When connecting the pressure switch to the pump, it is recommended to measure the current pressure in the hydraulic tank. The manufacturer sets the default value to 1.5 bar. But in practice, some of the air usually escapes, and the pressure in the container will be lower.
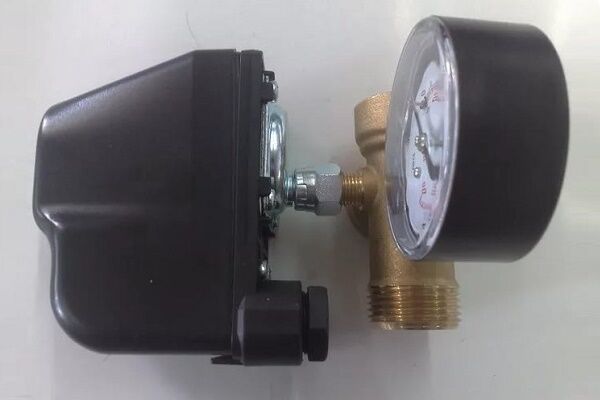
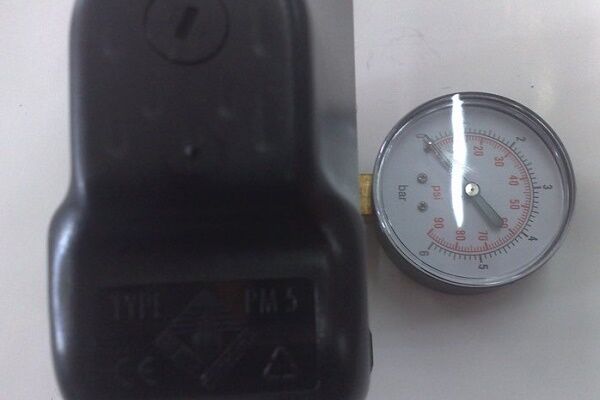
To measure the pressure in the accumulator, use a regular car pressure gauge. It is recommended to choose a model with a scale with the smallest gradation step. Such a device will allow for more accurate measurements. It makes no sense to measure pressure if it is not possible to take into account one tenth of a bar.
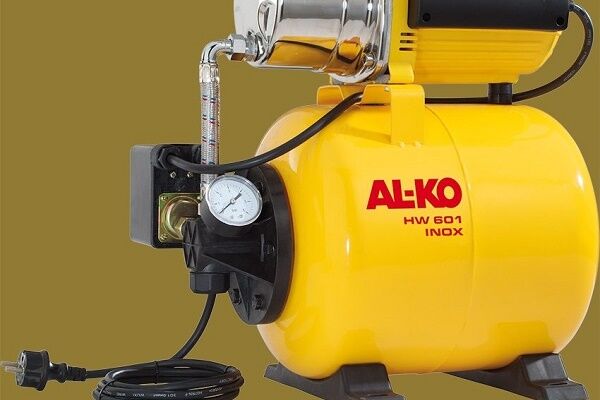
In this regard, it makes sense to check the pressure gauge that is equipped with an industrial pumping station.
Manufacturers often save money and install inexpensive models. The accuracy of measurements using such a device may be questionable. It is better to replace it with a more reliable and accurate device.

Mechanical car pressure gauges do not look very presentable, however, judging by the reviews, they are much better than newfangled electronic devices. If, nevertheless, the choice is made in favor of an electronic pressure gauge, you should not save. It is better to take a device made by a reliable manufacturer than a cheap plastic craft that does not provide accurate data and can break at any time.
Another important point is that the electronic pressure gauge requires power supply, you will have to monitor this. Checking the pressure in the hydraulic tank is very simple.
The pressure gauge is connected to the nipple and the readings are taken. Normal pressure is considered to be between one and one and a half atmospheres. If the pressure in the hydraulic tank is too high, the water supply in it will be less, but the pressure will be just fine.

It should be remembered that too high pressure in the system can be dangerous. In this case, all components of the water supply system constantly work under increased load, and this leads to rapid wear of the equipment. In addition, in order to maintain increased pressure in the system, you have to pump water into the tank more often, and therefore turn on the pump more often.
This is also not very useful as it increases the likelihood of breakdowns. When setting up a system, a certain balance is required. For example, if accumulator pressure too high or too low, it may damage the rubber gasket.
How to configure the relay correctly?
There is a cover on the body of the pressure switch, and under it there are two springs equipped with nuts: large and small. By rotating these springs, they set the lower pressure in the accumulator, as well as the difference between the on and off pressure values. The lower pressure is regulated by a large spring, and the small one is responsible for the difference between the upper and lower pressure.

Before starting the setup, it is necessary to study the technical documentation of the pressure switch, as well as the pumping station: the hydraulic tank and its other elements.
The documentation indicates the operating and limit values for which this equipment is designed. During adjustment, these indicators should be taken into account so as not to exceed them, otherwise these devices may soon break.
Sometimes it happens that while setting the pressure switch, the pressure in the system still reaches the limit values. If this happens, you simply need to turn off the pump manually and continue tuning.Fortunately, such situations are extremely rare, since the power of household surface pumps is simply not enough to bring the hydraulic tank or system to its maximum performance.

It is useless to adjust the relay if the accumulator is filled with water. In this case, not only the water pressure will be taken into account, but also the air pressure parameters in the container.
To adjust the pressure switch, you need to do the following:
- Set the operating air pressure in the empty accumulator.
- Turn on the pump.
- Fill the tank with water until the lower pressure is reached.
- Turn off the pump.
- Rotate the small nut until the pump starts.
- Wait until the tank is filled and the pump turns off.
- Open the water.
- Rotate the large spring to set the cut-in pressure.
- Turn on the pump.
- Fill the hydraulic tank with water.
- Correct the position of the small adjustment spring.
You can determine the direction of rotation of the adjusting springs by the “+” and “-” signs, which are usually located nearby. To increase the activation pressure, the large spring should be rotated clockwise, and to decrease this indicator, it should be rotated counterclockwise.

When adjusting the pressure switch for the pump, the rotation of the adjusting springs must be done very smoothly, approximately a quarter or half a turn; these are very sensitive elements.When turned back on, the pressure gauge should show lower pressure.
Regarding indicators when adjusting the relay, it will be useful to remember the following points:
- If the hydraulic tank is filled and the pressure gauge readings remain unchanged, it means that the maximum pressure in the tank has been reached, the pump should be turned off immediately.
- If the difference between the switch-off and switch-on pressure values is about 1-2 atm, this is considered normal.
- If the difference is greater or less, the adjustment should be repeated taking into account possible errors.
- The optimal difference between the set lower pressure and the pressure in the empty accumulator determined at the very beginning is 0.1-0.3 atm.
- The air pressure in the hydraulic accumulator should not be less than 0.8 atm.
The system can turn on and off regularly in automatic mode and with other indicators. But these limits make it possible to minimize the wear of equipment, for example, the rubber insert of the hydraulic tank, and extend the operating time of all devices.
Some tips and tricks
For normal functioning pumping station It is recommended to measure the air pressure in the hydraulic accumulator every three months. This measure will help maintain stable settings in the operation of the equipment. A sharp change in indicators may indicate some kind of breakdown that needs to be fixed.
In order to quickly monitor the condition of the system, it makes sense to simply record the readings of the water pressure gauge from time to time when turning the pump on and off. If they correspond to the numbers set when setting up the equipment, the system can be considered normal.
A noticeable difference indicates that you need to check the air pressure in the hydraulic tank and, possibly, reconfigure the pressure switch. Sometimes you just need to pump a little air into the accumulator, and the performance will return to normal.
The accuracy of the pressure gauge indicators has a certain error. This may be partly due to the friction of its moving parts during measurements. To improve the reading process, it is recommended to additionally lubricate the pressure gauge before starting measurements.
The pressure switch, like other mechanisms, tends to wear out over time. Initially, you should choose a durable product. An important factor in the long-term operation of the pressure switch is the correct settings. This device should not be used at the maximum permissible upper pressure values.

You should leave a small margin, then the elements of the device will not wear out so quickly. If it is necessary to set the upper pressure in the system at a sufficiently high level, for example, five atmospheres, it is better to purchase a relay with a maximum permissible operating value of six atmospheres. Finding such a model is more difficult, but it is quite possible.
Serious damage to the pressure switch can be caused by contamination in water pipes. This is a typical situation for old water pipelines made of metal structures.
Before installing the pumping station, it is recommended to thoroughly clean the water supply system. It wouldn’t hurt to completely replace metal pipes with plastic structures, if possible.
When adjusting the relay, the adjusting springs should be treated with extreme care.If they are compressed too much, e.g. are twisted during the setup process, errors will very soon begin to be observed during operation of the device. Relay failure in the near future is almost guaranteed.
If, while checking the operation of the pumping station, a gradual increase in shutdown pressure is observed, this may indicate that the device is clogged. You don't need to change it right away.
You need to unscrew the four mounting bolts on the pressure switch housing, remove the membrane assembly and thoroughly rinse the inside of the relay, where possible, as well as all small holes.
Sometimes it is enough to simply remove the relay and clean its holes on the outside without disassembling it. It also wouldn't hurt to clean the entire pumping station. If water suddenly begins to flow directly from the relay housing, it means that particles of contaminants have broken through the membrane. In this case, the device will have to be completely replaced.
Conclusions and useful video on the topic
An overview of the pressure switch device is presented here:
This video details the process of setting up a pressure switch:
Setting up a pressure switch is not always easy. You need to act carefully and carefully. But understanding the principles of operation of the device and the features of its configuration allows you to cope with this task quite satisfactorily.
We are waiting for your stories about your experience in installing and configuring a pressure switch, and operating a pumping system equipped with the device. Perhaps you have any questions while reading the material? Ask them and comment on the article in the block below.


In general, I was sure that there was no need to additionally configure the pressure switch, but after reading it I somehow got tired of it.I had a problem, I couldn’t find the technical documentation, so I acted blindly. I was very afraid of exceeding the limit values, but everything seemed to work out (a diamond in the eye). I still have a question, why is it still necessary to configure? I didn't notice any changes after the setup.
Regarding the adjustment of the pressure switch, this issue has already been discussed on the forum and in the answers I provided a link to a good video from YouTube.
In general, the question is not new, so there is no point in describing everything. It is not always necessary to adjust the pressure switch, but when there are second interruptions in the supply of water to the water supply system, the pressure switch is adjusted first, since it is often the cause of a failure in the water supply.
Guys, re-read the article carefully, and the rest too, you always confuse the switch-on pressure and switch-off pressure and, accordingly, adjust the relay.
Why is there a pause of a second or two when the water comes out of the tap? The water flowed and flowed and suddenly disappeared for a second. Then she went again. The pump turned on. What to do?
There may be several reasons - leakage of the casing and pipeline, air pressure in the accumulator, clogged filters, decreased well flow, and so on. More details are needed to draw any conclusions. At least these jerks begin immediately, or after 10-15 minutes of normal operation the jet gradually weakens and begins to “spit.”
I set everything up, but now after power is applied, the relay turns on and off instantly, followed by the pump located in the well.I can’t find a reason, what should I do?
This means that you have made the settings incorrectly and you end up with a “domino effect” or chain reaction. The shutdown of one pump leads to the shutdown of the second, since they are connected in the same water supply system. Here you need to figure out this: the reason is the incorrect adjustment of the pressure switch or there are still problems in the electrical circuit of the equipment.
Please provide an approximate equipment connection diagram so that I can give specific advice that will help you solve this problem. You need a communications connection diagram, brand and model of pumps, and an electrical circuit diagram. Thanks to this data, it will be possible to narrow the list of possible problems to a few options. I will be waiting for your answer.
In the section “To adjust the pressure switch, you need to perform the following steps”:
“...2. Turn on the pump.
3. Fill the tank with water until the lower pressure is reached.
4. Turn off the pump.
5. Rotate the small nut until the pump starts.”
Question: how can the pump start when it was turned off in the previous step?