Review of the best well cleaning devices and methods for using them
The fact that there is a well on your property does not guarantee an uninterrupted supply of quality water.
Agree, like any structure, it requires maintenance and cleaning, otherwise water can only be used to meet technical needs. Therefore, it is better to prepare equipment for cleaning wells in advance, know how to use them and be fully prepared.
We will tell you when it is necessary to clean and what equipment is best to use in a given situation. You can make some tools yourself; this is confirmed by the visual photo instructions presented in the article.
The content of the article:
When you can't wait any longer
When you start to notice that the well water has become cloudy or yellowed, it begins to smell somehow strange or a rainbow film has appeared on its surface, you have a desire to take action. This is the right decision, but it is not always possible to implement it immediately.
Professional well cleaning is an expensive undertaking that requires some financial preparation. But the longer we push the existing problem away from ourselves, the more actively it begins to remind itself of itself.

If the listed symptoms occur, the well must be cleaned immediately.
Otherwise, contamination of the well leads to negative manifestations:
- bottom filter does not cope with its task - muddy water does not brighten;
- the smell of their well shaft is comparable to the “aromas” of a septic tank;
- the surface of the water is covered with a persistent oily or iridescent film;
- the static and dynamic liquid level drops noticeably.
You cannot drink such well water, and doing so is problematic: its smell and appearance will become an obstacle even in case of severe thirst.
So, you need to take measures, and you will most likely have to do it yourself.
If mold deposits and mucus have formed on the walls of the water intake source, then cleaning alone is not enough. It is necessary to carry out well disinfection.
What devices can be used
We already talked about how to manually clean a well in an article about muddy water, so today we’ll talk about devices that can make the work of a well cleaner easier, making it much more efficient.
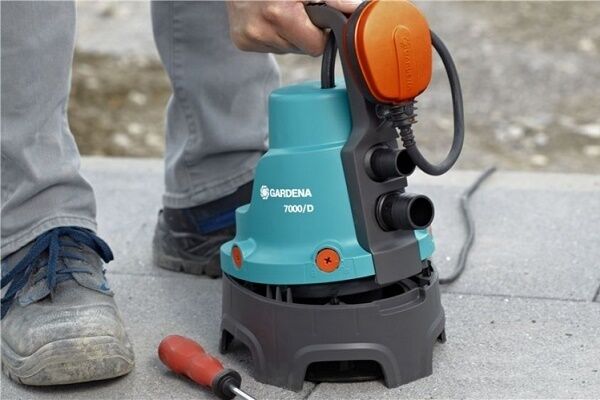
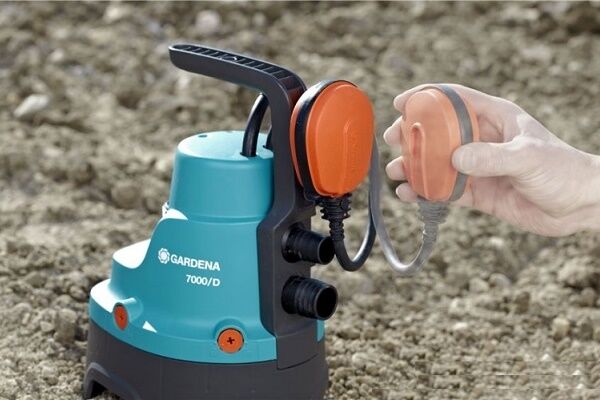
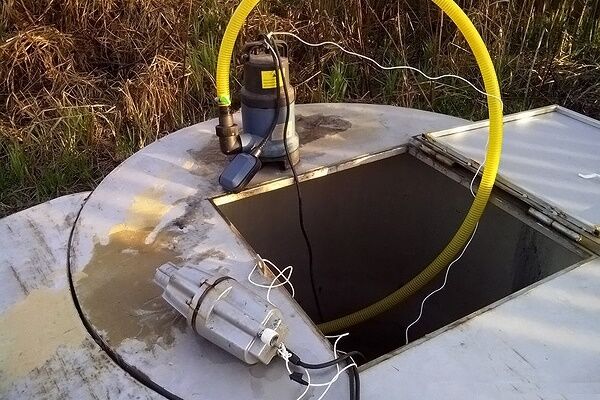
We will use drainage and pressure pumps
Manual cleaning is good, but it takes a lot of time and effort. If your labor costs are not comparable to the results obtained, it’s time to think about automating a number of procedures. For example, you can organize forced circulation of well fluid using a pumping unit for this purpose and drainage pump.
Each well cleaning pump performs its own function:
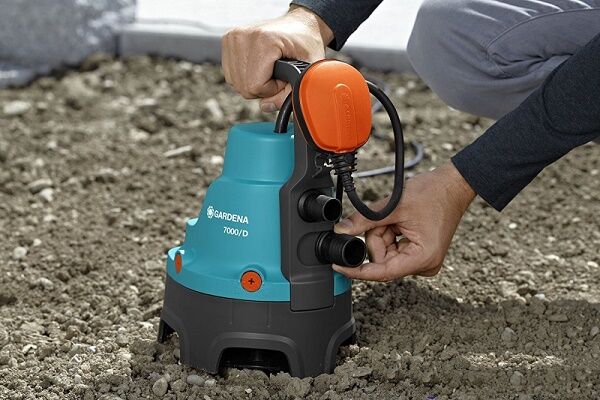
- Drainage pump. It will pump water from the well to the surface. Thus, it will not only free the mine from liquid, but also from particles of dirt that are dissolved in it.
- Pressure pump. It should be mounted near the head of the well so that it can pump water inside. Essentially, its task is to act as a scraper.
The dense water flow, which is formed using pressure technology, will clean not only the walls of the well, but also its bottom. Let us dwell in more detail on the procedure for cleaning a well using these two types of pumps.
First you need to immerse the drainage pump to the bottom of the well. But how to do this so that the unit does not fall into the silt? To do this, build a special stand with a wide base.
The pressure hose of the drainage device must be lowered into a container with a capacity of approximately 300 liters.An old barrel or bathtub that has served its purpose is perfect for this purpose.
The pressure pump must also be connected through a suction hose to a container or bath into which water will be pumped. A very simple wire filter should be attached to the end of this hose to prevent clogging of the pump and the circulation of fine dirt.
The pressure hose of the unit is equipped with a hydraulic nozzle, which allows it to generate a sufficiently dense jet so that it can act as a scraper.
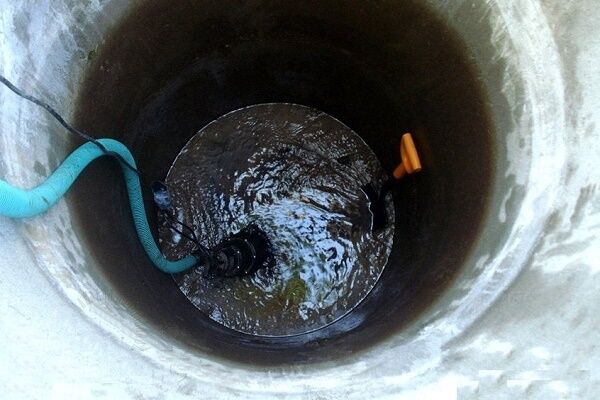
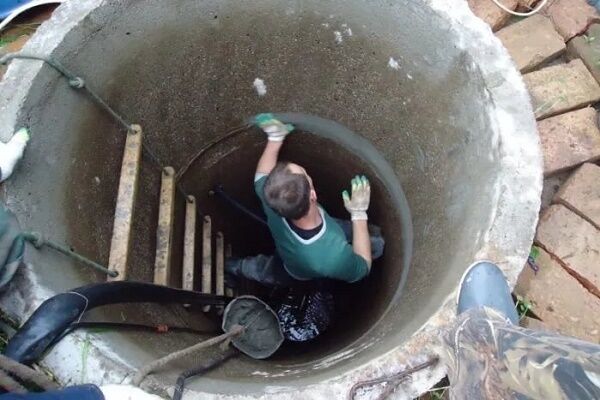
The preparatory procedures are completed, and you can begin cleaning the well. We turn on the drainage pump to pump out all the liquid from the well. And then we pump it back under pressure, knocking dirt and deposits off the shaft rings.
The whole process needs to be repeated several times. The hydraulic nozzle can be manipulated while being near the well shaft or standing on a ladder inside the shaft itself. In theory, all silt, sand and other foreign matter should settle at the bottom of the drainage tank.
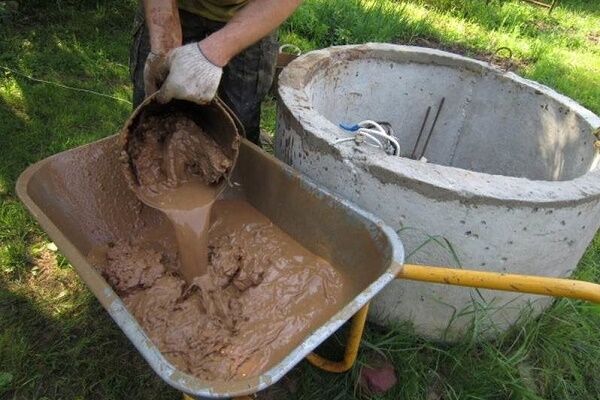
When the walls of the well are free of dirt and deposits, you can treat their surface with chemicals. For these purposes, use a regular spray bottle filled with a ten percent solution of bleach.
After treatment, the well shaft will need to be rinsed several times until the water stops smelling like bleach.
Another way to use pumps
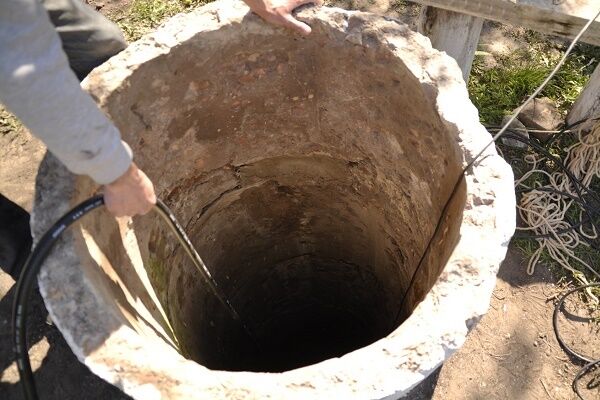
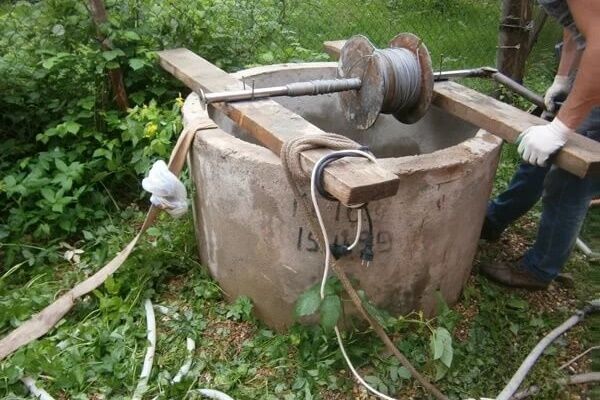
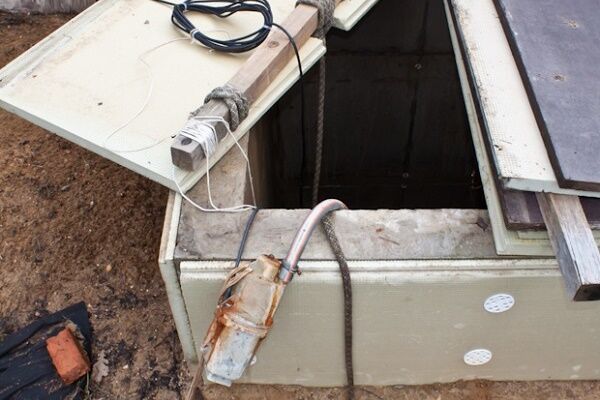
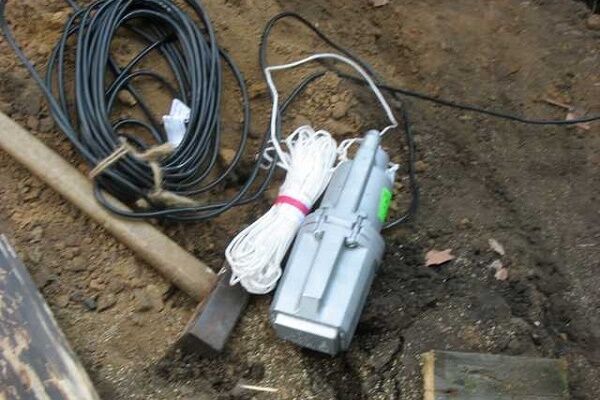
If you realized it in time and the situation in your well has not yet become catastrophic, you can get by with just one drainage pump. To clean the well, it is recommended to use the following models of pumps that pump out cold water: "Dwarf", "Stream", "Spring" or "Baby".

The pump must be suspended using a winch or cable at a distance of approximately 30 cm from the surface of the water. The half-meter hose from the device must be immersed in water. It is used to stir up silt and dirt in the liquid at the bottom. The second hose should be led outside to the place where dirty water is drained.
You whisk the water for about five minutes, then turn on the drainage.The device must operate until the water in the well becomes clean. It is recommended to clean the pump filter from dirt.
On average, the cleaning process will take about two hours. If the problem is not resolved during this time, other, more effective measures will have to be taken.
Scoop - the most affordable option
This option is perfect for those summer residents who are experiencing a financial shortage, but have a fair amount of free time. A homemade scoop is a simple but quite effective device that helps get rid of muddy deposits at the bottom of a well.

To make it, you will need a piece of pipe 100 mm long, the length of which will be no more than 2/3 of the diameter of the well shaft. One end of the pipe must be plugged with a removable plug, and the other must be cut at an angle of 30–35°.
We place the pipe with the cut side up, after which we weld two ears at the edges to its surface. The ears are needed to tie two ropes to them as fastenings.
We throw the scoop into the shaft with the tip down so that it sticks into the silt at the bottom of the well. Now you need to pull the rope that is attached closer to the cut. We ensure that the scoop scoops up as much dirt as possible from the bottom.
In one go, you can remove approximately 2-3 kg of silty deposits. This way, repeating this operation many times, you can clean the bottom well. Usually the whole process takes more than one day.
Grab is a more complex tool
To clean the bottom of a well from deposits accumulated on its surface, you can use a grab - a mechanism for a limited range of work.
Outwardly, it resembles jaws that can close, capturing bottom sediments, and open, freeing themselves from their load on the soil surface. A hand grab is suitable as a tool for cleaning a well. It’s not easy to find it on sale, so it’s better to make it yourself.

A grab is a bucket that we are used to seeing attached to the lifting device of a crane or excavator. A manual device looks approximately the same, only its weight and size will be smaller.

To make a grab yourself, we stock up on the following tools and materials:
- Steel sheet. The thickness of the sheet should not be less than 2 mm, but it is better not to make the product heavier, because the weight of the bucket along with the load will have to be lifted to the surface.
- Steel tire.
- Steel roller and pin.
- Profile pipe.
- Latch rod.
- Cable or chain. The length of the cable must be calculated in advance. It should be equal to two well depths with a margin of at least 2 meters.
- Welding machine and cutter or grinder.
So, we take a steel sheet approximately 2 mm thick, from which we cut out four semicircular sidewalls, equipped with eyes in full compliance with the dimensions shown in the photograph. We drill holes in the eyes.

Now you need to cut out two half-bottoms, one side of which is made in a straight line, and the other is cut out with teeth. The pitch and height of the teeth should be 20-25 mm.
These plates take a semicircular shape corresponding to the radius of the sidewalls. Two sidewalls are welded to each of the half-bottoms: one on each side. Now we have two half-ladles.

The half-buckets must be connected to each other. For these purposes, a steel roller with a diameter of 70 mm and a length of 202 mm is used, which has a hole across the entire length into which we insert a finger. All parameters of the roller and finger are clearly visible in the photographs.

To make rods, we need a steel tire 5-6 mm thick. Look at the photo. There are dimensions that we need to follow. According to them, we have to cut the tire. Don't forget to drill the holes.
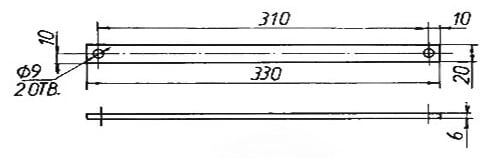
To make a traverse, we need a profile pipe.To make eyelets, metal waste left over from our previous work can be useful. A latch rod is attached to the traverse. An additional cable 500 mm long, equipped with a trigger ring, will then be connected to it.
This device is used to allow the bucket to be locked in the open position.

To lower the grab or raise it to the surface, you need a steel cable. It can be replaced with a chain or high-strength rope. The length of the cable is selected taking into account the depth of the well shaft.
One end of the lifting rope must be secured in the eye, which is located on the traverse. The other end is brought out through the bucket roller, as well as through the hole in the traverse.

Operating the grab is simple. Before using it, remove water from the well using a pump or any other method available to you.
The grab itself must be suspended on a cable or chain to the well gate. To capture the soil, you need to lower the bucket to the bottom of the well. The half-buckets of the mechanism must be in a retracted state. When they are pulled apart, the latch is cocked and secured with a ring.
The bucket, hooked to the ring, actually hangs on the rod, which does not allow the spring mechanism to straighten. When the grab hits the bottom, the ring stops influencing the rod, so the spring pushes it out.
It turns out that nothing holds the “jaws” anymore, and they begin to converge under the influence of their own weight, “biting” silt and dirt. One pass of such a device allows you to remove about a bucket of dirt from the well.
For a larger well, you can build a more powerful device, but in this case you will have to strengthen the lifting mechanisms. A winch can be used to remove the load. To transfer the sludge to a certain place immediately after removing it from the mine, a special boom is built.
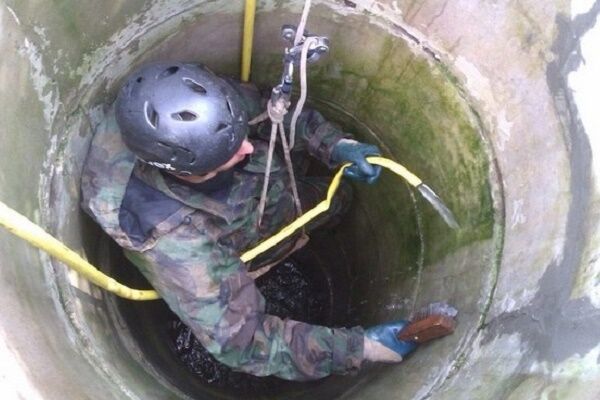
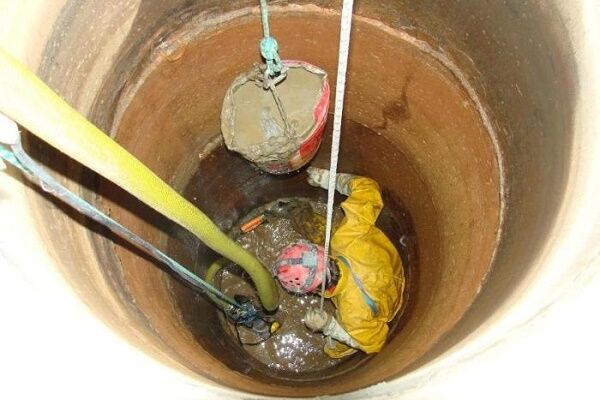
Safety of work in a well
Yes, the safety of working in a well is not directly related to the devices that are used. But you must always remember about it, because your own life and the lives of people close to you who will rush to save you may depend on the timely measures you take.

Working inside a well shaft is dangerous, so listen to our recommendations and follow them strictly.
Safety precautions:
- Do not clean the well alone. Invite two assistants so that they can back you up if you plan to be in the mine itself.
- Don't neglect special equipment. A helmet will protect your head: being below ground level, you can accidentally get hit on the head by a loose object falling from the side of the well. By the way, in case of such falls, you do not need to cover your head with your hands: just press yourself against the wall of the shaft.It is to the safety belt that the cable should be attached, with the help of which your assistants can pull you out of the well in the event of an emergency.
- Monitor your well-being. The deeper the well, the harder it is for the cleaner located near the bottom to breathe. Oxygen deficiency can be felt already at a depth of three meters. Difficulty breathing can cause panic or even loss of consciousness. Therefore, those workers who are on the surface of the earth must periodically call out to their partner submerged deep to make sure that he is okay.
- Provide yourself with reliable supports. The bottom of the well does not always provide reliable support for the feet. Therefore, it is better not to stand at the very bottom, but to sit on a platform to distribute the weight of your body over a larger area.
- Don't take unnecessary risks. This point directly concerns the danger that may await you in the well shaft. Often, it is in such mines, as well as in basements, that an accumulation of flammable or carbon dioxide gas can form.
Combustible and carbon monoxide gases are heavier than air, so they can “flow” into the mine and remain there for a long time. Therefore, when you have pumped water out of the mine, lower a bucket with a burning candle into it.
A sparkling candle signals the presence of flammable gas, and an extinguished candle indicates the presence of carbon dioxide. In both cases, work in the mine is prohibited.
After cleaning, it is advisable to well water analysisto make sure it is safe for health.
If our recommendations have led you to the conclusion that you cannot cope with the problem of cleaning the well on your own, then so be it.Even a large amount spent on paying specialists is nothing compared to your health, which is priceless.
Video instructions for making a grab
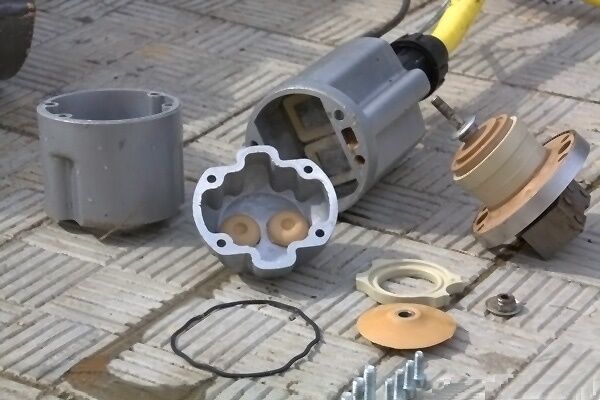
How to make a grab from an old gas cylinder and use it to clean a well?
You can use an old gas cylinder to make a grab. It is this design that is presented in detail and with a list of advantages in this video.
Before you start cutting the cylinder, do not forget to make sure that all the gas has come out of it. You should not make cuts along the seams of the cylinder or near them, because it is in these places that the metal of the product is significantly reinforced. By cutting in this place, you will lose much more time and effort.
How to clean a well using a hand grab?
The video shows the process of cleaning a well using a simple hand grab. Since it is problematic to carry out surveys at the bottom of a well, the soil capture operation is shown on the surface of the earth. The process of removing a grab from a well and cleaning it from bottom sediments is clearly presented.
There are different ways to clean a well. Tools that will help you with your work include cold water pumps, grabs, or even simple scoops. You can make some of these devices yourself by adopting the recommendations that we have collected for you in this article.
Do you have personal experience in cleaning a well? Do you want to share effective methods or ask questions on the topic? Please leave comments - the feedback form is located below.


I clean the old well on the property every two years. Of course, I monitor the condition of the seams in the well, I check from time to time.I am not a fan of spending extra money and therefore I built devices for cleaning wells myself from scrap materials. Later I used a compressor. The cleaning option using a drainage pump is not particularly good, I have heard a lot of criticism.
Once every two years? Are there any reasons for this or is it just for prevention? Sometimes people don’t look into a well for decades if the water quality doesn’t deteriorate. Of course, this probably shouldn’t be done either, but your case seems like overkill to me.
I will also have to clean the well, because the first signs of contamination have begun to appear, but I have been using it for 5 years now.
When it comes to cleaning the well, everyone decides for themselves personally. For some, cleaning once every two years seems quite frequent, but for others, once every 10 years is too much. Someone does not clean the well for decades, leading to a critical condition.
I can say that the well needs to be cleaned once every five years - this is a minimum. As for a manual grab for cleaning a well, this is a very practical solution. If the rings and seams are in perfect order, then you can clean the bottom of the well without going down into it - this is very convenient. The design is not complicated, so if you have the necessary tools, it is not difficult to make a manual grab with your own hands.
I think it would not be amiss to attach a diagram of the design of such a grab. A really necessary thing, plus you can clean the ponds on your property.
It is correctly written, no matter how long you delay this moment, it is getting closer and closer. Soon I’ll start cleaning my well. I do everything by hand, and it is a very labor-intensive and time-consuming task.Reading the article, I felt like a primitive man and learned from it many interesting devices. There are pumps and auxiliary tools, but something like a mini grab needs to be made.
I clean the drainage well like this... I pump out all the water with a drainer... there is a meter of black sludge at the bottom, the pump no longer pulls it, I take a high-pressure washer and wash the sludge at the bottom of the well, simultaneously pumping the diluted thicket up with a pump... something like this (then I fertilize it with this sludge fruit trees)